I was sitting on my porch last Tuesday, finally enjoying a bit of silence, when a sound from the kitchen made me jump clear out of my chair. It wasn’t a hum. It wasn’t even a rattle. It sounded like someone had thrown a handful of driveway gravel into my dishwasher and hit the ‘heavy duty’ cycle. My first thought? ‘Well, there goes my weekend and probably my savings account.’ I’ve been there before, staring at the control panel and wondering if I should just buy a new machine or try to save the one I have. It’s a gut-sinking feeling, but I’ve learned that the noise is usually louder than the actual problem.
Stop Panicking and Listen to the Grinds
Most people hear that awful grinding and immediately assume the motor has given up the ghost. I made that exact mistake years ago—I panicked, bought an expensive new motor, and then realized the noise was actually just a stray popcorn kernel rattling around in the pump housing. Talk about an expensive lesson in patience! Before you start shopping for a replacement, you need to understand that these machines are surprisingly talkative. If you can identify the specific sound of a failing motor versus a simple clog, you’ll save yourself a mountain of stress and a few hundred bucks. The ‘grinding rocks’ sound is almost always physical. It’s either something stuck where it shouldn’t be, or a part that’s lost its smooth rotation. According to experts at Yale Appliances, nearly 20% of appliance service calls could be avoided if homeowners performed basic diagnostic checks before calling a pro. Today, I’m going to help you peel back the layers of your machine so you can find the culprit without losing your mind.
Is your dishwasher actually dying or just being dramatic?
It’s the question we all ask when the noise starts echoing off the kitchen tiles. Is this a $15 fix or a $500 disaster? Most of the time, it’s the former. I’ve found that using a comprehensive guide to DIY diagnostics can narrow down the issue in about ten minutes of poking around. Usually, it’s a bone fragment, a plastic toothpick, or a piece of a broken plate that made its way past the filter and is now doing a chaotic dance in the impeller.
The First Place I Always Check When Things Get Noisy
Whenever a neighbor asks me to take a look at their noisy machine, the first thing I do is reach for the filter assembly. You would be shocked—honestly, horrified—at what ends up in there over time. If your filter is gunked up or loose, debris can bypass it and hit the internal moving parts. If you find yourself struggling to even get the thing open, you might need to learn how to handle a stuck dishwasher filter that hasn’t been cleaned since the house was built. It’s all about the quick identification of faults before they turn into permanent damage. Have you ever opened your dishwasher mid-cycle because the noise was just too much to handle? Drop a comment and tell me what you found—or what you’re afraid you’re going to find in there!
Hunt for the Obstruction Before You Buy Parts
I always tell people that a dishwasher is basically a series of hoses, a heater, and two very hard-working pumps. When one of them starts screaming, it’s usually because it’s trying to chew on something that isn’t food. Before you start ripping wires out, you need to check the drain pump. Think of the drain pump as the machine’s exit strategy; if it’s blocked, the water stays put and the motor overheats. I remember helping my neighbor, Dave, who was convinced his dishwasher was a total loss because of a rhythmic thumping. We pulled the kickplate, disconnected the power, and found a literal marble—one of his kid’s toys—stuck right in the housing. If you hear a low drone instead of a grind, you might be diagnosing a humming noise from your dishwashers drain pump rather than a mechanical failure. Clearing that one marble saved him $600. It’s about checking the simple things first, like clearing debris from a dishwasher check valve without tools, which can often resolve drainage and noise issues in one go.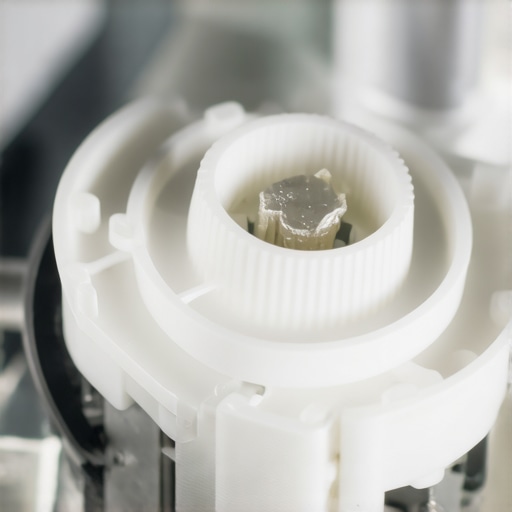
Know Your Pumps to Save Your Sanity
It is incredibly common to confuse the two main hearts of the machine. You have the drain pump and the circulation pump, and they do very different jobs. If the noise happens while water is being sprayed onto your dishes, the culprit is the circulation pump. If the noise only happens at the very end of the cycle when water is exiting the tub, it’s the drain pump. Understanding the difference between a drain pump and a circulation pump is the first step in buying the right replacement. If the grinding is constant and high-pitched, you might actually be looking at the signs of a dying circulation pump in your dishwasher, which usually means the internal bearings have dried out or rusted. In that case, no amount of cleaning will help; it’s a hardware swap.
Test the Electrical Life Before Giving Up
Once you’ve confirmed there isn’t a stray bone fragment or a shard of glass in the impeller, it’s time to get clinical. Grab a multimeter—it’s the most important tool in your arsenal. Just because a motor isn’t turning doesn’t mean the motor is bad; it might not be getting the signal to start. I once spent two hours trying to figure out why my own unit wouldn’t fill, only to realize the float switch was stuck in the ‘up’ position by a build-up of old detergent. You should always know how to test your dishwashers float switch for continuity before assuming the control board is fried. If you do find yourself suspecting the brain of the machine, there are specific 5 multimeter tricks for diagnosing a dead control board that can save you from an unnecessary and expensive repair. It’s much cheaper to replace a $20 switch than a $200 board. If you’ve ever felt intimidated by a multimeter, think of it like a simple flashlight—it just tells you if the path for the electricity is open or closed. If the path is closed when it should be open, you’ve found your ghost.
The Control Board Myth That Costs Homeowners Millions
Most people see a blank display and immediately assume the ‘brain’ of the machine has suffered a fatal stroke. I’m here to tell you that this is often a very expensive assumption. In fact, professional technicians frequently point out that peripheral components are designed to protect the board by failing first. Before you spend $200 on a new PCB, you should be checking the thermal fuse on your dishwasher. This tiny, inexpensive part is the unsung hero of your appliance’s safety system; if it blows, the whole machine goes dark, mimicking a fried board perfectly. Have you ever replaced a major part only to find it didn’t solve the problem? Let me know in the comments below! According to the National Association of Service Managers, a staggering percentage of ‘defective’ control boards returned for warranty are actually perfectly fine—the issue was a tripped safety sensor or a loose ribbon cable. You really need to learn how to tell if your oven control board is actually fried or if you’re just looking at a simple connection error.
Why is my dishwasher finishing its cycle with cold water?
This is a classic ‘nuance’ problem. Most DIYers think a cold dishwasher means a dead heating element. While that’s possible, the culprit is often the high-limit thermostat or the control relay. In the world of oven diagnostics and pinpointing faults, we see the same thing: people see an oven that won’t heat and immediately buy a new bake element without testing for continuity. I always suggest testing your ovens high-limit thermostat first. If that safety switch is tripped, your element won’t get power, even if the element itself is brand new.
The Trap of Visual Inspection
Another common mistake is relying solely on your eyes. I’ve seen heating elements that look absolutely pristine but have internal ‘dead spots’ that prevent them from reaching temperature. You have to get tactile and technical. I recommend how to check your ovens bake element for tiny blisters that indicate a pending failure, but always back it up with an ohmmeter reading. It’s the same with gas units. If you’re testing the gas oven solenoid, don’t just listen for a click; check the actual resistance. A solenoid can click and still be mechanically stuck. This ‘oops’ factor—ignoring the electrical specs for visual cues—is why so many weekend repairs end in frustration. Don’t fall into the trap of ‘it looks fine, so it must be fine.’ Real diagnostics is about proving a part is bad before you ever reach for your wallet.
The Tools That Turn a Headache Into a Quick Win
I’ve spent too many hours using the wrong screwdriver and ending up with stripped screws and bloody knuckles. If you’re serious about this, you need a dedicated kit. My personal hero tool is a high-quality digital multimeter. I don’t care if it’s a budget model, as long as it handles continuity and resistance accurately. This is the difference between guessing and knowing. For instance, when I’m testing an oven bake element for invisible cracks, the multimeter tells me the truth that my eyes miss. You also need a set of nut drivers—specifically 1/4 inch and 5/16 inch—because that’s what holds 90% of American appliances together. Don’t rely on an adjustable wrench; you’ll just round off the heads and make your life miserable. I also keep a flexible inspection mirror in my bag. It sounds simple, but being able to see behind a motor without pulling the whole machine out is a game-changer.
How do I maintain my kitchen appliances over time?
Maintenance isn’t just about fixing what’s broken; it’s about preventing the break from ever happening. I’ve made it a habit to perform a deep clean every six months. This involves cleaning mineral buildup from dishwasher spray nozzles with a thin wire or a toothpick. If those holes get clogged, your water pressure drops and your pump has to work twice as hard. I also focus on the seals. You’d be amazed at how a little vinegar and a soft brush can extend the life of your door. I always suggest learning how to deep clean the moldy gasket in your dishwasher door to prevent leaks that eventually rot out your kitchen floor. It’s these small, boring tasks that save you from needing a comprehensive guide to DIY diagnostics in the middle of a holiday dinner party. For the oven, it’s all about keeping the sensors clear of grease and salt, which can throw off your temperature readings and lead to a burnt roast.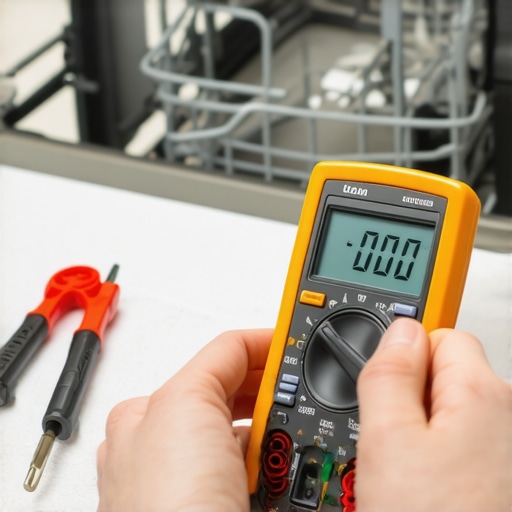
The Precision of Professional Diagnostics
If you really want to level up, you need to start looking at technical schematics. Professional technicians rely on communities like Appliantology.org, where niche experts share service manuals that aren’t available to the general public. As Scott Brown from Appliantology often notes, the biggest hurdle for DIYers is misinterpreting voltage readings on modern electronic boards. You have to know if you’re looking at a ghost voltage or a real signal. This level of detail is essential for oven repair essentials and troubleshooting common issues. If you can’t read a circuit diagram, you’re just a parts-changer, not a technician. I recommend spending an hour learning the basics of ladder diagrams; it will turn your oven diagnostics and pinpointing faults from a guessing game into a surgical strike. Knowing exactly where the power stops allows you to replace just the faulty component rather than the whole assembly.
Where the World of Appliance Repair Is Heading
I’ve been watching the industry closely, and the trend is clear: we are moving toward self-healing appliances. Within the next decade, I predict your dishwasher won’t just beep when it’s done; it will send a notification to your phone saying, ‘My drain pump is drawing 20% more current than normal—clean your filter now.’ We’re going to see a shift from reactive repair to predictive maintenance. While this sounds great, it also means parts are becoming more integrated and software-locked. That’s why mastering the basics now—like removing hard water spots from dishwasher walls to protect the stainless steel—is so vital. You need to protect the hardware you have before the smart versions become the only option. My challenge for you this weekend is simple: don’t wait for a leak. Go grab your multimeter, find your dishwasher’s heating element, and run a simple resistance check. Getting comfortable with the tool now means you won’t be shaking with nerves when the kitchen floor is actually under an inch of water.
The Hard Truth About Those ‘Quick’ Fixes That Failed
Over the years, I’ve realized that the biggest enemy of a successful repair isn’t a lack of knowledge—it’s impatience. I used to be the person who would see a single spark and immediately order a $150 replacement part, only to find out later it was just a loose wire. Now, I never touch a screw without my multimeter in hand. Another lightbulb moment? Maintenance isn’t a chore; it’s a long-term investment. Spending five minutes every few months clearing mineral buildup from dishwasher spray nozzles can literally add years to your pump’s lifespan. Finally, don’t be afraid to admit when you’re out of your league. There’s no shame in knowing when to skip the DIY and call a professional oven technician, especially when dealing with gas lines or complex control board logic that could compromise your safety.
My Go-To Toolbox for Kitchen Resurrections
If you want to move beyond simple guessing, you need the right gear in your cabinet. I don’t go anywhere without a reliable digital multimeter—it’s the only way to perform oven diagnostics and pinpointing faults with absolute accuracy. Along with that, a set of magnetized nut drivers (1/4\” and 5/16\”) will save you from losing screws in the dark recesses of the machine’s base. For digital resources, I always keep a tab open for comprehensive guides to DIY diagnostics because even pros need a refresher on specific manufacturer error codes. I also highly recommend tracking down the specific service manual for your model; it’s the secret map that explains how to identify dishwasher faults quickly without the expensive trial and error.
#IMAGE_PLACE_HOLDER_E#
Take Back Control of Your Kitchen This Weekend
There is a unique kind of satisfaction that comes from hearing your dishwasher hum quietly again or seeing your oven reach the perfect temperature after you’ve fixed it yourself. You don’t need to be a mechanical genius to handle most dishwasher, parts, diagnostics, and oven repair tasks; you just need a little bit of curiosity and the willingness to get your hands dirty. By following these steps and using the right dishwasher, parts, diagnostics, and oven repair techniques, you’re not just saving money—you’re gaining the confidence to maintain your own home. Have you ever successfully fixed an appliance only to find a ‘bonus’ part left over at the end? Tell me about your most memorable DIY win or ‘oops’ moment in the comments below!