I was standing in my kitchen, staring at a tray of cookies that looked more like charcoal briquettes than snickerdoodles, and I felt like throwing the whole appliance out the window. My digital display mocked me with a steady ‘350°F’ readout. That was the moment I realized my oven was a liar. It’s a gut-punch when you spend forty bucks on high-quality ingredients only for your equipment to fail you. If you’ve ever felt like your baking is a game of Russian Roulette, you aren’t crazy. Most people jump straight to oven repair essentials and troubleshooting common issues with parts thinking they need a whole new heating element. But more often than not, your oven just needs a reality check. Today, we’re going to fix that with a five-dollar tool and about twenty minutes of your time. I’m going to show you how to stop guessing and start knowing.
Your Oven Dial is a Dirty Liar
It’s easy to assume that because a machine is digital, it’s precise. That’s a dangerous assumption. Over time, sensors get tired, covered in grease, or just slightly out of whack. I remember early on I almost wasted $200 on a technician because I thought the heating element was dying. I felt like a total amateur when I realized I could have just checked the signs your oven temperature sensor is inaccurate and recalibrated it myself. According to the experts at America’s Test Kitchen, it is remarkably common for a home oven to be off by 25 to 50 degrees right out of the box. That is the difference between a golden loaf of bread and a burnt brick. Before you dive into deep oven diagnostics, you need to establish a baseline with a simple analog thermometer.
Can a cheap thermometer really beat a fancy digital sensor?
It sounds backward, doesn’t it? We trust the high-tech display because it looks official. But the built-in sensor is often tucked in a back corner where airflow isn’t great. A standalone oven thermometer sits right on the rack where your food goes. It doesn’t have an agenda; it just tells the truth. If you find your oven is consistently running hot, you might need to follow the fast way to recalibrate your oven for accurate results. Trust me, I’ve been there—trying to bake a birthday cake in an oven that was actually 40 degrees hotter than it claimed. It wasn’t pretty. Have you ever suspected your oven was gaslighting you about the temperature? Drop a comment and tell me about your biggest baking disaster—I bet I’ve got you beat. Now, let’s get into the nitty-gritty of how to run this test properly so you never have to serve a raw turkey again.To start, grab that analog thermometer. Don’t just toss it on the bottom floor of the oven—heat rises, and the floor is basically a lava pit that will give you a false high reading. Hang it right in the center of the middle rack. This is the ‘strike zone’ where 90% of your cooking happens. While you’re at it, check if your heat is escaping before it even reaches the sensor; I always recommend testing your oven door seal with the dollar bill trick to rule out a drafty gasket before assuming the internal electronics are fried.
Put Your Thermometer in the Strike Zone
Once the thermometer is hung, close the door and set your oven to 350°F. Now, here is where most people fail: they wait for the beep and start reading. That beep is a dirty lie. Most ovens signal they are ‘preheated’ when the air temperature hits the target, but the walls of the oven are still cold. This causes the temperature to crash the second you open the door. You need to let the oven soak in the heat for at least 30 minutes. 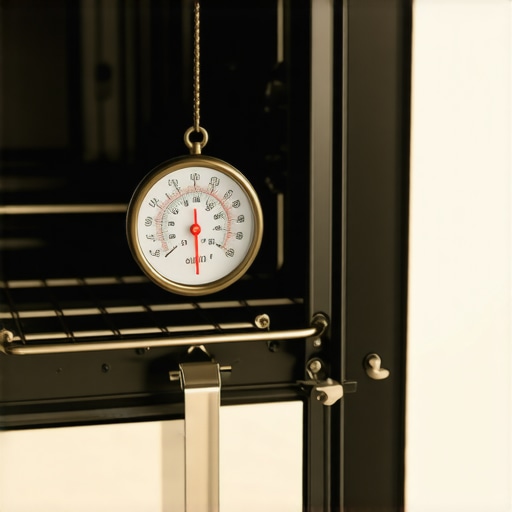
Forget the Preheat Beep
I learned this the hard way during a frantic Thanksgiving at my in-laws’. I was so rushed that I didn’t let the oven cycle properly. I saw 350 on my thermometer once, assumed I was 25 degrees low, and ‘fixed’ the digital offset. In reality, the oven was just at the peak of its first heat cycle. By the time the turkey was supposed to be done, the skin was charred but the inside was still shivering. I had effectively recalibrated the oven to be a frozen-tundra machine because I didn’t understand the rhythm of the heating element. If you find your unit isn’t reacting at all, you should move on to the most reliable way to test an oven thermal fuse to ensure power is actually reaching the components.
Master the Art of the Three-Cycle Average
Ovens don’t stay at one temperature; they operate like a heartbeat. The element turns on, the heat rises above 350°F, the element turns off, and the heat drifts down below 350°F before kicking back on. To get the truth, you need to write down the high and low readings of three consecutive cycles. If your oven hits 370°F then drops to 330°F, your average is 350°F—it’s actually perfect. But if your average is 320°F, you’ve found your culprit. This is a common step when you are trying to figure out how to fix an oven that bakes unevenly or too slowly.
Adjust the Digital Offset Yourself
Most modern ovens have a hidden calibration mode. You usually hold down the ‘Bake’ or ‘Settings’ button for several seconds until the display shows ’00’. This is your offset. If your average was 30 degrees too cold, you change that ’00’ to ‘+30’. If you are fixing an oven that heats way past the set temperature, you would enter a negative number. If this software fix doesn’t work, it’s time to get hands-on by testing an oven temperature sensor with just a multimeter. If the sensor is physically failing or you are fixing an oven that won’t reach high temperatures despite the offset, a cheap replacement part is your next logical step.Most DIYers assume that if they see a glow from the bottom of their gas range, the igniter is doing its job. This is the single biggest ‘gotcha’ in the world of kitchen repair. I once spent two hours helping a neighbor who was convinced his gas valve was shot because the igniter was bright orange. In reality, an igniter can glow like a miniature sun and still fail to pull enough amperage to open the safety valve. You need a specific amount of current—usually between 3.2 and 3.6 amps for most standard igniters—to trigger that valve. If it is pulling 2.8, it will glow, but you will never get fire. This is why how to test a gas oven igniter with a multimeter is more than just a suggestion; it is the difference between fixing the stove and throwing parts at a ghost. According to data from the Association of Home Appliance Manufacturers (AHAM), improper diagnostic techniques lead to a 30% return rate on electrical components that were not actually broken.
Why does my oven click but never actually light?
If you are hearing that rhythmic clicking but smelling no gas, you are likely facing a gas oven that won’t heat despite a glowing igniter. The trap here is the ‘universal’ replacement part. I have seen people buy cheap knock-offs that do not match the resistance requirements of their specific control board. It might work for a week, then fry the board entirely. If you are moving over to the wet side of the kitchen, you will find similar patterns. For instance, when identifying dishwasher faults quickly, people often blame the motor when the real culprit is a tiny bit of debris in the check valve. 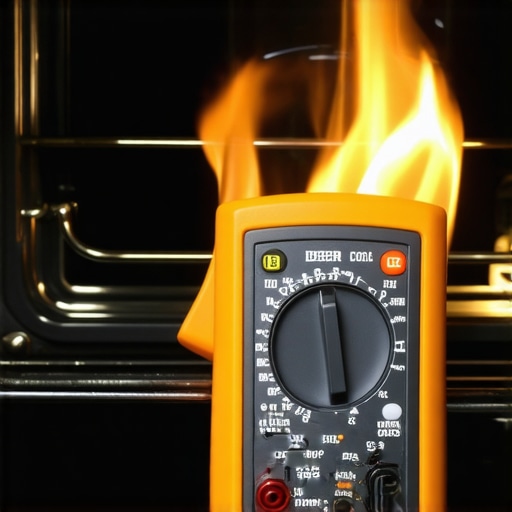 Don’t let the complexity of a modern machine scare you into a $500 service call. Many times, the ‘catastrophic failure’ is just a safety feature doing exactly what it was designed to do. If your dishwasher stops mid-cycle, you might be dealing with a dishwasher that won’t heat the water because a thermal limit tripped, not because the pump died. You can often resolve this by testing your dishwasher’s high limit thermostat for continuity. Have you ever replaced a part only to realize the original was perfectly fine? Let me know in the comments so we can commiserate—I have certainly been there! Before you buy anything, always check your dishwasher parts guide for DIY diagnostics to ensure you are not chasing your tail.I’ll be honest: I used to be a ‘if it ain’t broke, don’t fix it’ kind of guy. Then I had a dishwasher flood my kitchen at 2 AM on a Tuesday. Now, I’m a maintenance or bust convert. The secret to long-term success isn’t just knowing how to fix a fuse; it’s about having the right gear and a schedule that doesn’t feel like a chore. If you’re serious about this, you need a high-quality multimeter. I don’t mean those five-dollar plastic ones from the bargain bin. I use a True RMS meter because it gives me the precision I need when I’m testing your dishwasher’s circulation pump for continuity. A cheap meter might bounce around and give you a ghost reading, leading you to buy a $150 motor you don’t need.
How to Keep Your Kitchen Running Like New for Ten Years
Maintenance isn’t just about cleaning; it’s about mechanical prevention. Every few months, I take ten minutes to look at my oven door. It sounds boring, but knowing how to spot a failing oven hinge before the door drops is one of those skills that saves you a massive headache later. If you catch a hinge getting stiff, a little high-temp lubricant can prevent a snapped spring. While you’re down there, take a look at the floor of your oven. I’ve seen beautiful ranges ruined because someone ignored a little spill. Learning why your oven bottom is rusting and how to stop it early can extend the life of your appliance by half a decade.  On the dishwasher side, the biggest killer is ‘invisible’ gunk. I once helped a friend who complained his plates felt like sandpaper. We found a literal graveyard of chicken bones and plastic bits in his sump. If you aren’t regularly cleaning your dishwasher’s hidden sump filter, you are basically washing your dishes in garbage water. According to the technical service manuals from Whirlpool’s Engineering division, nearly 40% of circulation pump failures are actually caused by mineral buildup on the impeller, not actual electrical failure. That is a huge margin of error that you can avoid with a simple vinegar soak.
Keep an Eye on the Small Stuff Before it Breaks
Looking ahead, we’re moving into an era where our appliances will tell us exactly what’s wrong via smartphone apps. While that’s cool, it also means more sensors to fail. I expect the next big trend in DIY repair to be acoustic diagnostics—using your phone’s mic to listen to the frequency of a pump or motor to predict a failure before it happens. Until then, you have to rely on your eyes. Spend five minutes this weekend the right way to inspect your dishwasher float switch to make sure it moves freely. It’s the easiest way to prevent a flood. If you’ve got some crusty oven racks, don’t scrub them with steel wool until you check out the best way to remove stubborn rust from an oven rack without ruining the finish. My challenge for you: go pull that dishwasher filter tonight. You might be surprised—and a little disgusted—at what you find.
The Real Reason My Repairs Finally Started Working
If there is one thing I’ve learned from years of tinkering, it’s that the machine isn’t usually trying to break—it’s trying to tell you it’s dirty or out of alignment. Most of my early failures happened because I skipped the ‘boring’ steps. I would assume a part was dead before I even checked if it was receiving power. I eventually realized that oven repair essentials and troubleshooting common issues with parts isn’t just about turning a wrench; it is about developing a detective’s mindset. Don’t rush to buy that expensive circuit board just because the screen is flickering. Many times, it is just a loose wire or a bit of oxidation on a terminal. Another major ‘lightbulb moment’ was realizing that the environment matters as much as the internal parts. If your kitchen is humid or your vents are blocked, your appliance is working twice as hard to do half the job. Before you decide your electronics are shot, make sure you know how to tell if your oven control board is failing versus a simple external issue like a tripped breaker.
Gear That Actually Saves Your Sanity
I don’t believe in buying every gadget in the hardware store, but there are three things I never open a dishwasher or oven without. First, a magnetic parts tray is a lifesaver; you haven’t known true frustration until you’ve lost a specialized T-20 screw inside the insulation of an oven door. Second, invest in a high-quality True RMS multimeter. It gives you the accuracy needed when testing sensors that rely on tiny resistance changes. Finally, keep a tube of food-grade high-temp lubricant on hand. It turns a squeaky, difficult job into a smooth one, especially when you are trying to fix a dishwasher door that is too loud or stiff. Having these tools nearby changes your attitude from ‘I hope this works’ to ‘I know this works.’ If you aren’t sure where to start your collection, I always point people toward a solid dishwasher parts guide for DIY diagnostics to see what tools are required for their specific model.
#IMAGE_PLACEHOLDER_E#
Stop Wondering and Start Fixing
You don’t need a degree in electrical engineering to keep your kitchen running. You just need the willingness to look at a problem, do the diagnostic work, and trust the data you find. Whether you are recalibrating a lying oven or clearing out a gunked-up sump filter, you are taking control of your home and saving yourself thousands of dollars over the life of your appliances. The next time you hear a weird hum or smell something off, don’t ignore it. Use the resources you’ve gathered here and tackle it head-on. Your oven repair journey starts with that very first test. You’ve got the knowledge—now go use it! Have you ever successfully fixed an appliance only to find a ‘spare’ screw left over at the end? Tell me your story in the comments below!