I remember standing in my kitchen last November, perfectly seasoned lasagna in hand, ready for the big reveal. I clicked the oven light switch, expecting that warm, reassuring glow. Instead? Pure darkness. Again. It was the third time in as many months that the bulb had surrendered. I’ll be honest: I stood there for a good minute, just staring at the black void of the oven window, feeling a very specific kind of appliance-induced rage. It’s not just the five bucks for a new bulb; it’s the sheer inconvenience of flying blind while your dinner is at stake. If you are tired of squinting through a glass door with a smartphone flashlight, you are in the right place. Today, we are going to dive into the messy reality of why your oven is eating light bulbs and how you can reclaim your kitchen’s visibility once and for all.
Stop Spending a Fortune on Oven Bulbs
When this first started happening to me, I made the classic rookie mistake: I assumed I just had bad luck and went out to buy the cheapest bulbs I could find at the local hardware store. I thought a bulb was a bulb. Boy, was I wrong. Those cheap, non-appliance-rated bulbs aren’t built to withstand the punishing heat of a 450-degree roasting session. My “bargain” bulbs were literally melting their own filaments within a week. Getting the right oven repair essentials means understanding that these tiny glass orbs are actually specialized pieces of hardware. Sometimes, the problem isn’t the bulb at all, but rather how you are installing it. Did you know that the natural oils from your fingers can create hot spots on the glass, leading to premature failure? It sounds like a myth, but it is a very real factor in bulb longevity.
Is it really just a bad batch of bulbs?
It is tempting to blame the manufacturer, but if you have replaced the light more than twice in a season, you are likely looking at a deeper mechanical or electrical gremlin. It could be as simple as a loose socket vibrating during the convection cycle, or as complex as a voltage spike hitting your appliance. According to the IEEE (Institute of Electrical and Electronics Engineers), even minor power surges in a residential setting can significantly shorten the lifespan of incandescent filaments. This is why it is so important to look at the bigger picture of oven diagnostics before you keep throwing money at the problem. I’ve seen cases where a faulty oven light switch was actually arcing, causing the bulb to pop every time the door opened. Have you ever noticed your light flickering before it finally dies for good? If so, you might be dealing with more than just a spent filament. We are going to look at everything from checking your oven temperature sensor for heat-related issues to ensuring your door seal isn’t letting moisture reach the socket. I promise, by the end of this, you’ll never have to bake in the dark again. Tell me, have you faced this specific problem more than once this year?
Stop Buying the Wrong Bulbs for Your Heat
The biggest reason people fail at this is they ignore the fine print on the packaging. You cannot use a standard 40-watt bulb designed for a hallway lamp inside a high-heat environment. Think of it like trying to run a marathon in flip-flops; you might make it a few yards, but the failure is inevitable. You need specifically rated appliance bulbs, usually made of heavy-duty glass and filaments that can handle the expansion and contraction caused by extreme temperature swings. I once made the mistake of grabbing a generic bulb from the ‘junk drawer’ just to see if it would work. Within ten minutes of preheating to bake some muffins, I heard a loud pop and found shards of glass inside my convection fan. It was a nightmare to clean and reminded me why oven repair essentials always include buying the correct OEM-spec parts. If you are constantly replacing the light, ensure you are buying 130-volt bulbs rather than the standard 120-volt ones; that extra 10-volt cushion makes a massive difference in longevity when the power grid fluctuates.
Protect the Glass from Your Own Skin Oils
This sounds like something out of a science fiction movie, but your fingers are actually the enemy here. Our skin produces natural oils that, when transferred to the glass surface of a bulb, create ‘hot spots.’ As the oven heats up, these oily spots get significantly hotter than the rest of the glass, causing it to crack or the filament to burn out prematurely. When you are performing oven bulb maintenance, always use a clean cloth or wear latex gloves. It’s a tiny step that adds months to the bulb’s life. I started keeping a pair of ‘oven gloves’ in my tool kit specifically for this, and I haven’t had a ‘mystery pop’ since.
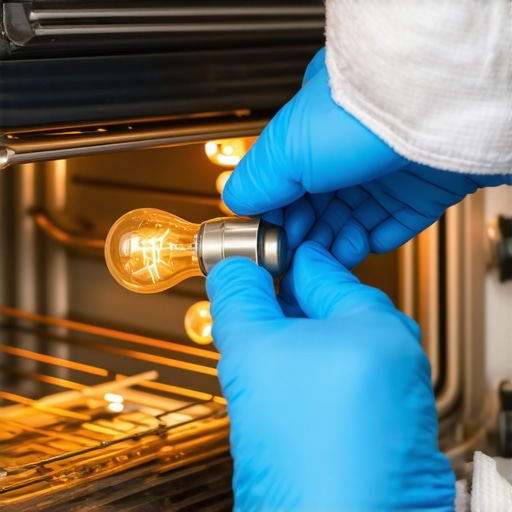
Check for Mechanical Vibrations and Loose Sockets
Imagine trying to hold a steady candle while someone is shaking your arm. That is what your light bulb filament goes through every time your oven’s cooling fan or convection motor kicks in. If your oven is older, these motors can become unbalanced, sending micro-vibrations through the chassis that snap fragile filaments. If you hear a rattling sound, you might need to look into oven diagnostics to see if a motor mount is loose. However, a more common culprit is a loose socket. If the bulb isn’t seated perfectly, it can arc—creating tiny electrical sparks that generate localized heat and fry the connection. Take a moment to inspect the socket for any dark, charred marks. If you see discoloration, the socket is toast and needs to be swapped out. You can often find instructions on how to replace a faulty oven light switch or socket assembly that will guide you through the wiring without needing a master’s degree in electrical engineering.
Test Your Voltage for Stability
If the hardware looks fine, the problem might be the invisible force flowing through it. Residential power isn’t always a steady 120 volts; it can spike, especially during storms or when large appliances like your AC kick on. These spikes are like a sledgehammer to a delicate light bulb. If you’ve noticed other issues, like your dishwasher acting up, it’s worth checking the broader system. Sometimes diagnosing an oven that keeps tripping the breaker can reveal underlying electrical surges that are killing your lights. Use a multimeter to check the voltage at the socket. While you have the tool out, it’s also a great time for testing an oven temperature sensor to ensure the heat itself isn’t spiraling out of control and melting your components. If the voltage is consistently high, you might need a whole-home surge protector to save your expensive kitchen tech from an early grave.
We’ve all been there: you’ve replaced the bulb, the socket looks clean, and yet you’re still staring at a dark oven. This is where most DIYers throw up their hands and assume the main control board is dead. But here is a contrarian truth I’ve learned after years of tinkering: the control board is rarely the first thing to fail. In fact, many people waste hundreds of dollars on a new board when the culprit is actually a $15 thermal fuse or a slightly loose wire in the terminal block. Before you pull the trigger on an expensive board, you should focus on oven diagnostics that target the periphery components. It’s much more common for a vibration-induced loose connection to mimic a board failure than for the board’s logic to actually fry.
Could Your Neighborhood Power Grid Be Killing Your Appliances?
If you find yourself replacing bulbs or sensors every other month, the issue might not be inside your kitchen at all. Most residential electronics are rated for a very specific voltage range, but the grid fluctuates more than we realize. This is why I always recommend 130-volt bulbs over the standard 120-volt versions. That extra headroom acts as a buffer against the ‘dirty power’ that often follows a summer storm. I’ve seen cases where a minor surge didn’t trip the breaker but was just enough to weaken the filament or even confuse the logic on a failing oven control board. According to data from the Association of Home Appliance Manufacturers (AHAM), a significant percentage of control boards returned as ‘defective’ are actually functional; the real issue was often an external power spike or a faulty sensor elsewhere in the circuit. If you’ve recently had a storm, you might find yourself fixing a dishwasher that won’t start alongside your oven issues.
The Trap of Overtightening Your Bulbs
Here is a specific ‘oops’ factor that almost every homeowner falls for: the urge to crank the bulb in as tight as possible. We think we’re ensuring a good connection, but in reality, you are likely flattening the brass tab at the bottom of the socket. Once that tab loses its springiness, you get a weak connection that leads to arcing and localized heat buildup. This is a classic example of how oven repair essentials start with finesse, not force. If you’ve already flattened it, you can sometimes gently pry it back up with a small screwdriver (with the power off!), but often you’ll end up needing to learn how to replace a faulty oven light switch or socket assembly entirely because the metal has become brittle from the heat. I once spent two hours diagnosing a ‘dead’ oven only to find the owner had twisted the bulb so hard they’d actually snapped the internal ceramic housing.
This nuance isn’t limited to ovens, either. In the world of dishwasher faults, people often assume a ‘dirty’ wash means the pump is broken. In reality, it’s often a tiny faulty dishwasher turbidity sensor that just needs a quick wipe. We tend to jump to the most expensive conclusion because it feels more ‘serious,’ but the pros know it’s the little things—the seals, the sensors, and the seat of the bulb—that actually keep the kitchen running. Have you ever fallen into this trap of over-repairing something that just needed a gentle touch? Let me know in the comments below.
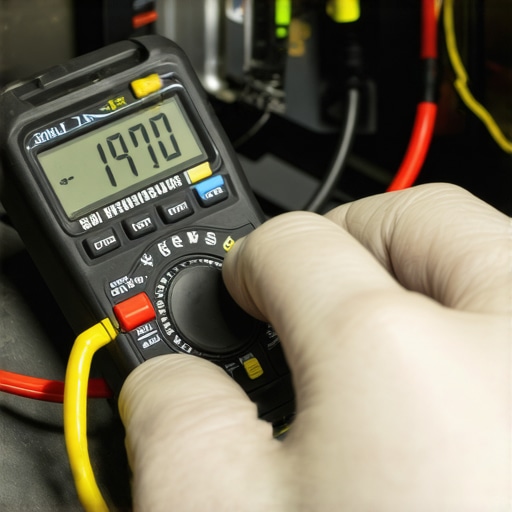
Speaking of a gentle touch, let’s talk about the specific gear that actually makes a difference when you are moving past simple bulb swaps and into real maintenance. I used to rely on a five-dollar voltage tester I found in a bargain bin, but after it gave me a false negative on a live heating element, I learned my lesson. If you are serious about your kitchen’s health, you need a high-quality digital multimeter like a Fluke 115. I personally use this model because its ‘Auto-V’ feature automatically detects whether I am looking at AC or DC voltage, which is a lifesaver when you are switching between dishwasher parts and complex oven circuits. This isn’t just about safety; it is about precision. When you are testing an oven temperature sensor, a few ohms of difference can be the reason your soufflé keeps collapsing.
Grab a Reliable Multimeter Before You Buy Spare Parts
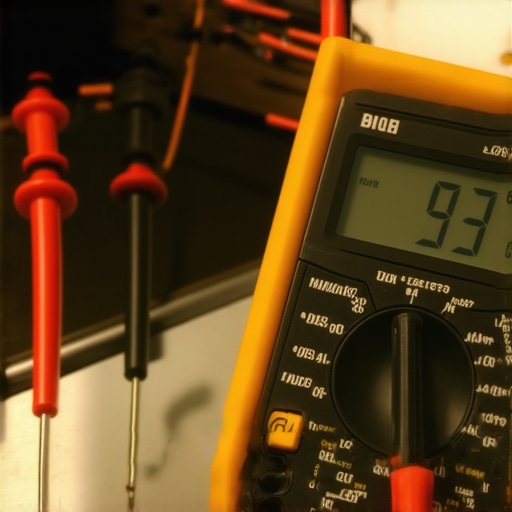
Most homeowners start by ordering a new control board or heating element the moment something stops working. That is a expensive way to gamble. Instead, use your meter to verify continuity. According to the NEMA MG 1-2016 standard, residential motors—like your dishwasher’s pump—are only rated to handle a 10% voltage variation. If you check your outlet and find you are hitting 135 volts, no amount of new parts will fix a system that is being cooked from the inside out. I always check the terminal block first for any signs of heat damage before I even look at the schematic. If you can master identifying dishwasher faults with a meter, you will save enough in one year to pay for the tool ten times over.
How Can I Keep My Appliances Healthy Long-Term?
Maintenance isn’t a one-time event; it is a rhythm. Every six months, I make it a point to pull my dishwasher and check the water inlet valve for sediment. If you live in an area with hard water, those tiny screens can clog, forcing the pump to work twice as hard. While you are back there, it takes less than five minutes for testing your dishwasher’s circulation pump to ensure the windings aren’t starting to degrade. For the oven, the most important long-term habit is checking the door seal. A leaky gasket doesn’t just waste energy; it allows heat to escape directly onto your control knobs and the delicate display board, which leads to those garbled characters we all dread. If you are already noticing issues, start with testing an oven thermal fuse as a baseline check. It is often the first component to ‘sacrifice’ itself to save the more expensive electronics.
Predicting the End of Blind DIY Diagnostics
Looking ahead, the trend is moving away from manual testing toward ‘smart’ modular diagnostics. We are already seeing high-end ranges that can throw a specific error code to your smartphone before you even smell smoke. In the next five years, I expect even mid-range appliances to feature built-in resistance testing for elements. However, until that day comes, the best way to scale your repair skills is to build a solid foundation of oven diagnostics using physical tools. Don’t wait for a total failure to learn your machine. My challenge for you this weekend is to pull out your multimeter and check the resistance on your bake element. Knowing the ‘healthy’ reading now will make it much easier to spot a failing part later. It only takes ten minutes, but it gives you a level of control over your kitchen that most people never achieve.
The Hard Lessons My Dark Oven Taught Me
After years of wrestling with appliances, I’ve realized that a failing light is rarely just a light. One of the biggest ‘aha’ moments for me was discovering that a slightly loose mounting screw on the oven’s back panel was causing enough vibration to kill a filament every few weeks. I also learned that if you see a garbled mess of characters on your display, the bulb might be the least of your worries; you should check if your oven control board is failing. Another hard truth? If you don’t clean the socket with a bit of contact cleaner (while power is off!), the residue from years of roasting chicken creates high-resistance paths that fry even the most expensive 130V bulbs.
#IMAGE_PLACEHOLDER_E#
The Tools I Keep in My Kitchen Repair Bag
I don’t go into any repair without my ‘holy trinity’ of diagnostic gear. First is a professional-grade multimeter for testing an oven temperature sensor accurately—cheap ones just don’t have the precision needed for modern electronics. Second, I always keep a pair of powder-free latex gloves to prevent skin oils from touching new glass. Finally, I rely heavily on oven repair essentials like a small inspection mirror to see inside the socket without breaking my neck. These aren’t just gadgets; they are the difference between a ten-minute fix and a three-hour headache. If you’re ever in doubt, don’t hesitate to contact us for professional guidance before you start tearing the chassis apart.
Take Control of Your Kitchen Again
Repairing your own appliances is about more than just saving money; it’s about the peace of mind that comes from knowing exactly how your home works. You don’t have to accept a dark oven as ‘just the way it is.’ By following a logical path of oven diagnostics, you can identify why that oven light bulb keeps burning out every month and fix it for good. Whether it’s adjusting a faulty oven light switch or simply tightening a terminal block, the power to fix it is in your hands. Have you ever discovered a surprisingly simple reason why your oven light stopped working? Let me know in the comments below!