I remember the first time I walked into my kitchen at two in the morning, barefoot and bleary-eyed, only to hear a soft, rhythmic slosh coming from under the counter. I hadn’t run the machine all day. Yet, when I pulled the door open, there it was—a tub full of murky, lukewarm water threatening to spill over onto my hardwood floors. It felt like my house was playing a prank on me. How can a machine that is powered down and “sleeping” decide to start a pool party? It turns out, this is one of those frustrating appliance mysteries that makes you want to throw the whole unit out the window, but I promise you, it’s usually just a simple mechanical betrayal.
Stop the Ghost Flooding Before It Ruins Your Floor
If you’re staring at a rising tide in your machine right now, you’re likely dealing with one of two culprits: a backflow from your sink or a leaky water inlet valve. Early in my DIY journey, I made the massive mistake of assuming my drain pump was broken because, well, there was water that wasn’t draining. I spent a whole Saturday running diagnostics and eventually replaced the pump, only to find the tub full again the next morning. It was a classic case of misdiagnosis. Sometimes, the simple fix for a dishwasher that wont stop filling is actually just checking the way your drain hose is looped. According to experts at the International Association of Certified Home Inspectors (InterNACHI), a missing “high loop” in the drain line is one of the most common plumbing code violations found in residential kitchens, often leading to sink water siphoning right back into your clean dishwasher.
Is my dishwasher just a total lemon?
It is easy to feel like you bought a dud when you see why your dishwasher bottom is full of standing water. But most of the time, the machine is perfectly fine; it is the components or the installation that have let you down. We are going to walk through how to tell if it’s dirty sink water or clean tap water filling your tub, because that one detail changes everything. Have you ever opened your dishwasher and found a “gift” of dirty water left over from the night’s dishes? Tell me I am not the only one who has had a mini-meltdown over a soggy kitchen floor!
Before you go out and buy a whole new rack or start diving into parts and diagnostics, we need to isolate the source. If the water is crystal clear, your inlet valve is likely stuck open. If it is murky and smells like last night’s spaghetti, your sink is the culprit. Let’s get into how to stop the leak for good.
Identify if the Water is Fresh or Filthy
You need to be a bit of a detective here. When you see that pool of water, look at its clarity. If it looks like you could drink it (please don’t), it is coming from your home’s water supply through a faulty inlet valve. If it is gray, greasy, or smells like a wet dog, it is backwash from your sink. This happens because gravity is a cruel mistress; if your drain hose is flat on the cabinet floor, any water going down your sink drain can take the path of least resistance right into your dishwasher tub. I once spent three hours troubleshooting a ‘broken’ pump, even checking the difference between a drain pump and a circulation pump, only to realize my teenage son had accidentally bumped the drain hose under the sink, knocking it out of its mounting bracket and causing it to sag.
Stop Backflow with the High Loop Trick
The fix for dirty water flooding is often free and requires zero new parts. You need to ensure your drain hose makes a “high loop”—meaning it must arch higher than the entry point of the sink drain or garbage disposal before it connects. This creates a natural trap that prevents sink water from siphoning backward into your machine. If your kitchen setup includes an air gap—that little chrome cylinder sitting next to your faucet—make sure it is not obstructed by food particles. You can usually learn how to unclog your dishwashers air gap in minutes with a simple bottle brush or a stray piece of wire. 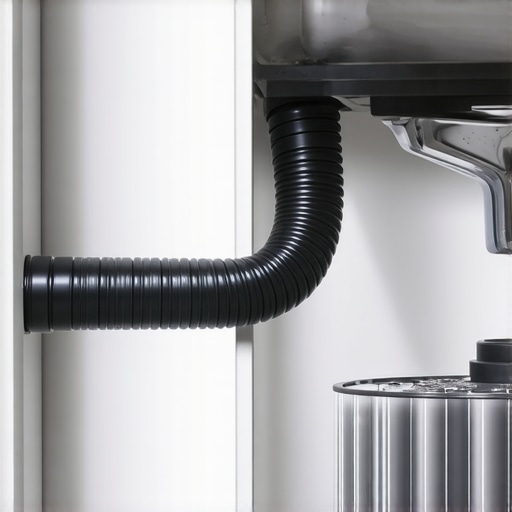
The Mechanical Failure of the Inlet Valve
If the water in your tub is crystal clear and cold, the culprit is the water inlet valve. This part acts like a bouncer at a club; its only job is to stay shut until the control board tells it to let water in. Over time, calcium buildup from hard water or a weak internal spring can prevent it from sealing completely. Even a microscopic gap will let water drip in 24/7, eventually filling the bottom of the tub. To confirm this, you can try testing your dishwasher float switch for flooding issues, as the float is supposed to kill the power to the valve if the water gets too high. However, if the valve is mechanically stuck open due to debris, cutting the power won’t stop the flow; only turning off the water supply will.
How to Replace the Valve Safely
Before you start pulling things apart, shut off the water supply line under the sink and kill the power at the breaker. Accessing the valve usually requires removing the bottom kickplate. It is a tight squeeze, and you will likely find years of accumulated dust and maybe a lost utensil or two. When I replaced mine last winter, I forgot to put a thick towel down and ended up soaking my socks—don’t make that mistake. Use parts and diagnostics to ensure you have the exact model number before ordering a replacement. A generic valve might look right but could have a different thread pitch or electrical connector, which could lead to a much worse why your dishwasher is overflowing onto the kitchen floor scenario later on. Once the new valve is in, hand-tighten the connections first to avoid cross-threading the plastic housing.
One of the biggest misconceptions I see in the DIY community is what I call the ‘parts-cannon’ approach. Everyone assumes that a non-functional appliance needs a new heart, but in reality, it usually just needs a band-aid. For instance, when an oven won’t heat, people rush to buy a expensive new control board. But in my experience, checking your oven bake element for tiny blisters is a much more effective first step. A tiny physical defect in the element is far more common than a fried board. We often think the most expensive part must be the failure point, but that is rarely the case.
Why the control board is rarely the real enemy
Contrarian as it sounds, I rarely start my diagnostics at the control board. Modern boards are remarkably resilient. The real nuance lies in the sensors and switches that feed the board information. According to the Association of Home Appliance Manufacturers (AHAM), a significant percentage of service calls result in ‘no part needed’ because the issue was environmental or a simple connection failure. If you do not use comprehensive DIY diagnostics, you are just gambling with your wallet.
How do I know if the part is actually dead?
Stop guessing and start measuring. You cannot see electricity, so you have to use a multimeter to find the truth. Whether you are testing an oven broil element or checking the dishwasher float switch for continuity, the numbers do not lie. Most DIYers skip this because they are intimidated by the tool, but learning a few multimeter tricks for diagnosing a dead control board can save you hundreds. I once saw a homeowner replace an entire motor only to find out a heat-damaged power cord was the only problem. 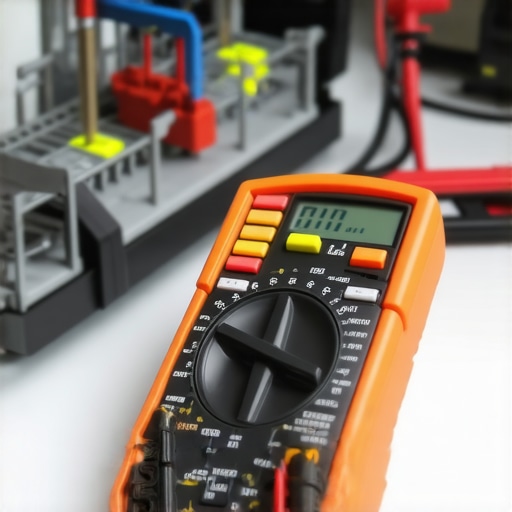 The ‘Oops’ factor here is huge: if you replace a board without fixing the underlying short in a secondary component, you might just fry the new one instantly. It is a painful mistake that turns a small fix into a total nightmare. This is especially true for ovens; for example, oven repair essentials always involve checking the high-limit thermostat before assuming the heating element is toast.
Avoid the trap of noise-based assumptions
When it comes to noises, do not assume the worst. People hear a rattle and immediately look into replacing a noisy dishwasher drain pump assembly. However, the hidden nuance is often just a stray popcorn kernel or a piece of glass caught in the impeller. This is where pinpointing faults before calling an expert pays off. You have to be willing to get your hands dirty and physically inspect the components before you open your wallet. Have you ever fallen into this trap of buying a part before testing? Let me know in the comments below!
Get the Right Gear Before You Get Your Hands Greasy
I’ve spent many nights hunched over a puddle of water or a cold oven, and I’ve realized that your success as a DIYer depends entirely on the accuracy of your information. If you’re serious about this, toss that cheap, unbranded screwdriver set and invest in a dedicated 1/4-inch and 5/16-inch nut driver. Most modern appliances, especially American brands like Whirlpool and Maytag, are held together almost exclusively by these sizes. I personally swear by Klein Tools because the magnetic tips actually hold the screws when you’re reaching into the dark recesses of a dishwasher frame. Without them, you’re just one dropped screw away from a very bad day. When you are testing the resistance on your dishwasher heating element, having a lead that doesn’t slip is the difference between a clear answer and a spark that scares the life out of you.
Speaking of answers, you absolutely need a reliable digital multimeter. I remember being terrified of them until I realized it’s just a translation tool—it translates the ‘language’ of electricity into numbers you can actually use. Whether you are testing your oven temperature sensor without calling a pro or how to test a dishwasher heating element for a short, the meter is your eyes. According to the Whirlpool Technical Training Job Aid, most heating elements should read between 10 and 50 ohms; anything outside that range is an automatic ‘replace’ signal. It takes the guesswork out of the equation entirely. 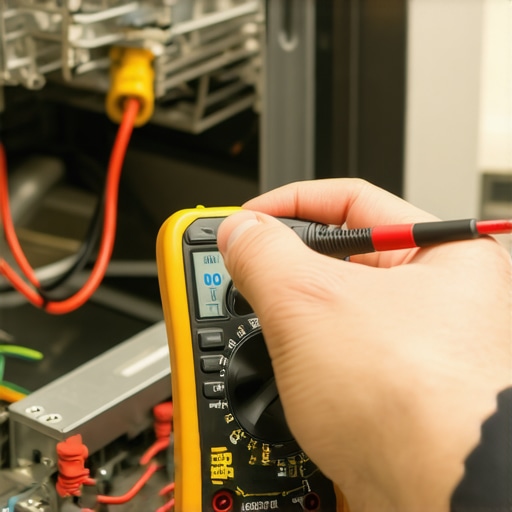
How do I keep my appliances running for another decade?
Maintenance isn’t just about fixing things when they break; it’s about preventing the catastrophic failures that lead to expensive parts runs. For dishwashers, the absolute best thing you can do is how to clean the hidden filter in your dishwasher sump at least once every three months. Over time, a mix of calcium and undissolved soap creates a concrete-like sludge that chokes the motor. I predict that in the next few years, we’ll see more ‘smart’ diagnostic chips that send a notification to your phone when this buildup reaches a critical level, but for now, we have to rely on manual inspections. If your machine is already acting up, try how to unclog a blocked dishwasher air gap with a straw—it sounds ridiculous, but it works perfectly for clearing out the minor debris that causes drainage backups.
For your oven, keep an eye on the gaskets. A leaky seal forces the oven to work twice as hard, leading to a why your oven takes forever to preheat and then drops temp situation. I highly recommend performing a quick ‘paper test’—close the oven door on a single sheet of paper; if you can pull it out easily, your hinges are sagging or the gasket is compressed. You might need to look into replacing an oven door hinge receiver to get that tight seal back. Don’t wait until the control board fries from the escaping heat to take action. My challenge to you today: grab your multimeter and check your oven’s bake element for continuity. It takes five minutes and might just save your next Sunday roast!
Why Your Gut Feeling Is Often a Costly Liar
After years of fixing my own machines, the biggest lightbulb moment was realizing that expensive parts rarely fail first. We often look at a dead screen and assume it is time for a new machine, but a quick check might show it is just a loose wire. Another reality? Brand names do not guarantee immunity from clogs. Even a high-end dishwasher needs you to understand the diagnostic process before you start ordering replacements. Lastly, never underestimate the power of a simple cleaning; half the broken pumps I have seen were just choked with debris, not mechanically dead.
The Toolbox That Saves Me Hundreds Every Year
If you want to stop being at the mercy of expensive service calls, you need a few non-negotiables. First, a magnetic nut driver set is worth its weight in gold for those hard-to-reach dishwasher screws. Second, I always keep a digital multimeter nearby—it is the only way to be 100% sure before you dive into oven repair essentials. I also highly recommend bookmarking official technical job aids for your specific model; they contain the exact ohm readings you need to verify if a part is truly shot. Finally, knowing when to stop diying and call an expert is a tool in itself—safety always comes before pride.
Start Your DIY Success Story Today
There is a unique kind of satisfaction that comes from hearing your dishwasher hum perfectly or seeing your oven preheat after you have personally handled the repair. It is about more than just saving money; it is about taking control of your home’s ecosystem. Whether you are inspecting your oven control board or securing a floppy drain hose, you are building skills that last a lifetime. Don’t let a little water or a clicking noise intimidate you—you have the tools and the knowledge to handle parts, oven repair, diagnostics, and dishwasher maintenance like a pro. Have you ever successfully fixed an appliance only to find out the problem was something tiny and unexpected? Let me know your biggest aha! moment in the comments below!