I was standing in my kitchen, flour on my apron and a sad, pale tray of baguettes in my hand, wondering why my expensive steam oven had suddenly decided to quit on me. It is a gut-punch when your high-end gear fails just when you need it most. I could hear the pump hum, but no mist appeared. That is when it hit me: hard water does not just ruin showerheads; it is the silent killer of steam injectors too. If you have noticed your bread crusts are lackluster or your steam cycle is more like a dry heat cycle, you are likely dealing with a calcified blockage. Today, I am going to show you exactly how to bust through that lime scale and get your oven back to professional-grade performance without calling a tech.
Why Your Steam Oven Is Leaving You High and Dry
It is easy to ignore the mineral content in our tap water until it literally stops our appliances in their tracks. According to the U.S. Geological Survey, more than 85% of American homes have hard water. This calcium and magnesium build-up is the same culprit that causes homeowners to seek out the quickest way to remove hard water build-up in your dishwasher. In a steam-enabled oven, these minerals bake into a rock-hard crust inside the tiny nozzle of the injector. I learned this the hard way. Early on, I thought I could just power through it by running the cycle more often, but that only made the clog more dense. Before you start looking at oven repair essentials for a total replacement, you need to understand that this is often a simple mechanical blockage, not a catastrophic electrical failure.
Is this DIY fix actually worth the effort?
You might be worried about poking around in the delicate internals of a convection unit. I get it. I once made the mistake of trying to scrape a nozzle with a metal paperclip while the oven was still warm—please, do not do that. I ended up scratching the precision finish and nearly burning my knuckles. But if you follow a methodical approach and use the right tools, it is a perfectly manageable task for any weekend warrior. Have you ever looked at your oven’s steam nozzle and noticed those white, crusty deposits forming around the edges? It is a common sight that most people ignore until the steam stops entirely. Taking care of this now saves you from deep-diving into oven diagnostics later when the pump burns out from trying to push against a wall of calcium. Let us get into the nitty-gritty of clearing those lines and getting your kitchen back in order.
Kill the Power and Clear the Path
Safety first, and I mean it. Before you even think about touching that injector, unplug the unit or flip the breaker. I once thought I could ‘quick-clean’ a nozzle while the convection fan was still spinning—I nearly lost a fingernail and definitely scared the cat. Once it is cold and powerless, locate your steam inlet. It usually looks like a small brass or plastic nipple tucked into the upper corner or behind a removable baffle. If you can’t find it, you might need to check your specific oven repair essentials to see the layout of your model. Think of this nozzle as a tiny soda straw; it does not take much to plug it up, and it takes even less to bend it if you are reckless.
Soften the Mineral Stone with Acid
You are not going to chip away at calcium with a hammer. You need to dissolve it. I like to use a 50/50 mix of white vinegar and distilled water. Why distilled? Because adding more tap water is just inviting more minerals to the party. I take a small spray bottle and saturate the nozzle area. Let it sit for at least twenty minutes. If the scale is really thick—like a crusty barnacle—I will soak a paper towel in the solution and wrap it around the injector. This is very similar to the quickest way to remove hard water build-up in your dishwasher, where the acid breaks the chemical bond of the minerals.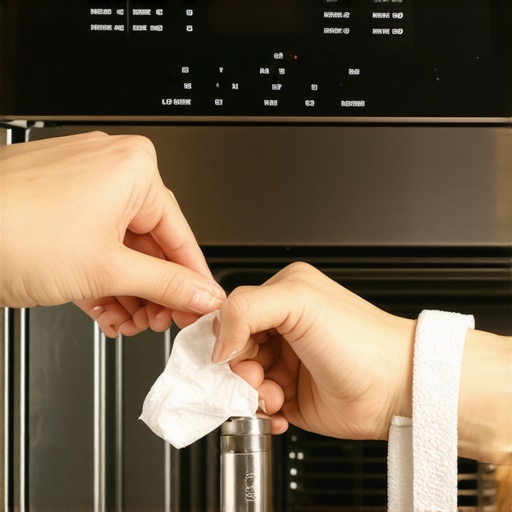
The Gentle Poke and Flush Technique
After the soak, the scale should be soft, like wet chalk. This is where most people mess up by grabbing a drill bit or a needle. Do not do it. Use a nylon-bristled brush or a soft wooden toothpick. I once used a sewing needle and broke the tip off inside the nozzle—I had to spend the afternoon performing oven diagnostics just to figure out how to disassemble the entire water line to get it out. Scrub the exterior gently. If your oven has a ‘descale’ or ‘flush’ mode, now is the time to run it. If it does not, you can use a plastic medical syringe filled with your vinegar solution to manually force liquid through the nozzle. If it resists, do not push hard. You do not want to blow a seal in the pump. Just like a simple trick for clearing your dishwasher spray arm holes, patience is your best tool here.
How to Tell if You Actually Fixed It
Once you have flushed the line, wipe everything down and restore power. Run a short steam cycle. You should see a fine, consistent mist, not a sputtering dribble. If the steam is still weak, you might be looking at a failing pump or a deeper blockage in the reservoir line. While you are at it, it is a good idea to perform a quick check on other systems; for instance, testing an oven temperature sensor with just a multimeter ensures that your oven is not just steaming well, but heating accurately too. If the control panel is throwing weird codes during the steam cycle, you should investigate if your oven control board is failing before you assume it is still just a clog.
Stop trusting the self-clean button for mineral issues
Most people assume that cranking the heat to 500 degrees will solve all their oven’s problems, but when it comes to steam injectors, this is a recipe for disaster. While high heat is great for carbonized food spills, it actually petrifies calcium deposits. I’ve seen homeowners run a self-clean cycle to ‘blow out’ a clog, only to turn that soft lime into a ceramic-like stone that no amount of vinegar can touch. If you’re already seeing symptoms, skip the heat and go straight to manual oven diagnostics. According to data from the Association of Home Appliance Manufacturers (AHAM), heating mineral deposits without a solvent can increase their structural density, making them nearly impossible to remove without replacing the entire injector assembly. 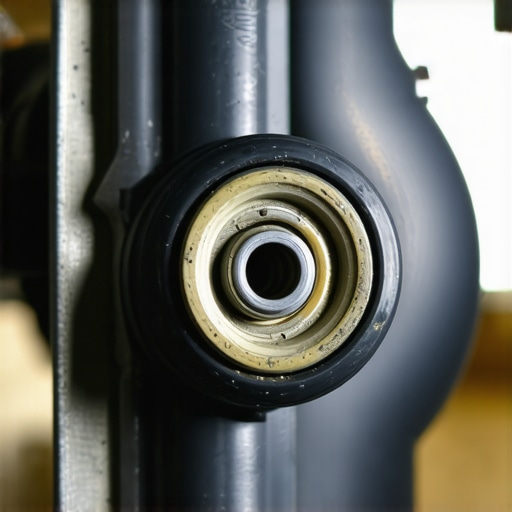
Is the nozzle really the only thing that breaks?
Sometimes you can clear the nozzle perfectly and still get zero steam. This is where the ‘hidden nuance’ of the check valve comes in. This tiny one-way valve prevents hot air from backing up into the water lines. If it gets stuck open, steam cannot build pressure; if it is stuck closed, the pump works itself to death. Before you go buying every item on a list of oven repair essentials, check that valve. I once spent two hours descaling a nozzle only to realize the internal rubber seal on the check valve had warped from heat exposure. It is a similar logic to dishwasher parts: a comprehensive guide to diy diagnostics—you have to look at the whole system flow, not just the exit point.
The ‘Oops’ factor that kills your pump
Here is the trap: using industrial-strength descalers meant for heavy machinery. These often contain sulfamic or phosphoric acids that are too aggressive for the plastic fittings or thin-walled brass inside a high-end oven. I’ve seen these chemicals eat through a gasket in minutes, leading to a slow leak that eventually shorts out the control board. If you suspect your issue is more than just a surface clog, you might need to look into parts and diagnostics: how to identify dishwasher faults quickly to learn how to test solenoids and pumps, as the mechanisms are remarkably similar. Have you ever fallen into the trap of using a chemical that was too strong and regretted it? Let me know in the comments. Keeping your gear running is not just about cleaning; it is about knowing when to stop before you do more damage.
My emergency kit for high-end appliances
I keep a dedicated ‘appliance medical kit’ in my junk drawer, and it has saved me thousands in service calls. When you are dealing with precision steam injectors and convection systems, you cannot rely on a standard toolbox. I personally use a 20cc plastic medical syringe and a length of 1.5mm nylon weed-whacker line. Why? Because the nylon is stiff enough to push through a calcium clog but soft enough that it won’t scratch the bore of your injector. If you use a metal wire, you risk creating microscopic burrs where minerals will cling even faster next time. Beyond the physical cleaners, I never start a repair without my digital multimeter. I prefer the Klein MM400 because it’s rugged enough for a workshop but precise enough to handle the low-voltage signals on a control board. If you want to get serious about your kitchen, you need to learn oven diagnostics so you aren’t just guessing which part to buy. Mastering these tools means you can stop being a victim of your appliances and start being their master.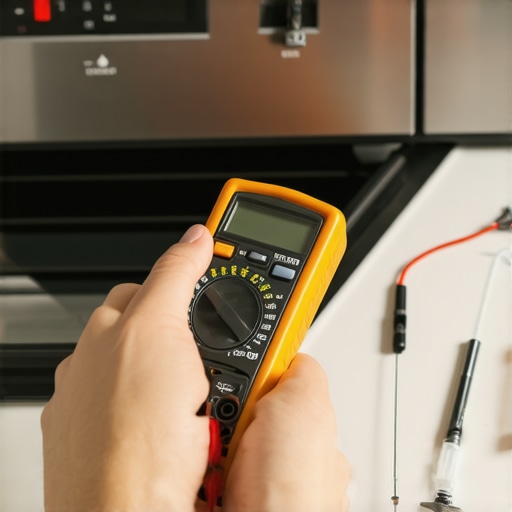
How do I keep the steam flowing year after year?
The secret to longevity is not more cleaning; it is better water. I made the switch to using only distilled water in my steam reservoir, and I haven’t had a clog in three years. If your oven is plumbed directly into your home’s water line, you absolutely must install an inline scale inhibitor. According to technical data from the American Society of Plumbing Engineers (ASPE), even water categorized as ‘moderately hard’ can reduce the thermal efficiency of heat-exchange surfaces by nearly 20% in just one year of regular use. This isn’t just about the injector; it’s about the entire system. While you are maintaining the water lines, take a moment to look at your other components. Learning how to test an oven fan motor for resistance can help you catch a failing bearing before it overheats and takes out your expensive new steam pump. It is all about the holistic view of the machine. I also recommend a monthly ‘dry run’ where you check for leaks around the door gasket, as moisture can migrate and cause you to need dishwasher parts: a comprehensive guide to diy diagnostics-style troubleshooting on your oven’s electrical harness.
Smart sensors might be the end of our descaling woes
Looking ahead, I see a shift in how we handle these mineral issues. We are moving toward a ‘predictive maintenance’ era where internal sensors will measure the flow rate of the steam and the electrical resistance of the heating element in real-time. Instead of waiting for your bread to come out flat and sad, your oven will likely send an alert to your phone saying, ‘Descale required in 5 cycles.’ This will prevent the rock-hard petrification I mentioned earlier. Until that tech is standard in every kitchen, you have to be the sensor. If you suspect something is off, don’t wait. Grab a multimeter and start testing an oven temperature sensor with just a multimeter to ensure your thermal environment is still healthy. If your oven is acting up, I challenge you to do one thing today: find your oven’s thermal fuse and learn how to test your ovens thermal fuse for continuity. It is the most common ‘silent killer’ of heat, and knowing how to check it yourself is the ultimate DIY power move.
Lessons My Oven Taught Me Before I Listened
I used to think that a steam oven was a ‘set it and forget it’ piece of technology, but the minerals in our water have other plans. The hardest lesson I learned was that forcing a blockage is the fastest way to blow an internal seal. If you feel resistance when flushing the line, stop and let the acid do the work. Another lightbulb moment for me was realizing that cleaning the nozzle is only half the battle; if your water line is crunchy, your pump will eventually burn out. It is better to perform regular oven diagnostics than to wait for a total failure. I also discovered that metal pins are the enemy; they create microscopic scratches in the brass that actually give minerals a better place to grip, making future clogs even harder to shift. Stick to nylon or wood whenever possible.
A Peek into My Appliance Repair Kit
You do not need a garage full of tools to keep your oven in top shape, but a few specific items are non-negotiable for me. First, a 20cc medical syringe is the best way to apply controlled pressure when flushing vinegar through the system without over-stressing the lines. Second, I swear by a Klein MM400 Multimeter for all my electrical checks; it is essential for things like how to test your ovens thermal fuse for continuity when the heat fails. Finally, I keep a spool of 1.5mm nylon weed-whacker line. It is stiff enough to navigate a curved injector pipe but soft enough to avoid damaging the bore. I trust these tools because they focus on precision rather than brute force, which is exactly what high-end dishwasher parts: a comprehensive guide to diy diagnostics-style repairs require.
Mastering Your Steam Oven Once and for All
Reclaiming your kitchen from hard water build-up is one of the most satisfying DIY wins you can achieve. When you see that first blast of fine, consistent mist hitting the dough, you will know the effort was worth it. Taking ownership of your appliance maintenance means you are no longer at the mercy of expensive service calls or flat, lackluster loaves of bread. By keeping your oven repair essentials handy and staying ahead of the mineral scale, you ensure your equipment performs at its peak for years to come. Don’t be afraid to dig into the internals; your oven is a machine, and with the right approach, you are its master. Have you ever noticed your steam cycle getting weaker over time or found a specific tool that worked wonders on a clog? Let me know your experiences in the comments below!