I stood in my kitchen last November, socks damp from a spill, staring at a sliver of light escaping from the top of my oven. My dinner was taking forever. The kitchen felt like a sauna. I tried to shove the door shut, but it just lazily drifted back open about half an inch. It was infuriating. I realized then that my oven wasn’t broken—it was just tired. Specifically, the door springs had lost their oomph after a decade of Sunday roasts. If your door doesn’t have that firm, snappy close anymore, you’re literally tossing money out of the gap. Today, I am going to walk you through how to swap those worn-out springs so you can finally get a tight seal again.
The High Cost of a Sagging Oven Door
[IMAGE_PLACEHOLDER]I’ll be honest: I made a classic rookie mistake years ago. I spent nearly sixty dollars troubleshooting common issues with parts and replaced the entire silicone gasket first. I thought the rubber was the problem. It wasn’t. The gasket can’t do its job if the springs aren’t pulling the door tight against the frame. According to Energy.gov, even a small gap can lead to significant heat loss, which forces your oven to work double-time. You might notice you are fixing an oven door that won’t stay latched or, worse, spotting a failing oven hinge before it completely gives way. Replacing those springs is the fountain of youth for your appliance. Have you noticed your oven preheating slower than usual lately?
Will I end up breaking the glass?
It is the number one fear I hear from neighbors. If I take the door off, will the tempered glass shatter? The short answer is no—not if you handle it with a little respect. I used to be terrified of replacing a cracked oven door hinge because of that big glass pane. But once you understand how the weight is distributed, it becomes a straightforward mechanical task. We are not doing rocket science here; we are just restoring tension. By the time we are done, your door will shut with a thud that sounds like a solid luxury car door.
Locate the Source of Your Door Tension
Before you grab your screwdriver, you need to know which system your oven uses. Most modern units have springs built directly into the hinges, while older models often hide long, coiled springs behind the side panels of the stove. This is a critical step in your oven diagnostics because it determines if you are replacing the whole hinge assembly or just a few small parts. If your oven has a drawer at the bottom, pull it out and look at the frame—sometimes you can see the springs stretching toward the back. If they look like stretched-out Slinkys, they are definitely the culprits.
Flip the Hinge Locks Before You Lift
This is where people get hurt or break things. Open the door fully. On each hinge, you will see a little metal tab or a rotating latch. You must flip these tabs forward or down until they lock onto the hinge hook. If you do not do this, the hinges will snap shut with the force of a bear trap the moment you lift the door, which is a common nightmare when replacing a cracked oven door hinge. 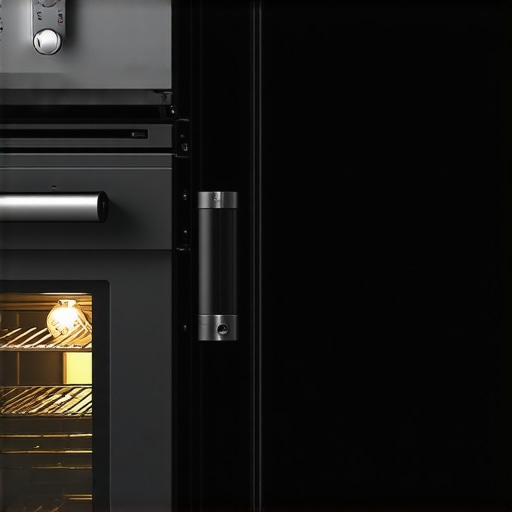
Master the 45-Degree Pull
Once those hinges are locked, close the door until it hits the stops—usually at about a 45-degree angle. Grasp the sides of the door firmly, lift up, and pull toward you. I remember the first time I did this on an old Frigidaire; I was so nervous about the glass that I did not lift high enough. The door got stuck halfway, and I was left wobbling a 30-pound slab of steel while trying to find the slot again. The trick is a confident, steady upward motion. This prevents the door from binding and keeps you from fixing an oven door that won’t stay latched due to bent mounting brackets.
Swap the Springs Without Losing a Finger
With the door on a padded surface like an old rug, you can now access the internal components. If your springs are the side-mounted type, you will need to pull the oven out from the wall and remove the side panels. Use heavy-duty pliers to unhook the old, stretched-out spring from the frame and the tension cable. It will be stiff, so wear gloves. When you hook the new one in, make sure it is seated perfectly in the notch. A misaligned spring will cause the door to pull unevenly, and eventually fixing an oven that won’t reach high temperatures will be impossible because the heat will just bypass the gasket again.
Verify Your Heat Seal
After sliding the door back onto the frame and flipping the hinge locks back to their original position, give it a test. It should snap shut and stay there without any help. I always recommend taking five minutes to learn how to calibrate your oven with a simple thermometer once the door is tight. You will be surprised how much your internal temperature was fluctuating before you fixed that gap. A tight door means consistent heat, which means no more half-burnt, half-raw cookies.Most DIY tutorials suggest that if your gas oven doesn’t heat, you should check for the orange glow. The logic is simple: if it glows, it is getting power, so the problem must be the gas valve. I am here to tell you that this is a costly misconception. In my experience, a glowing igniter is the most deceptive part of oven diagnostics. Igniters are made of silicon carbide or silicon nitride, and as they age, they develop microscopic cracks that increase resistance. They might still get hot enough to glow, but they will not draw enough amperage to trigger the safety valve to release gas. According to technical standards from the Association of Home Appliance Manufacturers (AHAM), a typical igniter needs to draw a specific amperage—usually between 3.2 and 3.6 amps—to open the valve. Anything less, even if it looks like a miniature sun in your broiler, means your dinner stays cold. 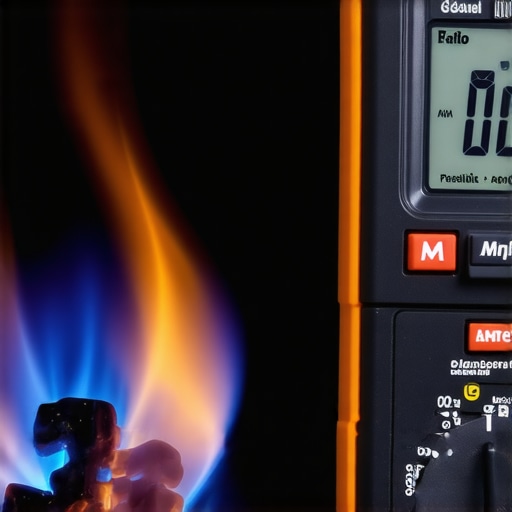
Don’t Replace the Board Before You Check the Sensor
Another classic trap involves the control board. People see an error code and immediately start identifying the right control board for your wall oven because they think the brain is fried. Stop right there. Before you drop hundreds of dollars on a circuit board, you need to be testing an oven temperature sensor with just a multimeter. A sensor is just a resistor that changes its value based on heat. If it is even slightly out of range—say 1050 ohms at room temperature instead of the standard 1100—your oven will behave like it is possessed, overshooting temperatures or shutting down unexpectedly.
Is my control board actually repairable?
Actually, yes, more often than the manufacturer wants you to believe. If you see a charred spot on the back of the board, it is often just a blown relay that costs five dollars at an electronics shop. Learning how to tell if your oven control board is repairable can save your appliance from the landfill and keep your wallet full. I once almost tossed a perfectly good range because of a stuck button error that turned out to be a simple ten-dollar ribbon cable issue rather than a dead processor.
The Hidden Danger of Ghost Failures
The biggest oops factor I see in the field is what I call the ghost failure. This happens when troubleshooting common issues with parts is done in a vacuum without checking the environment. Grease buildup on a sensor or a loose ground wire can mimic a catastrophic electronic failure. Always clean your connection points with electrical contact cleaner before condemning a major component. Have you ever replaced an expensive part only to find out the old one was actually fine? Let me know in the comments—we have all been there, and sharing those stories helps the whole community avoid the same trap!That trap usually starts with poor data. If you are serious about this, you need to upgrade your toolkit beyond a basic screwdriver and a prayer. I learned the hard way that when you are testing the resistance of an oven igniter with your multimeter, a cheap five-dollar meter from the discount bin can give you a ghost reading that sends you on a wild goose chase.
Why a Cheap Multimeter Is a Liability
I now use an auto-ranging digital multimeter with a high-quality thermocouple. According to the Whirlpool ‘Service Matters’ technical training manuals, even a 10% deviation in line voltage can cause intermittent control board resets that look like hardware failure. If your meter is off by just a few percent, you will misdiagnose a perfectly healthy board. A pro-grade tool allows you to verify that the amperage draw is consistent, which is the only real way to know if your igniter is failing before it leaves you with a cold pizza.
The Special Wrench You Will Actually Need
While we are on the subject of tools, let’s talk about the nightmare of rusted fasteners. If you have ever tried to swap a heater, you know that heat and moisture turn factory nuts into solid lumps of corrosion. I spent three hours once fighting a single bolt before I discovered the correct tool for removing a rusted dishwasher heating element nut—a specialized thin-walled deep socket. Using the wrong wrench here is how you end up cracking the plastic tub, and once that tub is cracked, your dishwasher is essentially a very expensive boat anchor. #IMAGE_PLACE_HOLDER_D#
How do I keep my kitchen running smoothly for years?
It comes down to a quarterly ritual. Every three months, I don’t just clean the filters; I perform a full systemic check. For the dishwasher, this means testing your dishwasher water level switch in 5 minutes to ensure the float isn’t getting sluggish from hard water buildup. For the oven, it means checking the door alignment we discussed earlier. This proactive approach turns ’emergencies’ into ‘scheduled maintenance.’ If you wait for the puddle on the floor or the smell of smoke, you are already too late. Knowing your way around dishwasher parts: a comprehensive guide to DIY diagnostics can help you spot the difference between a simple clog and a motor that is actually on its last legs.
Will Your Stove Soon Fix Itself?
I predict that within the next five years, the ‘connected kitchen’ will move from being a gimmick to a necessity. We are already seeing appliances with built-in ohmic sensors that can predict a heating element failure before it happens. Future models will likely send a notification to your phone saying ‘Element Resistance is at 15%—Order Replacement Now’ rather than just failing mid-bake. Until then, you are the brain of the machine. Go grab your multimeter right now and check the continuity of your bake element—it takes two minutes, costs nothing, and could save you from a massive holiday dinner disaster.
Hard Truths I Learned While Taming My Range
After years of tinkering, I’ve realized that the most common mistake isn’t using the wrong tool—it’s ignoring the context. When you are troubleshooting common issues with parts, remember that a component rarely fails in isolation; a failing spring often hides a bent hinge arm or a warped frame. Another ‘lightbulb moment’ for me was realizing that heat is the ultimate enemy of every plastic and rubber piece in your kitchen. If you smell something off, do not wait for an error code. Check the gaskets and wiring immediately before a minor leak becomes a major hazard.
I also learned that ‘good enough’ is never enough when it comes to door tension. If your oven doesn’t have that satisfying snap when closing, you are literally hemorrhaging money through heat loss. I used to think fixing an oven door that won’t stay latched was just a cosmetic annoyance, but it is actually the most impactful DIY task you can perform to restore baking consistency and lower your utility bills.
The Toolkit That Actually Gets the Job Done
To avoid the ‘ghost readings’ I mentioned earlier, I rely on a few specific resources and tools that haven’t let me down. For high-precision electronics, I always suggest a professional-grade multimeter. This is absolutely vital when testing the resistance of an oven igniter with your multimeter to ensure you are getting an accurate amp draw rather than a misleading voltage spike. I also keep a set of offset screwdrivers for those impossible-to-reach hinge screws that always seem to be tucked into the tightest corners. For deep-dive research into more complex systems, I frequently visit dishwasher parts: a comprehensive guide to DIY diagnostics. Even though it’s focused on dishwashers, the diagnostic logic and structural diagrams help bridge the gap between different kitchen appliances and turn guesswork into a repeatable science.
Take the First Step Toward a Better Kitchen
You do not need a degree in mechanical engineering to keep your stove in top shape. You just need patience and the willingness to look closely at how things move. Whether you are calibrating your oven with a simple thermometer or finally swapping out those heavy-duty springs, you are taking back control of your home environment. This type of oven repair isn’t just about saving money on a service call—it is about the pride of knowing your machine is working exactly as it was designed to. Go ahead, open that oven door and give those hinges a look. You might be one small adjustment away from the best meal you have cooked all year. Which part of your oven or dishwasher has been acting up the longest? Let me know in the comments below, and let’s figure out the fix together!