I was loading my favorite white dinner plates last Tuesday when I saw it. A nasty orange streak across the rim. My heart sank. I looked down at the bottom rack and there it was: a jagged little tooth of exposed metal, weeping rust like a sore. I’d been ignoring the tiny crack in the vinyl coating for months. Now, my expensive plates were paying the price. It’s a gut-punch when a machine that’s supposed to clean things starts ruining them instead. Today, I’m going to show you how to stop that rust in its tracks and recoat those peeling tines without spending $150 on a replacement rack. [image_placeholder]
Why You Can’t Just Ignore That Little Speck of Rust
Rust is like a virus in your kitchen. Once it finds a way through that vinyl coating, it starts eating the metal underneath, and it doesn’t stop. Before you know it, you aren’t just dealing with a cosmetic issue; you’re dealing with structural failure. I once tried to ignore a small crack, thinking it wasn’t a big deal. Within a month, a whole section of the rack was brittle. If things get too far gone, you might even find yourself replacing a broken dishwasher tine row yourself just to keep your bowls from falling through. We often think we need to call in the pros for this, but honestly, checking your dishwasher parts for DIY diagnostics is the best way to save a fortune. A new rack can cost nearly as much as a budget dishwasher. That’s a hard pill to swallow when a bottle of touch-up paint costs ten bucks. I made the classic rookie mistake of using electrical tape to cover a peel. It lasted exactly one cycle before the heat turned it into a sticky, black sludge that I spent the weekend scrubbing off. Don’t be like me.
Is a DIY Patch Job Really Going to Hold Up?
I get the skepticism. You’re thinking, “Is some liquid vinyl really going to survive 150-degree water and harsh detergents?” It’s a fair question. According to the Association of Home Appliance Manufacturers (AHAM), the environment inside a dishwasher is one of the most corrosive in the home due to the combination of moisture, heat, and chemical agents. However, modern repair kits are specifically formulated to bond with the existing rack coating. When applied correctly, these patches can last for years. The key is catching it before the rust spreads too deep. If your machine is already acting up in other ways—maybe leaving a chalky film on your good plates or sounding like a jet engine—it’s time to do a full sweep. Have you noticed any of those dreaded orange spots on your dishes lately, or are you catching the problem early? Let me know in the comments if you’ve tried the “quick fix” and had it fail on you like I did. Before we dive into the sandpaper and the sealant, let’s make sure we are looking at the right problem. Sometimes what looks like a rack issue is actually an is-your-dishwasher-spray-arm-melting-check-these-3-things”>melting spray arm or an inlet valve problem. But if it’s definitely the rack, grab a pair of gloves. We’re about to save you a couple hundred dollars.
Scrape the Metal Down to a Silver Shine
The biggest mistake people make is painting over the rust. If you trap moisture and oxidation under a fresh layer of vinyl, you’re just building a tiny greenhouse for decay. You need to get aggressive. Grab a piece of 100-grit sandpaper or a small wire brush. Your goal is to see shiny, bare metal. It’s a lot like removing stubborn rust from an oven rack; you can’t be timid if you want the fix to stick. I remember the first time I tried this—I was in a rush and just did a light scuff. Two weeks later, the rust had bloated under the new coating like a gross orange blister. I had to peel the whole mess off and start from scratch. Now, I sand until that tine looks like a polished silver needle. 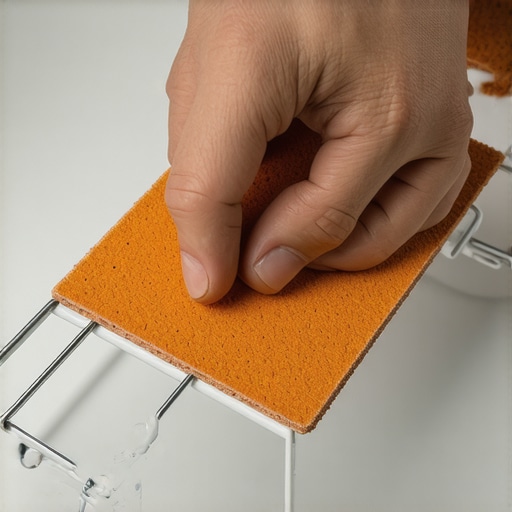
Ditch the Grease for a Perfect Bond
Once the metal is exposed, it’s vulnerable. More importantly, it’s probably covered in microscopic bits of grease and old detergent. If you don’t strip those away, your repair kit won’t bond. It’ll just slide off during the first heavy-duty cycle. Take a cotton swab dipped in rubbing alcohol and scrub the area thoroughly. This acts as a chemical primer. While you’re down there with your head in the machine, take a second to check your dishwasher parts for DIY diagnostics. Is there gunk building up elsewhere? Often, rust is a symptom of a larger moisture or drainage problem, so it’s worth seeing why your dishwasher bottom stays dirty after a cycle. A clean environment ensures the repair lasts years, not days.
Apply the Vinyl Without Making a Mess
Most repair kits come with a bottle of liquid PVC and a little brush, similar to nail polish. The trick is to apply thin, even coats rather than one big glob. If the glob is too thick, the outside dries but the inside stays gooey, eventually shearing off when a plate hits it. Start from the healthy vinyl and work your way over the bare metal. You want a slight overlap to create a seamless seal. If you’re worried about other components, like if your dishwasher spray arm is melting, keep those chemicals far away from the plastic arms. They are designed for the metal racks only.
The Patience Phase of the Repair
This is where most DIYers fail: the drying time. Most kits require at least 24 hours to cure completely. If you run a load of dishes after 6 hours because you really need those coffee mugs, you’ve just flushed your hard work down the drain. The heat and steam will liquefy the semi-cured vinyl. Think of it like a cast on a broken bone; you can’t go running until the structure is solid. While you wait, use the downtime to clean your dishwashers hidden sump filter. It’s a productive way to keep your hands off the rack while the sealant does its thing. If you notice the tines are too far gone to just paint, you might actually be better off replacing a broken dishwasher tine row yourself, which is still cheaper than a whole new rack.
But even with the best sandpaper and a steady hand, some DIY repairs fail within weeks. Why? Because most people fall into the trap of believing that the original manufacturer always knows best. In my experience, relying solely on OEM (Original Equipment Manufacturer) advice for rack maintenance is a mistake. Many factory coatings are designed for cost-efficiency, not extreme longevity. When you’re performing parts and diagnostics to identify dishwasher faults quickly, you’ll often find that the aftermarket vinyl repair kits actually use a higher-density polymer than the original rack coating. Don’t be afraid to deviate from the brand name if the reviews show the sealant holds up better to high-heat cycles.
Stop trusting factory coatings blindly
The real secret to a permanent fix isn’t just the paint; it’s the chemistry of your wash. Everyone tells you to use more detergent for cleaner dishes, but if your coating is already compromised, those aggressive enzymes are your worst enemy. Modern detergents are designed to eat organic matter, and they aren’t picky. If your high-limit thermostat for continuity is failing, the water might be reaching temperatures that literally soften the vinyl, allowing those chemicals to penetrate the metal core. I’ve seen repairs that should have lasted years melt away in a month because the machine was running ten degrees too hot. Have you ever fallen into this trap of fixing the symptom but ignoring the heat? Let me know in the comments.

Why does my repair keep peeling after just a few months?
If you’ve followed every step and the vinyl still bubbles, you likely have a hidden vibration issue. A dishwasher rack that isn’t seated properly or has a worn-out roller assembly will rattle during the spray cycle. These micro-impacts against your plates create tiny stress fractures in the new coating. It’s the same logic used in oven diagnostics for pinpointing faults; you have to look at how the machine moves, not just how it looks. A study published in the Journal of Applied Polymer Science confirms that repeated thermal expansion combined with mechanical stress significantly accelerates the failure of PVC-based adhesives. If your rack isn’t stable, your repair won’t be either.
The one diagnostic step you’re probably skipping
Before you close the door on your repair, you must check the spray arm alignment. If the arm is slightly bent or hitting the rack, it will strip your new coating off faster than any rust could. This is a common crossover issue; much like how you might be testing an oven fan motor for resistance to solve a noise problem, you should check your spray arms to solve a rack problem. If you notice your dishwasher leaves a film on silverware, it’s a sign that the water flow is turbulent, which adds unnecessary pressure to those newly repaired tines. Take the extra five minutes to ensure everything is spinning freely. Saving $150 on a new rack is only a victory if you don’t have to do it all over again next season.
Stop the cycle of constant repairs
I’ve spent years tinkering with these machines, and if there’s one thing I’ve learned, it’s that waiting for a breakdown is a rookie move. Real maintenance is about catching the whisper of a problem before it becomes a scream. For me, that means monthly deep dives into the guts of the machine. I don’t just look; I use a digital multimeter. Specifically, the Klein Tools MM400 is my go-to because it’s rugged enough to survive being dropped on a tile floor while I’m wrangling a heavy rack. Learning testing-an-oven-temperature-sensor-with-just-a-multimeter changed everything for me—it turned guesswork into a science. If you know exactly what the resistance should be, you aren’t just swapping parts blindly; you’re executing a targeted strike.
The specific gear I use to save my appliances
Beyond the multimeter, I swear by a set of long-reach dental picks. They are perfect for clearing debris from the tiny holes in a spray arm or extracting a stray glass shard from the sump. While most people are struggling with bulky pliers, these picks let you perform parts and diagnostics to identify dishwasher faults quickly without dismantling the entire unit. When it comes to the oven, I never start a job without checking the basics first. I’ve seen too many people buy a whole new control board when they really just needed to know how to test a gas oven igniter with a multimeter. These tools aren’t just about fixing what’s broken; they are about extending the life of the machine by five or ten years.
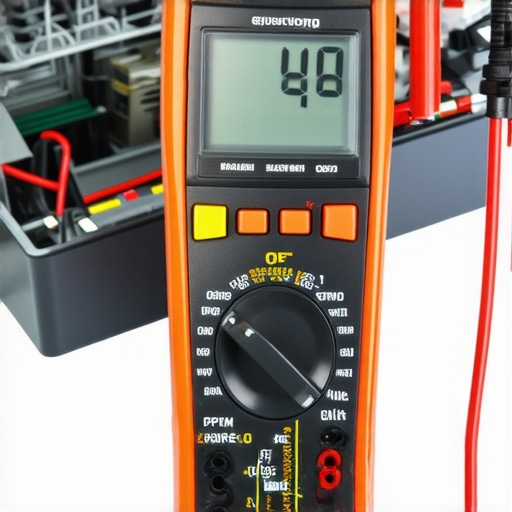
The technical service guide for Whirlpool’s WDT series (Manual #W11174780B) explicitly warns that even a slight variance in motor resistance often precedes a full pump failure. This is why authority matters—knowing the specs allows you to replace a twenty-dollar component today instead of a five-hundred-dollar assembly next month. This proactive approach is the core of oven repair essentials and troubleshooting common issues with parts. If you aren’t checking these values periodically, you’re just waiting for a flood or a fire.
How do I keep my dishwasher running like new?
Maintenance isn’t a one-time event; it’s a habit. The most effective thing you can do is perform a chemical strip once a quarter. I use a high-acid descaler to eat away the limescale that builds up on the heating element and sensors. While you’re at it, don’t forget the best way to clean a greasy dishwasher filter. If that filter is clogged, your circulation pump has to work twice as hard, which wears out the bearings and leads to that dreaded low-frequency hum. Looking ahead, I suspect we’ll soon see smart appliances with integrated vibration sensors that alert your phone the moment a bearing starts to wobble. Until that future arrives, your ears and your multimeter are your best defenses. I challenge you to pull out your dishwasher filter tonight and see what’s actually hiding in there—you might be surprised by what’s slowing your machine down.
Secrets I Learned While Scraping Rust Off My Own Racks
Over the years, I’ve realized that a dishwasher isn’t just a machine; it’s a high-heat chemistry lab. The most important lesson I’ve learned is that prevention is cheaper than any paint. If you see a tiny bubble in your vinyl, pop it and seal it immediately. Waiting even a week allows water to travel down the wire, turning a 5-minute fix into a 2-hour sanding marathon. I also found that most ‘universal’ repair kits are great, but they require a perfectly dry surface—I now use a hairdryer to ensure there is zero moisture trapped in the metal pores before I apply the first coat. Lastly, don’t ignore the signs of larger issues; checking a comprehensive guide to dishwasher diagnostics can help you spot if high heat or chemical imbalance is causing your racks to degrade faster than they should.
My Go-To Toolkit for Reliable Fixes
I don’t believe in guessing when it comes to my home. My toolkit for these repairs always includes a high-quality liquid PVC sealant (specifically one rated for 180°F+), 100-grit sandpaper, and my trusted multimeter. While the sandpaper handles the rust, the multimeter is essential to identify dishwasher faults quickly, such as a heater that’s running too hot and melting your rack coating. I personally recommend the Uber Goop or Re-Rack brands because they bond better with older dishwasher plastics. For those who want to level up their maintenance game, mastering oven repair essentials alongside your dishwasher upkeep will save you thousands over the life of your appliances. #IMAGE_PLACEHOLDER_E#
Your Path to a Lifetime of Working Appliances
Repairing your own dishwasher rack is more than just a way to save $150; it’s about taking ownership of the things you use every day. There is a deep sense of satisfaction in knowing that your favorite plates are safe because of a repair you did with your own two hands. Don’t be intimidated by the wires and the sensors. Once you start pinpointing faults yourself, you’ll realize that most home repairs are just a series of small, logical steps. Your dishwasher is an investment, and with a little bit of vinyl and some patience, you can keep it running—and looking—like new for years to come. Have you ever found a rust spot that was just too far gone to save, or did you catch yours in time? Let me know in the comments below!