There I was, knee-deep in greasy lasagna pans after a family Sunday roast, staring at a dishwasher that suddenly decided to go on permanent strike. I pressed the start button. Silence. I pressed it again, harder this time, as if brute force could somehow jump-start the circuit. Still nothing. It is that specific, sinking feeling where you realize your relaxing evening has just been replaced by a sink full of lukewarm, soapy water and a looming repair bill. But before you go hunting for your checkbook or a pair of rubber gloves, let me tell you something: most of the time, the fix is far simpler than you think.
Don’t Let a Dead Dishwasher Ruin Your Evening
Most of us assume the worst when the display stays dark. We start mentally calculating the cost of a new unit or wondering which local repair guy won’t overcharge us for a five-minute visit. I’ve been in those shoes, and I’ve learned the hard way that jumping to conclusions is the quickest way to empty your wallet. Years ago, I actually paid a sixty-dollar service fee only to have a technician point out that my child lock was engaged. Talk about a blow to the ego! Today, I want to help you avoid that embarrassment by focusing on identifying dishwasher faults quickly before you give up hope. We are going to look at the simple stuff first, because often, the problem isn’t a dead motor, but a minor component like a worn door latch assembly that just isn’t telling the brain of the machine that it’s safe to start.
Is it actually worth trying to fix this myself?
You might be skeptical, thinking you aren’t a ‘handy’ person or that you might end up flooding the kitchen. That is a completely valid fear! However, according to Consumer Reports, nearly 20% of major appliance problems are resolved by simple maintenance or troubleshooting that doesn’t even require professional tools. If you can use a screwdriver and have a little patience, you can master DIY diagnostics. We’re going to narrow down the culprits together. Have you ever spent an hour scrubbing plates by hand only to realize the fix was just a flipped breaker or a loose plug? I’d love to hear your most frustrating ‘it wasn’t actually broken’ stories! Understanding the “why” behind the silence is the first step, whether it’s because your dishwasher won’t turn on after a storm or a simple sensor glitch is holding everything up.
Stop Assuming the Worst and Start Testing
Before you tear the unit out of the cabinetry, treat your dishwasher like a flashlight. If it doesn’t turn on, you don’t throw the whole thing away; you check the batteries and the bulb first. In your kitchen, the ‘batteries’ are your circuit breaker and the wall outlet. I remember one frantic Tuesday where I was convinced my control board had fried. I had tools scattered across the floor and was halfway through a tantrum before I realized my cat had chased a stray kibble behind the machine and nudged the power cord just enough to break the connection. It felt ridiculous, but it taught me to always verify the physical connection first. Check your breaker box twice; sometimes a breaker looks ‘on’ but has actually tripped internally. If you have a GFCi outlet under the sink, press that reset button. It is the simplest fix, especially if your dishwasher won’t turn on after a storm. 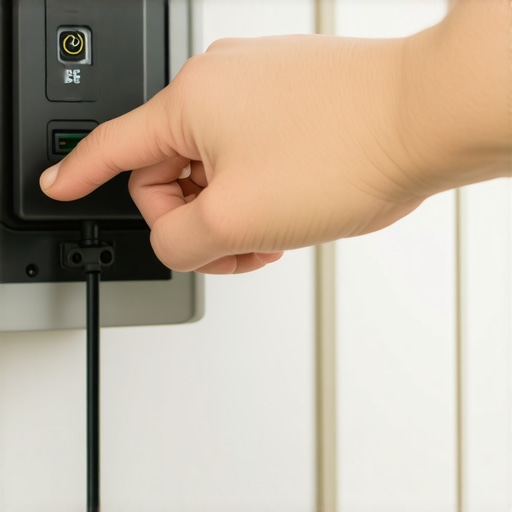
Make the Door Speak to the Motherboard
Think of the door latch as a security guard. If that guard doesn’t confirm the door is shut tight, the ‘brain’ of the dishwasher won’t allow a single drop of water to enter. This is a safety feature to prevent your kitchen from becoming an indoor pool. If you notice your door doesn’t ‘click’ like it used to, or if you can wiggle it while it’s closed, you are likely looking at a mechanical failure. You can often solve this by how to replace a dishwasher door latch assembly yourself with just a Torx screwdriver and twenty minutes of your time. Don’t overlook the simple physical alignment either; sometimes a slightly tilted rack prevents the door from seating perfectly, which triggers the sensor to stay off.
Find the Hidden Fuse That Shuts Everything Down
If the power is reaching the machine but the display is still a void of darkness, the culprit is frequently the thermal fuse. Think of this as the dishwasher’s ’emergency brake.’ If the machine gets too hot, this tiny part blows to prevent a fire. Once it blows, the machine is dead to the world until the part is replaced. To diagnose this, you’ll need a multimeter to check for ‘continuity’—which is just a fancy way of saying you’re checking if electricity can still travel from one side of the part to the other. This is a core part of dishwasher parts a comprehensive guide to diy diagnostics. If the path is broken, the fuse is dead. While you are at it, it is also worth testing your dishwashers high limit thermostat for continuity, as these two often work in tandem to manage the electrical flow.
Wiggle the Float Switch to Unlock the Cycle
If your lights are on but nobody is home—meaning the panel works but the water won’t start—you need to look at the float switch. This is usually a small plastic ‘mushroom’ at the bottom of the tub. If it’s stuck in the ‘up’ position, the dishwasher thinks it is already full of water and refuses to add more. I once found a stray cherry pit wedged under mine, keeping the switch engaged for three days while I washed dishes by hand. Always check if your dishwasher float switch is stuck by simply lifting it up and down. You should hear a distinct ‘click’ each time. If you don’t hear that click, the switch is likely gunked up with old detergent or has failed electrically.
While clearing a cherry pit from a float switch feels like a victory, truly mastering your kitchen’s health requires looking past the obvious. Most DIYers fall into the ‘Parts Cannon’ trap—firing off new components at a problem and hoping something sticks. I’ve seen homeowners spend hundreds on a new control board when the real issue was a three-dollar wire nut that had shaken loose over years of high-heat cycles. To save your sanity and your savings, you have to stop looking for what is broken and start looking for why it failed in the first place.
Stop guessing and start measuring with a multimeter
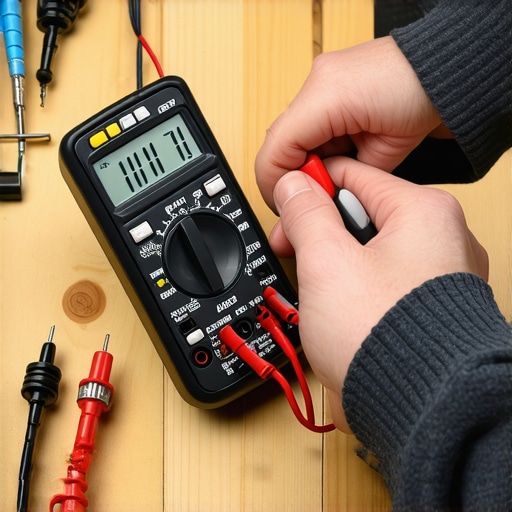
One of the most common myths in home repair is that a part is ‘good’ because it doesn’t look burnt. In reality, electrical components like an oven igniter or a dishwasher solenoid can look pristine while being completely dead inside. This is where identifying dishwasher faults quickly becomes an actual science rather than a guessing game. If you aren’t testing an oven temperature sensor with just a multimeter, you’re essentially flying blind. I’ve had readers tell me they replaced their entire bake element only to realize the issue was a failing relay on the control board. Always verify the path of electricity before you pull out the credit card.
Can a simple loose wire mimic a total control board failure?
Absolutely. According to reports from the Association of Home Appliance Manufacturers (AHAM), a significant percentage of appliances returned as ‘defective’ actually suffer from simple connection issues or external environment factors rather than internal component failure. This ‘Ghost in the Machine’ often manifests as a display that flickers or an oven temperature that drops randomly during baking. Before you assume the brain of your machine is fried, check the terminal block for signs of heat stress or arcing. You might find that checking for a burnt terminal block on your electric oven reveals a simple charred connection that’s blocking the flow of power.
The ‘Oops’ factor of ignoring the symptom for the cause
Here is the nuance that separates the pros from the amateurs: a blown fuse is almost always a symptom, not the root cause. If your thermal fuse trips, it did its job by preventing a fire. But why did it get that hot? If you just swap the fuse without investigating, it will blow again during your next Sunday dinner. You need to dive into oven repair essentials troubleshooting common issues with parts to see if a cooling fan has stalled or if the air vents are blocked. In dishwashers, a similar logic applies; if your unit is not stopping its fill cycle, don’t just blame the switch—check the inlet valve for sediment build-up that’s physically propping it open.
Diagnostics isn’t about having the strongest arm to turn a wrench; it’s about having the sharpest eye for detail. Have you ever fallen into the trap of replacing a perfectly good part because you skipped a testing step? I’d love to hear your stories in the comments so we can all learn from those expensive ‘oops’ moments together! Whether you’re diving into DIY diagnostics for the first time or you’re a seasoned vet, remember that the smallest details often hold the biggest solutions.
To move from a lucky guesser to a confident fixer, you need to stop using the ‘screwdriver-only’ method and upgrade your arsenal. I personally swear by an auto-ranging digital multimeter because it removes the cognitive load of having to guess which voltage range you are looking for. When I am testing an oven temperature sensor with just a multimeter, I do not want to fiddle with complex dials; I want a clear digital readout that tells me if I am within the 1000-1100 ohm range required for accuracy. If you really want to scale your DIY game and handle multiple appliances, you also need a high-quality Torx bit set. Most modern dishwashers use T15 screws, and using a flathead or a ‘close enough’ Philips is the fastest way to strip a screw and turn a twenty-minute repair into a three-hour nightmare.
Stop Hard Water Before it Stops Your Machine
Maintenance is where most people fail because they wait for a flood before they look at the plumbing. In my house, the biggest enemy is scale. If you live in an area with hard water, your machine is essentially swallowing liquid rock every time it runs. This build-up eventually chokes the life out of your inlet valve, leading to weak spray or no water at all. I have found that the quickest way to remove hard water build-up is a monthly descaling cycle with a citric-acid-based cleaner, but if the damage is already done, you will need to learn how to clear a hard water clog in your dishwasher inlet valve manually. It is a bit messy, but it is a heck of a lot cheaper than buying a brand-new unit simply because a screen got plugged up.
How do I keep my appliances running like new for a decade?
The secret to scaling your success is actually quite boring: a consistent maintenance checklist. Every six months, I pull my dishwasher and check for moisture signs around the motor and seals. I also believe that the best way to clean a greasy dishwasher filter is just hot water and a soft toothbrush—never use wire brushes that can tear the fine mesh. For the oven, it is about inspecting the door seal for tears that cause heat loss. You can perform oven diagnostics pinpointing faults just by looking for heat stains on the cabinet faces. Looking forward, we are seeing a shift toward ‘Connected Appliances’ that will eventually use AI-driven vibration sensors to tell our phones exactly which part is about to fail. But until those sensors are foolproof, your own eyes and a multimeter are still the gold standard. According to the National Fire Protection Association (NFPA), nearly 10% of home fires involve cooking equipment, often stemming from simple grease buildup or electrical malfunctions that could have been caught during a routine check. 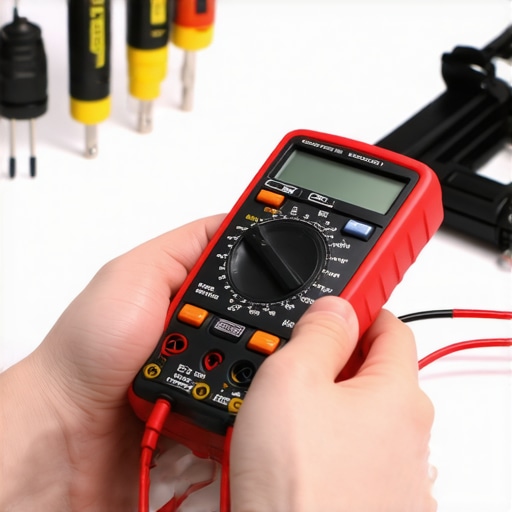 I challenge you: do not wait for your oven to fail during a holiday meal. Go grab a multimeter and perform the most reliable way to test an oven thermal fuse tonight just to get comfortable with the process. Mastering the tool while everything is working is the absolute best way to ensure you do not panic when things actually go dark.
Hard-Won Truths from My Kitchen Floor
After years of tinkering, I have realized that the biggest barrier to a fix isn’t the machine—it is the assumption that the problem must be expensive. Most of the time, the solution is hidden in the details. First, never trust a visual inspection; electrical flow doesn’t leave a trail, which is why identifying dishwasher faults quickly requires a multimeter, not just a flashlight. Second, always take a photo of your wiring before you unplug a single spade connector. It feels like an extra step, but it is your safety net. Lastly, remember that sensors are the ‘ears’ of your machine. If they are gunked up with mineral deposits, the ‘brain’ will never get the message to start, no matter how many times you press the button.
Gear That Actually Saves You Money
You don’t need a professional’s van to get professional results. I recommend starting with a magnetic parts tray; it is the only way to ensure those tiny T15 screws don’t vanish into the abyss of your subfloor. Beyond that, keep a small bottle of white vinegar or citric acid handy for regular descaling, as it prevents the most common sensor failures. For complex electrical issues, don’t hesitate to reach out or contact us if you are stuck between choosing a new part or a new machine. I also suggest keeping a dedicated folder for your appliance model numbers, as oven repair essentials troubleshooting common issues with parts becomes significantly easier when you can pull up the exact wiring diagram for your specific year and make.
#IMAGE_PLACEHOLDER_E#
Take Control of Your Kitchen Again
There is a unique kind of pride that comes from hearing your dishwasher hum back to life or seeing your oven reach the perfect temperature after you have worked on it yourself. You are not just saving a few hundred dollars; you are gaining the confidence to maintain your home without fear. The next time you face a silent display, don’t see a chore—see a puzzle waiting to be solved. Identifying dishwasher faults quickly is a skill that only gets sharper with every repair you attempt. Have you ever found a bizarre object like a cherry pit or a stray coin blocking your machine’s progress? Let me know in the comments below!