I was halfway through prepping a massive Sunday roast when my oven display suddenly decided to transform into a garbled mess of characters. It was like the appliance was trying to speak an ancient, digital language. My heart sank because I knew exactly what that meant—or I thought I did. Most people see a flickering screen or a dead keypad and assume the entire range is headed for the scrap yard. I used to be one of them. I once spent nearly three hundred dollars on a brand-new control module, only to realize later that I should have spent ten minutes checking for a burnt terminal block instead. Today, I want to save you from that expensive mistake and help you figure out if that expensive ‘brain’ in your oven can actually be brought back to life.
That Moment Your Oven Decides to Retire Early
The control board is the nervous system of your kitchen. When it glitches, everything else follows suit. You might notice the temperature swinging wildly or hear a relay board clicking for the wrong reasons. It feels like a total catastrophe, but often, the failure is localized to a single, repairable component. Before you start shopping for a new appliance, we need to run a few oven diagnostics to pinpoint the fault. My goal today is to give you the confidence to pull that board out and look at it with a critical eye, rather than just reaching for your credit card. Have you ever stood in your kitchen, staring at a blank display, wondering if your oven was officially a giant paperweight?
Is fixing an old board actually worth your time?
I get the skepticism. In a world where everything is designed to be disposable, the idea of soldering a capacitor or cleaning a ribbon cable seems like a relic of the past. However, a new control board can cost upwards of $400, and for many older models, they aren’t even manufactured anymore. According to data from the Consumer Reports repair-or-replace guide, if a repair costs more than half the price of a new unit, you should skip it—but a DIY board repair often costs less than twenty bucks in parts.
Decide if Your Board is Trash or Treasure
The first thing I always do is look for the ‘telltale’ signs of a board that is beyond saving. We aren’t just looking for software glitches; we are looking for physical trauma. If you open up the control housing and see a literal burn mark on the green fiberglass, or if the board smells like a campfire, you might be in trouble. But even then, there’s hope. I’ve found that many issues are just common symptoms of board failure that can be solved with a bit of patience. We are going to look for cold solder joints, swollen capacitors, and stuck relays to see if your oven is a candidate for a second chance.
Search for the Smoke Signals
The first thing I do after cutting the power—seriously, unplug the stove—is a ‘smell and squint’ test. You are looking for the ‘magic smoke’ that escaped. If you see a capacitor that looks like a tiny, bloated soda can, it is a goner. I once helped a neighbor whose GE range had a completely dark display. He was ready to buy a new one, but when we pulled the panel, we saw a single scorch mark. This is where troubleshooting common issues with parts becomes a detective game. It turned out to be a simple loose connection that had arced. Before you buy a $400 module, look for cracked solder joints that look like tiny grey rings around the metal pins. These ‘cold’ joints happen because of the constant heating and cooling cycles an oven goes through, eventually breaking the electrical connection. 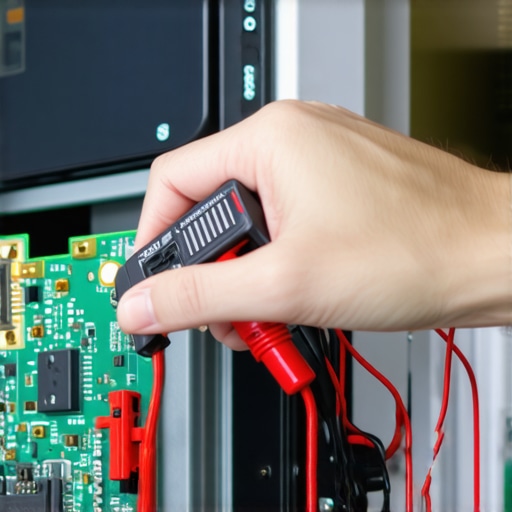
Don’t Ignore the Ribbon Cables
One of my most embarrassing ‘repairs’ involved a board I was sure was dead. I had already looked up the part number and was ready to click buy when I decided to unplug the ribbon cable connecting the keypad to the board. It looked slightly dull, so I cleaned the contacts with a standard pencil eraser. I plugged it back in, and the oven fired right up. Sometimes, the ‘brain’ is fine, but it is just not hearing the ‘fingers’ on the keypad. Oxidation is a silent killer of electronics. If your display is fine but the buttons are unresponsive, this simple cleaning trick saves more boards than actual soldering does. If the problem persists, you might actually be dealing with a wider issue, so it is worth pinpointing the fault before assuming the board is the only culprit.
Verify Power Before Blaming the Brain
It is easy to blame the control board because it is the most visible part of the system, but electricity is a chain. If one link is broken, the board might just be sitting there waiting for power that never arrives. I always pull out my trusty tool to perform testing with just a multimeter to ensure the board is receiving the full 120V or 240V it needs. If the board is getting power but not sending it to the elements, you are likely looking at a stuck relay. Think of a relay as a heavy-duty light switch that the board flips for you. If you hear a click but the oven doesn’t heat, that relay might be burnt out internally.
Test the Fuses First
Many modern ovens have a thermal fuse hidden behind the back panel or near the control housing. If this fuse blows, the board might go completely dead to prevent a fire. This is a safety feature, not a failure of the computer itself. Before you trash a perfectly good control unit, find the most reliable way to test an oven thermal fuse to see if it has continuity. I have seen hundreds of dollars wasted on new boards when a five-dollar fuse was the only thing standing between a cold oven and a hot dinner. If your oven recently survived a power surge, it is also possible the board’s internal fuse took the hit, much like how you might need to fix a dishwasher that won’t start after a surge. Always check the gatekeepers of power first.
A lot of people think that once the digital display goes dark, the oven is essentially a large, stainless-steel brick. The common wisdom is that modern electronics are just too complex to touch, and that if a board fails, it is probably a microchip issue that requires a PhD to solve. In my experience, that is rarely the case. Most ‘computer’ failures in appliances aren’t actually failures of the processor itself but are instead physical breakdowns of the solder joints or the capacitors that support them. We tend to over-complicate the ‘brain’ of the oven, when in reality, it is often just a victim of its own environment—constant heat, grease, and vibration. If you have been looking for common symptoms of board failure, you might have noticed that many problems are intermittent. Intermittent means physical, not digital.
Stop Blaming the Computer for Every Little Glitch
Before you spend half a month’s rent on a new control module, you need to consider that the board might be perfectly fine and it is just getting bad data. I have seen countless DIYers replace a perfectly functional board because they assumed the ‘F-code’ on the screen meant the board was toasted. In many instances, the board is just doing its job and reporting a fault elsewhere. For example, if you are testing for hidden cold spots in your bake element, a failing element can actually draw improper current that confuses the control board. According to a report by The Repair Association, nearly 30% of electronics returned as ‘defective’ by consumers are actually functional but were part of a system with a different mechanical failure. This is why running proper oven diagnostics is non-negotiable.
Should you actually trust a multimeter over your own eyes?
The short answer is yes, every single time. A relay on a board can look pristine—no burn marks, no smell, no swelling—and still be internally fused or open. If you are only looking for visual trauma, you are going to miss about 60% of the actual problems. This is a nuance many beginners skip. They look for the ‘smoke’ I mentioned earlier, and when they don’t see it, they assume the board is fine and move on to something else. This happens in other appliances too; for instance, when people are trying to identify dishwasher faults quickly, they often overlook the control module simply because it ‘looks’ new. Never trust your eyes when a meter can give you the truth.
#IMAGE_PLACE_HOLDER_C#
The $400 Mistake You Might Be Making Right Now
Here is the ‘Oops’ factor that kills more boards than actual power surges: Static electricity. If you decide to pull that board out to inspect it, and you walk across your kitchen rug in wool socks before touching the green fiberglass, you might have just fried a thousand-dollar appliance. It is called Electrostatic Discharge (ESD), and it is the silent killer of DIY repairs. Always ground yourself by touching a metal part of the oven frame before you touch the board. I once ruined a perfectly good Whirlpool board this way, and let me tell you, that’s a mistake you only make once. It turns a simple troubleshooting session into a very expensive shopping trip. Have you ever fallen into this trap or accidentally made a problem worse while trying to fix it? Let me know in the comments, because we have all been there at least once!
Once you’ve dodged the static electricity trap, you need to gear up for the long haul with the right equipment. I’ve realized over the years that a cheap hardware store screwdriver isn’t going to cut it when you are deep into oven diagnostics. My go-to is an auto-ranging multimeter—not the $10 version, but one that can accurately measure micro-farads. Why? Because testing capacitors is the only way to prove a board is healthy. If you’re just testing with a multimeter for basic continuity, you’re only seeing half the picture. I also keep a can of DeoxIT D5 handy. It’s not just ‘cleaner’; it’s a chemical deoxidizer that prevents future corrosion on those finicky ribbon cables. If you’re working on a dishwasher, this is even more critical because of the moisture. In fact, knowing how to identify dishwasher faults quickly often comes down to just checking those connection points for green, crusty oxidation before you even look at the pump. 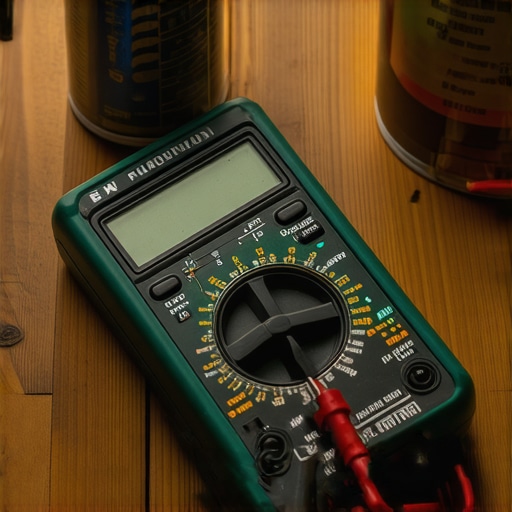
The Three Tools I Won’t Touch a Circuit Board Without
To really scale your DIY skills, you have to look at the ‘why’ behind the failure. Most boards fail because of heat. It’s a design flaw in many ranges where the control board sits directly above the door vent. To combat this, I’ve started checking my door gaskets religiously. If your replacement gasket is leaky, you’re literally baking your computer. According to the NASA-STD-8739.3 technical standard for soldered electrical connections, cleanliness and thermal management are the two biggest factors in electronic longevity. If your oven is heating way past the set temperature, that extra heat is radiating upward and shortening the life of every capacitor on that board.
How do I maintain my oven electronics over time?
It’s simpler than you think: keep the grease out. Grease is conductive and acidic. When you’re cleaning an oven’s inner glass, take a second to wipe down the area around the control panel with a dry microfiber cloth. Also, ensure your internal cooling fan motor is actually spinning. That fan is the only thing protecting your $400 board from a slow, melty death. In the next few years, I expect we’ll see more ‘Smart’ boards that self-diagnose via smartphone apps, but for now, your best defense is physical maintenance and a good set of probes. I want you to try this one thing today: next time you have the back panel off for a routine check, don’t just look for burns. Use a soft, anti-static brush to clear the dust off the board components. Dust holds moisture, and moisture leads to shorts. It takes two minutes and could save you a massive headache later. If you’re still feeling unsure about the hardware, check out my guide on troubleshooting common issues with parts to build that baseline confidence.
What I Learned After Trashing Three Perfectly Good Boards
The biggest revelation in my journey with electronics is that intermittent failures are almost always physical, not digital. If your display flickers or only works when you press a certain spot, it is not a software bug; it is a hardware cry for help. I have learned the hard way that heat is the ultimate enemy. When you are pinpointing faults before calling an expert, always look at the environment surrounding the board. If you find yourself identifying a replacement gasket, remember that a tight seal keeps the heat inside the oven and away from the delicate soldering on your control module. Finally, never underestimate the power of a simple reset—killing the breaker for 30 minutes can occasionally clear a logic lock that looks like a total failure.
The Gear That Keeps My Kitchen Running Smoothly
You do not need a lab full of equipment, but a few specific items changed the game for me. First, a high-quality multimeter is non-negotiable for testing with a multimeter to ensure your sensor is not feeding the board bad data. I also swear by DeoxIT D5 for cleaning those finicky ribbon cables; it is the secret weapon for anyone trying to identify dishwasher faults quickly as well. Lastly, a simple anti-static wrist strap is the best five-dollar insurance policy you can buy to prevent accidentally frying a board during inspection.
Take Control of Your Appliance Today
Stepping into the world of oven repair can feel intimidating, but remember that these machines are designed to be serviced. By taking the time to inspect your board instead of immediately ordering a replacement, you are not just saving money—you are building a skill that makes you the master of your own home. If you hit a wall, there is no shame in knowing when to call an oven repair expert, but give yourself the chance to be the hero first. Have you ever managed to bring a ‘dead’ appliance back to life with a simple cleaning or a quick solder? Let me know your biggest DIY win in the comments below!