The smell of burnt cookies isn’t always because you forgot to set the timer. Last Thanksgiving, I was juggling a turkey in the bottom oven and rolls in the top, only to realize my kitchen felt like a literal furnace. When I looked closer, I saw a thin wisp of steam curling out from the upper right corner of the door. My gasket wasn’t just old; it had completely collapsed. I made the classic rookie mistake of thinking a “one size fits all” strip from the local hardware store would do the trick. Spoiler alert: it didn’t. I ended up with a door that wouldn’t close and a very cold turkey. It was a mess, and honestly, a little embarrassing when the family arrived.
That Hidden Gap is Killing Your Electric Bill
We often ignore that rubbery strip around the oven door until it is literally falling off in chunks. But here is the thing: your oven works by maintaining a precise internal environment. When that seal fails, your heating elements have to work double-time just to keep up. I have spent way too much time troubleshooting common issues with parts only to realize the fix was staring me in the face. If you have noticed your oven leaking steam from the top edge, you aren’t just losing heat; you’re losing money. According to experts at the Department of Energy, even small gaps in kitchen appliance seals can lead to significant energy loss and uneven cooking results. Today, I am going to walk you through how to identify the exact part number without the headache I went through. We are going to dive into the world of model numbers and OEM vs. aftermarket parts so you can bake with confidence again. Have you noticed your kitchen getting unusually hot lately when the oven is on?
Is replacing it yourself actually worth the hassle?
I get it. You are worried about ripping the old one out and being left with a pile of rubber and an unusable oven. Believe me, I have been there—standing in the kitchen with a pair of pliers and a sense of impending doom. But replacing a gasket is one of the most satisfying DIY wins you can get. Before you call a pro, you should try the dollar bill trick to see if your seal is actually toast. If the bill slides out easily when the door is closed, it is time for a change. It usually takes about twenty minutes and saves you a $150 service call. The real trick isn’t the installation itself; it is the identification. I once bought a gasket that looked identical to mine, but it was three inches too short because I didn’t realize my double oven used two different sizes for the top and bottom units. [image placeholder]
Getting the Right Part the First Time
When you are dealing with a double oven, things get twice as complicated. You might assume the gaskets are identical, but often they aren’t, especially in older models. I’ve learned that pinpointing faults before calling a repair expert starts with your model number plate. That little metal tag is your best friend. Without it, you are just guessing, and guessing leads to returns, shipping fees, and more takeout pizza because your oven is out of commission. Let’s look at how to find that plate and what those numbers actually mean for your specific brand.
Find Your Model Number Before You Shop
To get the right gasket, you need to be a detective for five minutes. Open your oven door—both of them if it’s a double unit—and look around the frame. You are searching for a metal plate or a sticker. Usually, it’s tucked along the side of the door jamb or just inside the bottom drawer. This number is the only way to ensure you don’t end up with a part that is slightly too thick, which is why your oven door pops open while baking. I once tried to eye-ball a gasket for an old Whirlpool, and because I didn’t check the specific series number on that plate, the seal I bought was designed for a slightly different hinge setup. It looked right, but it caused the door to bind every time I tried to close it.
Why OEM parts save you from a second repair
You might see cheap universal kits online, but they are often more trouble than they’re worth. When you are pinpointing faults before calling a repair expert, you’ll find that original equipment manufacturer (OEM) gaskets are molded specifically for the curves of your oven’s frame. Aftermarket ones are often just long strips of rubber that you have to cut yourself, and if your corners aren’t perfect, you’re right back to fixing the steam leak from your oven doors top edge.
Pull the Old Gasket Without Scratching the Porcelain
Most modern gaskets are held in by small metal clips or a friction-fit channel. Take a pair of needle-nose pliers and gently pull a section of the old rubber away. If you see metal clips inserted into small holes in the oven frame, you need to unhook them one by one. I remember the first time I did this; I was so impatient I just ripped the whole thing out in one go. Half of the clips snapped off inside the frame holes. I spent the next hour with a magnet and a thin wire trying to fish out metal shards so the new gasket would sit flat. Don’t be me—slow and steady is the goal here.
Check for hidden damage while the seal is off
With the gasket removed, you have a rare view of the oven’s ‘skeleton.’ Take a moment to inspect your ovens power cord for heat damage if it’s visible near the back, or check the frame for any warping. If the metal where the gasket sits is scorched or discolored, your old seal was likely failing for months. This is also the best time to test your oven door seal on the other oven if you have a double unit, because usually, when one goes, the other isn’t far behind. #IMAGE_PLACE_HOLDER_B#
Clean the Channel Before the New Seal Goes In
You would be shocked at how much burnt-on grease hides under that rubber strip. If you try to press a new gasket over old spills, it won’t create an airtight seal. Use a mixture of warm water and a mild degreaser. Avoid using a scraper that can chip the finish. Once it is clean and bone-dry, start at the top center of the door.
The Secret to a Perfect Fit
Push the new gasket into the channel or click the clips into place, working your way down the sides. Don’t stretch the rubber. If you pull it too tight, the corners will eventually pull away and leave gaps. I like to massage the rubber into the corners with my thumb to make sure it’s fully seated. If you feel resistance, stop and check if a clip is bent. Forcing it is a quick way to ensure you’ll be troubleshooting common issues with parts again in six months. Once the new seal is in, close the door and leave it shut for a few hours. The pressure helps the rubber take its new shape against the door’s surface.Most DIYers reach for a multimeter and assume a loud beep means their bake element is in perfect health. I used to think the same until I worked on an old Frigidaire that passed every continuity test but still left my casseroles raw in the middle. The truth is, elements can develop microscopic fractures or internal thinning that doesn’t fully break the circuit. These issues only manifest when the metal expands under extreme heat, causing resistance to spike and heat output to plummet. When you are testing your oven bake element for hidden cold spots, you need to look for physical pitting or discoloration, not just electrical flow. Sometimes the part is technically ‘working’ but failing to reach the necessary wattage. #IMAGE_PLACE_HOLDER_C#
The Terminal Block Trap That Ruins New Elements
The most expensive mistake I see in home repair is replacing a perfectly good heating element because the owner didn’t look at the back of the appliance first. If your oven won’t heat, you should check for a burnt terminal block on your electric oven. A loose screw on the power cord connection creates electrical arcing, which melts the plastic block and eventually cuts power entirely. If you install a brand-new element into a system with a failing terminal block, you risk blowing the new part or, worse, causing a localized fire. It is a classic ‘oops’ factor that turns a $50 fix into a $500 headache.
Why does my oven click but never actually get hot?
This frustrating symptom usually points to a failing relay on the control board rather than the heating element itself. People often assume the igniter is dead, but if the ‘brain’ of the appliance can’t send the signal to close the circuit, nothing happens. Learning how to identify a bad oven relay on the control board can save you from buying unnecessary components. According to data from the Association of Home Appliance Manufacturers (AHAM), electronic control failures are becoming the primary reason for appliance retirement, often because owners misdiagnose them as mechanical failures. If you see charred marks on the back of the board, that click is the sound of a relay struggling to bridge a gap it can no longer reach.
Stop Blaming the Pump for Every Drainage Issue
In the world of dishwashers, the common myth is that standing water always equals a dead motor. In reality, when identifying dishwasher faults quickly, the culprit is frequently a tiny piece of plastic or a seed stuck in the check valve. This prevents the water from back-flowing but can also lock the drain path entirely. Before you order a whole new assembly, check the simplest physical barriers. Have you ever spent a fortune on a complex part only to find out it was a $5 fuse or a loose wire? Have you ever fallen into this trap? Let me know in the comments. If you’re feeling overwhelmed by the electronics, it might be time to know when to stop diying and call an oven repair expert.
After you have identified that the problem isn’t just a simple gasket, you need to look at the physical tools that separate the hobbyists from the experts. I do not mean a rusty screwdriver from the junk drawer. I am talking about a high-quality digital multimeter equipped with needle-point probes. Most people struggle with the blunt probes that come standard in the box, but those are a recipe for disaster on modern control boards where the pins are spaced barely a millimeter apart. If you slip, you have just shorted the board and turned a minor repair into a major expense. When I am identifying dishwasher faults quickly, I rely on a meter that can read low resistance with high precision. This is absolutely crucial when testing a dishwasher heating element for a short, as even a minor deviation in ohms can indicate a part that is about to fail under load.
The Tools That Actually Save Your Sanity
Beyond the multimeter, I always keep a set of flexible grabber tools and a high-lumen inspection light. You would be amazed how many ‘broken’ appliances are actually just victims of a stray cherry pit or a piece of broken glass lodged in the impeller. According to the Whirlpool Global Service Support documentation, nearly 30% of drain-related service calls could be avoided by simply inspecting the sump area for physical obstructions. This is why the real reason your dishwasher sounds like its grinding rocks is rarely a motor failure and usually a foreign object. If you aren’t looking into the dark corners of the machine with a proper light, you are just guessing. 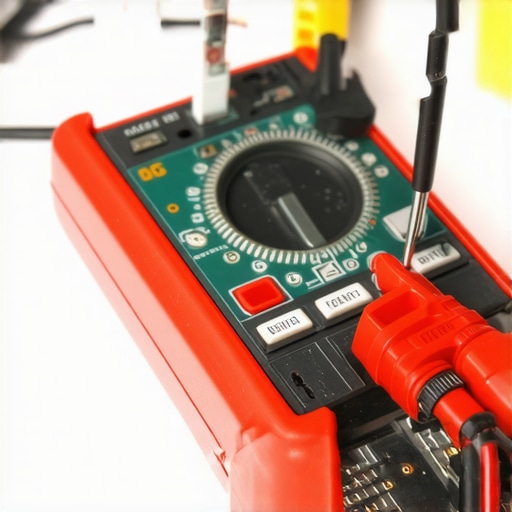
How can I actually prevent these breakdowns from happening over time?
Maintenance is not just about cleaning the surfaces; it is about monitoring the internal ‘pulse’ of your machine. For instance, if you start noticing the real reason your dishwasher soap door wont open is a sticky residue, it is a signal that your water temperature might be too low or you are using too much detergent. This gunk eventually migrates into the internal hoses and sensors. I recommend doing a deep-clean of your dishwasher filters every single month without exception. It is the single most effective way to ensure you aren’t left wondering why the bottom of your dishwasher is always full of water on a Tuesday night. For your oven, avoid the ‘self-clean’ cycle if you can. The extreme heat is notorious for frying delicate electronics, often leading to situations where you’ll be how to tell if your ovens relay board is clicking for the wrong reasons.
The Future of Smart Diagnostics is Already Here
We are currently seeing a massive shift toward appliances that talk back. In the next few years, the trend will move away from cryptic beep codes and toward full-color diagnostic displays and smartphone integration that tells you exactly which thermistor is out of range. However, even with all that tech, the mechanical components—the pumps, the hinges, and the elements—will still wear out. This makes a dishwasher parts a comprehensive guide to diy diagnostics more relevant than ever because while the ‘brain’ might get smarter, the ‘muscles’ still need manual replacement. My advice? Go pull your dishwasher filter right now. If it is covered in a grey film, clean it with a soft brush and hot water. It is the easiest advanced maintenance tip I can give you to prevent a total pump seizure.
Hard Truths from the Kitchen Floor
One thing I have learned after years of tinkering is that your senses are better diagnostic tools than any expensive gadget. If you smell something sweet while the oven is on, it is likely a spill you missed; but if you smell ozone, you should stop immediately and check the wiring. I also realized that ‘good enough’ is the enemy of a long-lasting fix. Using an aftermarket part might save you ten dollars today, but it often leads to troubleshooting common issues with parts again in three months. Another lightbulb moment was documenting everything. I now take a photo of every wire before I unplug it. This simple habit prevents the panic of staring at a control board with five identical red wires and no idea where they go.
The Gear I Carry to Every Job
You do not need a truck full of tools, but you do need the right ones. I always recommend a digital multimeter with fine-point leads because they allow you to test small components without causing a short. I also keep a set of nut drivers instead of a bulky socket set for those tight spaces behind the oven. For reference, I constantly go back to the original manufacturer service manuals which you can often find tucked inside the appliance or online. These are far more valuable than a generic YouTube video because they contain the exact specs for recalibrating your oven for accurate temperatures. Finally, a simple telescoping mirror is a lifesaver for identifying a failed door hinge on a wall oven without having to uninstall the whole unit.
Take Back Control of Your Kitchen
Repairing your own appliances can feel intimidating at first, but once you successfully swap a part or clear a clog, you gain a sense of independence that is worth every minute of research. You do not have to be at the mercy of a repairman’s schedule or high service fees. By learning to handle identifying dishwasher faults quickly, you are protecting your home and your wallet. Remember, every expert was once a beginner with a screwdriver and a question. Your oven repair journey starts with just one small step, and before you know it, you will be the one giving advice to your neighbors. Have you ever been surprised by how simple a fix turned out to be after you finally opened the machine up? Let me know in the comments below!