I remember the sound vividly: a sharp, metallic *clink* followed by my favorite ceramic pasta bowl diving headfirst into the spray arm. That one rusted-out tine row had finally given up the ghost, and my dishwasher rack had become a jagged, toothless mouth. It wasn’t just about the broken bowl; it was the daily frustration of a loading grid that felt more like a high-stakes game of Tetris. If your dishes are clattering together or you are noticing white streaks on silverware because nothing stays upright, you know exactly the headache I am talking about. Today, I am going to show you that you do not need to shell out $150 for a full rack assembly just because a few rows of spikes are failing. We are going to fix this ourselves for a fraction of the cost.
Stop Fighting Your Dishwasher Rack and Fix the Tines
For years, I just dealt with it. I wedged plates against the sides and prayed they wouldn’t tip. I even once tried to “repair” a snapped tine using waterproof epoxy—a move I deeply regret. Within three cycles, the high heat turned that epoxy into a sticky, grey sludge that bonded to my salad plates. It was a mess. Don’t be like me. The truth is, these racks are more modular than they look. Learning how to identify dishwasher faults quickly often starts with realizing that the internal components are often designed to be swapped out individually. Whether you are dealing with a cracked spray arm mount or just a floppy row of tines, the solution is usually just a few clips away.
Is it actually worth the hassle to repair instead of replace?
It is a fair question to ask. We live in a culture that tells us to toss the whole machine the second a plastic bit breaks. However, the data suggests otherwise. According to research from Consumer Reports, simple component swaps like rack repairs are some of the most cost-effective ways to extend an appliance’s lifespan. Have you ever looked at a broken part and assumed it was permanent, only to find out it is held on by two simple plastic latches? If you have ever felt intimidated by a “broken” rack, tell me about it in the comments or reach out through our contact page. Before we get into the nitty-gritty of the swap, make sure you have checked my comprehensive guide to DIY diagnostics to ensure your dishwasher is not hiding other issues, like a drainage problem that might be making the rack environment more corrosive.
Locate the Model Sticker or Lose Your Mind
The most common mistake DIYers make is assuming all dishwasher racks are built the same. They aren’t. If you buy a generic tine replacement kit without checking your specific model number, you are going to end up with a pile of plastic that doesn’t quite fit. Usually, you will find this sticker on the side of the door or just inside the tub frame. Having this number is vital because it ensures the mounting clips on the replacement rows align perfectly with your existing rack grid. It is the same logic as replacing a damaged oven rack with the correct oem part; precision prevents future rattling. I once tried to force a ‘universal’ tine row into my 10-year-old Bosch, thinking a clip is a clip. I ended up snapping the main rack wire because I was too impatient to find the right part. Don’t be that person.
Pop the Plastic End Caps Carefully
To get to the tines, you often have to remove the entire rack from the tracks. Most modern dishwashers use plastic end caps or ‘stop’ clips on the metal rails. These are notorious for becoming brittle over time due to the constant heat of the drying cycle. Use a flathead screwdriver to gently pry the tab. If you feel too much resistance, stop. If you break these, your rack will fly off the rails every time you pull it out. While you have the rack out, take a second to look at the metal wires. If you notice the rack is pitted or corroded, you might need to apply some rack touch-up paint to prevent the new tines from rusting at the contact points. 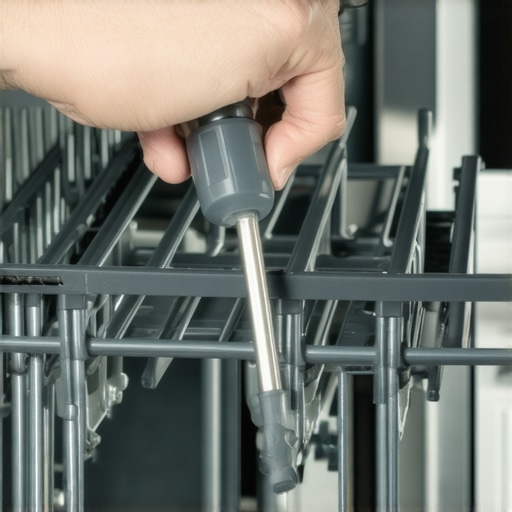
Align the New Rows for Maximum Stability
Once the old, floppy tines are out, snapping the new ones in is the most satisfying part of the job. Most replacement tine rows use a ‘pivot and click’ system. You hook the bottom of the row onto the thickest horizontal wire of the rack and then rotate it upward until the locking tab engages. When I did this last month, I realized I had been loading my plates completely wrong for three years. By adjusting the spacing of the new tines, I was finally able to achieve maximum water reach for my oversized dinner plates. If the rows feel loose, double-check that the clips haven’t slipped between the wires. A secure tine row should have zero ‘wiggle’ when you push against it with a heavy ceramic bowl.
Check the Spray Arm Clearance
Before you slide the rack back into place and celebrate, do a manual clearance check. I learned this the hard way after my first repair. I loaded the rack, started the cycle, and heard a rhythmic *thwack-thwack-thwack*. The new tines were slightly taller than the old ones, and they were hitting the upper spray arm. Reach in and spin the spray arm by hand to ensure it has a full 360-degree rotation without clipping the bottom of your newly repaired rack. This is a crucial part of dishwasher parts and diagnostics that many people overlook until they see the wear marks on the plastic arm.
The Big Myth of Universal Tine Kits
Most DIYers think they can save a few bucks by ordering ‘universal’ silicone tine caps or generic clip-on rows from a random online marketplace. In my experience, this is the quickest way to end up with a dishwasher that sounds like a rock tumbler. The geometry of your rack is precision-engineered to maintain a specific angle for drainage. When you use parts that aren’t built for your specific model, you risk the ‘cascade effect’—where one heavy pot tips, knocking into your glassware, and eventually causing a dishwasher that shakes the whole kitchen island because the load is off-balance. I have fallen into this trap myself, trying to save $20 only to spend $100 on new wine glasses. Have you ever fallen into this repair trap? Let me know in the comments.
Can you actually fix a rack that is already rusting?
This is the advanced question I get most often. If your tines are snapping because the underlying metal is turning into orange dust, simply clicking in a new row is a temporary band-aid. Rust is like a virus in a dishwasher. According to experts at the Association of Home Appliance Manufacturers (AHAM), once the vinyl coating is compromised, the high-heat environment and detergent enzymes accelerate the oxidation of the steel. If you see your dishwasher interior looks pitted or corroded, you must seal those exposed metal points with food-grade rack paint before installing your new tines. If you don’t, the rust will travel down the wire and eventually rot the main frame of the rack, making any repair moot. 
The Hidden Chemistry That Eats Your Tines
We often blame the dishes for breaking the tines, but the real culprit is often the thermal and chemical environment inside the machine. If you find your tines becoming brittle and snapping frequently, you might have a deeper issue with your water temperature. I always recommend testing your dishwashers high limit thermostat for continuity. If that thermostat is failing, your water might be reaching temperatures high enough to degrade the plastic clips that hold your tines in place. Furthermore, the truth about dishwasher pods and your drain hose is that some highly concentrated detergents are surprisingly aggressive toward older vinyl coatings. Mastering how to identify dishwasher faults quickly means looking past the broken plastic and asking why it broke in the first place. This same analytical approach applies to other appliances; for instance, when you’re troubleshooting common issues with oven parts, you’re often looking for the root cause—like a voltage spike—rather than just the burnt-out element. Always remember to check your comprehensive guide to DIY diagnostics to ensure the rest of the machine is healthy before investing in a full rack overhaul. Check out our contact page if you’re struggling to find the right part number for your specific vintage model. You can also view our privacy policy for more information on how we handle your data.
The Multimeter is Your Secret Weapon
If you are serious about moving beyond just swapping parts and actually mastering your kitchen’s health, you need to invest in a decent digital multimeter. I’m not talking about a five-dollar bargain bin version; get something with auto-ranging capabilities. This single tool is the difference between blindly buying a expensive control board and realizing you just need to spend five minutes testing your dishwashers high limit thermostat for continuity. In my own workshop, I use a Klein Tools MM400 because it handles the vibration of a running machine without losing its calibration. When you start pinpointing faults before calling a repair expert, you stop being a victim of ‘part-darts’—that expensive game where you throw components at a machine until it finally works.
How do I maintain my kitchen appliances for the long haul?
Maintenance is not a once-a-year event; it is a lifestyle for your machines. For dishwashers, the biggest threat is scale. Even if your tines are perfect, calcium carbonate will find its way into the solenoid valves. I make it a habit to use the quickest way to remove hard water build-up in your dishwasher every three months. For ovens, maintenance means checking for physical degradation. You should be testing an oven bake element for invisible cracks at the start of every holiday season. According to technical documentation from the Association of Home Appliance Manufacturers (AHAM), nearly 30% of appliance failures could be prevented by simple, routine descaling and terminal inspections. 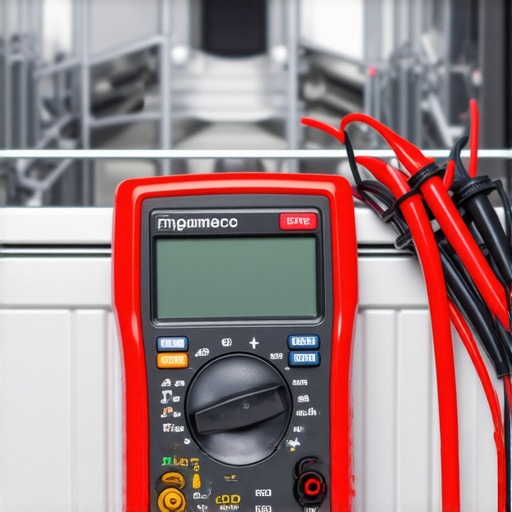
Hard Water is the Silent Killer of Plastic Parts
It isn’t just the metal that suffers. High mineral content in your water makes the plastic clips on your dishwasher tines and spray arms brittle much faster. When minerals bake onto the plastic, they create micro-fissures. This is why I always suggest homeowners identify dishwasher faults quickly by looking for a white, chalky residue on the underside of the racks. If you see it there, it is already inside your pump. If you are dealing with an electric range, this same corrosive environment can lead to high-resistance connections; I always recommend checking for a burnt terminal block on your electric oven if you notice any odd smells during a self-clean cycle. Making these checks part of your routine turns a potential $500 repair into a $15 part replacement.
Where the Future of Home Repair is Heading
We are entering an era of ‘smart’ diagnostics, but don’t let the Wi-Fi connectivity fool you. While your next dishwasher might send a notification to your phone, the physical components—the tines, the pumps, and the gaskets—remain the same mechanical systems they have been for decades. The trend is moving toward predictive maintenance, where sensors can detect a failing motor by its harmonic frequency before it actually stops. However, until that is standard in every home, you still need to know your oven repair essentials and troubleshooting common issues. My advanced tip for you this week: Grab your multimeter, set it to Ohms, and test your oven’s igniter or bake element today, even if it’s working perfectly. Knowing what a ‘healthy’ reading looks like now will save you hours of frustration when the machine actually goes dark. If you run into a reading that doesn’t make sense, don’t hesitate to reach out through our contact page or review our privacy policy for more on how we support our DIY community.
The Hard-Earned Truth About Kitchen Maintenance Cycles
After years of tinkering, I have realized that dishwasher tines don’t just snap because of a heavy pot; they fail because of a slow degradation of the protective vinyl. If you are constantly finding brittle plastic, it is time to look at the thermal environment. I highly suggest testing your dishwashers high limit thermostat for continuity to make sure your water isn’t boiling the life out of your racks and clips. Another lightbulb moment for me was realizing that rust is like an iceberg—if you see a tiny orange dot, the metal wire underneath is likely compromised for two inches in either direction. Don’t just paint over it; sand it down until you see shiny steel before applying any sealant. Lastly, always keep a digital log of your model numbers in a kitchen drawer or on your phone. It saves you from the ‘will it fit’ anxiety that ruins so many weekend projects.
#IMAGE_PLACEHOLDER_E#
Tools That Make the Transition from Amateur to Expert
To truly master your kitchen, you need more than just a screwdriver and a can-do attitude. My personal toolkit always includes a digital multimeter for pinpointing faults before calling a repair expert. I also swear by food-grade, high-heat silicone sealant for those tiny rack punctures that paint won’t fill. For more complex issues, I rely on the technical diagrams found in our oven repair essentials and troubleshooting guide. Having these resources at your fingertips transforms a stressful breakdown into a manageable task. If you’re ever unsure about an electrical reading, check the most reliable way to test an oven thermal fuse to understand how continuity and resistance should look on a healthy machine.
Your First Successful Repair is Just the Beginning
There is a specific kind of pride that comes from hearing your dishwasher run perfectly with parts you installed yourself. You aren’t just saving money; you are keeping a perfectly good machine out of the landfill. Whether you are swapping tines or learning how to identify dishwasher faults quickly, you are building a skill set that lasts a lifetime. Don’t be afraid to get your hands dirty and dive back into the manual next time something rattles. If you ever feel stuck, you can always visit our contact page or review our privacy policy for more information on how we support our DIY community. Have you ever successfully repaired an appliance only to have another part break the very next day? Let me know in the comments below!