That sound—somewhere between a muffled firecracker and a heavy thump—usually happens right when you’re just trying to preheat the oven for a frozen pizza. It’s enough to make you jump out of your skin, and honestly, it should. I remember the first time my old range did this. I was standing right there, coffee in hand, and *WHUMP*. The oven door actually rattled. Like a fool, I just turned it off, waited a beat, and tried again. It worked fine that time, so I went back to my day. But ignoring that ‘pop’ was the biggest mistake I could have made. Within two weeks, I wasn’t just dealing with a noise; I was dealing with a full-blown ignition failure that cost me a lot more than a simple cleaning would have.
Get Rid of That Scary Boom for Good
Today, we are going to dive into the gut of your appliance to figure out why your kitchen sounds like a construction zone. This isn’t just about a weird noise; it’s about ‘delayed ignition.’ Essentially, your oven is releasing gas, but it isn’t lighting immediately. When it finally does catch, all that built-up gas ignites at once, causing a mini-explosion inside the chamber. We’re going to look at your burner ports, the health of your igniter, and whether you’re dealing with why your gas oven igniter clicks but the burner doesn’t light properly. My goal is to get you back to baking without the jump-scare. I’ve spent years tinkering with oven repair essentials and troubleshooting common issues, and I can tell you that most of the time, the fix is simpler than you think—if you catch it early. Have you ever felt that mini-shockwave against your shins when the oven finally kicks on? It’s a common frustration, but it’s one you can’t afford to ignore.
Should You Be Panicking About Your House?
It’s the question everyone asks when they hear a bang coming from a gas appliance. Is the house going to blow? According to the National Fire Protection Association (NFPA), while modern ovens have safety valves to prevent catastrophic failures, ‘delayed ignition’ is still a leading cause of appliance-related flash fires in residential settings. It’s serious, but it’s manageable. Usually, the culprit is just a dirty burner or a weak igniter that’s struggling to reach the right temperature. If you’ve noticed that your gas oven igniter glows but doesn’t light the gas immediately, you’re looking at the prime suspect. I once spent three hours tearing apart a control board only to realize the burner holes were just clogged with spilled casserole drippings. Don’t be like me. We’re going to start with the easy stuff first, but I’ll also tell you exactly when to stop diying and call an oven repair expert before things get dangerous. Ready to stop the noise?To stop that heart-stopping thump, you need to get comfortable with the inside of your appliance. The first thing you need to do is watch that igniter like a hawk. When you turn the dial, the igniter should glow a bright, lemon-yellow within seconds. If it’s a dull orange, it’s failing. Think of a weak igniter like a dying match in a windstorm; it’s trying to provide a spark, but it doesn’t have the heat to catch the gas immediately. This is often why your gas oven igniter glows but doesn’t light the burner right away, allowing gas to pool in the bottom of the oven until it finally reaches a ‘critical mass’ and explodes into a flame.
Watch the Glow Before the Bang
If the glow is weak, you aren’t looking at a cleaning job; you’re looking at a replacement. I once spent an hour scrubbing a burner tube only to realize the igniter was just tired after a decade of service. Learning how to swap a broken spark igniter on a gas range is a skill that saves you a $200 service call. But if the igniter is glowing bright and you still hear a pop, the issue is structural. You need to perform some oven diagnostics to pinpointing faults before the gas buildup becomes a frequent visitor in your kitchen. 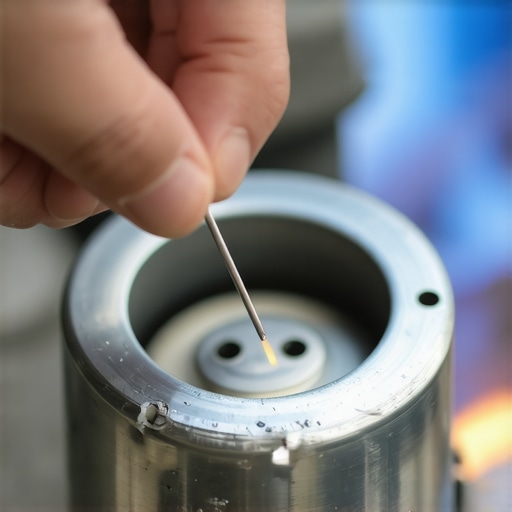
Clear the Path for a Smooth Flame
Gas travels through a series of tiny holes in the burner tube. If these holes are clogged with grease, carbon, or spilled food, the gas can’t reach the igniter in a steady stream. It’s like a traffic jam on a one-lane bridge; the gas backs up, and when it finally squeezes through, it comes out in a rush. I remember a neighbor’s oven that sounded like a cannon every time she made lasagna. When I pulled the bottom panel, I found a single petrified tater tot that had fallen through and charred right over the primary ignition port. It was blocking the flow just enough to cause a three-second delay. Knowing how to clean the debris from an ovens hidden burner is often the only ‘repair’ you actually need.
When a Toothpick is Your Best Tool
Use a stiff toothpick or a small needle to poke through every single port on that burner tube. Do not use an oversized drill bit, as you don’t want to enlarge the holes—you just want to clear them. If the ports are clear and the igniter is strong, but you still hear a clicking that doesn’t lead to a flame, check the alignment. Sometimes the igniter gets bumped and is no longer sitting close enough to the gas ports. If you’ve checked the hardware and everything looks pristine, it’s time to consider if your oven control board is failing and sending erratic signals to the gas valve. While you’re in there, it’s also a good idea to spend five minutes testing your ovens high limit thermostat to ensure the appliance is still operating within safe thermal boundaries.
Here is the nuance that most DIY guides miss: just because your igniter is glowing doesn’t mean it is actually working. I have seen hundreds of homeowners waste money on new gas valves because they saw that orange glow and assumed the igniter was fine. In my experience, a ‘weak’ igniter is the most common cause of that terrifying boom. It might have enough resistance to get hot and glow, but it fails to draw the specific amperage required to trigger the safety valve to release gas consistently. This results in why your gas oven igniter glows but doesn’t light immediately, creating that dangerous buildup. According to data from the Association of Home Appliance Manufacturers (AHAM), igniter performance can degrade by up to 20% before a total failure occurs, leaving you in a ‘limbo’ state of noisy, delayed starts.
The Glow Trap That Fools Most DIYers
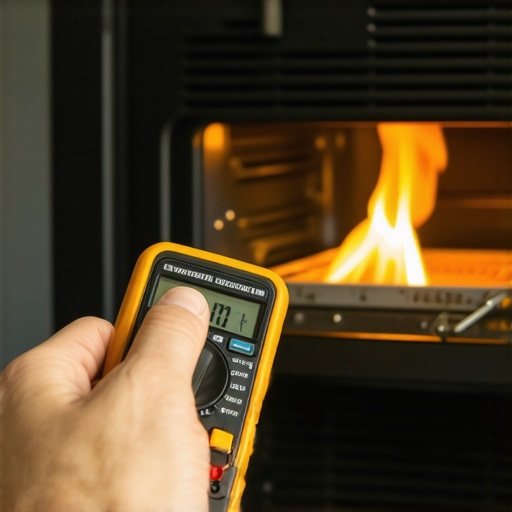
If you are using a multimeter, do not just check for continuity. You need to check the amp draw while the oven is trying to ignite. If your igniter is drawing less than 3.2 to 3.6 amps (depending on the model), it is garbage, regardless of how pretty that orange light looks. This is the gold standard of oven diagnostics to pinpointing faults accurately. I once watched a guy replace his entire burner assembly twice because he refused to believe a glowing part could be faulty. Don’t fall into that trap. If you find yourself over your head, it might be time to learn when to stop diying and call an oven repair expert before you start throwing parts at a problem you haven’t fully diagnosed.
Could your relay board be clicking for the wrong reasons?
Sometimes the noise isn’t gas-related at all. If you hear a rapid-fire clicking coming from the back of the unit, you might be wondering how to tell if your ovens relay board is clicking for the wrong reasons. A failing relay can cycle the igniter on and off so fast that the gas never gets a chance to light smoothly, leading to a ‘pop’ when it finally catches. Before you order a $300 control board, I always recommend you how to check for a burnt terminal block on your electric oven or the equivalent wiring harness on your gas model. A simple loose wire can mimic a total board failure. I have seen it happen a dozen times: a homeowner buys a new board, installs it, and the problem remains because the actual fault was a $2 plastic wire nut that melted under the heat. It is a classic ‘oops’ factor that costs a fortune in unnecessary oven repair essentials and parts.
This logic of checking the small stuff first applies to more than just your range. Whether you are dealing with a kitchen fire-hazard or simply identifying dishwasher faults quickly, the process is the same: verify the power, check the connections, and never trust a part just because it looks okay on the surface. Have you ever fallen into this trap and replaced a part that was actually perfectly fine? Let me know in the comments below! If you are still struggling to find the culprit, you can always reach out via our contact us page for more specific advice on your model.
To move beyond the basic ‘guess and check’ method, you need tools that don’t lie to you. I personally never touch a gas range without my Klein MM400 multimeter. It isn’t just about brand loyalty; it’s about the K-type thermocouple lead that allows me to measure the actual internal temperature of the oven without constantly opening the door and losing heat. If you’re serious about oven repair essentials and troubleshooting, you need to stop relying on the display screen. According to technical bulletins from the American National Standards Institute (ANSI) Z21.1, gas pressure and thermal consistency are the two pillars of appliance safety. If your gas pressure is off by even a fraction of an inch of water column, you will get that delayed ignition ‘boom’ regardless of how new your igniter is.
Why a Cheap Multimeter is Costing You Money
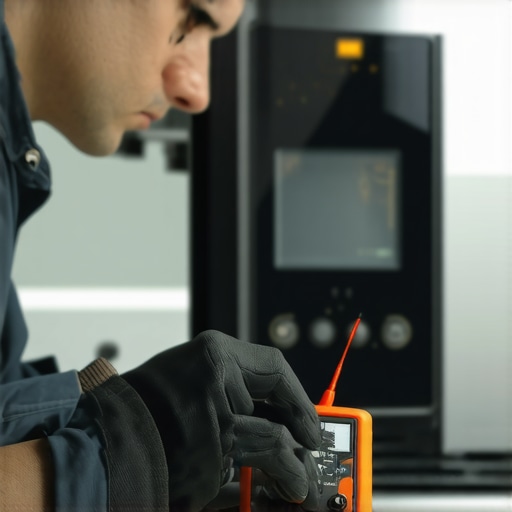
I’ve seen too many DIYers use those five-dollar pocket testers and wonder why they can’t see the amp draw. You need a clamp meter or a series-capable multimeter to verify the 3.2 to 3.6 amp draw I mentioned earlier. This is the difference between a successful fix and a wasted Saturday. Once you have the right data, you can move on to the fast way to recalibrate your oven for accurate temperatures. Most people don’t realize that the factory calibration can drift over five or ten years. If your oven is ‘popping’ and also burning your cookies, your thermostat calibration is likely the silent partner in crime. I always recommend performing these oven diagnostics to pinpointing faults before you start replacing expensive valves.
How do I maintain my oven’s precision over the long haul?
The secret to a quiet, efficient oven isn’t a magic chemical; it’s airflow and integrity. Every six months, you should be testing your oven door seal with the dollar bill trick. A leaky seal forces the burner to cycle twice as often, wearing out your igniter in half the time. It’s a chain reaction: heat escapes, the sensor calls for more gas, the igniter gets overworked, and eventually, it gets weak enough to cause that scary ‘thump.’ This logic isn’t exclusive to the kitchen range, either. Whether you are following a dishwasher parts guide to diy diagnostics or fixing a dryer, the relationship between seals and component lifespan is identical. If you keep the heat where it belongs, the parts will last.
The Shift Toward Predictive Appliance Tech
Looking ahead, the days of manual probing might be numbered. We are already seeing the integration of ‘Smart Diagnostics’ where the appliance monitors its own amp draw and sends a push notification to your phone when the igniter starts to fail—long before you hear the first explosion. This shift toward predictive maintenance will make identifying dishwasher faults quickly and oven issues much easier for the average homeowner. However, until that tech is in every home, you still need to know your way around a burner tube. I want you to try one thing this weekend: pull your bottom oven panel and look for any signs of soot or ‘scorching’ near the igniter. If you see black carbon buildup, you’ve found a future failure point. Clean it now using how to clean the debris from an ovens hidden burner techniques and save yourself the headache of a midnight ‘boom’ later on.
The Hard Truth About My Most Expensive Rookie Mistakes
I once thought a glowing igniter was a healthy one. It wasn’t. That orange light is often a liar, masking a component that has lost its strength. If you want to master oven diagnostics to pinpointing faults, you have to look past the visual and measure the actual current. I spent years replacing gas valves only to realize the igniter was just ‘tired.’ Another lesson? Cleaning isn’t just about aesthetics. A single speck of grease on a burner port is enough to cause a two-second delay, which is all the time gas needs to pool into a mini-bomb. It is why learning how to clean the debris from an ovens hidden burner is the first step I always take before buying parts. Finally, trust your ears. The sound is your warning; if your oven is clicking but not lighting, the machine is literally screaming for help. Ignoring it will only lead to more expensive failures down the road.
The Small Kit That Saves Me Thousands in Service Calls
I never walk into a kitchen without my trusty digital multimeter. It gives me the precision I need to see if an igniter is drawing enough amps to safely open the gas valve. Without it, you are just guessing with your wallet. I also recommend keeping a dedicated set of micro-needles or a specific burner port cleaning tool in your kitchen drawer; you would be surprised how often a simple physical clearing solves the problem faster than any replacement part. Bookmark the official OEM parts diagrams for your specific model too. When you are troubleshooting common issues with parts, fitment is everything for safety. I also suggest keeping a copy of a dishwasher parts guide to diy diagnostics nearby, as the logic of electrical testing carries over across almost all your kitchen appliances.
Reclaiming Your Kitchen Without the Fear
Don’t let a little noise keep you away from your favorite recipes. You now have the knowledge to identify the glow, clear the ports, and know exactly when the job is within your reach. Taking that first step into DIY repair is intimidating, but once you hear that smooth, silent ignition, you will wonder why you waited so long. If things ever feel too complex, check out my guide on when to stop diying and call an oven repair expert to stay safe. Have you ever been startled by your oven making a loud bang right when you were expecting a quiet preheat? Let me know your experience in the comments below!