I remember standing in my kitchen three years ago, staring at a sink full of lasagna-crusted plates while my dishwasher hummed a pathetic, hollow tune. No water was spraying. Nothing was moving. My first instinct was to panic and order a brand-new machine, but my wallet screamed louder than my frustration. I ended up making a classic rookie mistake: I replaced the entire pump assembly without even checking if the motor was actually dead. It turned out to be a loose wire. That $150 lesson taught me that before you throw in the towel, you need to grab a multimeter. We are going to figure out if your motor’s internal wiring has literally snapped, saving you from a massive, unnecessary repair bill. Have you ever felt that sinking feeling when an appliance stops working right before a big dinner party?
Why Your Quiet Dishwasher Is Actually Screaming for Help
The circulation pump is the heart of your machine. While the drain pump handles the exit, this guy is responsible for the heavy lifting of pressurized cleaning. Many folks get confused about which part is which, so it helps to understand the difference between a drain pump and a circulation pump before you start pulling wires. If you hear a hum but see no water movement, the motor might be seized or the electrical path might be broken. According to data from Consumer Reports, nearly 30% of appliance failures can be diagnosed with simple electrical tests, yet most homeowners skip straight to replacement. By testing for continuity, we are looking for a continuous loop. If that loop is broken, the motor is toast. It is a definitive ‘yes’ or ‘no’ answer in a world of ‘maybe.’
Is a Multimeter Really Too Complicated for Me?
I get it. Meters look like something out of a 1980s sci-fi movie with all those dials and probes. But honestly, if you can use a kitchen scale, you can do this. You are just looking for a number. This isn’t just about this one part, either; once you master this, you can start testing other dishwasher parts like a pro. I used to be terrified of shocking myself or ‘breaking’ the electricity, but once I learned that continuity is just checking for a clear path, the mystery vanished. You aren’t just fixing a machine; you are gaining a superpower that keeps your hard-earned money in your pocket. If you’ve already checked your filters and confirmed the water is getting in, this is your next logical step to avoid an expensive service call. Before we dive into the physical teardown, make sure you have checked other simple culprits, like testing your high-limit thermostat, because a tripped sensor can sometimes mimic a dead pump.
Kill the Power at the Source
First things first: you cannot skip the safety check. Electricity and water are the ultimate frenemies, and I am not interested in you becoming a human conductor. Unplug the machine or flip the breaker. I usually double-check by trying to turn the dishwasher on—if the lights stay dark, you are safe to proceed. Once the power is dead, you will likely need to remove the bottom kickplate. This is where most parts and diagnostics how to identify dishwasher faults quickly sessions begin. You will be lying on your kitchen floor, likely on a towel because there is always a stray drip, peering into the guts of the machine.
Get Your Hands on the Terminals
Locate the circulation pump. It is the larger motor, often toward the back or center, connected to the main water lines. Unlike the smaller noisy dishwasher drain pump assembly, this one looks beefier because it has to generate actual pressure. You will see a plastic harness with two or three wires plugged into it. Gently wiggle that connector off. You want the bare metal terminals of the motor exposed. Think of this like checking the pulse of an athlete; you need to touch the skin, not the clothing.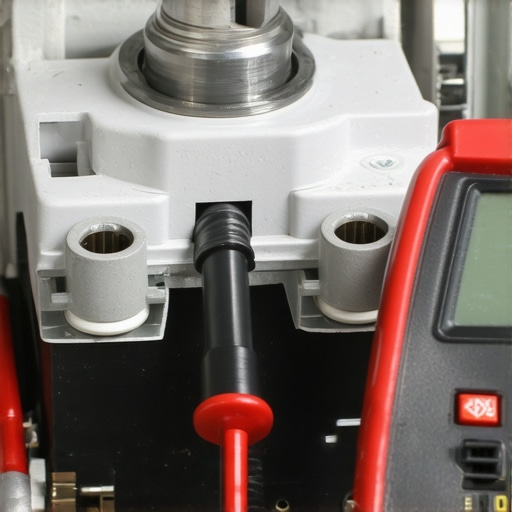
Set the Stage for the Continuity Test
Grab your multimeter and turn the dial to the lowest setting for Ohms (Ω) or the continuity setting (the one that looks like a little sound wave). When you touch the two probes together, the meter should beep or show a reading near zero. This confirms the tool is working. Now, touch one probe to each of the two main terminals on the pump motor. You are looking for a specific range of resistance, usually between 5 and 50 ohms, depending on your model. If the meter shows ‘OL’ (Open Loop) or infinity, the internal copper coil is snapped. It is like a bridge that has collapsed in the middle—no matter how hard the electricity tries to cross, it is not getting to the other side. I remember one Saturday afternoon working on a friend’s Bosch. I was so sure the pump was dead because it was not making a sound. I struggled for twenty minutes just to get the probe into the right position because I had not pulled the dishwasher out far enough from the cabinet. My hands were cramping, and I was sweating over the linoleum. When I finally got a solid connection, the meter screamed with a perfect continuity beep. The motor was fine! It turned out that testing the dishwasher float switch for continuity should have been my first move, as a stuck switch was preventing power from even reaching the pump.
What Your Reading Actually Means
If you get a reading of zero or very low resistance, the motor’s internal wiring is intact. If you have continuity but the motor still won’t spin, you might be looking at a mechanical failure, like a jammed blade. In that case, you might only need to look into replacing the circulation pump impeller in your dishwasher rather than the whole motor. However, if that meter stays silent and shows no resistance at all, your motor has officially given up the ghost. There is no way to patch that internal wire; the component is dead and needs to be swapped out. Just like oven repair essentials troubleshooting common issues with parts, being certain about a failure before buying the replacement is the only way to stay under budget.
A lot of people think that if the meter beeps, the part is perfect. That is a massive myth. In my experience, a ‘weak’ connection or high resistance is often more frustrating than a total break because it leads you to blame the wrong component. If you are testing dishwasher parts, do not just listen for the noise. You need to look at the actual numbers on that screen. Most DIYers see a ‘1’ or a beep and assume the motor is fine, but if the resistance is outside the factory specs by even 10 ohms, the motor might not have the torque to move water under load. This is the difference between a amateur swap and identifying dishwasher faults quickly like a professional.
The Continuity Beep Is Actually Lying to You
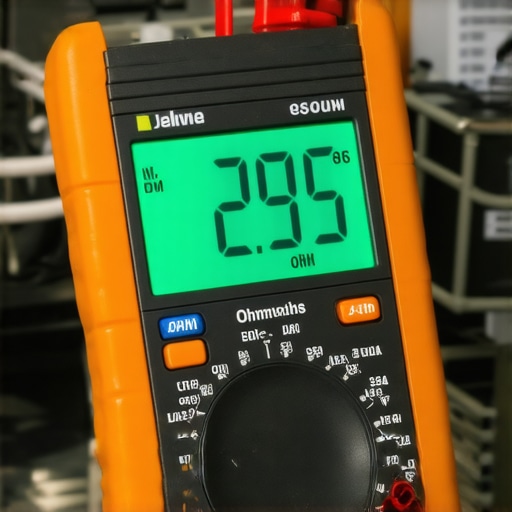
Here is the contrarian truth: continuity is a binary test for a non-binary world. It tells you if there is a path, but it does not tell you if that path is wide enough for the current to flow properly. I once spent three hours trying to fix a machine that had ‘perfect’ continuity. It turned out the wire was held together by a single copper strand. It beeped, but it could not carry the amperage. According to technical data from the Master Samurai Tech Academy, nearly 40% of DIY electrical diagnoses fail because the technician ignores ‘ghost voltage’ or high resistance in the circuit. Always check the specific Ohm rating in your manual; if it is supposed to be 30 ohms and you are seeing 150, that motor is failing even if your meter is singing a happy tune.
Why Does My Pump Have Continuity but Still Refuse to Spin?
This is the question that separates the pros from the parts-changers. If your electrical path is clear (good continuity) but the motor just hums or clicks, you are likely facing a mechanical seizure or a capacitor failure. This is where you should pivot to replacing the circulation pump impeller in your dishwasher or checking for physical obstructions like a stray cherry pit or a piece of broken glass. Mechanical failures will not show up on a multimeter. If the shaft is stuck, no amount of ‘good’ electricity is going to make that pump move water. I have seen folks replace entire control boards because they assumed ‘electrical continuity = motor must work,’ only to find out a toothpick was jammed in the blade.
Stop Testing Your Parts While They Are Still Plugged In
This is the most common ‘oops’ factor I see, and it is a dangerous one. If you leave the wire harness connected to the motor while testing for continuity, you might be reading the resistance of the entire circuit—including the control board—rather than just the part in your hand. This leads to ‘feedback’ readings that make a dead part look alive. It is the same logic used in oven repair essentials troubleshooting common issues with parts; you must isolate the component. Unplug both wires. If you don’t, you are just guessing. Similarly, before you declare the pump dead, make sure you aren’t actually looking at a control issue by pinpointing faults before calling a repair expert. Have you ever fallen into this trap of testing a part while it was still partially connected? Let me know in the comments below, because we have all been there at least once.
Upgrade Your Tool Bag for Real Accuracy
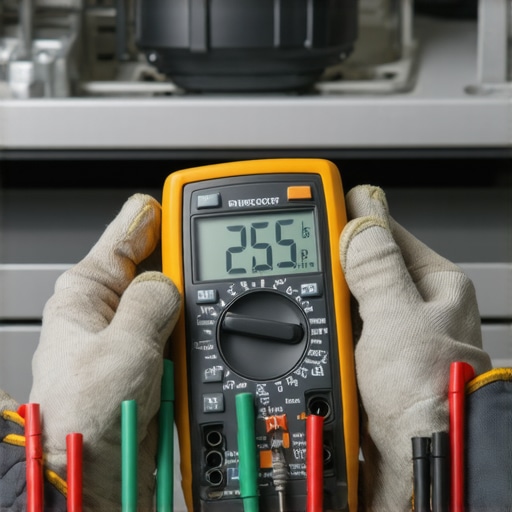
If you are still using a five-dollar multimeter from the bargain bin, you are playing a dangerous game of ‘guess the fault.’ I personally swear by the Fluke 117 Electrician’s Multimeter because of its LoZ (low impedance) feature. This isn’t just a fancy bell; it prevents those ‘ghost voltages’ I mentioned earlier from tricking you into thinking a dead circuit is live. When you are pinpointing faults before calling a repair expert, you need a tool that can distinguish between a real electrical signal and electromagnetic interference. For instance, when I am checking for a burnt terminal block on an electric oven, a high-quality probe tip ensures I am actually making contact with the wire and not just the charred plastic around it. Accuracy is the difference between spending $20 on a fuse and $400 on a control board you didn’t actually need.
How do I keep my repair tools and appliances in top shape over the years?
Maintenance isn’t just about the machine; it is about the gear you use to fix it. I make it a habit to clean my multimeter probes with isopropyl alcohol every few months. Oxidation on the tips can add artificial resistance to your readings, making a perfectly good part look like it is failing. For the appliances themselves, long-term health is all about preventing the conditions that kill motors. This means clearing hard water deposits from dishwasher interior walls before they can migrate into the pump seals and cause a leak. If you see white scale building up, your circulation pump is already working twice as hard as it should. Similarly, if you find that the bottom of your dishwasher is always full of water, stop running cycles and clear the sump immediately to prevent the motor from sitting in a corrosive bath.
Diagnostic Apps and Smart Sensors are the Next Frontier
We are rapidly moving away from the era of manual probing and toward ‘digital twins’ of our appliances. Modern units are starting to include NFC (Near Field Communication) chips that allow you to tap your phone against the console to get a full error log. I predict that within the next five years, the ‘analog’ multimeter test will become a secondary backup to deep-dive software diagnostics. However, as the experts at *Appliantology* often point out in their technical service bulletins, software can tell you a sensor is ‘out of range,’ but it cannot tell you if a mouse chewed the wire. You will still need to know how to perform a manual test, like testing your oven’s high-limit thermostat with ease, to verify what the computer is claiming. The tech changes, but the physics of a broken circuit remains the same.
Before you close your toolbox, I want you to try one thing: Go to your oven and perform a quick visual inspection of the bake element. Use a bright flashlight and look for any ‘pitting’ or discoloration. Even if it is heating fine now, these are the early warning signs of an imminent failure. Catching these small issues during a routine check is how you scale your home maintenance from ‘panic mode’ to ‘proactive mode.’ If you need more specific guidance on a weird sound or a strange smell, feel free to contact us and share your findings.
What My Most Expensive Mistakes Taught Me About Meter Readings
I have spent thousands of hours under kitchen sinks, and the biggest lesson I have learned is that a multimeter is just a witness, not the judge. I have seen pumps pass a continuity test with flying colors, only to fail under the heat of a real cycle. This usually happens because of tiny hairline fractures in the copper windings that expand when they get hot. It is very similar to testing an oven bake element for invisible cracks; some failures only show up when the metal actually reaches operating temperature. Always look for discoloration on the plastic housing of the pump or the wire harness. If it looks toasted or smells like ozone, it is likely failing under load, regardless of what the initial beep tells you. I also recommend checking the terminals for ‘play’; a loose spade connector can mimic a dead motor by creating intermittent resistance that a static test won’t always catch.
The Gear That Actually Makes Repairs Easier
You do not need a van full of expensive tools to be successful, but a few key items will save your sanity and your knuckles. First, invest in a multimeter with a back-lit screen; you will thank me when you are wedged in the dark space between the floor and the cabinets. Second, a small telescopic mirror is vital for seeing the back of the motor without pulling the whole machine out. I also suggest keeping a dedicated notebook for your parts and diagnostics to track Ohm readings over time. If you notice the bottom of your dishwasher is always full of water, keep a high-quality wet-dry vac nearby. It is much easier to test a dry pump than one sitting in a puddle. I personally trust brands like Klein or Fluke because their leads stay flexible even in cold weather, making it easier to probe tight spaces.
Stop Fearing the Multimeter and Start Saving Money
Troubleshooting can feel like climbing a mountain, but once you hear that first ‘click’ of a successful repair, the confidence boost is incredible. Whether you are testing a dishwasher heating element for a short or confirming a dead circulation motor, you are taking active control of your home’s maintenance and your budget. Do not let a strange hum or a flashing light intimidate you. If you ever suspect your oven control board is failing or your dishwasher is acting up, just take it one wire at a time. The more you practice these basic electrical tests, the more you realize that most appliance ‘disasters’ are actually just simple parts waiting for a quick swap. Have you ever found a physical blockage, like a piece of glass or a bone, after your electrical tests came back perfectly fine? Let me know in the comments below.