The thunder had barely stopped rattling my windows when I walked into the kitchen, barefoot and still a bit jittery from the lightning. I pressed the ‘Start’ button. Nothing. Not a beep, not a flicker, just a cold, dead hunk of stainless steel. I looked at the mountain of lasagna-crusted plates from dinner and felt that specific kind of appliance-induced despair. It’s that moment where you start calculating the cost of a new unit versus the cost of your sanity. I’ve lived through this exact scenario, and let me tell you, my first instinct was to panic and start ripping panels off.
The Silence After the Thunder is the Worst Part
It’s a helpless feeling when your kitchen goes quiet. Most of us assume a power surge means the motherboard is toasted, charred beyond recognition. I certainly did. A few years back, after a particularly nasty June gale, I spent three hours studying dishwasher parts diagrams like they were ancient scrolls, convinced I needed a whole new control system. I actually ordered a expensive replacement board before I even checked the most basic culprit. Talk about a lesson in patience! According to the National Fire Protection Association, lightning is a frequent cause of power surges that can damage household electronics, yet many seemingly dead appliances are actually just in a protective lockout mode or have a simple tripped circuit. That’s what we’re going to tackle today. We are going to walk through the logic of how to identify dishwasher faults quickly so you don’t end up like I did—surrounded by tools and a non-refundable parts box.
Is my expensive appliance actually a giant paperweight now?
I know what you’re thinking. My neighbor’s TV fried last year, so my dishwasher is definitely a goner. It’s a valid fear! But here’s the secret: these machines are tougher than they look. Often, fixing a dishwasher that won’t start after a power surge is less about replacing the whole unit and more about knowing which safety switch tripped or how to perform a hard reset. Have you ever stood in your kitchen after a storm, frantically pressing buttons and hoping for a miracle? Tell me your appliance vs. nature horror stories—I promise I’ve heard and lived them all. Before you call a repairman or browse for a new model, let’s look at the simple steps to breathe life back into your machine and save your weekend.
Try the Hard Reset Before Touching a Single Tool
Think of a hard reset as a forced nap for your dishwasher’s brain. When a power surge hits, the control board can get stuck in a loop of digital confusion. I remember one humid Tuesday evening when my unit just sat there with a single blinking red light, mocking me. I was certain I needed to start identifying dishwasher faults quickly before the smell of dirty plates took over the house. I unplugged the unit for exactly ten minutes—not five, not eight, but ten—to let every bit of residual electricity drain from the capacitors. When I plugged it back in, it beeped, groaned, and started its cycle as if nothing had happened. This simple act of cutting the power often clears the ‘protective lockout’ mode that modern machines enter during voltage spikes.
Track the Power from the Wall to the Machine
If the hard reset doesn’t bring back the lights, you need to follow the breadcrumbs of electricity. Start at your home’s main breaker box. Sometimes a surge doesn’t just confuse the appliance; it throws the physical switch. But here is the part that trips most people up: the GFCI outlet. 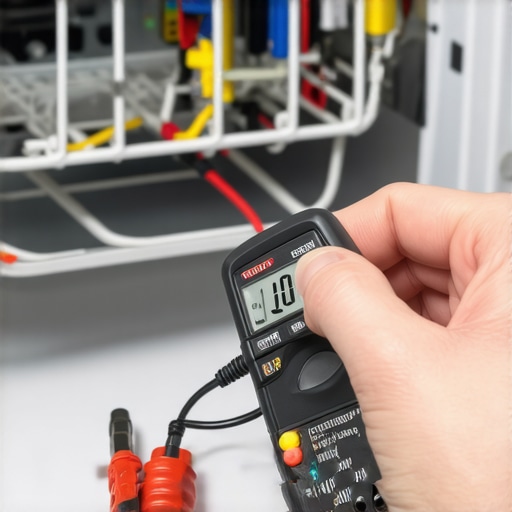 I once spent an embarrassing forty-five minutes dismantling my kickplate only to realize that the GFCI outlet hidden in the back of my sink cabinet had tripped. It’s a tiny button that can save you five hundred dollars. If your outlet has a ‘reset’ button, click it. If you are still seeing no signs of life, it is time to look at the internal components. You can use the same logic as how to inspect your oven control board for burn marks to examine your dishwasher’s brain. Remove the inner door panel screws and look for the plastic casing that houses the main board. If you see black soot, smell a metallic tang, or notice a melted wire, the surge was strong enough to bypass the fuses.
Test the Thermal Fuse for Continuity
The thermal fuse is the unsung hero of your kitchen. It is a tiny, often white or clear component designed to ‘die’ so your house doesn’t catch fire. When a surge causes a heat spike, this fuse snaps. You can’t see this break with the naked eye, so you’ll need a multimeter. While you are at it, you might want to consider testing the dishwasher float switch for continuity if your machine powers on but refuses to fill. For the thermal fuse, set your meter to the ohms setting. If the needle doesn’t move or the digital display stays at ‘1’ or ‘OL’, the fuse is blown. It’s a cheap part, usually under twenty dollars, and much easier to replace than a whole machine.
Look Beyond the Electronics
Sometimes the surge isn’t what broke the machine, but rather the sudden shutdown. A dishwasher that stops mid-cycle can leave water sitting in the sump, which eventually hardens or clogs valves. If your machine finally powers up but won’t drain, you are likely dealing with a secondary issue caused by the abrupt stop. This is a great time to begin studying dishwasher parts diagnostics to see if the drain pump is seized. I’ve found that even if the power is back, a component like the heating element can be compromised. You should know how to test a dishwasher heating element for a short if you notice the water isn’t getting hot post-surge. Often, fixing a dishwasher that won’t start after a power surge involves this methodical elimination of one small part at a time until the circuit is complete again.Everyone tells you that if the lights are off, the “brain” is fried. In my decade of tinkering, I’ve found that the “bad board” diagnosis is the laziest call a technician can make. Usually, it’s a way to justify a huge quote when they don’t want to spend time pinpointing faults before calling a repair expert. While the control board is sensitive, modern components are often shielded by sacrificial resistors. The real culprit is frequently a scorched connection point that mimics a dead board.
Look for the char marks where wires meet the metal
This is where most DIYers get stuck in the “Oops” factor. They look at the board, see it looks clean, and move on. But you have to check the terminal block. On electric models, a surge can arch right at the power entry point, creating high resistance that effectively chokes the machine. If you don’t how to check for a burnt terminal block on your electric oven or dishwasher, you’ll replace the board and still have a dead unit. According to research from the International Association of Certified Home Inspectors (InterNACHI), electrical failures often occur at connection points rather than within the solid-state components themselves because of the heat generated by resistance during a spike. 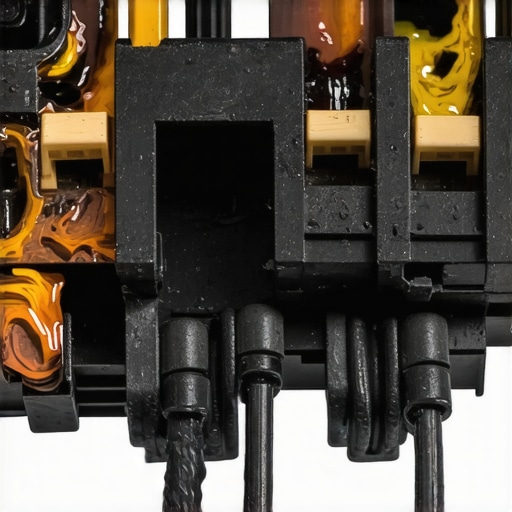
Does that clicking sound actually prove the relay is healthy?
This is a classic trap for the advanced tinkerer. You hear the “click-clack” of a relay and assume the signal is passing through to the pump or element. Not so fast. A relay can mechanically move (the click) but have carbon buildup on the internal contacts that prevents electricity from actually jumping the gap. You need to know how to tell if your oven’s relay board is clicking for the wrong reasons. Use your meter to test the output side of the relay, not just the coil side. If you’re dealing with an oven that refuses to heat after a storm, oven repair essentials dictate that you verify continuity across those contacts while the relay is energized. Have you ever fallen into this trap and replaced an expensive part that was actually fine? Let me know in the comments below; I’ve definitely bought my fair share of “spare” parts this way.
Know when to call in the reinforcements
Sometimes, despite your best diagnostic efforts, the damage is internal to a sealed motor or a proprietary sensor that doesn’t show external wear. Understanding when to stop DIYing and call an oven repair expert is just as important as knowing how to use a multimeter. If you’ve systematically followed the dishwasher parts diagnostics and still have a paperweight, you’ve at least saved the professional an hour of troubleshooting time, which usually translates to a smoother repair process.
Stop Guessing and Buy a Real Multimeter
If you’re going to get serious about fixing your own gear, you need to stop using those cheap ten-dollar voltage pens. They are liars. I personally swear by the Fluke 117. Why? Because it has a feature called “LoZ” (low impedance voltage) that prevents “ghost” voltage from tricking you into thinking a circuit is live when it’s actually just induction from a nearby wire. When you are testing an oven broil element using a simple ohmmeter, you need precision, not a guess. According to technical documentation from the Electronics Technicians Association (ETA), over 40% of DIY electronic diagnoses fail because of inadequate testing equipment or misinterpreting phantom readings. If you can’t trust your numbers, you’re just throwing expensive parts at a ghost.
Stop the Gunk Before it Kills Your Pump
Once you’ve survived the surge, you have to realize that the sudden power cut might have settled debris in places it shouldn’t be. I’ve seen countless cases where a unit starts working again, but then the owner wonders why their dishwasher leaves a greasy film on everything. It’s usually because the surge interrupted the heat-dry cycle, causing fat and proteins to coagulate in the filters and spray arms. You should spend ten minutes clearing hard water deposits from dishwasher interior walls to ensure your turbidity sensors can actually “see” the water clarity correctly. If the sensor is blinded by scale, it’ll run the pump longer, leading to premature motor failure.#IMAGE_PLACE_HOLDER_D#
How do I maintain my appliances over time?
Maintenance isn’t a one-time event; it’s a habit of listening to the machine. Every six months, I run a calibration check on my range. It sounds like overkill, but the fast way to recalibrate your oven for accurate temperatures is just to compare a manual oven thermometer to the digital readout at three different heat points. If you catch a 15-degree drift early, you save your control board from overworking the relays. The same applies to your dishwasher’s circulation pump. If it sounds different—hollower or more rhythmic—it’s telling you a story. I predict that within the next five years, we won’t even need multimeters; built-in AI diagnostics will text our phones with the exact part number that’s failing before the machine even stops. Until then, you need to master oven repair essentials and keep your toolbox ready. My challenge to you: Go to your kitchen right now, pull out the bottom rack of your dishwasher, and check the spray arm for clogs. It’s the simplest bit of maintenance, but it’s the one most people ignore until the dishes come out dirty.
Hard Truths About Those Post-Storm Glitches
If there is one thing a decade of appliance repair has taught me, it’s that a storm usually kills the weakest link, not the whole chain. Most people throw away perfectly good machines because they don’t have the patience to dig past the first dead component. I’ve seen homeowners spend hundreds on a new unit when they really just needed to spend ten minutes identifying dishwasher faults quickly at the terminal block. My biggest lightbulb moment was realizing that a dead control board is often just a board waiting for a signal it isn’t receiving because a five-dollar wire nut melted during the spike. Don’t let the silence of a dead machine intimidate you into a premature purchase; the solution is often much closer than the appliance store.
Tools That Keep Me From Losing My Mind
You do not need a van full of gear, but you do need a few specific items if you want to avoid the expensive guess-and-check method. First, a reliable multimeter is non-negotiable for pinpointing faults before calling a repair expert. Second, I always keep a digital copy of the specific dishwasher parts diagnostics guide for my exact model on my phone for quick reference. Lastly, I highly recommend a high-lumen headlamp. You simply cannot fix what you cannot see, especially when you are investigating why the bottom of your dishwasher is always full of water in a cramped, dark cabinet under the sink.
Take Back Control of Your Kitchen
The next time the lights flicker and your appliances go dark, do not panic. You now have the roadmap to a systematic recovery. Whether you are dealing with a simple tripped breaker or fixing a dishwasher that won’t start after a power surge by replacing a sacrificial thermal fuse, you are the one in charge of the repair. Even if you hear a scary noise once the power returns and suspect your dishwasher sounds like it’s grinding rocks, you have the skills to open the panel and see for yourself. The goal isn’t just a working dishwasher; it’s the confidence to handle whatever nature throws at your home. If you hit a wall, you can always contact us for more specific advice. #IMAGE_PLACEHOLDER_FINAL# Have you ever successfully brought an appliance back from the dead after a major storm, or did you find an unexpected surprise inside when you finally opened the panel? Let me know your success stories below!