I sat on my kitchen floor last Tuesday, staring at that stubborn amber “Preheating” light like it was a staring contest I was destined to lose. Forty minutes had passed. My frozen lasagna was still sitting on the counter, sweating, while the oven stayed as cold as a January morning in Maine. I kept waiting for that satisfying “click” and the light to vanish, but it just stayed there, glowing with unearned confidence. That’s the moment I realized my oven wasn’t just taking its sweet time; it was stuck in a loop of lies.
The Frustrating Reality of a Preheat Light That Won’t Quit
It’s incredibly easy to ignore a light that won’t turn off, thinking maybe the house is just chilly today. But let’s be real: if your oven hasn’t reached temperature in twenty minutes, something under the hood has checked out. I’ve spent years tinkering with oven repair essentials and troubleshooting common issues, and I can tell you that a lingering light is usually the first red flag of a failing component. According to data from the Association of Home Appliance Manufacturers (AHAM), a standard electric oven should hit 350°F in about 15 to 20 minutes. If yours is still trying after thirty, you aren’t baking; you’re just wasting electricity. Early in my DIY journey, I made the classic rookie mistake of assuming the light bulb itself was the problem. I actually replaced the indicator housing before checking the actual heating elements. Talk about a face-palm moment! I learned the hard way that you need to start with smart oven diagnostics to pinpoint the fault before you start ordering random parts. Usually, the light stays on because the control board is waiting for a signal from the temperature sensor that the target heat has been reached—a signal that never comes if your bake element has given up the ghost.
Is my oven actually dangerous when this happens?
The biggest fear I hear from neighbors is that the oven might explode or start a fire if that light stays on indefinitely. While an oven that won’t heat isn’t typically a “kaboom” scenario, it can lead to electrical issues if a short is involved. You really need to inspect your bake element for tiny blisters or cracks. These physical signs are the smoking gun. If you see a spot that looks like a burnt marshmallow on the metal coil, that’s where the continuity broke. I’ve found that more often than not, the culprit is either a dead element or a sensor that’s lost its mind. You can actually save yourself a $150 service fee by testing your oven temperature sensor with a basic multimeter. It takes five minutes and tells you exactly if the “brain” of the oven knows how hot it actually is. Have you ever stood in your kitchen, frustrated by a light that refuses to turn off while your dinner plans slowly evaporate? Drop a comment or reach out to us because I’d love to hear which part failed you first. We’re going to get into the nitty-gritty of testing these parts next, so don’t call the repairman just yet.
Pull the Plug and Start the Real Investigation
Before you even think about sticking a screwdriver into the back of your range, you have to cut the power. I cannot stress this enough. I once tried to shortcut this by just turning the knob to ‘Off,’ and I ended up with a zap that made my arm tingle for three hours. Unplug the unit or flip the breaker. Once the safety is handled, we need to treat your oven like a crime scene. The preheat light stays on because the ‘brain’ of the oven—the control board—is waiting for a specific electrical signal to tell it the job is done. If that signal never arrives, the light stays on, and your dinner stays raw. I always recommend oven diagnostics pinpointing faults before calling a repair expert because the ‘swap and pray’ method of buying parts is a fast way to go broke.
Look for Scars on the Heating Coil
The most common culprit is a broken bake element. Think of your bake element like the filament in an old-school light bulb; eventually, it just burns out. Open the door and look at the big black loop at the bottom. Do you see any discoloration, pitting, or spots that look like they’ve been chewed by a metallic rat? If so, you’re likely testing your oven bake element for hidden cold spots without even knowing it. One time, I helped a friend who swore her oven was fine because the element still ‘glowed a little bit.’ It turned out only half the element was receiving power because of a hairline fracture. We had to perform a full check, and testing an oven bake element for invisible cracks proved the part was toast.
Get an Accurate Reading with a Multimeter
If the element looks physically perfect, it doesn’t mean it’s functional. You need a multimeter set to ohms. You’re looking for continuity—a clear path for electricity to flow. If the meter shows ‘OL’ (Open Loop), the internal wire is snapped, even if the outer casing looks brand new. This is similar to how you’d handle testing the resistance on your dishwasher heating element. If the bake element tests fine, don’t forget to check the top one too. Often, how to test an oven broil element using a simple ohmmeter becomes the key, as many ovens use both elements to preheat quickly. 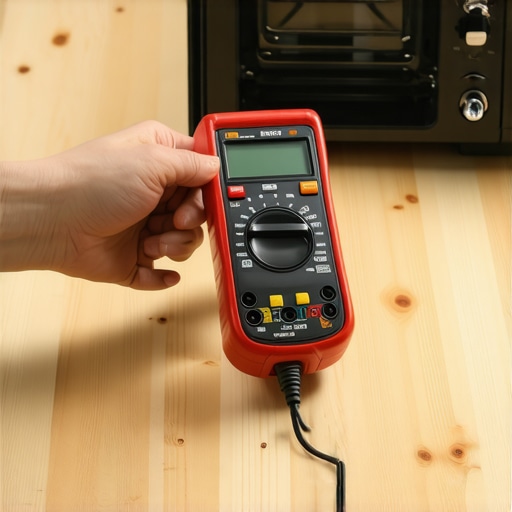
Stop Letting the Temperature Sensor Fool You
If both elements have continuity, the ‘thermometer’ is likely the liar. The oven temperature sensor is a small thin probe usually poking out of the back wall. It works on resistance: as the oven gets hotter, the resistance of the sensor changes. If the sensor is coated in years of burnt-on grease or has simply shorted out, it tells the control board it’s still 70°F even when the air inside is scorching. You can save yourself a massive headache by testing your oven temperature sensor without calling a pro using that same multimeter. If that sensor checks out, the last stop on our tour of frustration is the control board itself. You should inspect your oven control board for burn marks or a stuck relay. If a relay is fused, it might keep the light on even if the oven is actually off, which is a rare but confusing fault. Finally, if you’ve ruled out the heaters and the sensor, how to identify a bad oven relay on the control board will be your final step before deciding if a new range is in your future.
The Self-Clean Button is Your Oven’s Worst Enemy
Most people think that the self-cleaning cycle is a convenient feature designed to save you from scrubbing. In my experience, it is actually the leading cause of dead control boards and blown thermal fuses. While it sounds efficient, the extreme heat required for self-cleaning often exceeds what the sensitive electronics were designed to handle. This is the ultimate ‘oops’ factor: you try to clean the oven, and you end up needing to inspect your oven control board for burn marks because the heat literally melted a solder joint. If your preheat light is acting up after a cleaning cycle, you likely popped a safety component. Professionals often advise against using this feature on older units specifically because the risk of a total system failure outweighs the benefit of a clean interior.
Can you actually trust the digital readout on your control panel?
The biggest myth in the kitchen is that 350°F on the screen means 350°F on the rack. Most ovens operate on a ‘swing’ cycle. According to industry standards from the Association of Home Appliance Manufacturers (AHAM), it is perfectly normal for an oven to fluctuate 25 degrees above or below the set temperature to maintain an average. This nuance is why people often think they have a broken element when their cake comes out uneven. Before you start troubleshooting common issues with parts, verify the actual internal temp with a secondary thermometer. 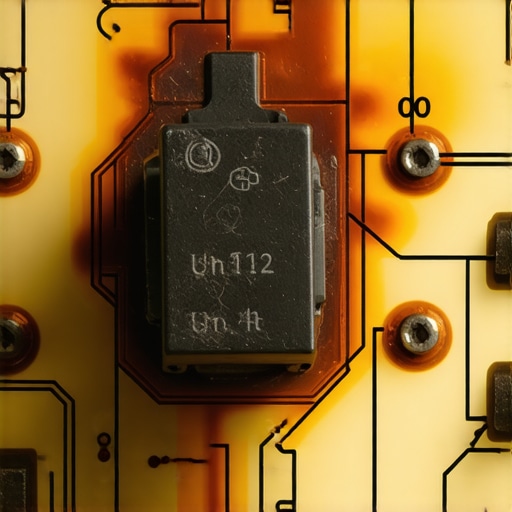
Don’t Ignore the Support Systems
We often focus entirely on the heating element, but diagnostics require a wider lens. For instance, in both ovens and dishwashers, a lack of heat might not be the heater at all; it could be a safety cut-off. In the world of dishwasher parts and DIY diagnostics, a clogged filter can lead to a similar ‘failure to heat’ scenario because the system detects low water flow and shuts down the element to prevent a fire. The same logic applies to your oven. If you have been testing the resistance on your ovens broil element and it looks fine, check the high-limit thermostat. It’s a tiny, inexpensive part that acts as a gatekeeper. If it’s tripped, no power reaches the heating components, and that preheat light will stay on forever while the oven stays cold.
The Hidden Nuance of Component Testing
Another trap I see DIYers fall into is testing for voltage without considering ‘under load’ conditions. A wire might show 240V on your meter when the oven is off, but the moment you turn it on, the voltage drops to zero because of a corroded terminal or a loose connection at the wall. This is a common hurdle when you are trying to identify dishwasher faults quickly or solve oven power issues. Always check your connections for ‘pitting’ or heat damage. Have you ever replaced a part only to find out it wasn’t the problem at all? I’ve certainly been there. Before you buy anything, make sure you are checking the thermal fuse or the oven equivalent. Have you ever fallen into this trap? Let me know in the comments, and we can figure out what went wrong together.
It’s one thing to fix a broken element; it’s another thing entirely to prevent the next failure before it leaves you with a half-baked turkey. I’ve learned that the difference between a five-year appliance and a twenty-year appliance isn’t just luck—it’s the specialized tools you keep in your junk drawer and a few minutes of boring maintenance every month. If you’re serious about this DIY life, you need to stop using that $5 hardware store screwdriver and invest in a dedicated 1/4-inch nut driver. Why? Because most appliance panels are held together by hex-head screws that strip the moment you look at them wrong. When I’m troubleshooting common issues with parts, having a tool that actually grips the fastener saves more time than the actual repair itself.
How do I keep these parts running for another decade?
Maintenance is basically just fighting friction and filth. For your oven, this means addressing the mechanical stress points. I always tell people that lubricating sticky oven door hinges safely is the most underrated task you can perform. If those hinges seize up, they put extra pressure on the frame, leading to heat leaks and eventually burned-out control boards. While you’re down there, check the hardware; knowing why your oven door handle is wobbly and how to tighten it prevents you from accidentally snapping the glass during a frantic holiday bake. It sounds minor, but these small vibrations and loose fits are what lead to the structural failures that usually end in a trip to the appliance showroom.
In the dishwasher world, the maintenance game is won or lost at the filter. Most modern units have a ‘hidden’ secondary screen that homeowners never touch. I’ve found that cleaning the hidden debris under your dishwasher filter once every three months prevents the circulation pump from overworking and burning out prematurely. According to the Whirlpool Technical Education manuals, restricted water flow is the primary cause of ‘high-limit’ trips that kill heating elements. If you don’t keep that path clear, you’ll find yourself back at square one, testing the resistance on your dishwasher heating element because the system choked on a rogue popcorn kernel.
The Future of Your Kitchen is Smarter Diagnostics
Looking ahead, I see a shift where we won’t even need multimeters for basic checks. We’re moving toward a world of ‘Digital Twins’ where your oven will broadcast its own resistance data to an app. But until that day comes, you are the brain of the operation. You need to be proactive. If you’ve spent any time identifying dishwasher faults quickly, you know that a little bit of vinegar and a soft brush can save you a $300 motor replacement. Don’t wait for the error code to pop up. My challenge to you today is this: Go into your kitchen, pull that dishwasher filter out, and see what’s actually living in there. It’s gross, it’s satisfying, and it’s the best way to ensure your machine keeps humming through next year.
I sat on my kitchen floor last Tuesday, staring at that stubborn amber “Preheating” light like it was a staring contest I was destined to lose. Forty minutes had passed. My frozen lasagna was still sitting on the counter, sweating, while the oven stayed as cold as a January morning in Maine. I kept waiting for that satisfying “click” and the light to vanish, but it just stayed there, glowing with unearned confidence. That’s the moment I realized my oven wasn’t just taking its sweet time; it was stuck in a loop of lies.
The Frustrating Reality of a Preheat Light That Won’t Quit
It’s incredibly easy to ignore a light that won’t turn off, thinking maybe the house is just chilly today. But let’s be real: if your oven hasn’t reached temperature in twenty minutes, something under the hood has checked out. I’ve spent years tinkering with oven repair essentials and troubleshooting common issues, and I can tell you that a lingering light is usually the first red flag of a failing component. According to data from the Association of Home Appliance Manufacturers (AHAM), a standard electric oven should hit 350°F in about 15 to 20 minutes. If yours is still trying after thirty, you aren’t baking; you’re just wasting electricity. Early in my DIY journey, I made the classic rookie mistake of assuming the light bulb itself was the problem. I actually replaced the indicator housing before checking the actual heating elements. Talk about a face-palm moment! I learned the hard way that you need to start with smart oven diagnostics to pinpoint the fault before you start ordering random parts. Usually, the light stays on because the control board is waiting for a signal from the temperature sensor that the target heat has been reached—a signal that never comes if your bake element has given up the ghost.
Is my oven actually dangerous when this happens?
The biggest fear I hear from neighbors is that the oven might explode or start a fire if that light stays on indefinitely. While an oven that won’t heat isn’t typically a “kaboom” scenario, it can lead to electrical issues if a short is involved. You really need to inspect your bake element for tiny blisters or cracks. These physical signs are the smoking gun. If you see a spot that looks like a burnt marshmallow on the metal coil, that’s where the continuity broke. I’ve found that more often than not, the culprit is either a dead element or a sensor that’s lost its mind. You can actually save yourself a $150 service fee by testing your oven temperature sensor with a basic multimeter. It takes five minutes and tells you exactly if the “brain” of the oven knows how hot it actually is. Have you ever stood in your kitchen, frustrated by a light that refuses to turn off while your dinner plans slowly evaporate? Drop a comment or reach out to us because I’d love to hear which part failed you first. We’re going to get into the nitty-gritty of testing these parts next, so don’t call the repairman just yet.
Pull the Plug and Start the Real Investigation
Before you even think about sticking a screwdriver into the back of your range, you have to cut the power. I cannot stress this enough. I once tried to shortcut this by just turning the knob to ‘Off,’ and I ended up with a zap that made my arm tingle for three hours. Unplug the unit or flip the breaker. Once the safety is handled, we need to treat your oven like a crime scene. The preheat light stays on because the ‘brain’ of the oven—the control board—is waiting for a specific electrical signal to tell it the job is done. If that signal never arrives, the light stays on, and your dinner stays raw. I always recommend oven diagnostics pinpointing faults before calling a repair expert because the ‘swap and pray’ method of buying parts is a fast way to go broke.
Look for Scars on the Heating Coil
The most common culprit is a broken bake element. Think of your bake element like the filament in an old-school light bulb; eventually, it just burns out. Open the door and look at the big black loop at the bottom. Do you see any discoloration, pitting, or spots that look like they’ve been chewed by a metallic rat? If so, you’re likely testing your oven bake element for hidden cold spots without even knowing it. One time, I helped a friend who swore her oven was fine because the element still ‘glowed a little bit.’ It turned out only half the element was receiving power because of a hairline fracture. We had to perform a full check, and testing an oven bake element for invisible cracks proved the part was toast.
Get an Accurate Reading with a Multimeter
If the element looks physically perfect, it doesn’t mean it’s functional. You need a multimeter set to ohms. You’re looking for continuity—a clear path for electricity to flow. If the meter shows ‘OL’ (Open Loop), the internal wire is snapped, even if the outer casing looks brand new. This is similar to how you’d handle testing the resistance on your dishwasher heating element. If the bake element tests fine, don’t forget to check the top one too. Often, how to test an oven broil element using a simple ohmmeter becomes the key, as many ovens use both elements to preheat quickly.
Stop Letting the Temperature Sensor Fool You
If both elements have continuity, the ‘thermometer’ is likely the liar. The oven temperature sensor is a small thin probe usually poking out of the back wall. It works on resistance: as the oven gets hotter, the resistance of the sensor changes. If the sensor is coated in years of burnt-on grease or has simply shorted out, it tells the control board it’s still 70°F even when the air inside is scorching. You can save yourself a massive headache by testing your oven temperature sensor without calling a pro using that same multimeter. If that sensor checks out, the last stop on our tour of frustration is the control board itself. You should inspect your oven control board for burn marks or a stuck relay. If a relay is fused, it might keep the light on even if the oven is actually off, which is a rare but confusing fault. Finally, if you’ve ruled out the heaters and the sensor, how to identify a bad oven relay on the control board will be your final step before deciding if a new range is in your future.
The Self-Clean Button is Your Oven’s Worst Enemy
Most people think that the self-cleaning cycle is a convenient feature designed to save you from scrubbing. In my experience, it is actually the leading cause of dead control boards and blown thermal fuses. While it sounds efficient, the extreme heat required for self-cleaning often exceeds what the sensitive electronics were designed to handle. This is the ultimate ‘oops’ factor: you try to clean the oven, and you end up needing to inspect your oven control board for burn marks because the heat literally melted a solder joint. If your preheat light is acting up after a cleaning cycle, you likely popped a safety component. Professionals often advise against using this feature on older units specifically because the risk of a total system failure outweighs the benefit of a clean interior.
Can you actually trust the digital readout on your control panel?
The biggest myth in the kitchen is that 350°F on the screen means 350°F on the rack. Most ovens operate on a ‘swing’ cycle. According to industry standards from the Association of Home Appliance Manufacturers (AHAM), it is perfectly normal for an oven to fluctuate 25 degrees above or below the set temperature to maintain an average. This nuance is why people often think they have a broken element when their cake comes out uneven. Before you start troubleshooting common issues with parts, verify the actual internal temp with a secondary thermometer.
Don’t Ignore the Support Systems
We often focus entirely on the heating element, but diagnostics require a wider lens. For instance, in both ovens and dishwashers, a lack of heat might not be the heater at all; it could be a safety cut-off. In the world of dishwasher parts and DIY diagnostics, a clogged filter can lead to a similar ‘failure to heat’ scenario because the system detects low water flow and shuts down the element to prevent a fire. The same logic applies to your oven. If you have been testing the resistance on your ovens broil element and it looks fine, check the high-limit thermostat. It’s a tiny, inexpensive part that acts as a gatekeeper. If it’s tripped, no power reaches the heating components, and that preheat light will stay on forever while the oven stays cold.
The Hidden Nuance of Component Testing
Another trap I see DIYers fall into is testing for voltage without considering ‘under load’ conditions. A wire might show 240V on your meter when the oven is off, but the moment you turn it on, the voltage drops to zero because of a corroded terminal or a loose connection at the wall. This is a common hurdle when you are trying to identify dishwasher faults quickly or solve oven power issues. Always check your connections for ‘pitting’ or heat damage. Have you ever replaced a part only to find out it wasn’t the problem at all? I’ve certainly been there. Before you buy anything, make sure you are checking the thermal fuse or the oven equivalent. Have you ever fallen into this trap? Let me know in the comments, and we can figure out what went wrong together.
It’s one thing to fix a broken element; it’s another thing entirely to prevent the next failure before it leaves you with a half-baked turkey. I’ve learned that the difference between a five-year appliance and a twenty-year appliance isn’t just luck—it’s the specialized tools you keep in your junk drawer and a few minutes of boring maintenance every month. If you’re serious about this DIY life, you need to stop using that $5 hardware store screwdriver and invest in a dedicated 1/4-inch nut driver. Why? Because most appliance panels are held together by hex-head screws that strip the moment you look at them wrong. When I’m troubleshooting common issues with parts, having a tool that actually grips the fastener saves more time than the actual repair itself.
How do I keep these parts running for another decade?
Maintenance is basically just fighting friction and filth. For your oven, this means addressing the mechanical stress points. I always tell people that lubricating sticky oven door hinges safely is the most underrated task you can perform. If those hinges seize up, they put extra pressure on the frame, leading to heat leaks and eventually burned-out control boards. While you’re down there, check the hardware; knowing why your oven door handle is wobbly and how to tighten it prevents you from accidentally snapping the glass during a frantic holiday bake. It sounds minor, but these small vibrations and loose fits are what lead to the structural failures that usually end in a trip to the appliance showroom.
In the dishwasher world, the maintenance game is won or lost at the filter. Most modern units have a ‘hidden’ secondary screen that homeowners never touch. I’ve found that cleaning the hidden debris under your dishwasher filter once every three months prevents the circulation pump from overworking and burning out prematurely. According to the Whirlpool Technical Education manuals, restricted water flow is the primary cause of ‘high-limit’ trips that kill heating elements. If you don’t keep that path clear, you’ll find yourself back at square one, testing the resistance on your dishwasher heating element because the system choked on a rogue popcorn kernel.
The Future of Your Kitchen is Smarter Diagnostics
Looking ahead, I see a shift where we won’t even need multimeters for basic checks. We’re moving toward a world of ‘Digital Twins’ where your oven will broadcast its own resistance data to an app. But until that day comes, you are the brain of the operation. You need to be proactive. If you’ve spent any time identifying dishwasher faults quickly, you know that a little bit of vinegar and a soft brush can save you a $300 motor replacement. Don’t wait for the error code to pop up. My challenge to you today is this: Go into your kitchen, pull that dishwasher filter out, and see what’s actually living in there. It’s gross, it’s satisfying, and it’s the best way to ensure your machine keeps humming through next year.
The Hardest Lesson I Learned While Staring at a Cold Oven
The single biggest mistake I made for years was trusting my eyes more than my multimeter. An oven element can look perfectly black and smooth while being totally dead on the inside. I once spent two days and $100 on a new control board because the element “looked fine,” only to realize a internal break had occurred that offered zero continuity. Always start with the basics of oven repair essentials and troubleshooting common issues before you throw money at the “brain” of the machine. I’ve also learned that small safety parts are often the culprit; testing your ovens high-limit thermostat with ease is usually a five-minute task that can save you a week of microwave dinners. Diagnostics is a game of elimination, not a game of guessing.
My Must-Have Toolkit for Kitchen Appliance Surgery
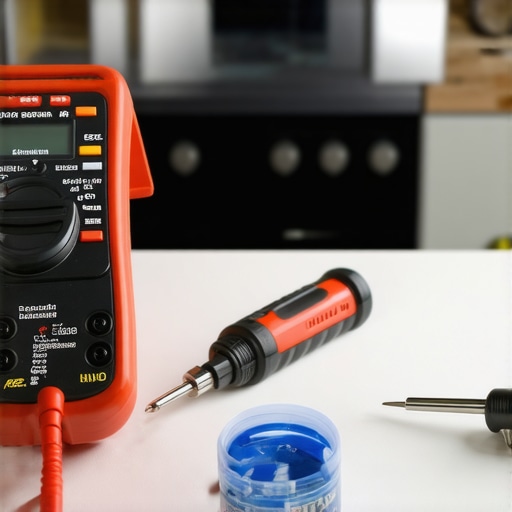
If you’re going to dive into the back of a range or under a dishwasher, you need more than just a butter knife and hope. I never start a repair without these three things: a digital multimeter (with sharp probes), a 1/4-inch magnetic nut driver, and a high-lumen headlamp. You can’t fix what you can’t see, and you certainly can’t fix what you haven’t measured. I rely on these because they turn a confusing “preheat light” mystery into a simple pass/fail test. If you want to refine your skills, studying oven diagnostics for pinpointing faults will teach you more about your home than any owner’s manual ever could. These tools are the bridge between being a frustrated homeowner and a confident DIYer.
Stop Waiting for the Light and Reclaim Your Kitchen
At the end of the day, that amber light is just a signal, not a sentence. Taking the time to understand the “why” behind a failure gives you the power to keep your home running on your own terms. Whether you’re swapping a burnt coil or simply cleaning a sensor, you’re building a skill set that lasts a lifetime. Just remember, part of being a pro is recognizing when to stop DIYing and call an oven repair expert, especially when dealing with gas lines or complex control board soldering. Reclaim your kitchen, get that oven hot again, and don’t let a tiny indicator light ruin your Tuesday. Have you ever replaced a part only to realize the issue was just a loose wire or a tripped breaker? Let me know your most surprising “aha!” moment in the comments below!