I remember it like it was yesterday—last Thanksgiving, and I was already running behind. I pulled my ‘good’ silverware out of the dishwasher, expecting that festive sparkle that makes a table pop. Instead, I found every single fork and spoon looking like it had been dusted with flour. It was humiliating. I spent the next twenty minutes frantically hand-polishing knives over the sink while my mother-in-law watched from the doorway. You buy a high-end machine so you don’t have to do the work yourself, but there I was, doing exactly that. I spent weeks convinced my machine was dying, and I even started identifying dishwasher faults quickly to see if a motor was failing. It turns out the solution was far simpler, and today, I’m going to help you skip the frustration and get that mirror-like finish back on your cutlery.
The Moment My Clean Silverware Embarrassed Me
I made a massive mistake early on that I’m almost embarrassed to admit: I thought more detergent equaled more cleaning power. I was practically overflowing the dispenser, thinking I was giving my dishes a spa day. In reality, I was just creating a chemical slurry. That white chalky film on all your dishes is often just a nasty combination of undissolved soap and mineral deposits. According to the Water Quality Association, hard water affects about 85% of homes in the United States, which means most of us are fighting a losing battle against calcium and magnesium every time we hit the start button. If you’ve started noticing hard water spots on your dishwasher walls, your silverware is just the canary in the coal mine. I felt like a total novice when I realized I was essentially gluing minerals to my forks with excess soap. We are going to look at how to balance your water chemistry and check the right dishwasher parts to ensure your rinse cycle actually rinses. Have you ever felt that gritty texture on a ‘clean’ spoon and wondered if your machine was actually making things dirtier?
Is it actually possible to get that shine back?
You might be looking at your cloudy knives right now and thinking they are permanently ruined or etched. It’s a common fear—that once the shine is gone, it’s gone for good. I’ve been there, standing in the kitchen aisle at the store, looking at new cutlery sets because I thought mine were toast. But don’t open your wallet just yet. Most of the time, those streaks are just stubborn surface deposits that can be cleared away with the right approach. Whether it’s learning how to remove hard water deposits or simply adjusting your loading style, we can fix this. We’re going to dive into the mechanical and chemical tweaks that turned my ‘cloudy’ disaster back into a success story.The first thing you need to do is neutralize the chemistry in the tub. If your glasses look like they were dipped in milk, you’re likely dealing with calcium. I discovered that a simple bowl of white vinegar placed upright in the top rack—without any other detergent—does more for a cloudy interior than five cycles of ‘heavy duty’ washing. You should also start by clearing hard water deposits from dishwasher interior walls before you even worry about the cutlery. If the walls are white, your forks don’t stand a chance. I remember trying this the first time; I was skeptical, but seeing that clear water at the end of the cycle was like a magic trick.
Find the Gunk Hiding Beneath Your Filter
Next, we have to look at the ‘gut’ of the machine. Most people forget that a dishwasher is essentially a recirculating pump. If the water is dirty, it’s just sandblasting your plates with old food particles. I once spent an hour scrubbing plates only to find a single cherry pit had wedged itself into the impeller. It caused a high-pitched whine and resulted in zero water pressure reaching the top rack. It is vital to learn how to clean the hidden debris under your dishwasher filter to ensure the water flowing over your silverware is actually clean. 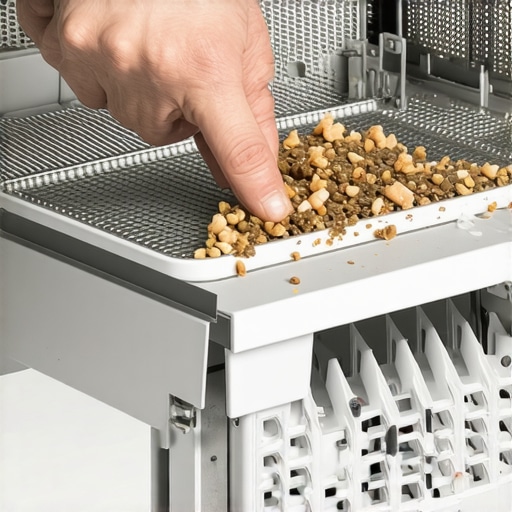
Verify Your Machine is Actually Heating the Water
Hot water is the secret sauce of dishwashing. If your water doesn’t reach at least 120°F, your detergent won’t activate properly. This is often why your dishwasher pod ends up undissolved in the tub or stuck to the side of the door. Use a meat thermometer to check the water temperature during the first fill. If it is cold, you might need to learn how to test a dishwasher heating element for a short using a multimeter. I have seen countless people replace their whole machine when a thirty-dollar element was the only thing preventing a perfect shine.
Give the Water a Clear Path to Your Cutlery
It sounds basic, but how you stack your forks determines if they get rinsed or just steamed. If you ‘nest’ your spoons—where they sit inside each other like Russian dolls—the water cannot get between them. I used to just throw everything in and hope for the best until I realized I was blocking the spray arms entirely. You should follow the best way to load your dishwasher for maximum water reach to avoid these ‘blind spots’ where minerals can settle and dry. Think of the spray arm like a lawn sprinkler; if you put a bucket over one head, the grass underneath stays dry and dusty. That is exactly what is happening to your silverware when the rack is overcrowded. Every fork tines needs a direct hit from the water jet to blast away the detergent residue that causes that dreaded cloudiness.
Stop Guessing and Start Testing Your Components
Most DIYers think they can ‘see’ a broken part. If a heating element isn’t glowing, it must be snapped, right? Wrong. In my experience, some of the most frustrating appliance failures are completely invisible to the naked eye. While you might be tempted to just order a new rack or motor, you really need to dive into dishwasher parts and a comprehensive guide to diy diagnostics before touching your wallet. Everyone says you should just replace a ten-year-old machine when it acts up, but I’ve found that high-quality components from a decade ago are often more robust than the budget-friendly units sold today. According to the Association of Home Appliance Manufacturers, the average lifespan of a dishwasher is about 10 years, but a simple fix can often extend that by another five. You might see a part that looks pristine, but inside, the wire has a microscopic break. This is why testing an oven bake element for invisible cracks or using a multimeter to check for continuity is the only way to be sure. 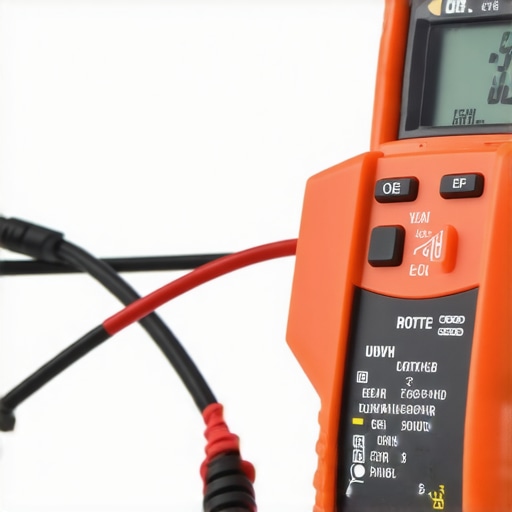
Why Visual Inspections Often Lead to Wasted Money
The biggest ‘oops’ factor I see with beginners is the assumption that a lack of heat means a dead element. I’ve seen people spend eighty dollars on a new part only to realize the issue was a charred wire terminal or a failing relay. Before you buy anything, you must be sure you are identifying dishwasher faults quickly by checking the power supply first. A common trap is ignoring the serial number. Two ovens might have the exact same model number on the door, but a manufacturing change mid-year means they use completely different gaskets. Always verify by finding the right part number for an oven door gasket or any other component directly from the part’s stamped code, not just the manual.
Does a Dead Control Board Always Mean You Need a Costly Replacement?
Advanced troubleshooters know that a blank screen doesn’t always mean the computer is fried. Often, it’s just a single failed component on the circuit board. If you have the patience, you can save hundreds by learning how to identify a bad oven relay on the control board. Most repair techs will tell you to swap the whole board because it’s faster for them, but for a DIYer, a $5 relay and a soldering iron can resurrect a ‘dead’ oven. However, there is a point where the effort outweighs the reward. Knowing when to stop diying and call an oven repair expert is a skill in itself. Have you ever fallen into the trap of buying a brand-new part only to find out it was a loose wire or a dirty sensor all along? Let me know in the comments below, I’d love to hear your ‘oops’ stories!
I used to think a screwdriver and a prayer were enough to handle any kitchen catastrophe, but that mindset changed the day I misdiagnosed a simple thermal fuse and almost threw out a perfectly good Maytag. If you want to move beyond guesswork, you need to invest in a decent digital multimeter. I personally use a model with an auto-ranging feature because it prevents me from blowing a fuse in the tool itself while I am learning 5 multimeter tricks for diagnosing a dead control board. When you are checking for continuity, you aren’t just looking for a ‘yes’ or ‘no’ answer; you are looking for specific resistance levels that tell you if a part is failing or just tired. For example, testing the resistance on your dishwasher heating element should yield a very specific ohm reading—usually between 15 and 30 ohms—and anything outside that range means your ‘clean’ dishes will never actually be dry.
How do I keep my appliances running for decades?
Maintenance isn’t a one-time event; it is a rhythm. One of the most effective habits I’ve adopted is a monthly ‘deep purge’ of the mechanical components that actually touch your food and water. This goes beyond just wiping the front panel. I make it a point to check the gaskets for any sign of deformation. If you catch a problem early, how to deep clean the moldy gasket in your dishwasher door becomes a five-minute wipe-down rather than a two-hour surgical scrub. According to technical documentation from the National Association of Service Managers (NASM), over 60% of appliance service calls could be avoided with regular consumer-level maintenance. This includes simple tasks like how to unclog your dishwashers air gap in five minutes to prevent nasty sink backflow from ruining your wash cycle.

Beyond the tools, I’ve found that the best way to scale your DIY skills is to keep a ‘repair log’ tucked inside the cabinet next to the machine. Note down the dates you replaced parts or cleared filters. This is especially helpful when oven repair essentials and troubleshooting common issues with parts come into play. If you know your bake element was replaced two years ago, you can pivot your diagnostics toward the temperature sensor or the control board instead. Looking forward, I predict we are entering an era of ‘Smart DIY’ where manufacturers will be forced to provide more accessible error codes through smartphone apps. While this might seem like it takes the ‘soul’ out of fixing things, it actually makes oven diagnostics and pinpointing faults much faster for those of us who aren’t afraid to get our hands dirty. If you haven’t yet, go grab a multimeter and check the resistance on your oven’s igniter today—you might be surprised how much life is left in that old machine!
What I Learned While Scrubbing Spoons at Midnight
I’ve spent years tinkering with appliances, and if there is one thing I’ve realized, it is that a ‘broken’ machine is usually just a ‘misunderstood’ one. First, the model number isn’t just a suggestion; it is the law. I once wasted forty dollars on a part that looked identical but had slightly different tolerances, and it taught me to always prioritize identifying dishwasher faults quickly before hitting the ‘buy’ button. Second, hard water isn’t just about spots; it is about friction. When minerals build up, parts that should move freely start to drag, leading to issues like why your dishwasher fills with water even when it is off. Finally, don’t ignore the small rubber bits. A simple check of the door components can reveal how to replace a worn-out dishwasher detergent dispenser seal, which often solves that ‘cloudy’ residue problem by ensuring the soap stays where it belongs until the right moment.
The Three Tools I Never Start a Repair Without
If you want to move from a hobbyist to a pro, you need more than just a standard toolbox. I personally swear by a high-quality digital multimeter with an audible continuity setting; it saves you from squinting at a tiny screen while you are hunched over a circuit board. I also keep a telescoping inspection mirror in my pocket to check those hard-to-reach areas when how to inspect your oven control board for burn marks becomes necessary. Most importantly, I rely on the detailed schematics found in oven diagnostics and pinpointing faults before calling a repair expert. These resources take the mystery out of the machine and turn a stressful afternoon into a satisfying logic puzzle. I trust these tools because they provide data, and data doesn’t lie when your dishwasher is acting up.
#IMAGE_PLACEHOLDER_E#
Your Journey to a Maintenance-Free Kitchen Starts Now
It is easy to feel defeated when your expensive appliances start underperforming, but remember that every machine is just a collection of replaceable parts waiting for a little attention. You don’t need an engineering degree to get that factory shine back on your silverware or to ensure your oven holds a steady temperature. By taking the time to perform basic dishwasher parts and a comprehensive guide to diy diagnostics, you are saving money and reducing waste. Whether you are testing your ovens high limit thermostat with ease or just deep-cleaning a filter, you are building a more resilient home. Don’t be afraid to get your hands a little greasy—the satisfaction of a job well done is worth every minute. Have you ever spent money on a new part only to find out the real issue was just a simple clog or a loose wire? Let me know your stories in the comments below!