I remember the smell first. It was a Tuesday night, and I just wanted to go to bed, but I opened my dishwasher to put away the plates and instead of a blast of steam, I got a whiff of swamp water. I looked down, and there it was: a murky, grey pool of stagnant water drowning the bottom of the tub. It felt like my kitchen had betrayed me. I had spent a lot of money on this machine, and now it was just an expensive, metal-lined bucket. For a second, I honestly thought about just buying a new one right then and there. Have you ever opened your dishwasher after a full cycle only to find it looking like a miniature lake?
Stop Staring at the Scummy Swamp in Your Dishwasher
When I first saw that pool of water, I panicked. I assumed the motor had died or that a pipe had burst under the floor. My first mistake was immediately reaching for the phone to call a repairman before I even got my hands dirty. I didn’t realize back then that I could pinpoint the fault quickly on my own. It turns out that standing water is rarely a sign that your machine is destined for the scrap heap. Most of the time, it is just a cry for help from a clogged filter or a stubborn bit of debris. According to research by Consumer Reports, many common dishwasher issues, including drainage problems, can be solved with basic maintenance rather than professional intervention. I spent hours researching why a machine would drain too slowly or stop altogether, and what I found was surprisingly simple.
Is This Actually Going to Cost Me Hundreds in Repairs?
You might be worried that you need a brand-new drain pump to get things moving again, but hold that thought. Before you pull out the credit card, you need to check the basics. I once spent an entire Saturday afternoon frustrated, only to realize I just needed to spend five minutes clearing an air gap in my sink. We are going to walk through exactly how to check your hoses and clean the hidden filter that most people don’t even know exists. By the time we are done, you will know whether you just have a simple clog or if it is time to look for specific parts.
Clear the Blockage at Your Sink First
Most people start by ripping out the dishwasher, but the problem is often right under your nose at the kitchen sink. If you have a garbage disposal, run it. A dishwasher often drains into the same pipe, and if that pipe is full of yesterday’s potato peels, the water has nowhere to go. If you don’t have a disposal, you likely have an air gap—that small chrome cylinder sitting on your sink. I once spent an hour panicking over a flood until I realized I just needed to learn how to unclog a blocked dishwasher air gap with a straw. It sounds like a middle-school science experiment, but blowing through a straw to clear out built-up gunk can restore your drainage instantly. If that air gap is clear, the problem is deeper inside the machine.
Hunt Down the Hidden Gunk in the Sump
Open the door and pull out the bottom rack. You are looking for the sump, which is the low point where water gathers. Most modern machines have a cylindrical filter that twists out. If yours is covered in a grey, slimy film, you’ve found your culprit. I remember a specific Tuesday when I pulled mine out and found a literal wall of grease and a single, calcified cherry pit wedged in the mesh. That tiny pit was enough to keep the water from exiting. You need to clean the hidden filter in your dishwasher sump using warm soapy water and a soft brush. While you are down there, reach into the hole where the filter sits. If you feel anything hard or jagged, you might be clearing debris from a dishwasher check valve without tools by simply fishing it out with your fingers. 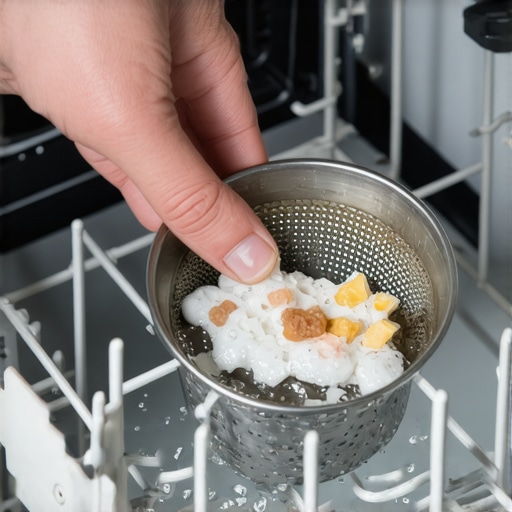
Look for Kinks in the Drain Line
Think of your dishwasher’s drain hose like a garden hose. If there is a sharp bend or a heavy box of detergent pressing against it under the sink, the water won’t move. I’ve seen cases where people pushed their machine back too far after a floor repair, pinching the line shut. If the hose looks clear but the water still won’t budge, check the connection to the sink. Sometimes a solid plug of grease forms right where the hose meets the drain pipe. You can usually pop the clamp off and tap the hose into a bucket to see if it’s clear. If it’s flowing fine there, then we have to look at the mechanical heart of the system.
Is That Humming Noise a Death Knell?
If you hear your dishwasher trying to drain but it sounds like a low, frustrated hum instead of a rushing pump, something is physically stopping the motor. This is where you need to distinguish the difference between a drain pump and a circulation pump. The drain pump is the small one responsible for kicking the water out. If it’s humming, a piece of broken glass or a toothpick might be jammed in the impeller. You can often diagnose this by diagnosing a humming noise from your dishwasher’s drain pump and checking for physical obstructions before assuming the motor is burnt out. If the pump spins freely but won’t turn on, you might be dealing with an electrical failure, which is why testing your dishwasher’s float switch for continuity is a vital next step to ensure the machine even knows it’s full of water.
The Orange Glow That Lies to You
Most DIYers think if they see that comforting orange light at the bottom of their gas oven, the igniter is doing its job. That is probably the biggest myth in kitchen repair. In my experience, a glowing igniter is often a red herring. It might be getting hot, but if it isn’t reaching the specific amperage required to trigger the gas valve, your dinner is staying cold. According to technical specifications from GE Appliances, a standard silicon carbide igniter must draw between 3.2 and 3.6 amps to safely open the gas valve. If yours is only pulling 2.8 amps, it will glow beautifully while you starve. This is why you need to know how to replace a glowing but faulty oven igniter rather than assuming your gas safety valve has bit the dust. Have you ever fallen into this trap where a part looked ‘fine’ but failed the actual test? Let me know in the comments.
Is Your Control Board Actually Fried?
When a dishwasher or oven goes completely dark, the first instinct is to assume the brain of the machine—the control board—is dead. This is a massive ‘oops’ factor that costs homeowners hundreds of dollars in unnecessary parts. Before you conclude the worst, you have to look at the gatekeepers. Often, a simple thermal fuse has tripped to protect the system from a minor overheat. I once nearly threw away a perfectly good range because I didn’t know about testing your oven’s thermal fuse when nothing turns on. It’s a ten-dollar part that mimics a five-hundred-dollar failure. The same applies to your cleaning machine; choosing the correct thermal fuse for your dishwasher model can save you from a premature trip to the appliance store. 
The Clicking Sound Isn’t Always a Good Sign
Another nuance that separates the pros from the amateurs is how they interpret sounds. If your gas oven is clicking but never firing up, don’t just keep turning the knob. That clicking is the spark module trying its best, but the failure might lie in the solenoid. You should be testing the gas oven solenoid when the clicking stops or even while it’s ongoing to ensure gas is actually being allowed into the burner tube. Most people skip this and go straight to replacing the spark electrode, which is rarely the culprit in a ‘no-flame’ situation.
Don’t Ignore the Electrical Fingerprints
If you’ve ruled out the fuses and the igniters, you might finally be facing the control board. But even then, don’t just swap it out. I always tell people to look for physical evidence—scorched resistors or ‘ghost’ marks on the plastic housing. Learning how to tell if your oven control board is actually fried involves a bit of detective work with a flashlight and a keen eye. Diagnostic mode isn’t a magic wand; it’s a guide. You still need a solid comprehensive guide to DIY diagnostics to verify that a sensor isn’t just sending bad data to a perfectly healthy board. By slowing down and checking these advanced nuances, you stop being a ‘parts-changer’ and start being a technician.The single most important tool in my kit isn’t a power drill or a specialized wrench—it’s a reliable digital multimeter. I used to be terrified of electrical testing until I realized it is just a conversation with the machine. If you are serious about this, you need to learn testing oven continuity on a budget with basic tools. I personally use a Fluke because I need that millisecond response time, but even a basic unit can help you master 5 multimeter tricks for diagnosing a dead control board. When you can accurately read ohms, you stop guessing if an element is burnt out. You can literally see the ‘invisible’ damage by learning how to test an oven broil element using a simple ohmmeter. I’ve found that most ‘broken’ ovens just have a tiny break in the internal wire that you cannot see with the naked eye until you are testing the resistance on your dishwasher heating element or oven coil.
How do I maintain these machines over the long haul?
Longevity isn’t about luck; it is about friction and heat management. For your oven, it starts with the seal. If heat is escaping, your control board works twice as hard and fries itself. I make it a habit every six months to inspect the rubber. If it is sagging, you need to know how to reseat a dishwasher door seal that keeps popping out or spend the few dollars finding the right part number for an oven door gasket before the escaping steam ruins your cabinetry. For the dishwasher, it is all about flow. Hard water is the silent killer. I take a toothpick and white vinegar to the arms twice a year, specifically focused on how to clean mineral buildup from dishwasher spray nozzles. According to the technical training documentation at the Samurai Tech Academy, most premature pump failures are caused by increased backpressure from these tiny, clogged holes. 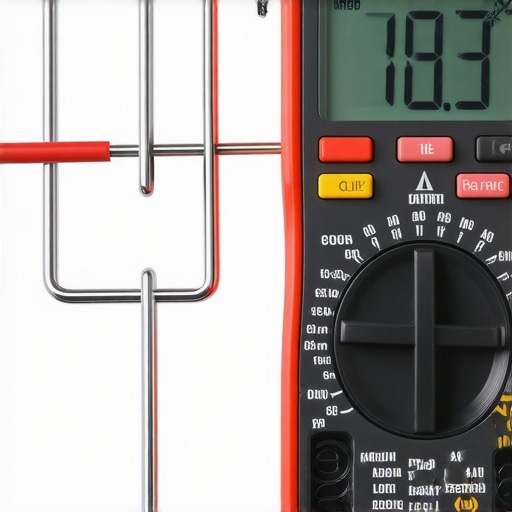 Looking ahead, I see a future where appliances are even more integrated with ‘smart’ self-diagnostics. We are already seeing machines that can text you when a filter is 90% clogged. While that sounds convenient, it also means more sensors that can fail. The trend is moving toward modularity, but the fundamental physics—heat, water, and electricity—won’t change. This weekend, I want you to try something: pull out your multimeter and check your oven’s bake element even if it is working fine. Getting a ‘baseline’ reading now will make it ten times easier to spot a failure later. It is the difference between being a victim of your appliances and being their master.
3 Lies My Appliances Told Me Before I Knew Better
After years of tinkering, I have realized that my appliances are masters of deception. The first big lie is that a part is good just because it looks fine. I once spent days troubleshooting a circuit because an igniter was glowing bright orange, but it simply wasn’t pulling enough current to open the valve. Now, I never trust my eyes alone; I always verify with data. The second lie is that every leak or drainage issue is a broken pump. More often than not, it is a simple blockage or a piece of debris that has found its way into the check valve. Finally, I learned that ignoring the ‘small stuff’ like a rattling sound or a slow drain eventually leads to a catastrophic failure of much more expensive components.
The Go-To Toolkit for a Stress-Free Fix
Success in DIY repair comes down to having the right information and the right gear. I never start a job without a digital multimeter because pinpointing faults before calling a repair expert is the only way to avoid wasting money on the wrong parts. For components, I always weigh the pros and cons of comparing aftermarket vs oem oven heating elements to ensure I am getting the best value for the specific age of my machine. I also rely heavily on manufacturer-specific parts diagrams which are often available for free online. However, the most important part of my ‘toolkit’ is knowing my limits; I have a list of criteria for when to skip the diy and call a professional oven technician, especially when dealing with internal gas lines or main power supply issues.
Your Kitchen Is Waiting for a Leader
There is a deep sense of satisfaction that comes from hearing your dishwasher hum back to life or seeing your oven reach the perfect temperature after you have fixed it yourself. You no longer have to be at the mercy of a service schedule or an unexpected repair bill. By keeping a close eye on your equipment and having a comprehensive guide to diy diagnostics at the ready, you become the master of your kitchen. Don’t wait for a total breakdown to start learning. Take a moment this weekend to check your seals or learn how to check your oven’s bake element for tiny blisters. Have you ever spent hours on a repair only to realize it was something incredibly simple like a loose wire or a dirty filter? Let me know your biggest ‘aha!’ moment in the comments below.