Have you ever fired up your dishwasher only to find it stubbornly refusing to run, leaving you puzzled and frustrated? I’ve been there myself, standing in front of my dishwasher, scratching my head, wondering why it suddenly stopped working out of nowhere. It’s that sinking feeling when you realize a small component might be the culprit, and you’re left questioning whether to call in a professional or attempt a repair yourself. That moment of uncertainty can be overwhelming, especially when the appliance is such a vital part of your daily routine.
Why Choosing the Right Thermal Fuse Matters More Than You Think
The truth is, selecting the correct thermal fuse for your dishwasher isn’t just about fixing a broken part; it’s about ensuring your safety, extending your appliance’s lifespan, and saving money. A thermal fuse acts as a safety device that shuts down the dishwasher if it overheats, preventing potential fires or damage. But not all thermal fuses are created equal, and using the wrong one can lead to repeated failures or even hazardous situations. I learned this lesson the hard way early on, when I impulsively bought a replacement fuse without checking its specifications—only to have it blow again after a few cycles, making me realize I’d overlooked an essential detail.
Could I Be Making a Costly Mistake?
Early mistakes are common, and I want to help you avoid the same errors. Picking the wrong thermal fuse can seem like a minor detail, but it can cause your dishwasher to not function correctly or, worse, pose safety risks. So, how do you find the right fit for your specific model? That’s what we’ll explore together today, along with some practical tips to help you make an informed decision. If you’ve ever faced this dilemma—finding the appropriate thermal fuse without getting overwhelmed—you’re not alone. Proper diagnostics and parts identification are key, and resources like this guide on diagnosing dishwasher faults can be a game-changer.
Ensuring you get the correct part means understanding your dishwasher’s make and model, and recognizing the specific specs your safety device requires. Making a mistake here might cost you money or compromise safety, so patience and proper research are essential. Now that I’ve shared my story, let’s dive into the steps to find that perfect thermal fuse—so your dishwasher can run smoothly and safely again. Ready to gain confidence in your DIY repairs? Let’s go!
Identify Your Dishwasher Model Precisely
The first step is to locate your dishwasher’s model number, usually found inside the door panel or on the edge of the door itself. Write it down or take a photo for quick reference. This ensures you select a compatible thermal fuse, preventing costly mistakes. I once purchased a fuse based on my brand alone, only to find it incompatible during installation—wasting time and money. Being specific about your model streamlines the process and guarantees safety.
Gather Accurate Specifications
Next, understand the exact voltage, amperage, and temperature ratings needed for your model. These details are critical, as a fuse with incorrect specs can cause repeated failures or safety hazards. Check the original part or consult the manufacturer’s documentation. Think of it like choosing the right fuse for a circuit—plugging in a 15-amp fuse where a 10-amp is needed is a recipe for trouble. Precise specifications ensure the fuse acts as a safety gate, preventing overheating or fires.
Compare OEM and Aftermarket Options
Decide between Original Equipment Manufacturer (OEM) parts or reliable aftermarket options. OEM parts guarantee perfect fit and performance, but aftermarket equivalents are often more affordable. When I replaced my dishwasher fuse, I chose an OEM part after reading reviews to avoid compatibility issues. Review sources like this guide for insights on selecting quality parts. Remember, a well-made fuse is like a trusted firefighter—ready to act when needed.
Use Your Resources and Verify Compatibility
Consult your dishwasher’s user manual or visit the manufacturer’s website for part numbers. Many sites allow you to input your model details to find compatible parts. I once used an online compatibility checker, which saved me the embarrassment of installing the wrong fuse. Cross-reference your findings with reputable suppliers to confirm compatibility. Think of this as double-checking your map before a journey—preventing detours and dead ends.
Follow Proper Installation Procedures
Before installing the new fuse, unplug the dishwasher and wear insulated gloves for safety. Locate the thermal fuse—usually near the control board or heating element—using your model’s diagram. Remove any cover panels if necessary. Carefully disconnect the old fuse using insulated tools, noting its wiring configuration. Insert the new fuse ensuring correct placement and secure connections. When I installed my fuse, I made a small diagram of the wiring; it helped me avoid mistakes on reassembly, ensuring the safeguard is functional.
Test Before Full Use
After installation, restore power and run a short cycle to confirm the repair. Keep an eye on the dishwasher’s operation and listen for abnormalities. If the thermal fuse blows again, double-check the fuse ratings and consider underlying issues like a malfunctioning thermistor or heating element. Testing the fuse with a multimeter for continuity before installation can prevent guesswork. Think of it like a final safety check—making sure everything works as intended, so your appliance stays safe and effective.
Many DIY enthusiasts and even seasoned repair people fall prey to oversimplified assumptions when it comes to diagnosing and replacing parts in appliances like dishwashers and ovens. A prevalent myth is that replacing a faulty component, such as a thermal fuse or heating element, automatically solves the underlying issue. However, this approach often overlooks the nuanced interplay of electrical and mechanical systems, leading to repeated failures or safety hazards. As I’ve learned through extensive troubleshooting, addressing only the symptomatic part without understanding the root cause can be a costly mistake. For instance, in diagnosing dishwasher issues, neglecting to inspect related components like thermistors or control boards can result in incomplete repairs. Dive into this comprehensive guide to better understand diagnostic nuances.
How do you differentiate between a part failure and a system-wide fault?
This question is vital for advanced repair work. Often, what appears to be a defective part is actually a symptom of a deeper problem. For example, an oven’s heating element may look burnt out, but the real issue could be a malfunctioning temperature sensor or control board sending incorrect signals. Jumping to replace the obvious part without verifying the entire control system can lead to wasted resources. Expert diagnostics involve testing continuity, voltage, and resistance across various interconnected components—skills that can be honed with proper training and tools. Remember, as oven diagnostics suggest, understanding these subtleties prevents costly misdirected repairs.
Another often overlooked aspect is the quality of replacement parts. Many believe that aftermarket parts are inferior, but with recent improvements, some aftermarket components match OEM standards when chosen carefully. The key lies in verifying compatibility and quality through reputable sources. Using lower-quality parts might seem economical initially but can result in advanced mistakes such as electrical mismatches or safety failures. To ensure you’re selecting reliable replacements, always consult detailed guides and reviews, like this resource on parts selection.
Furthermore, internal components such as wiring harnesses and fasteners can be overlooked. A loose connection or improper reassembly often causes persistent faults, even after replacing a seemingly faulty part. Thus, meticulous rechecking during reinstallation is paramount. Remember, troubleshooting isn’t just about fixing parts—it’s about understanding how each component contributes to the bigger picture.
So, next time you’re about to replace a part, ask yourself: am I addressing a symptom, or am I tackling the core issue? Developing this diagnostic insight turns troubleshooting from guesswork into a precise science, saving time, money, and potential safety risks. If you’re eager to enhance your repair skills further, I recommend exploring advanced diagnostic tips to become more confident in your troubleshooting journey. Share your experiences or challenges with diagnosing complex faults in the comments—let’s learn together!
Invest in Quality Diagnostic Tools for Long-Term Success
Getting your dishwasher, oven, or other appliances back in top shape involves more than just replacing parts; it requires precise diagnostics and reliable tools. I highly recommend investing in a digital multimeter with at least a 10A current rating and a set of insulated tools. A high-quality multimeter, such as the Fluke 117, allows you to accurately test components like thermostats, heating elements, and control boards, ensuring you’re addressing the root cause rather than just symptoms. Insulated screwdrivers and pliers are essential for safety and preventing accidental shorts during repairs. Using these tools consistently improves your diagnostic accuracy and extends the lifespan of your appliances.
Stick to the Schedule: Why Regular Maintenance Matters
Establishing a routine maintenance schedule can dramatically reduce unexpected breakdowns. For dishwashers, regularly cleaning filters and inspecting spray arms prevents clogs that cause poor cleaning performance or leaks. For ovens, checking door seals and cleaning vents ensure efficient operation. I personally set quarterly reminders to perform these tasks, which has saved me from more costly repairs later. Remember, small, consistent efforts go a long way in maintaining appliance health and avoiding emergency calls.
How do I maintain my appliances over time?
Maintaining your appliances involves a combination of proper cleaning, timely inspections, and leveraging diagnostic tools. Keep detailed records of repairs and parts replacements to identify patterns that may indicate emerging issues. Additionally, familiarize yourself with manufacturer guidelines and recommended maintenance practices found in user manuals or trusted guides linked within our site. As technology advances, smart diagnostics—like apps connected to appliance sensors—may become commonplace, offering proactive alerts before problems escalate. Staying informed and proactive ensures your appliances serve you reliably for years to come.
Looking ahead, the trend points toward smarter, interconnected appliances that can self-diagnose and notify you via smartphone. To prepare for this shift, start exploring more advanced diagnostic techniques now, such as using comprehensive testing procedures outlined in this detailed diagnostics guide. Whether you’re a DIY enthusiast or a professional, mastering these skills will keep your repairs efficient and safe, helping you troubleshoot complex issues without guesswork.
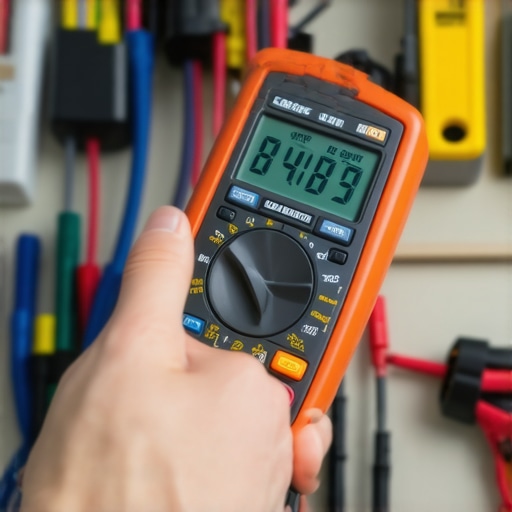
3 Costly Myths About Dishwasher and Oven Troubleshooting That I Had to Unlearn
One of the hardest lessons I learned was that not every malfunction is caused by the obvious faulty part. For instance, assuming a broken heating element is the root of all heating issues often led me astray; sometimes, a failing thermistor or control board was the real culprit. Real-world experience taught me to think holistically rather than chasing the most visible fault.
Another myth I dispelled early on was that aftermarket parts are inherently inferior. Through diligent research and testing, I found that many aftermarket components matched OEM standards perfectly, saving me money and reducing waste. The key was verifying compatibility and quality reviews before making a choice.
Finally, I used to believe that replacing a part once would permanently fix the problem. However, I learned that underlying issues, like wiring harness corrosion or recurrent component stress, can cause repeated failures. Diagnosing and addressing these systemic issues led to more durable repairs and greater peace of mind.
My Arsenal for Troubleshooting and Repair
Over time, I accumulated essential tools like a reliable digital multimeter (I swear by Fluke 117 for its accuracy), insulated screwdrivers, and a good set of wire connectors. These tools empowered me to perform accurate diagnostics and ensure safe, effective repairs. Additionally, I rely heavily on resources like this comprehensive diagnostic guide which helps me pinpoint issues quickly and confidently.
Books such as “Appliance Repair Essentials” have also been invaluable for understanding the interplay between electrical and mechanical components. They provided me with a solid foundation that complemented hands-on experience, allowing me to approach repairs systematically rather than by trial and error.
Lastly, I keep a digital notebook documenting each repair, noting what worked and what didn’t. This ongoing record becomes a personal reference library, reducing guesswork and improving my troubleshooting skills over time.
Keep the Spirit Burning: Your Repair Journey Awaits
Embracing the world of parts, dishwasher, oven repair, and diagnostics may seem daunting at first, but each challenge is an opportunity to become more self-reliant and confident. Remember, every expert was once a beginner who refused to give up. Dive into tutorials, invest in quality tools, and stay curious—your appliances will thank you, and so will your wallet. Ready to tackle your next repair challenge with newfound confidence? The power to fix is in your hands—and the rewards are well worth it.
If you’ve ever hesitated to diagnose or repair an appliance, share your experiences or questions below. Let’s learn and grow together in this repair community!