One evening, I was trying to prepare dinner when I noticed my oven refusing to ignite. The familiar click of the igniter sounded, but the gas never lit up. Frustration crept in as I realized my trusted oven was on the fritz—and I had no idea where to start diagnosing the problem. That lightbulb moment pushed me to roll up my sleeves and learn the ins and outs of replacing a glowing but faulty oven igniter. If you’ve ever faced this kind of kitchen crisis, you’re not alone. Many homeowners find themselves stuck, unsure whether to call a repair technician or try fixing it themselves.
Why a Dead Igniter Can Wind Up Ruining Your Cooking Day
The oven igniter is a tiny but crucial part of the gas oven system. When it fails, the gas can build up, creating a dangerous situation or simply preventing your oven from igniting altogether. According to the U.S. Consumer Product Safety Commission, appliance malfunctions like faulty igniters are responsible for a significant number of home fires annually—so ignoring the problem isn’t just inconvenient, it’s risky. Understanding how to spot a failing igniter and knowing how to replace it can save you from costly repairs or dangerous hazards down the line. Plus, a successful DIY fix can be incredibly satisfying—saving you money and giving you a newfound confidence in handling household repairs.
Is Replacing an Oven Igniter Really Worth the Effort?
It’s common to hesitate, worrying about whether this repair is too complicated or dangerous to tackle on your own. Early on, I made the mistake of trying to half-heartedly fix it without the proper tools, which only prolonged the process. Trust me, taking the time to research and gather the necessary parts makes a world of difference. For detailed guidance and to ensure you’re on the right track, you might want to check out resources like this comprehensive guide on oven repair. Ready to get your hands dirty and bring your oven back to life? Let’s dive into what you’ll need and how to do it.
Gather Your Tools and Parts
Before diving into the repair, assemble all necessary tools: a Phillips screwdriver, a socket wrench set, needle-nose pliers, and safety gloves. Also, purchase a compatible replacement igniter by consulting your oven’s model specifications or visiting appliance parts stores online. I once accidentally ordered the wrong igniter, which caused delays, so double-checking compatibility is crucial.
Disconnect Power and Gas Supply
Ensure safety by unplugging the oven from the electrical outlet and shutting off the gas valve. Think of this step as switching off the main power and fuel supply before performing surgery—skipping it can lead to electric shocks or gas leaks.
Locate the Igniter and Access It
Most oven igniters are positioned at the oven’s bottom, near the burner assembly. Remove the oven racks and, depending on your model, unscrew the back panel or the bottom panel inside the oven cavity. During one repair, I had to remove multiple panels, and I found keeping track of screws in a small container helped prevent losing any parts.
Disconnect the Old Igniter
Carefully disconnect the igniter’s wiring harness and unscrew it from its mounting bracket. Use needle-nose pliers if necessary, but avoid applying excessive force. Remember, the igniter is fragile; mishandling can cause further damage. During my first attempt, I cracked a fragile ceramic connector, highlighting the importance of gentle handling.
Install the New Igniter
Position the new igniter into its socket and secure it with screws. Reconnect the wiring harness, ensuring a snug fit to avoid poor electrical contact. Think of it like plugging a USB—firm and correct orientation are key. Once installed, double-check all connections before sealing up the panels.
Restore Power and Test
Turn on the gas and electricity, then power up the oven to verify the ignition. Observe if the igniter glows and the burner ignites within a few seconds. If it doesn’t, double-check wiring connections or consider testing the igniter’s resistance with a multimeter, as per the guidance here: diagnostics tips. During my last repair, a loose wire caused the igniter to glow without igniting gas, emphasizing the importance of a secure connection.
Ensure Safety and Proper Functioning
After testing, monitor the oven during its next cycle to ensure consistent ignition. If problems persist, consider inspecting the control board or gas valve, or contacting a professional. Remember, safety first—never ignore signs of gas leaks or electrical issues. For more detailed troubleshooting, you can visit this repair guide.
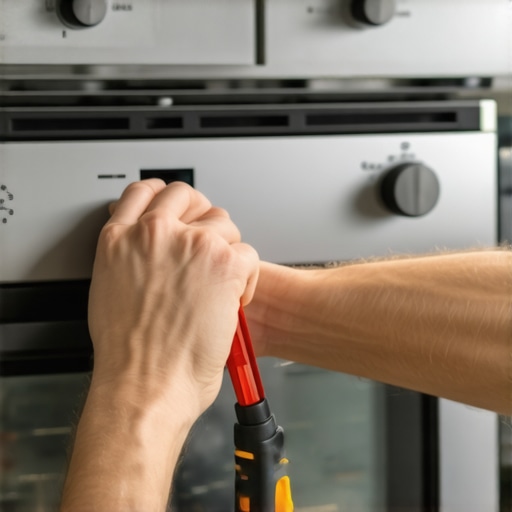
Many DIY enthusiasts and homeowners alike approach appliance repair with certain assumptions that, while popular, often lead to costly mistakes. One prevalent myth is that all parts are easily identifiable and straightforward to replace, but in reality, the nuances of diagnosing issues—like differentiating between a faulty thermistor and a bad control board—are often overlooked. According to appliance repair experts, misdiagnosing the root cause can result in unnecessary part replacements, which not only wastes money but also extends repair time. For instance, in dishwasher diagnostics, some assume that a blinking error code always points to the same fault, but subtle variations in the error pattern can indicate entirely different problems—such as a clogged drain versus a defective float switch. To avoid these pitfalls, it’s essential to understand the specific functions and failure modes of each component, rather than relying solely on generic troubleshooting methods. Always remember, a comprehensive diagnosis is your best safeguard against misapplied repairs that could jeopardize safety or lead to further damage.
Are You Missing Critical Clues When Diagnosing Appliances?
Advanced professionals know that symptoms like inconsistent heating or unusual noises often point to underlying issues that simple visual inspections can’t reveal. For example, a heating element that tests fine for continuity might still be faulty due to poor connections or corrosion, which can only be identified through careful voltage testing or inspection of wiring harnesses. Moreover, many homeowners overlook the importance of verifying electrical components with a multimeter, risking misdiagnosis. A study by the National Institute of Standards and Technology emphasizes that precise diagnostics rely on understanding the electrical characteristics and failure patterns of each part, not just visual cues. This level of nuance is vital if you want your repair to be durable and safe. When in doubt, consulting detailed guides on diagnostics and parts can prevent costly errors. For a comprehensive overview of troubleshooting strategies, visit this guide on dishwasher parts and diagnostics. Would you like to sharpen your diagnostic skills? Drop a comment below!
The Power of Proper Maintenance and Quality Tools
Maintaining your household appliances, such as ovens and dishwashers, is essential to ensure long-term performance and avoid costly repairs. Regular inspections, cleaning, and timely part replacements can drastically extend the lifespan of your appliances. I personally recommend establishing a routine check schedule every six months, focusing on key components like heating elements, filters, and seals, which are prone to wear and tear. Additionally, keeping a well-stocked toolkit tailored for appliance repair simplifies the process and makes troubleshooting more efficient.
Why a Good Set of Screwdrivers and Multimeters Is Non-Negotiable
From my experience, investing in top-quality screwdrivers with magnetic tips and a reliable digital multimeter pays dividends. Precision screwdrivers make disassembling panels less risky, especially for delicate components inside your oven or dishwasher. A multimeter allows you to accurately diagnose electrical faults—measuring continuity, resistance, and voltage—saving you from guesswork. Brands like Fluke are highly recommended for their durability and accuracy, but even mid-range models are sufficient for most household diagnostics.
Leveraging Software for Diagnostics
Beyond physical tools, software applications can be invaluable. For instance, some modern dishwashers and ovens provide diagnostic modes accessible via keypad combinations, revealing error codes that pinpoint issues swiftly. Familiarizing yourself with these codes through your appliance’s manual or manufacturer resources can prevent unnecessary part replacements. For example, detailed diagnostic guides can help interpret error signals accurately, streamlining repairs and ensuring safety.
Scaling Up for Long-Term Success
As you become more confident in your repair skills, consider investing in advanced diagnostic tools like thermal cameras to detect hidden hot spots or moisture meters for leak detection. These tools can help prevent small issues from escalating and reduce downtime. Moreover, maintaining an organized workspace with labeled storage for spare parts and tools enables quicker repairs and reduces frustration during troubleshooting. Looking ahead, I believe that the integration of IoT (Internet of Things) technology will further empower homeowners to monitor appliance health remotely, alerting them to issues before failures occur.
How do I maintain appliances over time to prevent major breakdowns?
Consistent upkeep is your best defense against unexpected appliance failures. Regular cleaning of filters, checking for corrosion or loose connections, and replacing worn parts early on are vital. For example, cleaning dishwasher spray arms and inspecting oven safety valves periodically can save you from emergency repairs. Plus, keeping abreast of manufacturer recalls and service bulletins ensures you’re aware of potential issues before they turn into costly problems. To keep everything in top shape, refer to comprehensive guides like this resources page, which offers detailed diagnostics and maintenance tips. Don’t forget to schedule professional inspections if you’re unsure about your assessments—sometimes an expert eye can catch problems early, saving time and money. Try integrating a routine diagnostics check with your maintenance schedule and see how it transforms the longevity and efficiency of your appliances.
3 Lessons I Didn’t See Coming in Oven Repair
One of the most surprising truths I learned while replacing my oven igniter is that patience outshines speed. Rushing often leads to overlooked wiring connections or fragile ceramic parts breaking, which can prolong the repair or create safety hazards. Another insight is understanding that not every problem points to a simple fix; sometimes, the culprit is a deeper electrical issue, reminding me to consider broader diagnostics beyond the immediate symptom. Lastly, I realized that investing in quality tools not only simplifies the repair process but also drastically reduces the risk of damaging sensitive components—saving money and frustration in the long run.
Tools and Resources I Trust for DIY Oven Fixes
Having the right kit can make all the difference. I personally rely on a high-quality digital multimeter like the Fluke to accurately test electrical components, ensuring I don’t replace parts unnecessarily. A comprehensive repair manual tailored to my oven model provides step-by-step guidance, helping me navigate tricky disassembly with confidence. For sourcing genuine parts, I’ve found that reputable online stores specializing in appliance parts offer both the best compatibility and warranty. Additionally, trusted online communities and forums can offer troubleshooting tips from those who’ve faced similar issues—like the invaluable insights I gained from this detailed repair guide.
Your Next Step: Trust Your Skills and Keep Learning
Embarking on DIY repairs like replacing an oven igniter can feel daunting, but every successful fix builds your confidence and practical knowledge. Remember, the more you learn about your appliances, the better you’ll become at diagnosing and solving problems efficiently. Embrace each repair opportunity as a chance to develop essential skills that will serve you for years to come. Whether you’re tackling the next appliance issue or sharing your newfound expertise with friends and family, your proactive approach makes a real difference. Want to dive deeper into appliance diagnostics? Visit this resource for expert insights and advanced troubleshooting tips. What appliance challenge are you ready to conquer next? Let me know below!