I’ll never forget the Tuesday morning I spent chasing a puddle that didn’t exist. My dishwasher had just finished its cycle, or so I thought, when a steady stream of gray water started creeping out from under the cabinet. The weird part? It had been bone-dry for the first forty minutes. I felt like a detective at a crime scene where the evidence only appeared once the suspect was trying to leave. If you’ve found yourself throwing down every beach towel you own just to survive the final ten minutes of a wash cycle, I know exactly how you feel. It’s maddening, it’s messy, and it’s actually more common than you’d think.
The Mystery of the Late-Cycle Flood
Most people assume a leak means a hole in the tub or a bad door seal, but if your kitchen stays dry until the very end, you’re dealing with a specific pressure issue. I remember when I first started tinkering with these machines, I spent sixty bucks and three hours fixing a leak from the kickplate area that wasn’t even there. I replaced the door gasket, thinking that had to be it. It wasn’t. The real culprit was hiding in the back, waiting for the drain pump to kick in. The problem usually boils down to the way water is forced out of the machine. When the pump engages, it creates significantly more pressure than when the water is just splashing around inside. That’s why you might need dishwasher parts and a comprehensive guide to diagnostics to stop guessing and start fixing. Today, I’m going to show you that the fix is often just a loose clamp or a tiny crack in a hose, not a reason to go shopping for a expensive replacement.
Is a leaking drain pump really worth fixing myself?
You might be worried that you’re going to turn a small puddle into a local disaster. I get it. Water and electricity are a scary combo. But here’s the truth: if you can turn a screwdriver and wiggle a hose, you’re halfway there. According to data from Consumer Reports, nearly 30% of dishwasher repairs are simple enough for homeowners to handle without a professional, often saving upwards of $150 per service call. Sometimes, it’s as simple as replacing a noisy dishwasher drain pump assembly that has finally given up the ghost. Before we dive into the guts of the machine, have you noticed if the water is clear or dirty when it leaks? Or maybe you’ve heard a weird sound right before the puddle starts? Drop a comment or reach out via our contact page—I’d love to hear what your machine is doing so we can nail this down together. We’re going to look at the drain hose, the pump housing, and those pesky little clamps that love to vibrate loose over time.To find the leak, you need to think like the water. When the cycle hits those last fifteen minutes, the machine isn’t just letting water gravity-drain; it’s aggressively pushing it out. This is where most DIYers get tripped up. They check the door seal when they should be looking at the exit ramp. Your first move is to get eyes on the drain hose. Think of this hose like a high-pressure garden sprayer. If there’s even a pinhole or a slightly loose connection where it meets the sink’s garbage disposal, the pressure will find it. I learned this the hard way during a ‘quick fix’ last summer. I had a tiny drip at the connector, so I cranked down on a worm gear clamp like I was trying to crush a diamond. I ended up cracking the plastic nipple on the disposal itself. Instead of a five-dollar clamp fix, I was out a hundred bucks for a new disposal. Be firm, but don’t play Hercules. You want to identify dishwasher faults quickly by looking for ‘salt trails’—those white, crusty streaks left behind by dried soapy water. They are the breadcrumbs leading to your leak. Even if the area is dry now, those trails tell you where the water was yesterday.
Clear the Path for Waste Water
Most end-of-cycle floods aren’t about a broken machine but a blocked path. If the water can’t get out fast enough, it backs up and forces its way out of the weakest link—usually the air gap or the base of the machine. This is especially true in older homes where the plumbing might not be up to modern drainage standards.
Keep Your Air Gap Free of Gunk
If you see water bubbling onto your counter, you need to know how to unclog your dishwasher’s air gap in five minutes. It’s a simple plastic cylinder, but if it’s packed with old kale or grease, the pressure will blow water right out the top or back into the tub. 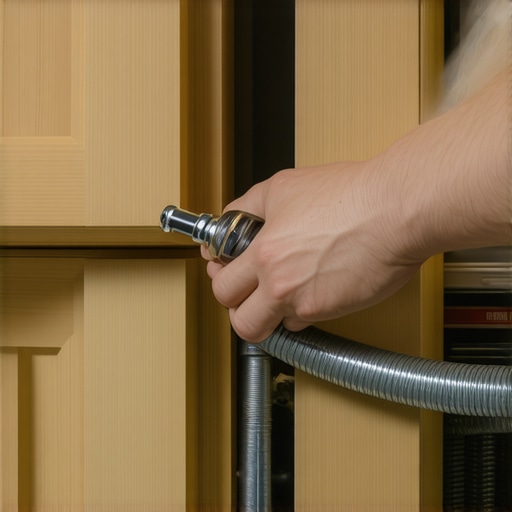
Don’t Ignore the Check Valve
Inside the drain path is a little rubber flap called a check valve. If this gets stuck or worn, water that’s supposed to be in the sewer ends up back in your machine. You should inspect your dishwasher’s check valve for clogs specifically if you notice the tub stays half-full after the ‘clean’ light comes on. This tiny flap is often the one part that stops your dishwasher from draining completely and causes that late-cycle overflow. If it’s warped or missing its ‘snap,’ it’s a cheap part to replace that saves huge headaches.
Inspect the Pump for Fatigue
If the hoses are tight and the air gap is clear, we have to look at the mechanical heart. You need to distinguish the difference between a drain pump and a circulation pump. The drain pump is smaller and only runs during those final minutes. Grab a flashlight and pull off the kickplate. Watch the pump housing as the machine drains. I once spent an hour looking at the top of the machine only to find a hairline crack in the pump’s plastic housing that only opened up when the motor got hot. The heat from the water expands the plastic, and that tiny crack becomes a geyser. If the housing looks warped or you see moisture dripping directly from the motor shaft, no amount of tape or sealant will save you; that’s when you know it’s time for a swap.
Stop replacing parts based on guesswork
Everyone tells you that if your oven isn’t heating or your dishwasher is acting up, you just need to swap the most obvious part. In my years of tinkering, I’ve found that the most common belief—that a non-functional component is a dead component—is often flat-out wrong. Many DIYers spend hundreds on new boards and elements when the issue is actually ‘phantom’ resistance or a loose terminal. Before you buy anything, you need a solid foundation in oven diagnostics for pinpointing faults before calling a repair expert. Often, the machine is just fine, but the communication between parts has broken down.
Can an oven element be failing even if it still glows red?
This is the ultimate ‘trap’ for intermediate repairers. You peak inside, see the orange glow, and assume the element is healthy. However, an element can develop internal ‘thin spots’ that allow it to glow but prevent it from reaching the necessary amperage to maintain a steady temperature. In fact, a technical bulletin from the Association of Home Appliance Manufacturers notes that heating elements can lose up to 10% of their efficiency through micro-fissures long before they actually snap. This is why testing an oven bake element for invisible cracks and checking its resistance with a multimeter is non-negotiable. If you rely on your eyes, you’re just gambling with your grocery budget. 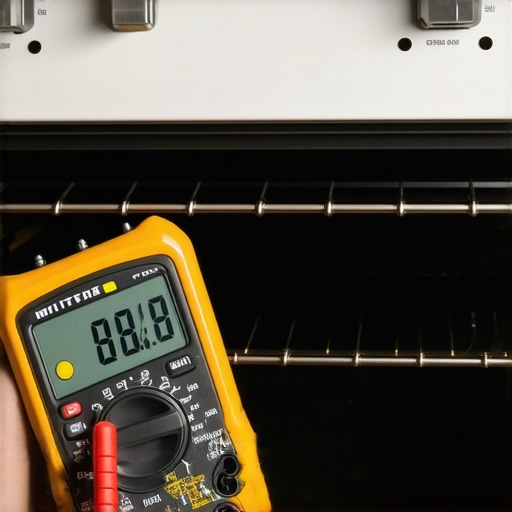
The danger of the clicking sound
We’ve all heard it—that rhythmic click-click-click when you turn on the stove or start a wash cycle. Most people assume a clicking relay means the relay is working. It’s actually the opposite. That sound is often the ‘death rattle’ of a component trying to engage but failing due to low voltage or a burnt contact point. You should know how to identify a bad oven relay on the control board by looking for ‘ghosting’—those faint, brownish heat blooms on the green circuit board. If you ignore these, you risk frying the entire logic board, which is a far more expensive mistake than just replacing a single relay.
Why your temperature sensor is lying to you
Another nuance that trips up even the pros is the temperature sensor. People think these parts either work or they don’t. In reality, they ‘drift.’ A sensor might tell the oven it’s at 350 degrees when it’s actually at 310. This leads to undercooked cakes and a lot of frustration. Instead of guessing, try testing your oven temperature sensor without calling a pro by checking its ohms at room temperature. It’s a five-minute job that prevents you from chasing ‘ghost’ problems in the heating circuit. Have you ever fallen into the trap of replacing a part only to find out the problem was a simple loose wire? Let me know in the comments—I’ve definitely been there! When you are ready to get serious, keep our dishwasher parts and diagnostics guide handy so you don’t miss the small details that matter most.
Equip your toolbox for long-term survival
When I first started, I thought a standard screwdriver set was enough. I was wrong. If you want to stop being a ‘parts swapper’ and start being a ‘fixer,’ you need a digital multimeter. I use a Fluke 115 because it doesn’t just give me numbers; it gives me confidence. For instance, when you’re testing the resistance on your ovens broil element, a cheap meter might flutter, but a quality one tells you exactly where that micro-crack is hiding. I also swear by a 1/4-inch nut driver. Why? Because 90% of appliance screws are hex-head, and using a flathead screwdriver on them is a one-way ticket to a stripped-out mess. If you’re serious about your kitchen, these oven repair essentials are non-negotiable.
How do I keep my dishwasher and oven running like new?
Consistency beats intensity every time. For your dishwasher, that means cleaning the coarse filter every month. I’ve seen machines that looked like they were dredging a swamp because the owner didn’t know a filter existed. If you don’t keep that path clear, you’ll eventually be testing the dishwasher float switch for continuity because the gunk has jammed it open. For the oven, keep a close eye on the electrical connection. Every six months, I pull my unit out to inspect your ovens power cord for heat damage. According to technical bulletins from Whirlpool Corporation, loose terminal connections are a leading cause of control board failure due to localized overheating. It takes two minutes to tighten a screw but two weeks to wait for a new board to arrive. 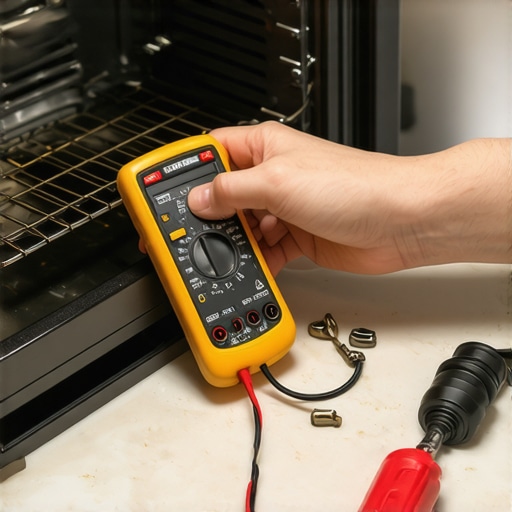
The digital shift in home diagnostics
We are entering an era where appliances will tell us exactly what’s wrong before the smoke even starts. Many newer models now include ‘optical diagnostic ports’ or QR codes that link directly to live error logs. In the next five years, I predict we’ll see ‘predictive repair’ modules where your dishwasher senses the drain pump’s amperage rising and warns you of a clog before it leaks. However, high-tech sensors often mean more complexity. That’s why knowing when to stop diying and call an oven repair expert is becoming a skill in itself. Don’t be afraid of the tech, but respect the high-voltage components. I challenge you to pull your multimeter out this weekend and check the ohms on your bake element—knowing your baseline ‘health’ now will save you a massive headache when things eventually act up. If you get stuck or see something that looks burnt, don’t hesitate to reach out through our contact page.
What My Most Expensive Mistakes Taught Me About Repairs
Over the years, I’ve realized that the most frustrating repairs aren’t the ones that take the longest; they are the ones where you fix the wrong thing. One of the biggest ‘lightbulb moments’ for me was realizing that a glowing element can still be a failure. If your oven takes forever to preheat, you should be testing your oven bake element for hidden cold spots before you blame the thermostat. Another hard lesson? Modern dishwashers are incredibly sensitive to pressure. If you’ve ever dealt with a unit and wondered why your dishwasher is overflowing onto the kitchen floor, you know it’s often a tiny blockage in the pressure switch tube rather than a massive mechanical failure. Finally, always trust the ‘salt trails’—those white crusty lines left by soapy water. They are the only honest witnesses in a kitchen flood.
The Kit That Separates the Pros from the Part-Swappers
If you want to move past guesswork, you need to invest in a few specific tools that pay for themselves in a single afternoon. First, get a high-quality digital multimeter. It’s the only way to stop ‘throwing parts’ at a problem and start actually measuring performance. I also recommend keeping a detailed set of oven repair essentials like non-magnetic nut drivers and a good headlamp. You can’t fix what you can’t see, and most appliance guts are dark and cramped. For those deeper dives, I always keep a tab open for dishwasher parts and a comprehensive guide to diagnostics because even experts need a refresher on specific error code sequences.
You Are More Capable Than the Repair Manual Admits
It’s easy to feel intimidated by the complex wiring and control boards in modern machines, but remember that most appliances are just a series of switches and hoses. When you take the time to learn how to fix a dishwasher that wont fill with water or diagnose a weak heating element, you aren’t just saving a service fee; you’re gaining total control over your home’s environment. There is a deep, quiet satisfaction in hearing your dishwasher hum through a perfect cycle or pulling a perfectly baked cake out of an oven you fixed yourself. Don’t be afraid to get your hands a little dirty—the confidence you gain is worth every drop of gray water. Have you ever found a ‘salt trail’ or a hidden crack that led you to a totally unexpected leak? Let me know in the comments below!