I’ll never forget the evening I pulled a beautiful tray of sourdough out of the oven, only to notice a tiny, jagged flake of rust had hitched a ride on the crust. It was embarrassing. I pride myself on a clean kitchen, but I’d let those oven racks get into a truly sorry state. They weren’t just discolored; they were gritty to the touch. I spent the next three hours scrubbing until my knuckles bled, using every harsh chemical under the sink, only to realize I was doing it all wrong. In fact, my first big mistake was thinking I could just sand the rust off with steel wool. All I did was strip the protective plating, ensuring the rust would come back with a vengeance the next time I cooked anything with a bit of steam.
Say Goodbye to Gritty Racks and Orange Flakes
If you’re staring at your oven racks right now and wondering if you should just throw them out and buy new ones, hold on. I’ve been there. Before you start choosing the correct replacement rack for an older oven, I want to share the method that finally worked for me after years of trial and error. We aren’t just talking about a light dusting of surface oxidation; we’re talking about that deep-seated, stubborn orange crust that seems to survive every self-clean cycle. Today, we’re going to get those racks back to their shiny, smooth glory using a few household staples and a bit of patience. You’ll save money, avoid unnecessary waste, and finally be able to bake without worrying about ‘extra seasoning’ falling onto your food.
Will This Method Actually Save My Racks?
It’s normal to be skeptical. I’ve tried the ‘miracle’ hacks you see on social media—the ones involving dryer sheets or potato skins—and most of them are total nonsense. You might be worried that once rust starts, the structural integrity of the metal is gone. While it’s true that deep pitting can be a sign of a lost cause, most of the time what you’re seeing is surface-level grime and oxidation that looks much worse than it actually is. According to metallurgical experts at organizations like the ASM International, iron oxide (rust) occupies much more volume than the original metal, which is why a little bit of rust looks like a total disaster. We’re going to strip that volume away and reveal the solid metal underneath. If you’ve ever dealt with replacing a rusted dishwasher tine, you know that keeping the original part is always the goal when possible.
The Real Reason Your Racks Are Rusting
Most people assume it’s just age, but there’s usually a specific culprit. For me, it was the humidity. I live in a place where the summers are soupy, and I realized that every time I used a water bath for a cheesecake, I was essentially steam-cleaning my racks with moisture they couldn’t escape. If you’ve noticed your oven door leaking steam, that excess moisture is the perfect breeding ground for rust. I even found that certain cleaners I used for cleaning the inner glass were actually too acidic for the rack’s finish. Have you ever noticed a sudden explosion of rust after a big holiday cooking session? Let me know in the comments, because I suspect we’re all making the same few mistakes. Before you consider calling an oven repair expert, let’s try this soak-and-seal method that’s about to change your life.
Give Your Racks a Heavy-Duty Ammonia Sauna
To get results that actually last, you need to stop scrubbing and start soaking. The secret isn’t a magic spray; it’s a focused ammonia steam bath. Grab a couple of heavy-duty contractor trash bags—the thick ones, because you don’t want a leak in your garage—and slide your racks inside. Pour in about half a cup of plain household ammonia. You don’t need to drown the racks in liquid; it’s the fumes that do the heavy lifting here. Seal the bags airtight with a zip tie or a very tight knot and leave them on a flat surface, preferably outdoors or in a well-ventilated shed, for a full 24 hours. I remember the first time I tried this in my cramped first apartment; I didn’t seal the bag properly and the whole kitchen smelled like a hair salon gone wrong for three days. But when I finally opened that bag outside, the black gunk and orange flakes literally slid off the metal like melted butter. It was disgusting, but incredibly satisfying.
Scrub Smarter and Not Harder
Once the 24-hour mark hits, carefully open the bag (stand back to avoid the initial puff of fumes) and take the racks to a utility sink or a large plastic tub. At this stage, the rust and baked-on grease have been chemically loosened. Instead of reaching for that abrasive steel wool that caused me so much grief in the past, use a non-scratch nylon scrubbing pad or even an old toothbrush for the tight corners where the bars meet the frame. If you find that the oxidation is particularly stubborn in specific spots, it might be more than just surface grime. Just as you would when removing hard water deposits from dishwasher tines, you need a gentle but persistent touch. If the metal underneath is pitted and crumbling, it’s a sign the structural integrity is compromised. In those rare cases, you’re better off replacing a damaged oven rack with the correct OEM part rather than trying to polish a ghost.
Don’t Skip the Essential Drying and Seasoning Phase
The biggest mistake people make is thinking the job is done once the racks look shiny and silver again. If you put those bare metal racks back into your oven now, they will rust again within a week. Raw steel is incredibly reactive to the moisture in your kitchen. As soon as you finish rinsing off the ammonia, dry the racks immediately with a lint-free cloth. I mean bone-dry. Then, take a paper towel dabbed in a tiny bit of high-smoke-point vegetable oil or grape seed oil and wipe down every single bar. This is ‘seasoning’ the rack, much like you would a cast-iron skillet. It creates a microscopic barrier against the steam that inevitably escapes during cooking. If you’ve been troubleshooting common issues with parts in your kitchen, you know that preventative maintenance like this saves you from a total breakdown later. This thin layer of oil won’t smoke at normal baking temperatures, but it will keep those orange flakes from making a comeback.I once thought that if I could just keep my racks shiny and my glass clear, my oven would live forever. But here’s the contrarian truth that seasoned repair pros won’t always tell you: the ‘Self-Clean’ button is often a one-way ticket to a motherboard failure. Everyone says it’s a standard feature, but in my experience, using it is the fastest way to fry your electronics. The Association of Home Appliance Manufacturers (AHAM) notes that these cycles push internal temperatures to nearly 900°F, which is far beyond what many delicate solder joints on a control board were designed to handle repeatedly. If you’ve been troubleshooting common issues with parts, you’ll likely notice that a dead display or a non-responsive keypad often follows a deep-clean cycle.
Is Your Oven Clicking for the Wrong Reasons?
This is the hidden nuance most DIYers miss. You hear a sharp click, the oven refuses to heat, and you immediately order a new bake element. But have you checked the relay? Learning how to tell if your ovens relay board is clicking for the wrong reasons is the difference between a twenty-dollar fix and a three-hundred-dollar mistake. A relay can mechanically click without actually completing the electrical circuit. Before you toss a perfectly good element, you need to dive into oven diagnostics pinpointing faults before calling a repair expert. I’ve fallen into this trap myself, spending a Saturday afternoon swapping out a gas igniter only to realize the issue was a tiny, invisible scorch mark on the control board. 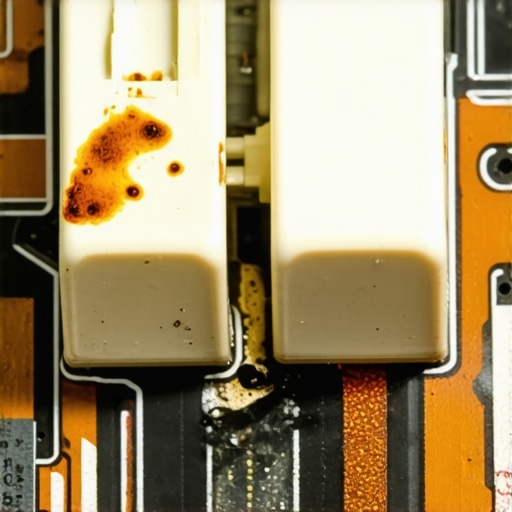
Avoid the Expensive Mistake of Blind Part Swapping
The real ‘oops’ factor in modern appliance repair is assuming that because a part looks old, it must be the culprit. While rust on a rack is obvious, knowing how to identify a bad oven relay on the control board requires a multimeter and a bit of patience. We often replace the ‘victim’ part—like a blown thermal fuse—without finding the ‘bully’—like a failing cooling fan—that caused it to blow in the first place. Have you ever replaced a part only for the same problem to come back a month later? Let me know in the comments, because that’s usually a sign you missed the root cause during your initial walkthrough. Real expertise comes from looking past the surface grime and understanding the electrical dance happening behind the stainless steel.That electrical dance becomes a lot clearer when you stop using your eyes and start using a multimeter. For years, I tried to ‘eyeball’ if a glow-bar igniter was working, but that is a fool’s errand. You need to verify the amperage. If you have ever wondered why your gas oven igniter glows but doesn’t light, it is usually because it is pulling 2.8 amps when it needs 3.2 to open the gas valve. You cannot see that difference with your eyes, but a simple meter will show you instantly. I personally use an auto-ranging model because I hate fumbling with dials when I am squeezed behind a range. This isn’t just for ovens, either; when you are identifying dishwasher faults quickly, a continuity test on the thermal fuse can save you from buying a new control board you do not actually need.
Stop Guessing and Start Measuring Every Component
When I first started diving into oven diagnostics pinpointing faults before calling a repair expert, I was intimidated by the wiring. But once you realize most of these systems are just loops of electricity, the fear vanishes. I recommend keeping a set of long-reach needle-nose pliers and a magnetic nut driver set specifically for these jobs. Why magnetic? Because dropping a screw into the bottom of a dishwasher sump is a nightmare that will add an hour to your ‘quick fix.’ Having a comprehensive guide to dishwasher parts is great, but having the physical tools to reach them is even better. I have found that testing your ovens high-limit thermostat with ease is only possible if you can actually reach the back panel without stripping the hex-head screws. #IMAGE_PLACE_HOLDER_D#
How do I keep my hard-working appliances running like new for years?
The secret to longevity isn’t a deep clean once a year; it is the small wins every month. For your oven, it is checking that the door seal is not losing heat, which stresses the heating elements. For your dishwasher, it involves clearing hard water deposits from the interior walls before they can clog the spray arms. According to the Whirlpool Technical Job Aid for Electric Ranges, even a 5% deviation in voltage can lead to premature failure of the control relay over time. By keeping the mechanical parts clean and the electrical connections tight, you are preventing that ‘creep’ of wear and tear. I predict that in the next few years, we will see more appliances with built-in ‘health monitors’ that alert your phone before a part fails, but until then, your multimeter is your best friend.
The DIY Advantage for Long-Term Kitchen Health
Learning these skills does not just save you money; it gives you a sense of mastery over your home. When you can confidently walk into a project knowing the difference between a drain pump and a circulation pump, you are no longer at the mercy of a two-week wait for a service call. My challenge to you this week: pull your oven out, safely unplug it, and inspect your ovens power cord for heat damage. It is a five-minute check that could prevent a house fire. If you find something crispy or discolored, you have just saved yourself from a major disaster.
The Hardest Lesson I Learned About DIY Diagnostics
I spent years thinking that if a wire looked connected, the circuit was solid. I was wrong. The most expensive mistakes I ever made happened because I assumed ‘visual’ was enough. When you are troubleshooting common issues with parts, remember that electricity doesn’t care how clean the connection looks; it only cares about the resistance. I also learned that patience is a literal tool. Rushing a diagnosis leads to buying parts you don’t need, whereas spending twenty minutes with a multimeter saves hundreds. Finally, never underestimate the power of a deep clean; half the ‘electrical’ failures I’ve seen were actually just grease-clogged sensors or sticky buttons.
Tools I Use to Keep Everything Running Smoothly
If you are serious about maintaining your home, you need a small, dedicated ‘kitchen kit.’ First, an auto-ranging multimeter is non-negotiable for identifying dishwasher faults quickly without the guesswork. Second, I swear by a set of magnetic nut drivers; they prevent that sinking feeling of a screw disappearing into the machine’s abyss. Third, I always keep a digital copy of a comprehensive guide to dishwasher parts on my phone for quick reference when I am mid-repair. These three items have saved me more times than I can count.
Take Control of Your Kitchen Again
You don’t need a master’s degree in engineering to keep your appliances humming. All it takes is a willingness to look under the hood and the confidence to try. Once you successfully recalibrate your oven for accurate temperatures or stop a leak on your own, you will never look at a repair bill the same way again. Effective oven repair does not have to be a mystery. It is just a series of small, logical steps that lead to a better-working home. #IMAGE_PLACEHOLDER_E# Have you ever successfully repaired an appliance only to find a ‘leftover’ screw when you were finished? Let me know in the comments below!