I still remember the smell of burnt sugar and the sound of a heavy ceramic dish sliding off a rusted wire. It was three years ago, right in the middle of a Sunday roast. I’d noticed the original rack in my 1994 GE was looking a bit skeletal. One of the tines had snapped off months ago, but I figured it was fine. Then, mid-baste, the whole thing sagged. Gravy everywhere. It was a mess that could have been avoided if I hadn’t been terrified of the replacement parts market. I was worried I’d buy the wrong size and be stuck with a useless piece of metal. But after a lot of trial and error, I realized that keeping these older workhorses going is actually simpler than the manufacturers want you to think.
The Frustrating Search for Discontinued Oven Parts
Most people assume that when an oven turns twenty, it’s destined for the scrap heap. I completely disagree. Those old machines are built like tanks, but finding a replacement rack feels like trying to find a needle in a haystack—if the haystack was also out of production. You can’t just walk into a big-box store and grab a rack off the shelf today. When I first started fixing up my kitchen appliances, I made a classic rookie mistake. I didn’t bother finding the right part number first. I just eyeballed it. I ended up buying a ‘universal’ rack that was exactly a quarter-inch too wide. I tried to force it, and all I got for my trouble was a long, ugly scratch in my oven’s porcelain lining. According to data from the National Association of Home Builders, the average life expectancy of a range is about 13-15 years, but with the right maintenance, they can easily double that. I’m here to make sure you don’t waste money on parts that don’t fit while you’re trying to keep your vintage beauty alive.
Does a Universal Rack Actually Exist?
This is the biggest question I get from neighbors. We all want a quick fix. But honestly? ‘Universal’ is usually a lie. Most of those sliding adjustable racks are flimsy and can’t hold the weight of a 20-pound turkey without bowing. Today, I’m going to walk you through how to pinpoint your specific model, even if the sticker has faded to nothing, and how to find replacement hardware that actually fits. We’ll also look at how oven diagnostics can help you decide if the rack is the only thing that needs attention.
Stop Playing the Guessing Game with Your Kitchen
You shouldn’t have to cross your fingers every time you slide a tray of cookies into the heat. We are going to solve the ‘will it fit’ anxiety once and for all. Have you ever ordered a part online only to realize it was for the 30-inch model when you have the 27-inch wall oven? Tell me your most annoying ‘wrong part’ story—I promise I’ve probably done worse. Before you go out and spend forty bucks on a piece of chrome-plated wire, you need to understand that manufacturers changed their rail designs almost every five years. It’s not just about width; it’s about the depth and how the ‘stops’ at the back of the rack engage with your oven walls. If you’ve already noticed other issues, like oven interior peeling or a door that won’t stay shut, you might want to check out my guide on fixing oven door hinges while you’re at it.
Hunt Down the Model Number Before You Click Buy
The secret to successful DIY repair isn’t having the best tools; it’s having the right information. Before you even look at a catalog, you need that model number. Manufacturers like GE, Whirlpool, and Frigidaire often used the same chassis for different models, but the internal rail spacing could change between the ‘Standard’ and ‘Deluxe’ versions. I remember spending forty minutes on my hands and knees with a flashlight, only to realize the model number on my old GE was hidden behind the kickplate. I had scrubbed the door frame raw thinking the sticker was just covered in grease, but it was never there to begin with. Identifying your machine is the first step in oven repair essentials. Once you have that string of letters and numbers, you can often find a direct cross-reference for parts that have been discontinued for a decade.
Where to Look When the Sticker is Missing
If the sticker is gone, check the ceiling of the oven cavity or the underside of the main cooktop (for ranges). If you still can’t find it, you’ll need to resort to visual identification and physical dimensions, which is like trying to solve a puzzle without the box art. This is why finding the right oven heating element without the manual is a skill every old-appliance owner should master.
Measure the Oven Walls Not the Old Rack
The biggest mistake I see is people measuring the rack they are trying to replace. If that rack is old, it might be warped, or it might not even be the original rack. Instead, take your tape measure and measure the distance between the side walls where the rails are stamped into the porcelain. You need the exact width from the flat surface of one side to the other. 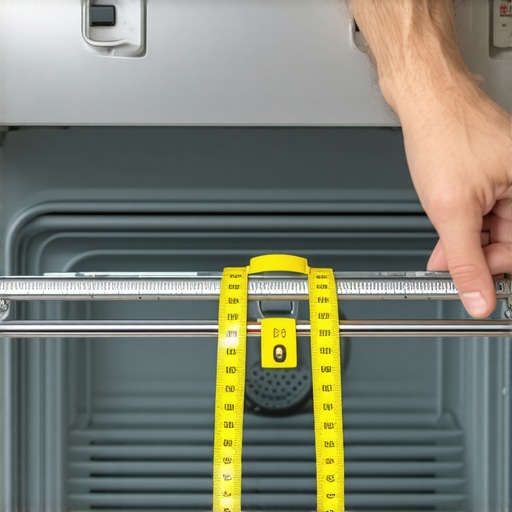
Avoid the Universal Trap
Those ‘adjustable’ racks you see at the hardware store are the duct tape of the appliance world—they work in an emergency, but they aren’t a permanent solution. They rely on tension or flimsy screws to stay at the right width. When I tried one in my 1994 GE, it collapsed under a Dutch oven. It’s better to spend time searching for an OEM-spec wire rack that matches your rail depth. While you have the racks out, it is the perfect time for how to check your ovens bake element for tiny blisters or other signs of failure. Often, a rack that doesn’t slide right is a sign of a larger alignment issue or even a warping interior due to overheating. If you suspect the heat is off, you should consider testing your oven temperature sensor without calling a pro to ensure you aren’t literally melting your hardware. Dealing with oven diagnostics early saves you from buying a new rack for an oven that is about to die anyway.
I’ve seen it a thousand times: a frustrated homeowner buys a brand-new heating element because their oven is cold, only to find the new part doesn’t fix a thing. We’ve been conditioned to think that if a component doesn’t work, the component itself must be broken. But here is a contrarian take that most big-box repair manuals won’t tell you: the part is often the victim, not the culprit. In my years of tinkering, I’ve found that high-heat cycles and vibrating dishwasher motors often mask deeper electrical issues that a simple ‘swap and pray’ approach won’t solve.
Stop Assuming the Element is Dead
Everyone tells you that if the oven won’t heat, you should check for continuity. While that is a great start, especially when testing an oven bake element for invisible cracks, it isn’t the whole story. The Association of Home Appliance Manufacturers (AHAM) has previously noted that a significant percentage of parts returned as ‘defective’ by DIYers are actually functional. The real issue is often a scorched terminal or a failing relay on the control board. If you don’t know how to identify a bad oven relay on the control board, you are just throwing money at a ghost. I once spent sixty dollars on a ‘discontinued’ igniter for a gas range only to realize a loose wire nut was the real villain. It’s an embarrassing lesson, but it’s one that taught me the value of oven diagnostics that go beyond the surface level.
Can a Faulty Sensor Mimic a Blown Thermal Fuse?
This is where things get tricky for the advanced DIYer. You might think your thermal fuse is gone because the oven won’t start, but a wildly inaccurate temperature sensor can sometimes cause the control board to lock out the system as a safety precaution. Before you start tearing out wires, you should be testing your ovens high-limit thermostat with ease to rule out a simple trip. This applies to your cleaning appliances too; if you are diving into dishwasher parts a comprehensive guide to diy diagnostics, remember that a ‘dead’ machine might just be a stuck float switch. I always recommend using a few 5 multimeter tricks for diagnosing a dead control board before you click ‘checkout’ on an expensive replacement.
The Hidden Trap of Ghost Resistance
Here is the ‘oops’ factor that bites even seasoned pros: testing for continuity when there is still ‘ghost’ resistance. A part might show continuity on a cheap meter, but it can fail under a real electrical load. This is incredibly common with dishwasher pumps and oven igniters. You think you’ve cleared the hurdle, but the moment the machine demands real power, the connection fails. If you’re already under the sink, take the extra five minutes to learn how to clean the hidden debris under your dishwasher filter. Sometimes, what looks like a mechanical failure is just a physical blockage putting too much strain on the motor. Have you ever fallen into this trap and replaced a perfectly good part? Let me know in the comments—I’d love to hear your ‘parts-cannon’ stories so we can all learn from the frustration.
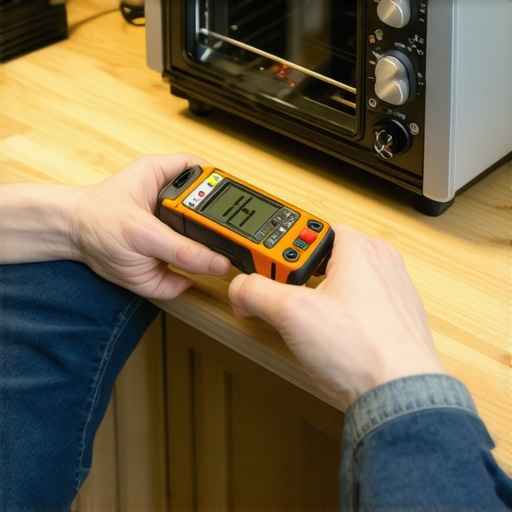
To stop being a ‘parts-swapper’ and start being a true ‘fixer,’ you need to invest in a reliable multimeter. I personally swear by a True-RMS digital meter because the cheap analog ones can give you false positives when checking a noisy power supply on a modern control board. You might miss the subtle voltage drop that tells you it is time for how to inspect your oven control board for burn marks. Beyond the tools, long-term results come from being surgical with your repairs. Instead of replacing an entire dishwasher rack for a few bucks, you can save a fortune by replacing a rusted dishwasher tine without buying a new rack. This level of precision is what separates a DIYer who gets lucky from one who builds a household that lasts for decades.
How do I keep my old appliances alive for another ten years?
It starts with moving beyond basic cleaning and diving into dishwasher parts a comprehensive guide to diy diagnostics. You have to stop treating the machine as a ‘black box’ and start performing preemptive checks. Every six months, I pull my dishwasher out just an inch or two to check the water inlet valve for signs of slow seepage. While I am there, I am always testing the dishwasher float switch for continuity even if the machine is draining perfectly. Prevention is always cheaper than a kitchen flood. According to the Whirlpool Job Aid for Gas and Electric Ranges, even a slightly loose neutral wire can cause a control board to behave erratically without throwing a specific error code. This is why your oven repair essentials troubleshooting common issues with parts checklist must include a physical inspection of every terminal connection. If a wire nut feels crunchy or discolored, replace it immediately before it cascades into a board failure.
The Future is Proprietary but Physics Wins Every Time
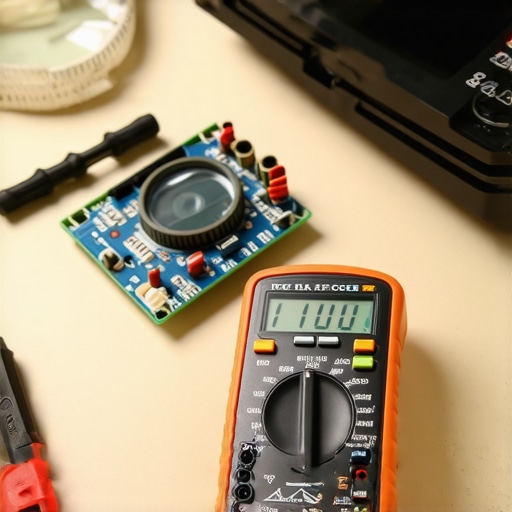
I predict that as appliance manufacturers push more ‘smart’ features and proprietary software locks, the barrier to entry for DIY repair will get higher. We are already seeing boards that require specific manufacturer ‘handshakes’ to activate. However, the mechanical fundamentals—heat, water, and motion—will never change. A heating element is still just a resistor, and a pump is still just a motor. Even if the future is full of touchscreens, knowing how to use a multimeter will remain your superpower. Try this advanced tip today: Pull your oven’s control board and inspect the solder joints on the back with a magnifying glass. If you see ‘cold’ joints or slight browning, you’ve just found your next weekend project before the machine dies mid-bake. Stay proactive, keep your terminals tight, and never let a machine tell you it’s ‘unrepairable’ just because the sticker says it’s twenty years old.
The Hardest Lessons I Learned Managing My Own Kitchen
Over the years, I’ve realized that the biggest obstacle to a successful repair isn’t the machine itself, but our own assumptions. Here are a few lightbulb moments that changed how I approach my appliances:
- Never trust a visual pass. I used to think if a wire looked clean, it was good. Now I know that corrosion often hides inside the insulation or at the terminal crimp. Always use a meter for how to test an oven broil element using a simple ohmmeter before assuming it is dead.
- Keep a technical diary. I keep a small notebook in my junk drawer with every appliance model and serial number. It saves me an hour of digging behind the kickplate every time I need a part.
- Heat is a liar. An oven might work fine at 350 degrees but fail at 450. If you are diagnosing an f3 error code on your digital oven display, it is often a sign of thermal expansion affecting a loose connection rather than a failed sensor.
My Go-To Toolkit for Domestic Engineering
If you want to move beyond guessing, you need the right gear. I always keep a True-RMS digital multimeter in my bag; it is the only way to get an accurate reading on modern control boards. I also rely heavily on OEM parts databases rather than generic search engines to learn how to identify dishwasher faults quickly without buying the wrong motor. Finally, never underestimate a high-quality headlamp—you cannot fix what you cannot see hidden behind the dark corners of an oven cavity.
#IMAGE_PLACEHOLDER_E#
Your Kitchen Deserves Another Decade
Don’t let a snapped rack or a flickering light convince you that it is time for a multi-thousand-dollar replacement. Most of the time, your appliance just needs a little bit of your time and a few precise measurements. By mastering oven repair essentials, you are not just saving money; you are keeping high-quality machinery out of the landfill. Sometimes, however, you have to know when to skip the diy and call a professional oven technician, and that wisdom only comes from getting your hands dirty first. Go grab your tape measure and give that old oven the respect it has earned. Have you ever spent hours looking for a part only to find it was hidden in plain sight? Let me know your best ‘found it’ story in the comments!