I stood there, looking at my oven door, holding a handle that had finally given up the ghost. It was dangling by a single, loose screw, looking exactly like my motivation after a long Tuesday. I thought, ‘This is a five-minute fix, easy.’ Well, fast forward twenty minutes, and I was staring at a screw head so mangled and stripped it looked like a tiny, silver crater. I’d used the wrong bit, applied too much force, and now I couldn’t get the old handle off or the new one on. It’s a classic DIY trap that turns a simple upgrade into a full-blown kitchen crisis. But I learned my lesson the hard way so you don’t have to. Today, we are going to get that shiny new handle on your appliance without a single metal shaving in sight.
Keep the Screwdriver from Ruining Your Saturday
I remember my first ‘big’ repair. I was trying to tackle some oven repair essentials and thought any old screwdriver from the junk drawer would do. I didn’t realize that oven manufacturers often use specific screw types that feel deceptively soft until they suddenly round out. If you’ve been wondering why your oven door handle is wobbly, you’re likely already dealing with a screw that’s halfway to being ruined. The secret to success isn’t just in the turning; it’s in the prep and the pressure. Most people just grab a Phillips head and start cranking, which is exactly how I ended up needing professional diagnostics just to figure out how to remove a screw I’d basically welded into place with my own mistakes. Before you dive in, make sure you aren’t dealing with a deeper issue, like identifying a failed door hinge that might be putting extra stress on that handle every time you open it.
Won’t the screws just strip anyway?
It’s a fair concern. These fasteners are often subjected to intense heat cycles, which can cause the metal to expand, contract, and eventually seize up. However, the real culprit is usually a phenomenon called ‘cam-out.’ This happens when the screwdriver slips out of the screw head because you aren’t using enough downward force or the bit is slightly the wrong size. According to the mechanical standards at The Engineering ToolBox, the mechanical advantage of a properly fitted fastener can reduce the required torque by up to 30%, drastically lowering the risk of surface damage. Have you ever started a simple fix only to end up with a pile of metal shavings and a headache? Tell me your most frustrating ‘simple’ repair story in the comments! We’re going to ensure your handle replacement is smooth, sturdy, and—most importantly—stress-free.The first rule of appliance repair is that if it feels like you’re forcing it, you probably are. Think of the screw head like a delicate gear; once you round those edges, there’s nothing for the bit to grab onto. I learned this the hard way while replacing the dishwasher soap dispenser assembly on my old unit—I rushed, slipped, and turned a five-minute job into a weekend-long hunt for a screw extractor. I once faced a stubborn screw on a door that was actually warped. I didn’t notice that why your oven door pops open while baking was a related symptom of the same hinge stress. I kept tightening the handle until the glass literally groaned. That’s the moment I realized repair is about the whole system, not just the part you’re holding.
Win the War Against Stripped Fasteners
When you realize the screwdriver is just spinning and making that awful grinding sound, stop immediately. Your best friend here is friction. Take a wide, flat rubber band and place it over the mangled screw head. Push your screwdriver firmly into the rubber band and then into the screw. The rubber fills the gaps where the metal has been gouged out, providing the grip you need to back it out. If that fails, it’s time for a manual impact driver. You hit it with a hammer, and the force translates into a tiny, high-torque turn that breaks the seized threads loose without further rounding the head. #IMAGE_PLACE_HOLDER_B#
Check the Rest of the Door While It’s Open
Since you already have the tools out and the handle off, take a moment to look at the overall health of the door. If your handle was vibrating loose, it might be due to a larger mechanical failure. Check if you are identifying a failed door hinge on a wall oven, as a stiff hinge forces you to pull harder on the handle than necessary. You might also want to how to lubricate sticky oven door hinges safely while the access is easy. It’s also the perfect time for testing your oven door seal with the dollar bill trick. If the seal is loose, the heat escaping can actually weaken the plastic spacers behind your handle, leading to that dreaded wobble.
Installing the New Handle the Right Way
When you finally go to put the new handle on, don’t just crank it down until your knuckles turn white. Over-tightening is why these things snap or strip in the first place. Hand-thread the screws first to ensure they aren’t cross-threading. Once they are snug, give them just a quarter-turn more. If you’re worried about them coming loose again, a tiny drop of blue thread-locker (the removable kind) will keep them in place despite the constant heat cycles. This isn’t just for ovens; the same logic applies when you’re fixing a dishwasher door that feels too light or heavy—finesse always beats brute force.Everyone tells you to buy the most expensive OEM part to guarantee a fix, but here is a contrarian truth: a brand-new part won’t save a machine that is being killed by its environment. I have seen homeowners spend hundreds on a dishwasher parts guide to find the right components, only to have them fail again in a month because they didn’t address the hard water or the vibration issues. The ‘Oops’ factor often comes from treating the symptom rather than the disease. For instance, if your oven handle keeps coming loose, it is rarely just a bad screw or a poor grip. It is usually heat escaping through a degraded seal, which softens the mounting points and warps the plastic spacers.
Stop Replacing Parts Without a Plan
Most DIYers fall into the trap of ‘parts cannon’ repair—throwing new components at the machine until it starts working again. This is especially dangerous when you are performing professional diagnostics on your own. You might think the heating element is dead, but have you checked the terminal block for charring? According to the Association of Home Appliance Manufacturers (AHAM), over 25% of appliance ‘failures’ reported by consumers are actually due to installation errors or external factors like improper voltage, rather than a defective part. If you are testing your oven temperature sensor without calling a pro, you need to understand that resistance values are highly sensitive to the temperature of the room, not just the oven itself. A reading that looks ‘bad’ might just be a sensor reacting to a drafty kitchen. #IMAGE_PLACE_HOLDER_C#
Is your control board actually the culprit?
This is the advanced question every serious DIYer eventually faces. We often blame the expensive ‘brain’ of the appliance when a simple mechanical failure is occurring. I once spent two hours convinced I needed a new mainboard because of a clicking sound, only to realize I should have been identifying a bad oven relay on the control board instead. It’s a much cheaper and more precise fix. Similarly, in the kitchen cleanup department, the real reason your dishwasher soap door won’t open is rarely a motor failure; it’s usually a build-up of detergent film that creates a vacuum seal. Have you ever fallen into this trap of over-diagnosing a simple mechanical block? Let me know in the comments!
Master the Nuance of Appliance Stress
When you are deep into identifying dishwasher faults quickly, remember that metal and plastic fatigue are cumulative. If you’ve had to tighten that oven handle three times this year, the threads in the door frame are likely stretched beyond their original tolerance. At that point, no amount of tightening will work. You might need to move to a slightly larger gauge screw or use a heat-resistant epoxy to rebuild the mounting site. These are the nuances that separate a ‘band-aid’ fix from a permanent solution. Don’t just look at the part that’s broken—look at what’s touching it, what’s heating it, and what’s vibrating it. That is how you win the war against planned obsolescence.If you want to move past the ‘guessing’ phase and into the ‘knowing’ phase of DIY, you need a toolkit that matches your ambition. I am not talking about a generic 100-piece socket set from a big-box store; I am talking about a reliable digital multimeter. I personally use a Fluke 115 because its True-RMS feature provides accuracy even on noisy circuits, which is vital when oven diagnostics become complex. Without a way to measure resistance, you are essentially flying blind. For instance, how to test an oven broil element using a simple ohmmeter is a fundamental skill that separates the pros from the parts-swappers. If you do not see a reading between 15 and 40 ohms, you have found your culprit without spending a dime on unnecessary parts. 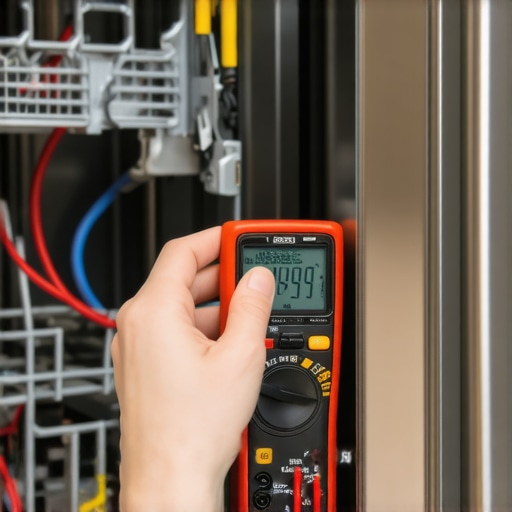
How do I maintain my appliances over the long haul?
The secret is not a magic chemical; it is consistency and a focus on fluid dynamics. Your dishwasher is essentially a specialized pressure washer, and it needs clear pathways to function. I make it a habit to check the drainage path every six months without fail. Learning how to clean the hidden debris under your dishwasher filter will prevent grit from acting like sandpaper on your internal seals. Similarly, if you live in an area with ‘liquid rock’ coming out of your taps, clearing hard water deposits from dishwasher interior walls is mandatory, not optional. If those minerals build up, they can eventually cause a total failure of the circulation pump impeller, leading to a much more expensive repair than a simple descaling would have cost.
Don’t Ignore the Small Warning Signs
We often wait for a total breakdown before we act, but appliances usually whisper before they scream. A slight change in the sound of the wash cycle or a dishwasher interior that looks pitted or corroded are early warning signs of chemical imbalances or stray electrical current. I suspect the future of home repair will lean heavily into predictive maintenance, where your phone alerts you to a failing heating element before it actually dies. According to Whirlpool Technical Service Manual (Job Aid W10131216), most modern control boards are designed to log ‘ghost’ errors that do not always trigger a visible light but indicate a component is drifting out of spec. Scaling your repair skills means moving from fixing one-off problems to understanding the architecture of your entire kitchen. When you learn to diagnose one heating circuit, you have essentially learned them all. My best advice for any serious DIYer? Buy a multimeter and use it to check the continuity of your thermal fuse right now—it is the fastest way to confirm if a component is truly dead or just protecting itself from a surge.
Repairing your own appliances is about more than just saving a few dollars; it is about reclaiming control over the machines that keep your household running. When you finally get that handle tightened or that element replaced, there is a specific kind of satisfaction that no service call can replicate.
The Hard-Won Lessons of a Kitchen Fixer
- The ‘Just One More Turn’ Trap: I have learned that the most dangerous moment in any repair is when you think you are finished. That final, unnecessary tug on a screw is usually what strips the threads. Trust your hand-tightening and a small quarter-turn; anything more is asking for trouble.
- Clean as You Go: Never put a component back together without cleaning the mounting surface. Whether you are dealing with oven repair essentials or a simple handle swap, removing old grease and grit prevents the ‘creeping looseness’ that leads to future failures.
- Heat Changes Everything: Metal in an oven is not static. It grows and shrinks. If you don’t account for this thermal expansion, your repairs will fail within a month. This is why using the right dishwasher parts guide or oven specs is non-negotiable.
- Documentation is Your Best Friend: Take photos of every wire and screw before you move them. I used to think I had a great memory until I was staring at three identical green wires and a blank expression.
Tools I Won’t Step Into a Kitchen Without
If you want to move from an amateur to a confident DIYer, you need to stop guessing. I always keep a Digital Multimeter in my kit; it is the only way to truly know if a component is dead or if you are just chasing ghosts. For those stubborn, seized screws we talked about, a Manual Impact Driver is a lifesaver—it uses a hammer strike to break the rust without ruining the screw head. I also highly recommend keeping Blue Thread-locker on hand for any part subject to vibration. Finally, for deeper technical knowledge, I frequently consult the Association of Home Appliance Manufacturers (AHAM) technical briefs to understand the ‘why’ behind the engineering. These resources are better than any generic YouTube video when you are identifying dishwasher faults quickly.
#IMAGE_PLACEHOLDER_E#
Your Path to Appliance Mastery Starts Here
You now have the framework to handle everything from a wobbly handle to complex oven repair diagnostics. Remember that every expert was once a beginner with a stripped screw and a lot of frustration. The difference between a broken machine and a fixed one is often just the patience to look closer and the willingness to learn the system. While there is a time when to stop diying and call an oven repair expert, most of the daily annoyances in your kitchen are well within your power to fix. You’ve got the tools, the logic, and the plan—now go get that kitchen back in order. Have you ever successfully fixed a part that a professional told you was ‘unrepairable’? I’d love to hear your victory stories in the comments below!