I’ll never forget the smell of my first ‘fried’ oven. It wasn’t the roast chicken I’d just slid onto the center rack; it was a sharp, acrid, chemical stink that seemed to seep out from the walls. One second the display was bright, the next, everything went dark. My heart sank because I immediately thought the expensive control board had fried. I almost called a pro right then and there, but I’ve learned the hard way that jumping to the most expensive conclusion is a classic rookie mistake. In my early days, I once replaced a perfectly good heating element because I didn’t bother to check the source of the power first. Today, I’m going to show you how to avoid that same frustration by checking for a burnt terminal block—a small, cheap part that often acts as the ‘silent killer’ of electric ovens.
Your Kitchen Suddenly Smells Like Melting Plastic
When an oven stops working, most people start poking around the bake element or swearing at the digital display. But here is the thing: your oven pulls a massive amount of current, and all that juice has to pass through a plastic block at the very back of the machine. Over time, those connections can loosen. When they get loose, they get hot. I’m talking ‘melt-the-insulation-off-the-wire’ hot. It’s a common issue, and honestly, it’s one of those oven repair essentials that every homeowner should know before they shell out hundreds for a service call. If you’ve already started pinpointing faults in your appliance, the terminal block is usually hiding right behind that small metal cover where the power cord enters the unit.
Is This DIY Fix Way Out of Your League?
I get it. Playing with high-voltage appliance wiring feels a bit like defusing a bomb in a movie. You might be worried that touching anything back there will lead to a permanent disaster. But here is the reality: if you can turn off a circuit breaker and use a screwdriver, you can do this. The goal today is to teach you how to inspect your oven’s power cord and the block it connects to without breaking a sweat. According to data from the National Fire Protection Association (NFPA), electrical malfunctions are a leading cause of home fires, often stemming from poor connections like these. By catching a scorched block early, you aren’t just saving your dinner; you’re protecting your home. Have you ever noticed a weird buzzing sound or a flickering light on your stove and just hoped it would go away on its own?
Kill the Power Before You Touch a Tool
Before you even think about sliding that range out, you need to ensure it is stone-cold dead electrically. I once had a scare where I flipped the breaker, but the handle didn’t quite catch in the panel. I reached back there, and the hair on my arms stood up before I even touched a wire because I could feel the hum of the current. Use a non-contact voltage tester or simply verify the clock display is completely dark. Once you are safe, pull the unit forward just enough to get behind it. You are looking for a small metal plate, usually held by two or three hex-head screws, right where the heavy power cord enters the chassis. If you find yourself struggling to reach or the space is too cramped, it might be time to call an oven repair expert, but most of the time, there is plenty of slack in the cord.
How to Find the Hidden Access Panel
Removing this panel is like opening the hood of a car. Underneath, you will see three thick wires attached to a ceramic or plastic block. This is the heart of your oven’s power distribution. While you are back there, it is a good idea to inspect your oven control board for burn marks as well, as heat from a bad connection can travel up the wiring harness and fry sensitive electronics. If the terminal block looks clean and solid, your problem might be deeper in the circuitry. But if you see black soot, melted plastic, or wires that look like they’ve been singed, you’ve found your culprit.
The Telltale Signs of a Melted Block
A few years ago, I was working on a friend’s range that would only heat up to 200 degrees. I spent an hour testing the oven broil element with an ohmmeter before I finally checked the back. The middle terminal was so badly charred that the wire was barely touching the metal. The heat from that bad connection was actually the reason why the oven control knobs were getting too hot to touch—the thermal energy was conducting through the chassis. 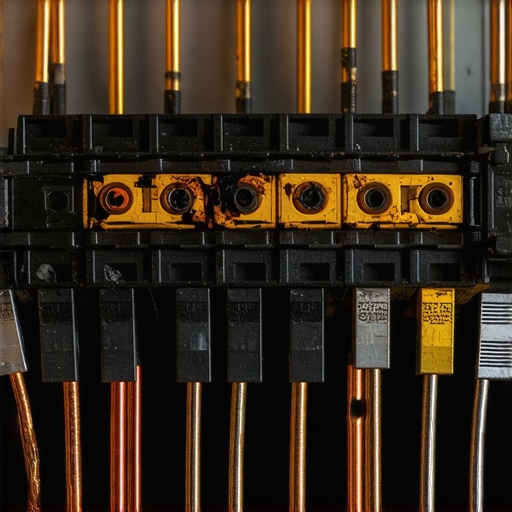 If you see any signs of ‘pitting’ (tiny holes in the metal) or if the plastic has turned into a brittle, brown mess, do not try to just tighten the nut. That metal has lost its integrity and will just keep overheating until it fails again.
Strip the Wires and Start Fresh
If the block is toasted, the ends of your power cord wires probably are too. You cannot just put a burnt wire onto a new block and expect it to work. Use a pair of heavy-duty wire strippers to cut back the insulation until you see shiny, bright copper. If the copper looks dull or purple, the heat has compromised the metal and it won’t conduct properly. Keep cutting back until you find ‘healthy’ wire. When you install the new terminal block, every connection must be incredibly tight. A loose nut is exactly what started the fire-show in the first place. Think of it like a garden hose; if the connection is loose, water sprays everywhere. In electricity, that ‘spray’ is heat and dangerous sparks.
Why Your Multimeter Might Be Lying to You
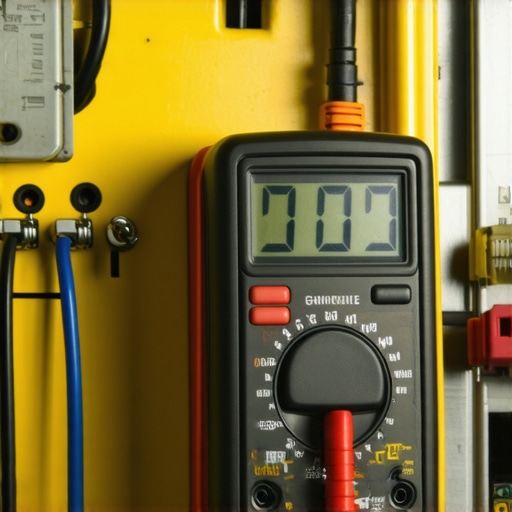
Most DIYers think that if their multimeter beeps during a continuity test, the part is definitively good. I used to think the same until a range nearly drove me mad. The truth is, continuity only tells you if there is a physical path; it does not tell you if that path can handle 40 amps of current. In my experience, a weak connection—like one at a slightly pitted terminal block—will pass a low-voltage battery test from your meter but fail miserably the second the oven calls for real power. This is often called ghost voltage. A high-impedance digital multimeter draws so little current that it can show 240V even if the connection is barely holding on. But as soon as you turn the dial to bake, that connection acts like a bottleneck, the voltage collapses, and the element stays cold. This is where most oven repair essentials guides fall short. You need to look for voltage drop under load, not just a simple beep. According to the Copper Development Association, even a tiny increase in resistance at a connection can cause temperatures to spike high enough to melt copper, which explains why your wires look like they spent a week in a campfire.
Can You Trust a Relay Just Because You Hear It Click?
This is the ultimate expert trap. You turn on the bake cycle, hear a satisfying click from the back, and assume the control board is doing its job. However, learning how to tell if your ovens relay board is clicking for the wrong reasons is a game changer. Sometimes the internal silver contacts inside the relay are so scorched by carbon buildup that while they physically move and make the noise, they aren’t actually passing electricity through to the element. If you have already tried testing your oven temperature sensor without calling a pro and everything seems fine, the relay might be lying to you. It is one of those pinpointing faults nuances that separates a parts-changer from a real technician. If you see signs of heat near the board, you should inspect your oven control board for burn marks immediately before the damage spreads to the logic chips.
The High-Heat Mistake Most People Make with Tape
Here is a massive oops factor: using standard plastic electrical tape inside an oven chassis. I have seen homeowners try to fix a nicked wire with the same black tape they use for a household extension cord. Standard tape is typically rated for only 176°F (80°C). Your oven cavity gets to 500°F, and even the space behind the back panel can easily exceed 200°F during a self-clean cycle. That tape will melt, smoke, and potentially cause a short that fries your expensive electronics. Always use high-temp fiberglass tape or ceramic wire nuts if you must make a repair. Have you ever fallen into this trap of using the wrong materials for a quick fix? Let me know in the comments. When you are deep into how to identify a bad oven relay on the control board, remember that every material you use must be rated for the environment. Don’t let a $5 mistake turn into a $500 disaster by ignoring the heat ratings of your repair parts.
If you are serious about never smelling that acrid plastic scent again, you need to stop using the cheap $10 multimeter you bought at the grocery store. I personally swear by my Fluke 117. The reason is simple: it has a feature called LoZ (Low Impedance) which prevents those ‘ghost voltages’ I mentioned earlier. When you are looking for oven repair essentials, a tool that does not lie to you is the most valuable thing in your bag. I also keep a set of Klein Tools heavy-duty wire strippers because they do not chew up the copper strands when you are prepping a connection for a new terminal block. Using the right tools is the difference between a fix that lasts ten years and one that fails before the next Thanksgiving turkey is done.
How do I maintain my oven’s electrical health over the years?
Maintenance is not just about cleaning up spills; it is about periodic inspections. Every couple of years, especially if you move the unit frequently for cleaning, you should take five minutes to inspect your oven’s power cord. Look for any signs of kinking or fraying. If you have a dishwasher nearby, it is worth the time to look over your dishwasher parts too, as vibrations from a heavy cycle can sometimes loosen nearby electrical junctions. According to the National Electrical Code (NEC) Section 422.16, the integrity of these flexible cord connections is vital for safety, particularly in high-draw kitchen appliances. 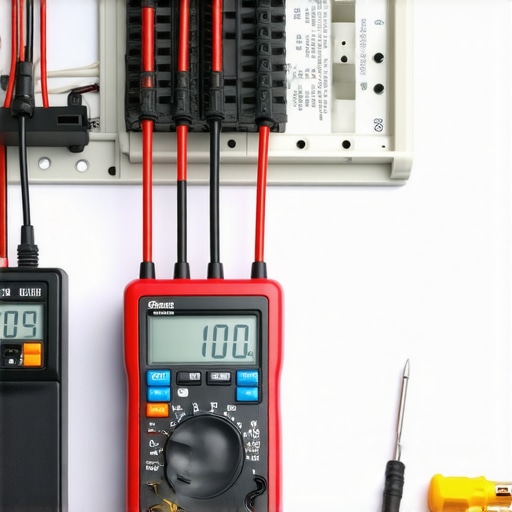 I also suggest you check your oven’s bake element for tiny blisters. These are early warning signs of internal wire failure that can lead to a surge back toward that terminal block we just discussed.
The Future of Finding Faults from Your Phone
The trend in appliance repair is moving toward integrated diagnostics. Soon, we won’t just be pinpointing faults with a handheld meter; our ovens will send a push notification to our phones saying, ‘Terminal Block Resistance High: Replace Part.’ Until that day comes, your best defense is a proactive eye and a tight wrench. If you’ve noticed any of the issues I’ve described, I want you to go grab your screwdriver tonight, pull that back panel off, and just look. Catching a loose nut now is a whole lot easier than replacing a fried control board later.
The One Tiny Error That Still Gets Me After Ten Years
Even after hundreds of repairs, I’ve realized that the ‘Tug Test’ is the most underrated step in the process. Once you’ve tightened those nuts on the terminal block, give each wire a firm, short pull. If there is even a millimeter of play, you’re looking at future arcing. I’ve seen people ignore a slightly loose ground wire because they think it doesn’t carry current, but that is a dangerous gamble. #IMAGE_PLACEHOLDER_E# When you are pinpointing faults before calling a repair expert, the goal is total mechanical security. I’ve also learned that if the plastic housing around the block is even slightly discolored, it’s already compromised. Don’t try to save five dollars by ‘cleaning’ a burnt part; just replace it. It’s one of those oven repair essentials that protects your family from a late-night electrical fire.
My Go-To Toolkit for Taming Appliance Gremlins
If you want to move beyond basic guessing, you need tools that offer more than just a continuity beep. I always keep a bottle of ‘Ox-Gard’ or a similar anti-oxidation compound in my bag to coat those copper-to-brass connections—it’s a trick used by electricians to prevent the very corrosion we’ve been talking about. For those deeper dives, I recommend keeping a copy of the Completely Revised Home Electrician’s Bible on your shelf; it’s helped me clarify complex wiring diagrams more than once. If you find yourself frequently working on kitchen units, understanding dishwasher parts and how they share circuit logic can also be incredibly helpful. Finally, always have a pack of ceramic wire nuts on hand; they are heat-rated far beyond the standard plastic ones you’ll find in a junk drawer.
You’re Just One Screwdriver Turn Away from Success
Taking the back off your oven for the first time is a rite of passage for any DIYer. It transforms the appliance from a mysterious black box into a machine you actually control. Whether you were worried about why your oven preheat light never turns off or dealing with an oven that stays warm long after you turn it off, the solution often starts with these simple, physical connections. You have the knowledge and the safety steps now to handle this with confidence. Don’t let a little soot intimidate you—you’ve got this. Have you ever found a wire so badly burnt it practically crumbled in your hand when you touched it? Let me know your most shocking discovery in the comments below!