I was standing in front of my range last Sunday, hovering over a tray of expensive sea salt brownies, when I realized I couldn’t see a thing. I flipped the switch. Nothing. Just that dead, hollow click that tells you your appliance is giving you the cold shoulder. I’ll be honest; I spent ten minutes muttering under my breath and frantically replacing the bulb three times before it finally dawned on me. The bulb was fine. The switch was the traitor. It’s one of those tiny, plastic components that feels insignificant until you’re squinting through a glass door trying to guess if your dinner is burnt. Today, I’m going to show you how to swap that pesky switch yourself so you can stop cooking in the dark and start trusting your eyes again.
Stop Squinting at Your Half-Baked Dinner
We often ignore the little things until they become a massive headache. You might think you can live without a light, but have you ever tried to check a soufflé through a dark window? It’s a recipe for disaster. Before you go calling a pro and dropping a hundred dollars on a service fee, you need to realize that this is a fix anyone can do with a bit of patience. I remember the first time I tried to tackle oven diagnostics; I was so nervous I’d break the whole control panel that I almost gave up. My biggest mistake early on was not realizing that most of these switches just snap into place. I spent an hour trying to find screws that didn’t even exist while the oven was still warm. Learn from me: wait for the cool down! It’s usually a simple mechanical failure. Over years of use, the internal contacts in that switch just wear out or get gummed up with kitchen grease. Interestingly, the National Fire Protection Association (NFPA) notes that cooking equipment is the leading cause of home fires, and while a light switch isn’t a high-draw heating element, any electrical component that is failing should be handled with absolute respect. That means the very first thing we do is cut the power. No exceptions.
Does Such a Small Part Really Matter?
You might be asking yourself if it is worth the trouble of pulling your oven away from the wall just for a light. I’m here to tell you that yes, it absolutely is. Beyond the convenience of seeing your food, a faulty switch can sometimes indicate a broader issue with your interior light circuit or even loose wiring that could cause a short later on. Plus, there is a certain DIY high you get from fixing something yourself for under twenty bucks. Have you ever felt that sinking feeling when an appliance starts working correctly, or do you usually just ignore the small glitches until the whole machine dies? Getting the right part is half the battle. You do not want to end up with a switch that does not fit the mounting hole. I’ve found that troubleshooting common issues starts with getting your model number right. Once you have that, the rest is just a simple game of unplug and replug.
Kill the Power and Pull the Plug First
I cannot stress this enough: electricity doesn’t care about your brownie recipe. Before you even think about touching that switch, you need to disconnect the appliance. If your oven is a slide-in model, pull it out far enough to reach the cord. While you are back there, it is the perfect time for a quick safety check. Take a moment to learn how to inspect your ovens power cord for heat damage. I once found a cord that was practically melting against the wall because of a poor connection, and I never would have seen it if I hadn’t been fixing a simple light switch. If your unit is hardwired, flip the breaker in your main panel and tape it in the ‘off’ position so no one accidentally turns it back on while your fingers are in the guts of the machine. Safety isn’t just a suggestion; it is the foundation of every successful DIY project.
Pry Gently to Save Your Finish
Now that the power is dead, look at the switch. It is usually held in place by two small plastic tabs. You’ll need a thin, flat-head screwdriver or a stiff putty knife to get under the edge. This is the moment where most people mess up. If you just crank on it, you will chip the porcelain or scratch the stainless steel. Think of it like opening a delicate locket. Gently wiggle the tool under the rim of the switch and apply light outward pressure. I remember the first time I did this; I was so impatient that I gouged a deep line right across the control panel. Now, whenever I’m replacing the oven door switch to fix interior light issues, I wrap the tip of my screwdriver in a single layer of electrical tape to act as a cushion. Once the tabs compress, the switch will pop out of the frame just enough for you to grab it with your fingers.
The Tape Trick to Avoid a Total Takedown
Here is the micro-story you need to hear so you don’t repeat my failures. Years ago, I popped a switch out, pulled the wires off, and—zip—both wires vanished into the hole like a startled snake retreating into a hole. I spent three hours disassembling the entire back of the oven just to find two little wires that should have stayed put. To prevent this, use a piece of blue painter’s tape. Before you pull the wires off the old switch, tape them securely to the face of the oven. This keeps them from slipping back into the dark abyss of the appliance walls. If you are worried the switch might not be the problem, you can use 5 multimeter tricks for diagnosing a dead control board to test for continuity across the switch terminals. If the meter shows ‘OL’ when the switch is clicked, you know for a fact the internal copper contacts have failed. 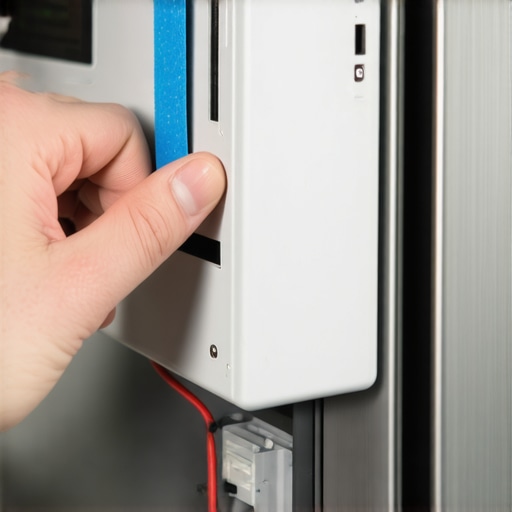
Listen for the Snap to Confirm the Fix
Once the old switch is out and the wires are safely taped, swap the connectors over to the new part. Most light switches use standard spade connectors, so they should slide on firmly. If a connector feels loose, give it a tiny squeeze with some needle-nose pliers to tighten the grip. A loose connection here can cause arcing, which leads to that flickering light problem we all hate. Push the switch back into the mounting hole until you hear a definitive click. That sound is the plastic locking tabs engaging with the frame. If it feels mushy or doesn’t sit flush, you might have the wrong part for your specific brand. Before you button everything up, consult oven diagnostics pinpointing faults before calling a repair expert to ensure no other components in the circuit are dragging down the performance. Slide the oven back, restore the power, and enjoy the glow of a job well done.
Why Swapping Parts Blindly Is an Expensive Mistake
Most DIYers think they’ve won the battle once they identify a faulty component, but there is a nuance that separates a weekend warrior from a seasoned pro. The common myth is that if a part isn’t working, it’s dead. In reality, modern machines are incredibly picky about electrical feedback. I’ve seen homeowners spend hundreds on a new control board because their oven wouldn’t heat, only to realize later it was a thermal fuse they could have fixed for ten bucks. Before you start ordering from a dishwasher parts comprehensive guide, you need to understand that the symptom is rarely the source. In my years of tinkering, I’ve found that the wiring harness is often the actual villain. Vibrations from years of use can rub a wire raw, creating a phantom fault that looks like a component failure but is actually just a lack of signal. The Association of Home Appliance Manufacturers (AHAM) has frequently pointed out that a significant percentage of ‘defective’ returned parts actually have no mechanical faults; they were simply misdiagnosed by people looking for the most obvious solution rather than the most logical one.
Can You Really Trust a Multimeter Reading at Face Value?
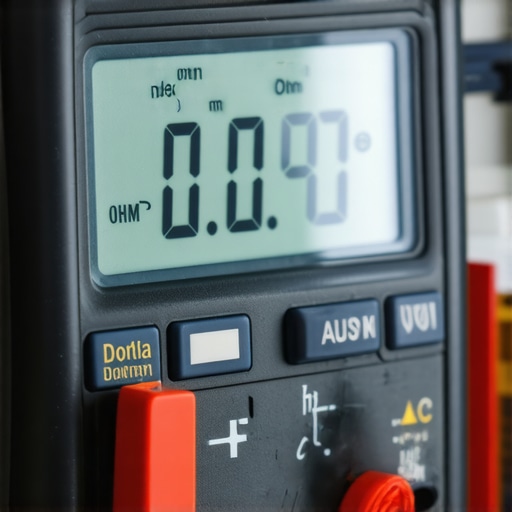
This is where things get technical. Most people use a multimeter to check for continuity—that simple beep that tells you a circuit is complete. But here is the ‘oops’ factor: continuity isn’t enough for high-load parts like heating elements or motors. You can have continuity and still have a part that fails under load because the resistance is out of spec. If you are testing the resistance on your dishwasher heating element, a reading of zero or infinity is an obvious fail, but a reading that is just slightly ‘off’ can cause the control board to shut down the cycle prematurely to prevent a fire. This is why oven diagnostics require more than just a quick glance. You have to know the specific ohm range your manufacturer expects. If you’re off by even 10%, that ‘new’ part might behave just as badly as the old one.
The Hidden Culprit Behind Most Dead Appliances
Everyone talks about the big parts—the pumps, the igniters, the boards. But the real nuance lies in the connectors. Kitchens are brutal environments filled with steam, grease, and heat. Over time, those spade connectors we talked about earlier can develop micro-corrosion. This creates high resistance, which generates heat, which further damages the connection. It’s a vicious cycle. I once spent an entire Saturday diagnosing a dead control board only to find that the harness plug had a tiny bit of oxidation on a single pin. A quick spray of contact cleaner and a scrub with a toothbrush saved me $300. This is the level of detail you need to bring to troubleshooting common issues with parts. Don’t just look at the part; look at how the part talks to the rest of the machine. Have you ever fallen into this trap where you replaced a perfectly good part because you missed a tiny detail? Let me know in the comments. I’d love to hear your ‘facepalm’ moments so we can all learn together. Remember, the goal isn’t just to replace; it’s to restore. Take the extra five minutes to clean those terminals and check for wire fatigue. It’s the difference between a fix that lasts a month and one that lasts a decade.
The jump from a frustrated homeowner to a confident fixer happens the moment you stop using a butter knife as a screwdriver. I’ve learned the hard way that the right tools don’t just make the job faster; they prevent you from destroying the very thing you’re trying to save. For instance, I never touch a control board without a can of specialized contact cleaner. I’ve seen people use WD-40, which is a nightmare—it’s a lubricant, not a cleaner, and it attracts dust that eventually shorts the board. When you’re following a dishwasher parts comprehensive guide, you’ll see mention of specific testing points. This is where a quality digital multimeter becomes your best friend. I personally use a Fluke 117 because of its ‘LoZ’ feature, which prevents ghost voltages from giving you a false reading. In the world of parts and diagnostics how to identify dishwasher faults quickly, accuracy is everything. According to technical specs from the Whirlpool Service Manual, certain thermistors require a resistance accuracy within a 5% margin. If your cheap meter is off by 10%, you’ll be chasing your tail for hours.
How do I maintain my kitchen appliances over time?
Maintenance isn’t a one-and-done event; it’s a rhythm. Most of us wait for a leak or a smell, but pro-active care starts in the spots you can’t see. For your dishwasher, this means going beyond the surface. It pays to know how to clean the hidden debris under your dishwasher filter at least once a quarter. Seeds, glass shards, and plastic ties love to settle in the sump, slowly grinding away at your pump impeller. For the oven, it’s about heat management. I suggest how to inspect your oven control board for burn marks every time you have the panel open for a bulb change or a switch repair. Catching a darkened solder joint early can save you a $400 board replacement later.
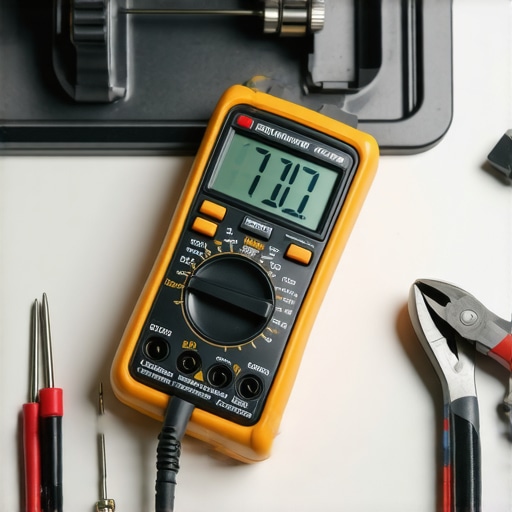
Looking ahead, I see a massive shift toward ‘Smart Diagnostics’ that might actually lock us out. We are already seeing appliances with encrypted error codes that require a proprietary Bluetooth key to read. However, the ‘Right to Repair’ movement is gaining ground, and I predict we will see more open-source diagnostic tools that plug into these machines. For now, the best defense is a good offense. I always start any repair by testing your ovens high limit thermostat with ease because it’s a common fail point that acts as a gatekeeper for the whole system. Before you buy that expensive new igniter, check the thermal fuse. My advanced tip for you this week: use your multimeter to check for ‘parasitic draw’ on your dishwasher when it’s off. If you’re seeing more than a couple of milliamps, you might have a relay that’s starting to weld itself shut. Catching that now prevents a flooded kitchen later.
What I Wish I Knew Before Opening the Control Panel
After years of wrestling with appliances, I’ve realized that the most expensive tool isn’t a fancy wrench—it’s the knowledge of the small details. For instance, I used to ignore it when your oven timer beeps at random times, thinking it was just a ghost in the machine. Now I know that’s often a cry for help from a struggling control board or a loose connection. I also learned the hard way that saving five dollars on a knock-off switch can lead to a total meltdown six months later. If you have ever wondered why your oven interior light keeps flickering or burning out fast, it is rarely the bulb’s fault and usually a symptom of poor terminal contact. Always aim for OEM parts if your budget allows; the peace of mind is worth the extra few bucks.
Tools That Make the Job Less Scary
If you want to move from ‘clueless’ to ‘capable,’ start building a small kit that goes beyond the basics. Beyond a digital multimeter, a magnetic parts tray is a literal life-saver for those tiny screws that love to roll under the fridge. I also keep a specialized electronic contact cleaner handy at all times. It’s the only stuff I trust when I’m busy identifying dishwasher faults quickly, as it removes oxidation without leaving a sticky mess behind. These aren’t just gadgets; they are the difference between a one-hour fix and a three-day ordeal. When you have the right gear, you stop looking at your appliances as intimidating black boxes and start seeing them as solvable puzzles.
#IMAGE_PLACEHOLDER_E#
Your Journey to Becoming the Family Hero
Repairing your own home isn’t just about saving money; it’s about reclaiming control over the environment you live in. When you finally fix that light or stop that annoying rattle, you’ll feel a sense of accomplishment that no service call can provide. There is a specific kind of pride that comes from a fully functional kitchen. However, stay grounded in reality—knowing when to stop diying and call an oven repair expert is a mark of a true professional, not a sign of defeat. You now have the skills, the tools, and the plan to tackle these common glitches with confidence. Go ahead, flip that switch and let there be light. Have you ever started a ‘simple’ repair only to find a much bigger, surprising problem hidden inside? Let me know your story below!