It was exactly 3:14 in the morning when the ‘beeping from the abyss’ started. I stumbled into the kitchen, bleary-eyed, convinced my house was trying to tell me something urgent. But there was nothing—no smoke, no timer set, just a digital display blinking ‘7:00’ with a smug little chirp every thirty seconds. If you’ve ever wanted to take a sledgehammer to a perfectly good range, you’re in the right place. We’ve all been there, standing in our pajamas, staring at a keypad that seems to have developed a mind of its own. It’s a maddening experience that turns a quiet home into a stress-filled search for a hidden ‘off’ button.
Stop the Ghost in the Machine
The reality is that these random beeps are rarely a sign of a sentient appliance trying to haunt you. Usually, it’s a cry for help from a specific component. In my early days of DIY, I made the massive mistake of assuming a beep always meant a dead motherboard. I spent a fortune on a new board only to realize the issue was a simple moisture leak from a poorly sealed vent. You need to diagnose the fault before you start throwing money at parts. Today, we’re going to narrow down whether your oven is suffering from a stuck button, a dying sensor, or a localized power surge that’s scrambled its brains. We will look at how to inspect the control board for clues and how to handle those frustrating error codes that make no sense.
Is your oven actually dying or just being dramatic?
I get the skepticism. You’re probably thinking, ‘Is it even worth my time to poke around or should I just call it a day?’ Here’s the truth: most ‘random’ beeping can be solved for less than fifty bucks if you catch it early. According to data from the Association of Home Appliance Manufacturers, environmental factors like excessive kitchen humidity and heat spikes cause a significant portion of electronic control failures. That means a little cleaning or a simple troubleshooting step might be all you need to restore the peace. Have you ever had your oven start screaming at you in the middle of the night for no reason? Let me know, because I need to know I’m not the only one who’s considered sleeping in the garage just to get some quiet. Before you reach for the toolbox, let’s look at why your hardware might be acting up and when you should call in a professional technician.
Pull the Plug and Let the Capacitors Drain
Before you start unscrewing panels, you have to perform a hard reset. I’m not talking about just hitting the ‘off’ button. Think of your oven’s control board like a tired laptop that’s been running for three years straight; it gets confused. To truly clear the memory and discharge the remaining electricity in the capacitors, you need to cut the power at the breaker for at least ten minutes. I once rushed this on a client’s Whirlpool, waiting only thirty seconds. The beeping resumed the moment I flipped the switch back on. When I finally gave it a full fifteen-minute ‘time out,’ the ghost error cleared itself. If the display stays dead after you restore power, you will need to learn how to tell if your oven control board is actually fried or if it’s just a blown fuse.
Look for the Tiny Toasted Parts
If the reset doesn’t work, you have to get physical. Most random beeping is caused by a short in the keypad or moisture getting into the control board. Pull the oven away from the wall, remove the back panel, and get a good look at the ‘brain.’ You are looking for ‘witness marks’—tiny black smudges or silver tracks that look like a snail crawled across the green board. I remember helping a friend whose oven chirped every time she boiled pasta. We realized the steam from the range was hitting the board because of a worn-out seal. You should inspect your oven control board for burn marks or localized corrosion. If the board looks clean but the buttons are unresponsive, you might be fixing the error code on your oven when the buttons won’t work by simply reseating the ribbon cable connection.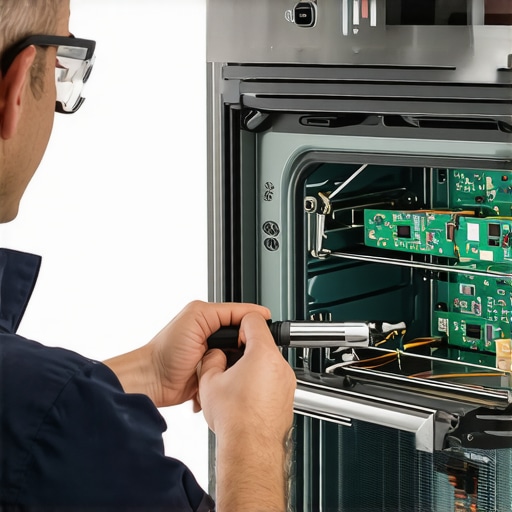
Does Your Sensor Think the Kitchen is on Fire?
The temperature sensor is a small metal probe sticking out of the back wall of the oven. It works like a gatekeeper for electricity; as the oven gets hotter, the resistance in the probe changes. If that sensor is out of calibration, it might tell the computer the oven is at 600 degrees when it’s actually cold, triggering a runaway overheat alarm. This is a common culprit for those 3:00 AM wake-up calls. You can use a multimeter to check it, much like testing the resistance on your dishwasher heating element. If the ohms are way off based on the room temperature, the sensor is lying to the board. You can save a lot of money by testing your oven temperature sensor without calling a pro first.
Testing for Blisters and Hot Spots
Sometimes the beeping isn’t the board—it’s the heating element failing. When a bake element starts to burn out, it can create a ‘ground out’ situation where the electricity jumps to the oven frame, causing the electronics to go haywire. I once found a bake element that looked perfect from the front, but when I unmounted it, the back was covered in tiny bubbles like a bad sunburn. Use a flashlight to perform a visual check, specifically how to test your oven’s bake element for hot spots. If you see any physical deformation, pitting, or discoloration, that part is toast. This is where oven diagnostics become vital; identifying the specific faulty part prevents you from replacing a perfectly good $200 control board when all you needed was a $40 heating element.
Why a Good Multimeter Reading Can Lie to You
Most DIY enthusiasts fall into what I call the ‘Continuity Trap.’ You set your meter to the beep setting, touch the probes to a heating element, hear that lovely sound, and assume the part is perfect. But here is the contrarian truth: continuity only tells you the circuit isn’t physically broken; it doesn’t tell you if the part can handle a load. In my years of troubleshooting, I’ve seen dozens of elements that show perfect continuity but fail the moment they try to pull 15 amps of current. You need to use 5 multimeter tricks for diagnosing a dead control board or element by measuring actual resistance (ohms) rather than just listening for a beep. If you aren’t checking the specific resistance specs, you are just guessing.
The Invisible Enemy Hiding in Your Outlets
We often blame the appliance, but we rarely look at the source. A study by the Electric Power Research Institute (EPRI) indicates that transient voltage surges and ‘dirty’ power quality account for nearly 40% of unexplained electronic malfunctions in modern home appliances. If your oven keeps ‘forgetting’ its settings or beeping randomly, it might not be a hardware failure at all. It could be electrical noise from a nearby aging refrigerator or a loose neutral wire in your house’s junction box. Before you start pinpointing faults on the machine itself, check the voltage at the outlet while the oven is trying to preheat. If the voltage drops significantly, you’ve got a house wiring issue, not a broken appliance.
Can Your Dishwasher’s Thermal Fuse Trick You into Buying a New Board?
This is the ultimate ‘Oops’ factor for homeowners. When a dishwasher goes completely dark—no lights, no response—the instinct is to replace the expensive main control board. However, most modern units have a tiny, $15 thermal fuse tucked near the top of the door. If this fuse blows due to a minor steam leak or a loose wire, the whole machine dies. I’ve seen people spend $300 on a new board when they just needed to spend ten minutes checking the thermal fuse on your dishwasher first. It is a protective measure designed to fail so your house doesn’t catch fire, but it’s often misdiagnosed as a total motherboard death. When looking at dishwasher parts, always start with the smallest, cheapest component and work your way up.
Stop the Guessing Game with Components
Another common mistake is the ‘parts cannon’ approach—throwing new components at the problem until it stops. This is especially risky when comparing aftermarket vs. oem oven heating elements. While some aftermarket parts are excellent, others have different resistance values that can actually burn out your original control board’s relays over time. Always verify the wattage and amperage ratings. Have you ever fallen into the trap of replacing a major part only to realize a $5 fuse was the real culprit? Let me know in the comments. Digging into the nuances of testing your oven temperature sensor accurately will save you more money than any ‘quick fix’ ever could. If you’re still stuck, it might be time to contact us for more specific guidance on your model.
Your Toolkit Needs an Upgrade
If you want to stop the cycle of 3:00 AM beeps forever, you need a specialized toolkit. I don’t mean a junk drawer full of random screwdrivers; I mean a dedicated ‘appliance go-bag’ centered around a true RMS multimeter. I personally swear by the Fluke 110 series because it filters out ghost voltage that can trick cheaper meters into giving false readings. When you are using 5 multimeter tricks for diagnosing a dead control board, precision is the difference between a fixed oven and a wasted weekend. I also keep a set of long-reach Torx drivers because manufacturers love to hide screws in deep, narrow recesses that standard bits simply can’t reach.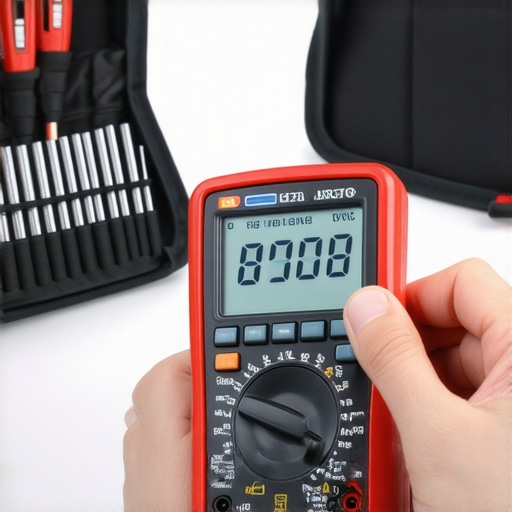
How do I keep my kitchen appliances running for decades?
The secret isn’t just fixing things when they break; it’s preventing the mechanical stress that leads to the failure in the first place. For dishwashers, this means a monthly deep clean of the sump area. If you don’t know where to start, looking at how to identify dishwasher faults quickly usually reveals that 90% of drainage issues start with a simple build-up of fats and minerals in the filter. I recommend running a high-heat cycle with a cup of white vinegar once a month to dissolve the calcium that eventually seizes your pump. It’s a lot cheaper than buying new dishwasher parts like a new circulation motor or heating assembly.
Don’t Ignore the Sludge in Your Sump
I’ve seen dozens of machines die simply because the owner didn’t know how to unclog your dishwashers air gap in five minutes. That tiny bit of backup causes the drain pump to work twice as hard, eventually overheating the windings. According to technical documentation from RepairClinic, nearly 30% of appliance failures are ‘secondary,’ meaning a neglected basic maintenance item eventually killed the more expensive control board. For ovens, the ‘silent killer’ is often a worn door seal. If heat escapes, it slowly cooks the sensitive electronics behind the knobs. Always keep your oven repair essentials handy, specifically a spare gasket, to maintain that thermal seal.
The Future is Smart and Probably Broken
We are moving into an era of ‘Predictive Maintenance’ where your oven might actually email you before the igniter fails. While this sounds great for convenience, it adds more layers of sensors and Wi-Fi modules that can—and will—fail. In the future, I expect we’ll see more integrated diagnostics, but for now, your best defense is still a regular physical inspection. My big advice for you today: pull your dishwasher’s bottom rack tonight and check the filter. If it feels slimy or looks clogged, clean it immediately. It’s the single most effective thing you can do right now to extend the life of your machine and prevent a major repair bill.
The Most Expensive Mistakes I Made So You Don’t Have To
If there is one thing a decade of tinkering has taught me, it’s that the ‘loudest’ problems often have the quietest solutions. I once spent three days trying to rewire a stove only to find a single loose wire on the back panel. The biggest lesson? Never skip the basics. Before you assume your appliance is a total loss, take five minutes to identify dishwasher faults quickly or look for the obvious signs of wear in your range. Most homeowners over-complicate things. You don’t need to be an engineer; you just need to be observant. Relying on oven diagnostics saves you from the ‘parts cannon’—that frustrating cycle of buying expensive boards when a simple cleaning would have sufficed.
Gear That Actually Makes the Job Easier
You don’t need a professional workshop, but a few specific items will save your sanity. First, a high-quality multimeter is non-negotiable for anyone serious about oven repair essentials. I also highly recommend keeping a ‘spare parts’ kit with common items like thermal fuses and door gaskets. Understanding dishwasher parts before you need them means you won’t be hand-washing dishes for a week while waiting for a shipment. These small investments in your toolkit turn a weekend crisis into a twenty-minute fix.
Take Back Control of Your Kitchen
There is a unique kind of pride that comes from silencing a haunted oven or fixing a leaky dishwasher with your own two hands. Don’t let the digital displays and complex sensors intimidate you; at their core, these machines are just tools designed to serve you. By staying curious and performing regular maintenance, you ensure your kitchen remains a place of peace rather than a source of stress. If you run into a problem that feels too big to handle, don’t hesitate to contact us for a bit of extra guidance. You’ve got this! Have you ever found a weird object—like a stray lego or a toothpick—in your dishwasher filter that was causing a major ruckus? Let me know in the comments below.