I remember the exact moment I lost my cool with my dishwasher. I was leaning over to pull out the bottom rack, the smell of ‘clean’ steam hitting my face, when I noticed it. Tiny, dark specks that looked like someone had taken a miniature ice pick to the stainless steel walls. I tried to wipe them away, thinking it was just some stubborn burnt-on lasagna, but my cloth snagged. These weren’t stains; they were actual craters. If you are seeing those same jagged pockmarks, don’t panic—your machine isn’t possessed, but it is under chemical attack. Today, I am going to walk you through why this happens and how you can stop the rot before you’re forced into a full-blown dishwasher diagnostics mission to save your kitchen floor from a leak.
That Morning I Found the Pockmarks
It is a sinking feeling when your expensive appliance starts looking like a piece of salvaged scrap metal. My first instinct was to grab the harshest cleaner I had—a massive mistake I still regret. I thought ‘more power’ meant a cleaner tub, but I ended up accelerating the very corrosion I was trying to stop. I have learned the hard way that when you see these signs, you need a gentle hand and a bit of chemistry knowledge, not a scouring pad. Sometimes, what looks like corrosion is actually just severe buildup, and you might just need to learn the trick to removing hard water spots from dishwasher walls before you assume the metal is gone for good. But if those spots are truly pitted, we need to talk about what is sitting in your detergent cup.
Is stainless steel really as ‘stainless’ as they promised?
You probably bought a stainless steel tub because you wanted something ‘bulletproof’ compared to the old plastic models. The irony is that while stainless steel is remarkably resistant to rust, it has a specific weakness: chlorides. According to the metal experts at the British Stainless Steel Association, even high-grade steel can suffer from ‘pitting corrosion’ when the protective chromium oxide layer is broken down by high concentrations of salt or bleach. This is why if your dishwasher leaves a chalky film on all your dishes, you shouldn’t just ignore it. That film is a signal that the mineral balance in your water is off, and those minerals are the frontline soldiers in the war against your tub’s integrity. Have you ever run your hand along the inside of your machine and felt those sharp, jagged little craters? It’s a common frustration, but it’s one we can definitely manage.
Stop your dishwasher from eating its own interior
Most of the time, pitting isn’t a manufacturing defect; it’s an environmental one. We often forget that the inside of a dishwasher is a high-heat, high-pressure chemical reactor. When you use too much detergent in soft water, or let salty food residue sit on the floor of the tub for days between cycles, you are basically creating a brine that eats metal for breakfast. If you’ve already started clearing hard water deposits from dishwasher interior walls and still see those pits, it is time to look at your salt levels and your detergent dosage. I’ll show you exactly how to recalibrate your washing habits to protect that finish, because nobody wants to replace a perfectly good machine just because the ‘skin’ is failing. Let’s get into the nitty-gritty of why your water chemistry is the secret culprit behind those ugly spots.
Stop Overdosing Your Detergent Cup
Most of us are guilty of the ‘more is better’ philosophy when it comes to cleaning, but with dishwashers, this is a recipe for internal destruction. Think of your detergent like a chemical sandpaper; if there isn’t enough grease or food for the enzymes to eat, they start looking for the next best thing: the protective layer of your stainless steel. I once thought my machine was broken because it left a gritty residue, so I did the most logical (and stupid) thing—I filled the pre-wash and main wash cups to the brim with high-alkaline powder. The next morning, the interior looked like it had been through a sandstorm. If you see your dishwasher leaves a chalky film on all your dishes, you are likely using way too much soap for your water’s hardness level. Use the minimum amount required to get the job done. If your water is soft, you only need about a tablespoon.
Adjust Your Water Softener for Real Protection
Many modern units come with an internal water softening system that requires dishwasher salt. If this is set incorrectly, you’re either bathing your tub in corrosive hard water or creating an overly aggressive soft water environment. It’s a delicate balance. I remember helping a friend who was convinced her pump was failing because of the noise, but after we did a full dishwasher diagnostics check, we realized her salt reservoir was bone dry and the settings were maxed out. This led to massive mineral spikes that were eating the metal. You need to test your home’s water hardness with a simple strip and match the machine’s internal settings to that number. 
Kill the Salt Before it Kills the Steel
Pitting often happens because of ‘crevice corrosion.’ This occurs when salty food particles or undissolved detergent sit in one spot for too long. If you aren’t going to run a full cycle immediately after loading, at least run a ‘rinse only’ cycle. This simple habit prevents acidic or salty residues from boring holes into the floor of your tub. I’ve seen tubs where the metal actually perforated because someone left a heavy dose of spilled salt in the bottom for a week while they were on vacation. If you suspect your water chemistry has already caused damage, you might need to start the trick to removing hard water spots from dishwasher walls to see the true extent of the pitting underneath.
Load for Better Water Flow
Sometimes pitting occurs in ‘blind spots’ where the water doesn’t reach effectively to rinse away the chemicals. If your spray arms are blocked or the racks are packed too tight, you create pockets of stagnant, concentrated chemical broth. Learning the best way to load your dishwasher for maximum water reach ensures that every square inch of that stainless steel is thoroughly rinsed at the end of the cycle. I once found a cluster of pits hidden behind the lower corner because a large platter was permanently blocking the spray jet from hitting that specific wall. It’s not just about the dishes getting clean; it’s about the machine staying healthy. If you’re already hearing weird sounds during the wash, you should also consider identifying a bad dishwasher circulation motor by the sound, as poor circulation is a silent partner in tub corrosion.
Stop Firing the Parts Cannon
I see it all the time in DIY forums: someone buys a new motor, installs it, and… absolutely nothing happens. They’ve fallen into the ‘parts cannon’ trap, where you just keep throwing expensive components at a problem until it accidentally goes away. The most common mistake I see in identifying dishwasher faults quickly is assuming that a lack of power at the component means the component itself is dead. In reality, the culprit is often a burnt trace on the control board or a loose wire. If you aren’t inspecting your oven control board for burn marks, you’re just guessing.
The Continuity Trap That Fooled Me Twice
Everyone says ‘just check for continuity,’ but in my experience, a simple beep from your meter is the ultimate liar. A component can have continuity but still fail under a full electrical load. I once spent three hours pinpointing oven faults only to realize that while my heating element was technically a complete circuit, it had high-resistance ‘hot spots’ that a basic multimeter test couldn’t see. You have to be smarter than the tool; try these 5 multimeter tricks for diagnosing a dead control board to see what’s really happening when the juice is flowing. 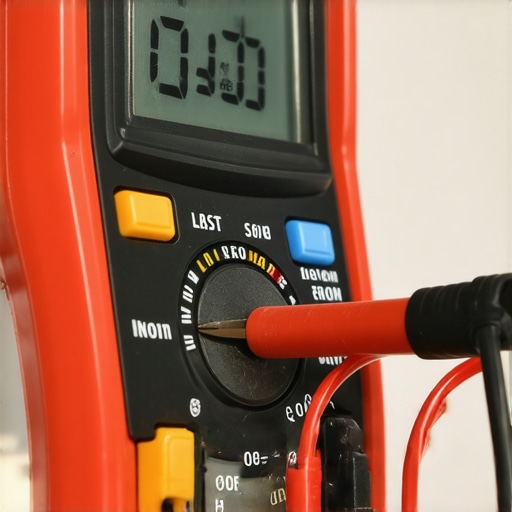
Why did my brand-new heating element burn out in a week?
It’s a sophisticated frustration: you did the repair, it worked, and then it died again. This is often caused by ‘short cycling.’ According to research by the Association of Home Appliance Manufacturers (AHAM), if your temperature sensor is skewed, it can force the element to stay on too long, essentially cooking the new part to death from the inside out. Before you buy another one, make sure you are testing your oven temperature sensor without calling a pro. Have you ever fallen into this trap of replacing the same part twice? Let me know in the comments below. If you’re still stuck, you might need to know when to stop diying and call an oven repair expert before you accidentally fry the entire harness.
The Tool Bag Essentials That Save Me Every Time
I’ve spent a lot of money on gadgets that ended up gathering dust, but a few specific pieces of gear have saved me thousands in professional repair bills. My favorite is a high-quality multimeter with a low-impedance (LoZ) setting. According to the technical experts at Fluke, using a standard high-impedance meter can lead to ‘ghost voltage’ readings, which happen when wires are running parallel to each other. This can totally mislead you when you are trying to figure out what to do when your dishwasher control panel goes blank. If you’re serious about DIY, don’t buy the $10 bargain bin meter. You need accuracy when you’re testing the resistance on your dishwasher heating element to know if the part is dead or if the board isn’t sending juice. Beyond electronics, I recommend a cheap USB borescope that plugs into your phone. It’s perfect for seeing around corners without pulling the whole machine out. I once used one to see exactly why your dishwasher is making a rattling noise—it was just a loose screw from a pot lid that had fallen into the sump. Without that camera, I would have spent two hours pulling the pump apart for no reason. 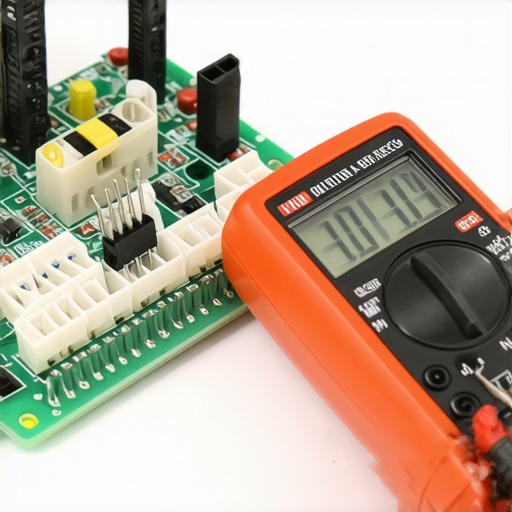
How do I maintain my kitchen appliances over the long haul?
Maintenance isn’t a one-and-done event; it’s a rhythm. I’ve found that the secret to a machine lasting fifteen years instead of five is simple: cleanliness. Every quarter, I set aside an hour to deep clean the moldy gasket in your dishwasher door. That rubber seal is the only thing standing between your kitchen and a flood, and grease buildup will rot it faster than you think. While I’m at it, I always take the time to clean the hidden debris under your dishwasher filter. If that area gets clogged, your pump has to work twice as hard, leading to a premature (and expensive) motor failure.
Why Smart Appliances Are Getting Smarter and Harder to Fix
We are heading toward a future where our appliances will tell us exactly what’s wrong before the part even fails. Many high-end brands are already integrating Wi-Fi diagnostics that send error codes directly to your phone. While this sounds great, it often locks you into their ecosystem. That’s why mastering oven repair essentials and troubleshooting common issues is more important than ever. Even if the machine is ‘smart,’ the physical components like hinges and heating coils are still the same old mechanical parts that need hands-on attention. My best advice? Don’t wait for a total breakdown. Take twenty minutes this weekend and try testing an oven bake element for invisible cracks. Catching a failing part now is much cheaper than emergency shipping on a Tuesday night when you have guests coming over.
Hard Truths from the Kitchen Trenches
After years of tinkering, I’ve realized that dishwasher diagnostics isn’t about having a degree in engineering; it’s about observation. Here are the lightbulb moments that changed how I treat my machines:
- Chemicals are stronger than you think. If you use soft water with high-alkaline soap, you aren’t cleaning; you are etching. Always match your detergent to your water hardness to prevent the metal from dissolving.
- Small sounds are early warnings. If you hear a high-pitched whistling noise, don’t wait for a flood. It is usually a seal or a pump pleading for help.
- The board isn’t always the bogeyman. Before you buy an expensive new computer for your appliance, check the wiring. Most “dead” machines just have a loose connection or a single burnt trace.
- Cleanliness is the best repair. Half of the “broken” machines I see just need someone to clean the hidden debris under your dishwasher filter. Flow is everything.
The Gear I Actually Use to Save Thousands
You don’t need a professional workshop to be successful. I trust these specific tools because they have never steered me wrong during a weekend repair session. First, a LoZ Multimeter is non-negotiable for avoiding ghost voltages that trick you into buying parts you don’t need. Second, a USB Borescope has allowed me to see clogs in drain lines without tearing my kitchen floor apart. Finally, simple Water Hardness Test Strips are the cheapest insurance policy you can buy; knowing your water chemistry is the only way to truly stop tub pitting. If you’re just starting out, mastering oven repair essentials and troubleshooting common issues will give you the confidence to move on to more complex dishwasher components.
Take Control of Your Kitchen’s Future
It is easy to feel defeated when an expensive appliance starts showing its age, but remember that you are the expert on how your home runs. By taking the time to learn the basics of identifying dishwasher faults quickly, you’re not just saving money—you’re gaining independence from the “throwaway” culture. Don’t be afraid to pull that machine out, look at the dishwasher parts yourself, and trust your gut. You’ve got this.
Have you ever found a “broken” part that turned out to be just a simple clog or a loose wire? Let me know in the comments below!