It was a Tuesday night, and the lasagna pan was finally ‘clean.’ Or so I thought. I hit the start button on my dishwasher and headed to the couch, only to be beckoned back by the rhythmic drip-drip-splatter of water hitting my hardwood floors. That little silver nub on the sink—the air gap—was acting like a miniature Old Faithful. My heart sank. I immediately jumped to the worst-case scenario: a dead pump, a flooded kitchen, and a massive repair bill. I’ve spent way too much time diagnosing dishwasher parts over the years to know that these things usually happen at the worst possible time. But here is the secret I learned the hard way: it’s almost always a five-minute fix.
That Mini-Geyser on Your Countertop is a Warning
When you see water overflowing onto the kitchen floor or geysering out of that chrome cap, your dishwasher isn’t necessarily broken. It’s actually doing its job. That air gap is a literal gap of air designed to prevent nasty sewer water from siphoning back into your clean dishes. If there is a clog in the hose between the gap and the garbage disposal, the water has nowhere else to go but up and out. It looks like a disaster, but it’s really just a minor traffic jam of food particles.
Is this simple fix actually worth the hype?
You might be thinking, ‘Surely I need a plumber for this?’ Absolutely not. The Plumbing-Heating-Cooling Contractors Association (PHCC) often points out that a significant percentage of residential service calls are for simple maintenance that homeowners can handle themselves. Paying a $150 service fee for a technician to blow a piece of broccoli out of a tube is a tough pill to swallow. I’ll admit, early on, I once spent an entire Saturday morning identifying dishwasher faults that didn’t exist, only to realize the issue was a single cherry pit stuck in the air gap.
The Mistake That Cost Me a Saturday Afternoon
The biggest mistake I ever made was over-complicating the situation. I once tore apart the entire kickplate and started fixing loose dishwasher spray arms thinking the pressure was the issue. I was covered in grey water and frustration, all because I didn’t check the air gap first. It’s a classic case of ‘check the easiest thing first.’ Today, we are going to bypass the drama. We’re going to use a simple trick involving a common household item—many pros even suggest unclogging the air gap with a straw as a quick hack. Have you ever spent hours on a repair only to find out it was a thirty-second fix? I’d love to hear I’m not the only one. [IMAGE_PLACEHOLDER]
Pop the Chrome Cap First
Your first move is purely cosmetic but necessary. Pull that chrome or brushed nickel cylinder straight up and off. Beneath it, you’ll find a plastic inner cap, usually held on by two small tabs or a threaded nut. I remember one specific Tuesday where I was convinced I had a major drainage failure. I was already looking up how to begin identifying dishwasher faults quickly when I noticed a tiny, translucent piece of plastic—a bread bag clip—wedged perfectly in the air gap’s Y-joint. It cost me zero dollars and exactly forty seconds to pull it out with a pair of tweezers. If you don’t see an obvious obstruction right at the top, don’t panic. The blockage is likely further down the line where the hose meets the garbage disposal. 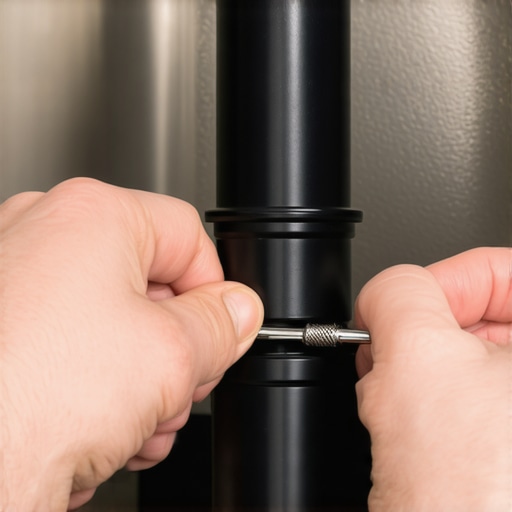
Can a Simple Drinking Straw Really Fix This?
The most effective DIY trick involves blowing air through the top to dislodge the ‘gunk’ stuck in the tube. This is the heart of the method for unclogging a blocked dishwasher air gap with a straw that saves dozens of my neighbors every year. By placing a sturdy straw into the hole and blowing hard, you create enough backpressure to push debris into the disposal. It’s a similar logic to how you might start testing your oven’s thermal fuse when nothing turns on; you start with the simplest component that acts as a safety gate. If you blow and feel significant resistance, the ‘clog’ is likely a solid object like a bone fragment or a fruit pit rather than just soft food waste.
The Garbage Disposal is Your Secret Enemy
If the straw trick fails, the issue is almost certainly at the point where the dishwasher drain hose connects to your garbage disposal. This is a classic choke point. I’ve seen people get confused between the difference between a drain pump and a circulation pump, but the air gap is much simpler. It’s just a tube. Often, the ‘knockout plug’ inside a newly installed disposal hasn’t been removed, or a build-up of grease has narrowed the opening to the size of a needle.
Clear the Debris Without Specialized Tools
You can often fix this by loosening the hose clamp at the disposal with a screwdriver. Be prepared with a small bucket, as some water will inevitably spill out. Once the hose is off, poke a screwdriver or a needle-nose pliers into the disposal’s inlet nipple. You’d be surprised how much kale and eggshell can pack into that one-inch space. If you find that your dishwasher bottom is full of standing water even after you’ve cleared the air gap, it means you might need to go one step further and look at clearing debris from a dishwasher check valve without tools to ensure the water flow is completely unobstructed. This hierarchy of checking the air gap first, then the disposal, and finally the internal valves will solve 95% of all overflowing sink issues.
The Glowing Igniter is Lying to You
Many people assume that if their gas oven’s igniter is glowing orange, the part is functioning perfectly. In my years of troubleshooting, I’ve found this is the most common diagnostic trap. A ‘lazy’ igniter might still glow but fail to reach the specific amperage required to trigger the safety valve. According to research by the Association of Home Appliance Manufacturers (AHAM), heating elements and igniters often experience ‘resistance drift’ as they age, meaning they look active but are technically failing. If your oven won’t start, don’t just look for light; you need to be pinpointing faults before calling a repair expert by checking the draw. I’ve helped friends who were certain they needed a new control board when they really just needed to know how to replace a glowing but faulty oven igniter. 
Don’t Fall for the Aftermarket Parts Trap
When you’re looking for oven repair essentials, the temptation to buy a $15 knock-off heating element is huge. I made this mistake once with a dishwasher rack and ended up replacing a stripped dishwasher rack screw every few months because the metal was too soft. When comparing aftermarket vs oem oven heating elements, the minor savings upfront usually result in a component that burns out in a fraction of the time. It’s an ‘oops’ factor that turns a one-time fix into a recurring nightmare.
Why does my control board look perfect but still fail?
This is the ultimate advanced frustration. You pull the board, look for burn marks, find none, and assume the board is fine. However, micro-fractures in solder joints or a failed capacitor won’t always leave a scorch mark. You can’t just rely on a visual scan; you have to learn 5 multimeter tricks for diagnosing a dead control board to see what the naked eye misses. Knowing how to tell if your oven control board is actually fried involves testing for continuity and voltage at the relay, not just looking for ‘smoke signs.’ Have you ever replaced a part that looked perfectly fine? Let me know in the comments below, and let’s figure out if you fell into the same trap I did.
Invest in a Real Multimeter or Stay Frustrated
If you are serious about moving past the ‘unclogging with a straw’ phase, you need to own a high-quality digital multimeter. I am not talking about the five-dollar version that feels like a toy; I mean one with a fast continuity beeper and at least 0.1-ohm resolution. When I started diagnosing dishwasher parts, I wasted weeks because my cheap meter gave me ghost readings. Now, I use needle-point probes that allow me to pierce through wire insulation or reach deep into tight harnesses without having to depin them. This is how the pros handle identifying dishwasher faults quickly without tearing the entire machine apart. 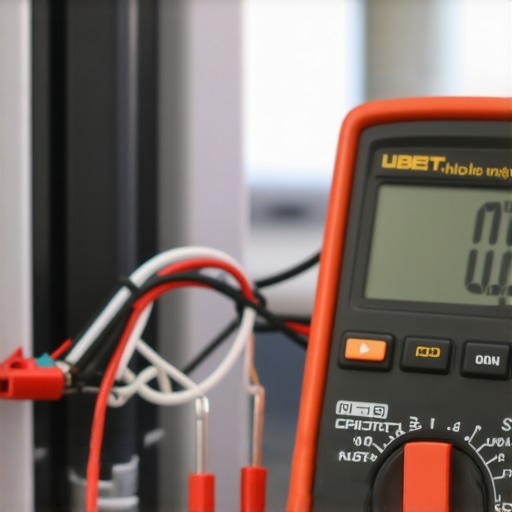
How do I maintain my kitchen appliances over time?
Consistency is the secret to avoiding those midnight floods. Every six months, I run a deep-clean cycle using a specialized citric acid cleaner to dissolve hidden calcium. This simple routine prevents the tedious job of cleaning mineral buildup from dishwasher spray nozzles later on. For the oven, I make it a habit to inspect the door gasket for brittle spots. A leaky seal lets heat escape, which is often the silent culprit behind why your oven burns the bottom of everything you bake. By keeping these wear-and-tear items in check, you extend the life of your expensive control boards and heating elements by years.
Stop Guessing and Start Measuring
The National Appliance Service Technician Certification (NASTeC) handbook explicitly notes that over 30% of electronic component failures are actually caused by poor electrical connections rather than the components themselves. This is why I always check for loose wire nuts or corroded terminals before I even think about buying oven repair essentials. If you can master testing the resistance on your dishwasher heating element, you move from being a ‘parts swapper’ to a genuine troubleshooter.
Why Smart Appliances Won’t Replace the Screwdriver Just Yet
Looking forward, I predict we are entering an era of ‘digital twin’ diagnostics where your dishwasher will send a push notification to your phone identifying exactly which relay has failed. However, even with the most advanced AI monitoring, the physical labor of replacing a seized pump or a frayed wire remains a human job. The trend is moving toward modularity, but for now, your hands and a set of nut drivers are your best defense. I strongly encourage you to grab your multimeter today and test just one heating element or thermal fuse. Once you see that numerical confirmation on the screen, the fear of DIY disappears.
Hard Lessons from My Most Expensive Appliance Blunders
Over the years, I have realized that the most expensive repairs usually start as small, ignored symptoms. I once ignored a slight whistling sound in my kitchen only to realize later that identifying a bad dishwasher circulation motor by the sound could have saved me from a full flood. Don’t assume a part is working just because it looks okay; a component like a gas igniter can be deceptive. It is incredibly common for a homeowner to wonder why your oven igniter clicks but never fires up even when it is glowing orange—it is all about the amperage, not just the light.
Another lightbulb moment for me was realizing how mechanical parts can be revived without a total replacement. I used to think a jammed door meant a new unit, but simply how to replace a broken dishwasher latch without a plumber taught me that most fixes are just a matter of alignment and patience. Experience has taught me to always check for debris before blaming the electronics.
The Essential Gear That Stops the Guesswork
If you want to stop feeling like you are just throwing parts at a problem, you need a curated set of tools that provide real data. I never start a job without my digital multimeter; it is the only way to be sure when how to test an oven broil element using a simple ohmmeter. Knowing the resistance of a part tells you its health in seconds.
I also recommend keeping a small stash of oven repair essentials like ceramic wire nuts and high-temp sealant. These aren’t just ‘nice to have’—they are the difference between a safe repair and a fire hazard. Finally, a flexible grabber tool is a lifesaver for those times you find yourself unclogging a blocked dishwasher air gap with a straw or trying to fish a bone out of the disposal inlet.
Take Control of Your Kitchen Maintenance Today
You don’t need to be a master plumber or a certified electrician to keep your home running smoothly. While there are certainly moments when to skip the diy and call a professional oven technician, the vast majority of dishwasher and oven issues are well within your reach. By starting with the simplest possible fix—like checking an air gap or a thermal fuse—you build the confidence to tackle larger projects. Your appliances are built to be serviced, so grab your tools and take that first step toward a self-sufficient kitchen. What was the most unexpected thing you ever found causing a clog in your dishwasher? Let me know in the comments below!