I remember standing in my kitchen last November, nose wrinkled, staring at my range like it was a ticking time bomb. I’d just turned it on to roast some veggies, but instead of the cozy smell of preheating metal, I got hit with a face-full of kerosene fumes. I panicked. I was frantically searching for a gas leak, checking every connection with soapy water, convinced I was about to be featured on the nightly news for all the wrong reasons. It’s a disorienting, scary moment that makes you want to order takeout and never touch a dial again. I thought I knew my way around a kitchen, but this had me stumped and, frankly, a little rattled.
That Weird Chemical Stink Isn’t Just in Your Head
The truth is, your oven likely isn’t broken, but it is trying to tell you something important about your environment. When I first dealt with this, I went down a massive rabbit hole of oven diagnostics, convinced I had a failing burner or a cracked manifold. I even wasted forty bucks and two hours of my life on a new igniter I didn’t need. Talk about a facepalm moment. Most of the time, that kerosene or paint-thinner smell happens because your oven’s burner is essentially “cooking” particles in the air from something else entirely. If you have done any recent painting or floor staining, those fumes are the culprit. According to the Association of Home Appliance Manufacturers (AHAM), gas ovens consume a large volume of room air for combustion, and any volatile organic compounds (VOCs) present in that air will transform into a sharp, chemical odor when they hit the flame.
Is my oven actually safe to use right now?
It sounds a bit crazy, doesn’t it? How can a project in a completely different room make your kitchen smell like a kerosene heater? Because gas ranges are basically giant air-circulators. Before you start troubleshooting common issues with parts, take a deep breath and look around. Have you used any heavy-duty cleaners, or maybe your gas oven smells like raw gas specifically? If it is truly a chemical, kerosene-like scent and not the rotten-egg smell of a leak, you are likely safe, but you’re definitely not going to want to bake a cake in there until we clear the air. I want to help you distinguish between a simple ventilation fix and a situation where you might need to be testing the gas oven solenoid for actual hardware failure. Have you ever been hit with this smell right after a home renovation project? I’d love to hear your story in the comments—mostly so I can feel better about my own mid-kitchen meltdown!
Open the Windows and Clear the Air First
Before you start tearing the back panel off your appliance, the very first step is to ventilate. If you’ve recently used floor finish, paint, or even a strong cleaning agent in the house, your oven is essentially acting like a giant incense burner for those chemicals. I once made the mistake of using a heavy-duty degreaser on my range hood right before preheating the oven for a Sunday roast. Within ten minutes, the house smelled like a chemical plant. I thought I’d broken something, but after opening every window and running the exhaust fan for an hour, the smell vanished. You need to purge the ambient air of those VOCs before you can accurately diagnose a mechanical failure. If you skip this, you might end up troubleshooting common issues with parts that are perfectly fine.
Know the Difference Between Kerosene and Raw Gas
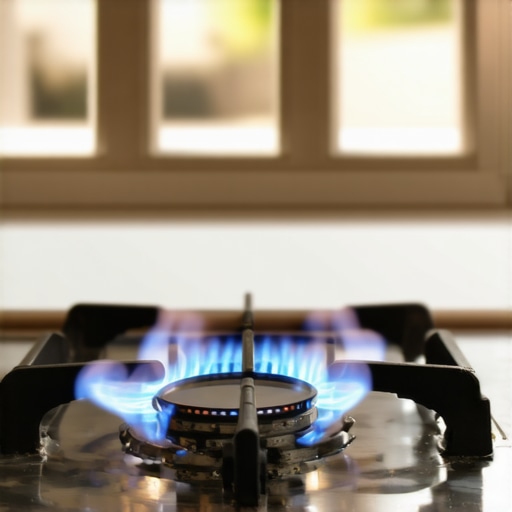
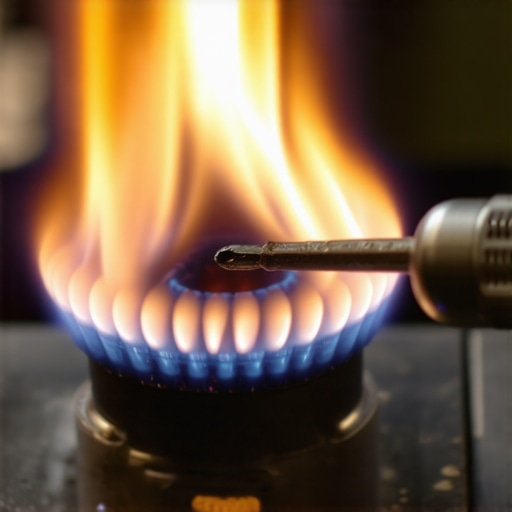
It’s vital to know exactly what you’re smelling to stay safe. A kerosene or paint-thinner scent is almost always environmental—it’s the result of the flame reacting with chemicals in the air. However, if you detect a rotten-egg odor, that is the mercaptan additive in your natural gas, and you need to shut off the gas valve immediately. If it’s a “dry” chemical smell, it’s likely not a leak, but it could still be a hardware issue if the burner isn’t getting enough oxygen. You should look at the flame color; a healthy flame is crisp and blue. If it’s lazy and orange, you might be dealing with the invisible clog in the gas orifice. I’ve seen cases where a tiny bit of spider web or dust inside that orifice causes an incomplete burn, leading to a strange, acrid odor that mimics chemical fumes.
Hardware Checks You Can Do Today
If the air is clear and the smell persists, it’s time for some targeted oven diagnostics. Start by checking the igniter. If the igniter is weak, it might take too long to open the safety valve, allowing a small amount of gas to linger before it finally poofs into flame, creating a burnt-chemical scent. While you’re at it, you should consider testing the gas oven solenoid to ensure it’s opening and closing fully. A solenoid that sticks slightly can cause erratic gas flow. Another sneaky culprit is a failing sensor. If the oven thinks it’s colder than it is, it might over-fire the burner. You can verify this by testing your oven’s high limit thermostat to see if it’s tripping or reading incorrectly. These steps saved me a fortune last year when I realized a simple sensor was the reason my oven was cooking its own insulation smells into the kitchen.
Adjust the Air Shutter Before Tossing Parts at the Problem
Most DIY guides will tell you that a chemical smell always equals a broken part, but I’m going to challenge that. In my experience, the most overlooked cause of that kerosene-like stink isn’t a dead igniter or a leaky valve—it’s a poorly adjusted air shutter. When your oven was installed, the technician should have tuned the air-to-fuel ratio. If that shutter has slipped or was never set correctly, you get an incomplete combustion that produces carbon monoxide and a sharp, acrid odor. Before you go spending money on oven repair essentials and troubleshooting common issues, take a look at the burner tube. If you see a flame that isn’t crisp, you’re likely dealing with why your gas oven flame looks lazy and yellow. Adjusting that little metal sliding plate can save you hundreds in unnecessary repairs.
Why does my energy-efficient home make the smell worse?
Here is a nuance that really trips up homeowners: the tighter your home is sealed for energy efficiency, the worse your oven odors will be. Modern, high-efficiency homes lack the natural “air leaks” of older houses. The Environmental Protection Agency (EPA) has highlighted that indoor air can be two to five times more polluted than outdoor air because of this lack of exchange. When you turn on your oven, it pulls in stagnant air laden with microscopic VOCs from your new sofa, your floor wax, or even a plug-in air freshener. It’s not that your oven is failing; it’s that your house is too airtight. I’ve seen people replace perfectly good sensors while testing your oven temperature sensor without calling a pro, only to find the smell persists because the real issue was a lack of make-up air.
The Self-Clean Trap and the Invisible Film
The biggest “oops” factor I encounter is the post-cleaning smell. If you’ve used a chemical cleaner and then immediately ran a self-clean cycle to “finish the job,” you’ve likely baked a layer of chemical residue onto the hidden areas of your oven cavity. This residue off-gasses every single time you preheat, creating a persistent kerosene-like vapor. It’s a nightmare to get rid of. If you’ve already fallen into this trap, don’t keep running the oven hoping it will burn off. You might be at the point when to stop diying and call an oven repair expert because the residue can sometimes damage the porcelain coating or the heating elements themselves. Have you ever tried to “deep clean” your way out of a smell, only to make it ten times worse? Let me know in the comments—I need to know I’m not the only one who has over-scrubbed their way into a headache!
Check the Gas Orifice for Hidden Obstructions
If the air is clear and the shutter is open, but the smell remains, you might be dealing with a literal bug in the system. Spiders are attracted to the smell of gas additives and often spin webs inside the narrow gas orifice. This tiny obstruction disrupts the venturi effect, preventing the gas from mixing properly with air. Instead of a clean burn, you get a sputtering flame that reeks of chemicals. Before you start testing the gas oven solenoid, use a thin wire or a specialized tool for clearing an oven gas orifice. It’s a five-minute fix that most people miss because they are too focused on the big, expensive parts. Always remember: in the world of appliance repair, the smallest hole often causes the biggest stink.
Stop Throwing Parts at the Wall and Buy a Multimeter
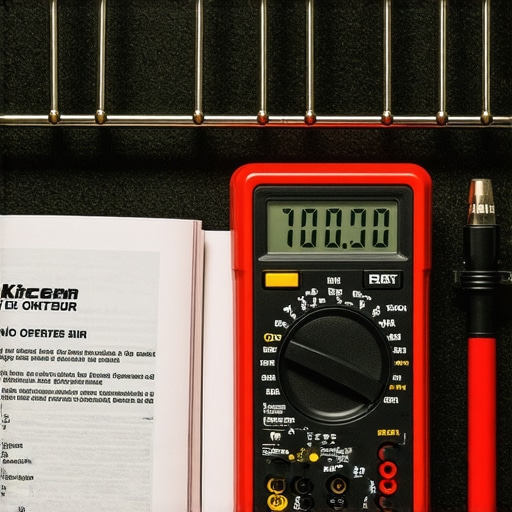
If you take anything away from my kitchen mishaps, let it be this: guessing is expensive. I used to be the guy who would see a problem and immediately order a new control board because ‘that’s usually what it is.’ That is a fast way to go broke. Now, my most-used tool isn’t a screwdriver—it’s a digital multimeter. You need to be able to check for continuity and resistance to know if a part is actually dead. For instance, I’ve saved countless hours by using 5 multimeter tricks for diagnosing a dead control board before I even think about touching my credit card. If you aren’t testing, you’re just gambling with your weekend. I personally recommend a model with an ‘auto-ranging’ feature because it eliminates the confusion of setting the dial to the right decimal point while you’re squeezed behind a range.
How do I keep my kitchen appliances running for another decade?
Maintenance isn’t a one-and-done deal; it’s about rhythm. For your dishwasher, that means more than just running a cleaning tab once a month. You need to get into the guts of the machine. I make it a habit to check the sump area every six months. You’d be shocked at the shards of glass, plastic ties, and ‘organic sludge’ that build up there. Learning how to clean the hidden debris under your dishwasher filter is the single best thing you can do to prevent your motor from burning out early. For the oven, keep those door seals clean. A crusty seal lets heat escape, forcing the burner to work twice as hard and shortening the life of your igniter and thermostat. It’s these small, boring tasks that separate a five-year appliance from a twenty-year one.
The Shift Toward Self-Diagnosing Smart Hardware
We are entering a weird era for home repair. I’m seeing more appliances that essentially ‘talk’ to your phone via Bluetooth or Wi-Fi to tell you exactly which sensor is failing. While some old-school pros hate it, I think it’s a game-changer for the DIYer. In the next few years, I predict that we won’t even need to look up error codes; your oven will just send you a link to the exact gasket you need. However, until that’s the standard, you still need a solid foundation in parts and diagnostics to identify dishwasher faults quickly. Even a ‘smart’ machine can’t tell you if a mouse chewed through a wire; it only knows the circuit is open. The tech is getting better, but the physical reality of gas, water, and electricity remains the same.
Follow the Gold Standard for Safety
When you are doing your own diagnostics, don’t just wing the safety side. I always refer back to the technical standards set by organizations like the National Fire Protection Association (NFPA). Specifically, NFPA 54 (the National Fuel Gas Code) provides the definitive word on gas appliance clearances and venting requirements. If you’ve modified your cabinetry or added a backsplash, check those clearances. An oven that can’t breathe is an oven that produces chemical smells and eventually fails. If you’re feeling overwhelmed by the technical side, take a look at our comprehensive guide to diy diagnostics to get your bearings. My challenge to you: this weekend, pull out your dishwasher filter and give it a real scrub. You might be surprised at what’s been living down there!
Hard Lessons from My Gas Oven Meltdown
After years of tinkering, I’ve realized that the ‘phantom’ kerosene smell is rarely about the oven being broken and almost always about the chemistry of the room. One major lightbulb moment was discovering how a brand-new rug in the living room could off-gas enough VOCs to make my kitchen smell like a refinery when the broiler was on. I also learned that if you find yourself troubleshooting common issues with parts, you should always start with the easiest variable: airflow. A simple draft from a window can disrupt the flame just enough to produce that acrid scent. Finally, never underestimate the power of a deep clean; sometimes the ‘chemical’ smell is just old grease reacting with high heat in a way you didn’t expect.
The Gear That Actually Saved My Sanity
I don’t believe in buying every tool in the aisle, but three things made my life infinitely easier. First, a high-quality multimeter is non-negotiable; I use mine for everything from 5 multimeter tricks for diagnosing a dead control board to checking my water heater. Second, a simple inspection mirror helps you see the burner flame without getting your face too close to the heat. Lastly, I always keep a copy of the manufacturer’s Service Manual (not just the user manual) downloaded on my tablet. These technical documents offer much deeper oven diagnostics than the basic troubleshooting charts you find in the box.
Take Back Control of Your Kitchen
It’s easy to feel defeated when your appliances start acting like strangers, but remember that these machines are just a collection of parts working toward a simple goal. By staying curious and methodical, you can solve almost any issue—from a weird smell to a faulty igniter. However, knowing your limits is part of being a pro DIYer. If you’ve checked the airflow, tested the sensors, and the air still feels heavy with fumes, it might be time for when to stop diying and call an oven repair expert. You’ve got the knowledge now to ensure your kitchen remains the heart of your home, not a source of stress. Have you ever replaced an expensive part only to realize the ‘repair’ was just a matter of opening a window? Let me know in the comments below!