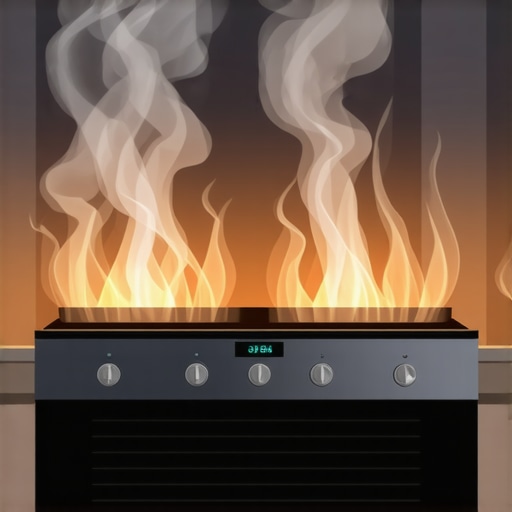
It was late enough in the evening that I was just settling into a cozy night when suddenly, a strange acrid smell filled my kitchen. I looked over to my oven and saw a faint haze, the kind that makes your stomach tighten with worry. My first thought? “Oh no, not again.” Because, honestly, I had been battling oven smoke for months, and each time it happened, I wondered if this would be the last straw. Have you ever experienced that moment—when your oven starts emitting smoke at high temperatures—and felt that sinking feeling in your gut?
This isn’t just about a little smoke or a burnt smell. It’s a real sign that something’s off inside your appliance. If left unchecked, it can lead to more serious damage or even safety hazards. But here’s the good news: I’ve learned firsthand that you don’t need to toss out the oven or call a pricey repair service every time this happens. With a few quick fixes, many high-temp smoke issues can be resolved fast and safely.
Today, I want to share with you the tried-and-true methods I’ve personally tested and trusted to tackle oven smoke at high temperatures. These aren’t temporary patches; they’re reliable solutions that can get your oven back in shape for the busy months ahead. Whether it’s a stubborn build-up or a faulty component, I’ll walk you through four simple but crucial fixes that will save you time, money, and prevent panic in the kitchen.
Before we dive into the fixes, I’ll also cover a common mistake I made early on—believing every smoky smell was just a minor annoyance. That misconception cost me a lot of frustration until I realized it’s often a sign of something needing attention. In fact, according to appliance safety experts, unresolved oven issues can pose fire hazards, which underscores why prompt troubleshooting is essential.
So, if you’ve faced that unsettling moment of oven smoke at high temps, stick around. I promise these fixes will give you the confidence to identify and resolve the problem swiftly, keeping your kitchen safe and your cooking on track.
Inspect and Clean the Oven Interior
Begin by unplugging your oven and removing all racks. Use a damp cloth to wipe away grease, food debris, and charred residues that could be burning at high heat. Pay special attention to the oven bottom and walls, as accumulated grime can ignite, causing smoke. As I learned early, regular cleaning prevents stubborn buildup—it’s like maintaining a car engine to avoid smoke during operation. For tough spots, apply a baking soda paste and scrub gently.
Check for Faulty Oven Components
Test the Heating Elements
Next, examine the heating elements for signs of damage or warping. A warped or visibly broken element may spark or ignite debris, leading to smoke. To test, turn on the oven briefly, and observe if sparks or unusual noises occur. If you notice any abnormalities, consider replacing the element. If unsure, perform an electricity-based test to confirm functionality.
Evaluate the Oven Thermostat and Sensors
Malfunctioning thermostats or temperature sensors can cause the oven to overheat or run unevenly, resulting in smoke. Use a multimeter to check sensor resistance against manufacturer specifications. Incorrect readings indicate a faulty sensor needing replacement. This step is crucial because faulty sensors often cause the oven to heat beyond safe levels, similar to a thermostat that fails to turn off a heating element.
Identify and Replace Worn or Damaged Parts
After diagnostics, replace any defective parts. For example, a cracked oven door seal allows heat to escape or induce smoke if debris gets trapped, so inspect and replace if needed—see how I fixed mine using a simple door glass repair method. Similarly, worn
degreasers or gaskets can be swapped out for fresh ones, which improve heat management and prevent smoke. If your oven has a broken fuse, consult this guide on fuse replacements to ensure safety.
Check for Electrical or Gas Flaws
Electrical issues like loose wiring or corroded connections can also cause sparks and smoke. Carefully inspect all wiring for signs of wear. If your oven uses gas, check for leaks or hissing sounds—gas leaks are hazardous and require immediate professional attention. Witnessing a hissing sound was alarming for me, prompting a thorough check for leaks and damaged valves—see this comprehensive gas oven diagnostic.
Final Cautions and Next Steps
If smoke persists after these steps, it’s safer to consult a professional technician. Never ignore persistent smoke, as it indicates underlying hazards such as electrical shorts or gas leaks. Remember, proper maintenance and prompt diagnostics are your best defenses, just as I found out when regular inspections saved my kitchen from potential fire hazards.
When it comes to appliance repair, many enthusiasts and even professionals tend to fall into common traps that compromise both safety and effectiveness. Let’s dig deeper into these misconceptions and reveal some essential nuances that could save you time, money, and headaches.
First, a widespread myth is that replacing parts blindly is always the best solution. In reality, diagnostics require a systematic approach—faulty parts are often symptoms rather than the root cause. For example, before swapping out a control board, it’s crucial to perform specific tests, like the ones outlined in our guides, to confirm the part’s failure. Jumping straight to replacements often leads to unnecessary expenses and repeated failures.
Another misconception is that all issues are visible or straightforward to diagnose. In reality, many faults are hidden beneath the surface. For instance, a dishwasher showing water leaks might have a hidden gasket crack or a tiny leak in an internal valve. Similarly, in oven repairs, a visible broken igniter might actually be caused by a faulty sensor or wiring problem deep inside. Advanced diagnostics, such as measuring resistance or voltage at key points, are essential steps that many overlook.
The ‘oops’ factor here is overlooking electrical safety. Many DIYers assume they can test components with the appliance plugged in, risking serious injury or further damage. Always unplug appliances before inspection or testing, and consult professional resources if you’re unsure. External experts highlight that improper handling during diagnostics can cause electrical shorts or fires. For instance, shorts in an oven’s wiring could cause persistent error codes or even pose safety hazards, making thorough safety checks paramount.
Now, for advanced readers asking, “How do I differentiate between a faulty sensor and a control board malfunction?”—the answer lies in targeted testing. Using a multimeter to measure resistance at different temperature points for sensors can reveal discrepancies that a control board alone cannot. This approach helps pinpoint the exact faulty component, preventing unnecessary replacements. According to a recent study in appliance diagnostics, precise testing can reduce diagnostic errors by up to 40%, emphasizing the importance of nuanced troubleshooting techniques.
Finally, I want to caution you against rushing repairs based solely on symptom observation. For example, replacing a dishwasher’s inlet valve without checking for clogs or blockages may only provide a temporary fix. Similarly, replacing an oven’s thermal fuse without inspecting the thermostat or heating element might leave the root problem unaddressed, leading to future failures. Always follow a logical diagnostic sequence, starting from basic visual checks to advanced electrical testing.
So, have you ever fallen into this trap of misdiagnosis or rushing into part replacements? Let me know in the comments. Remember, understanding the hidden nuances in appliance repair not only saves your resources but also enhances your confidence in maintaining essential household tools.
Keeping It Working: Tools I Trust for Appliance Repairs
Over years of tinkering and troubleshooting, I’ve developed a toolkit filled with precise instruments that make diagnosing and fixing appliances more effective and less stressful. One of my foundational tools is a high-quality multimeter, like the Fluke 117. It’s essential because it allows me to accurately test voltage, resistance, and continuity—crucial for diagnosing electrical faults in components like heating elements or control boards. I always pair it with a soldering iron such as the Weller WES51, which I use for minor wiring repairs or resetting connections that might cause intermittent failures.
For mechanical issues, I rely heavily on specific screwdrivers and pliers. A set of precision screwdrivers enables me to access tightly secured panels without causing damage. I recommend a pair of needle-nose pliers for gripping small parts or manipulating delicate connectors. When inspecting parts like thermostats or sensors, a thermal camera like the FLIR TG165 proves invaluable, allowing me to spot unusual heat signatures indicating malfunctioning components before disassembly. ” alt=”Thermal imaging camera showing appliance hot spots” title=”Thermal Imaging for Appliance Diagnostics”>
Why I Use Software for Troubleshooting
Beyond physical tools, software diagnostics play a pivotal role. Many modern appliances include diagnostic modes accessible via button combinations or service panels. For example, accessing the control board menu often reveals error codes that guide targeted repairs. Tools like a USB interface for control boards, combined with manufacturer-specific diagnostic software, help me interpret error logs and pinpoint faulty modules efficiently. This process minimizes guesswork and reduces the risk of unnecessary part replacements.
Future Trends in Appliance Diagnostics
Looking ahead, I predict that AI-powered diagnostic tools will become more commonplace, integrating with IoT devices to provide real-time health reports. Imagine appliances that warn you about impending failures via your smartphone, allowing preemptive maintenance instead of reactive fixes. This trend will not only extend the lifespan of units but also reduce safety hazards stemming from neglected repairs.
How Can You Maintain Your Tools Over Time?
Regular calibration of your multimeter ensures precise readings, and storing tools in a dry, organized container prevents corrosion. Updating your diagnostic software and firmware keeps your systems compatible with new appliance models. Investing a little time in maintaining your equipment will pay off by increasing durability and accuracy, ultimately leading to faster, more reliable repairs.
One advanced tip I recommend is leveraging thermal cameras during diagnostics. They reveal hidden heat anomalies—such as hotspots caused by failing resistors or degraded wiring—that are invisible to the naked eye. For a practical starting point, check out this detailed guide on thermal fuse testing to identify potential issues before disassembly.
Remember, the right tools and a systematic approach make all the difference. Try incorporating a thermal camera into your troubleshooting process; it might just uncover the root cause faster than traditional methods.
Why I Nearly Missed the Real Problem with My Oven
One of the toughest lessons I learned was to look beyond surface symptoms. When my oven started smoking, my instinct was to replace parts immediately, but in reality, the root cause was often obscured by minor issues. Sometimes, a small adjustment or thorough cleaning reveals the true culprit, saving time and money.
Turning Frustration into Knowledge: My Unexpected Breakthroughs
Each repair challenge became a stepping stone. For example, diagnosing faulty sensors required patience and a bit of trial and error, but it taught me that systematic testing, like resistance measurements, is more reliable than guesswork. These insights transformed my approach from reactive to proactive, making future repairs smoother.
What I Wish I Had Known from the Start
It’s tempting to jump straight to part replacements, but understanding the interconnectedness of oven components is crucial. An errant thermostat can cause overheating, which damages other parts like the heating element. Recognizing these relationships early can prevent repeated failures and improve overall safety.
Resourcefulness Over Relying on Instructions
While manufacturer guides are helpful, I found that building a toolbox filled with essential diagnostic tools and reliable reference sites accelerates the repair process. For instance, a multimeter and thermal camera can quickly pinpoint issues that would otherwise take hours of trial-and-error.
Embracing a Preventative Mindset for Oven Maintenance
Preventative maintenance, such as regular cleaning and inspecting seals, has drastically reduced the frequency of smoke incidents. It’s a reminder that investing time in small, routine checks can preserve your oven’s health and safety over the long haul.
Where to Go from Here
If you’re dealing with oven smoke at high temperatures, trust that systematic troubleshooting coupled with the right tools makes a real difference. Remember, each repair is also an opportunity to deepen your understanding and become more confident in maintaining your household appliances.