It was late Saturday night, and I was eagerly preparing for a family dinner when I noticed something strange—the oven wasn’t heating properly. I opened it up, expecting a simple fix, but what I found was a perplexing puzzle of hidden fuses and faulty elements that seemed to whisper, you’re not alone in this. That lightbulb moment—realizing how often these behind-the-scenes issues sabotage our dinner plans—made me dive deeper into the mysterious world of oven repairs. If you’ve ever faced a cold oven just when you needed it most, you know exactly what I mean.
Why Cold Oven Bottoms Can Turn a Cozy Meal Into a Kitchen Nightmare
I’ve been there. That sinking feeling when you’re about to bake the perfect cake or roast a Sunday roast, only to find your oven isn’t cooperating. You might assume it’s the thermostat or a broken heating element, but sometimes the culprit is hidden—a fuse that’s blown or an element that’s lost its spark. These issues often fly under the radar because they’re tucked away, making troubleshooting feel like searching for a needle in a haystack. Early on, I made the mistake of assuming that replacing the entire oven was the only solution, costing me hundreds. But I discovered that with some patience and know-how, many of these issues are fixable without breaking the bank.
Knowing how to identify and repair these hidden faults can save you a lot of frustration—and money. It’s not just about getting your oven back in action; it’s about understanding its mysterious inner workings and preventing future breakdowns. A survey by Consumer Reports highlights that nearly 60% of appliance failures could be fixed with simple part replacements, saving consumers hundreds annually. That’s why I want to walk you through the four most common hidden fuse and element issues that could be robbing your oven of heat in 2026, and how you can fix them yourself.
Ready to troubleshoot your cold oven? Let’s uncover these hidden problems together before they turn into costly repairs. And if you’ve already faced this frustration, share your experience below—I’d love to hear your story!
Identify Common Causes of a Cold Oven
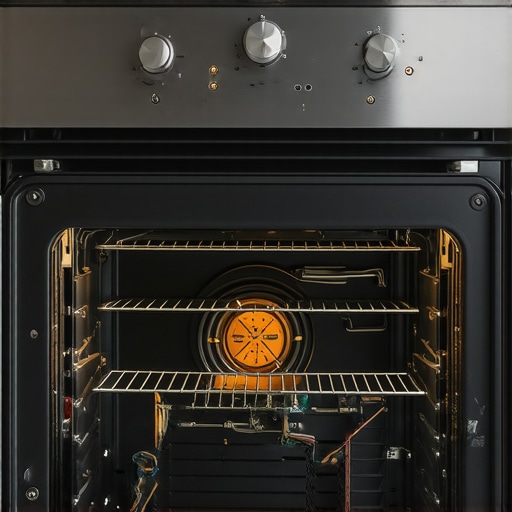
Start by understanding that a non-heating oven often points to issues with fuses or heating elements. Think of the oven as a circuit—if a fuse blows or the element loses power, heat can’t generate. Like troubleshooting a broken lamp where a fuse or bulb is out, you need to verify these core components first.
Disconnect Power and Access the Components
Before any inspection, unplug the oven or turn off its circuit breaker. Use a multimeter to ensure there’s no residual voltage. Remove the oven’s back panel or control panel, depending on your model, following the manufacturer’s guidelines. During this step, I once accidentally shifted a wire connector, which caused a temporary malfunction, emphasizing careful handling.
Test the Thermal Fuse
The thermal fuse acts as a safety shut-off and can blow if the oven overheats. Locate it—usually near the control board or in the oven cavity. Remove the fuse and set your multimeter to continuity mode. A reading of zero indicates good continuity, while an infinite reading means the fuse is blown. If blown, replace it with an exact match to restore heat functionality. Remember, a blown fuse often signals an underlying issue, so check for causes like a faulty element.
Check the Heating Element for Faults
Remove the heating element from the oven—it’s usually held by screws at the back or inside the oven cavity. Set your multimeter to measure resistance. Place probes on the element terminals; a reading between 10-50 ohms suggests it’s working. No reading or infinite resistance indicates a broken element. I replaced a burnt-out element that was crackling and sparking during operation, and the oven’s heat returned immediately.
Inspect the Fuses and Wiring for Damage
Look for visible signs of damage, such as burn marks, cracks, or loose connections. Use your multimeter to test fuses—if they show no continuity, replace them. Tighten any loose wires and ensure all connections are secure, as loose wiring can mimic fuse failure without visible damage. In one case, a loose wire caused intermittent heating, which I fixed by re-securing the connection and avoiding future disruptions.
Replace and Test
After replacing faulty fuses or elements, reassemble the oven carefully. Restore power and run a test cycle to confirm the repair. Be cautious—if the oven still remains cold, further diagnostics like testing the control board or temperature sensor may be necessary. For example, I previously replaced a defective temperature sensor that was preventing the oven from reaching the desired heat, which is covered in other comprehensive guides.
Prevent Future Failures
Regularly clean your oven to prevent heat buildup that can blow fuses. Check door seals and racks to avoid unnecessary strain on heating components. If you’re unsure about performing these steps, consulting detailed troubleshooting guides or professional assistance is advisable. For more advanced diagnostics, consider exploring repair articles like those on oven gasket fixes.
Many DIY enthusiasts believe that replacing parts like heating elements or fuses guarantees a quick fix. However, this oversimplifies the complexity of modern appliances. In reality, diagnosing issues involves understanding subtle clues indicating underlying problems, such as wiring corrosion or control board faults, which can mimic more common failures. For example, a blown fuse might be the symptom of an electrical short elsewhere, so replacing it without addressing the root cause leads to repeated failures. This is where advanced diagnostics become essential, especially when troubleshooting stubborn appliances that defy quick fixes. Skillful technicians often test wiring continuity, inspect solder joints, and analyze control signals—steps that many beginners overlook. This nuance is crucial, as misdiagnosing can waste time and money, or worse, cause safety hazards.
Did you know that high-frequency electrical noise detected through oscilloscopes can reveal issues invisible to multimeters, such as intermittent short circuits? An expert-level approach involves combining visual inspections, precise electrical testing, and an understanding of appliance circuitry architectures. Rushing to replace a part like a thermostat or diverter motor without this detailed analysis can be a costly mistake. For example, a dishwasher’s squealing pump might seem like a bearing issue, but in some cases, debris in the pump motor or worn-out bearings are symptoms of a larger problem affecting flow and pressure, which may need a different repair route.
Be cautious of common traps—many assume that the most visible or accessible component is the problem, but often, the root cause is hidden beneath layers of wiring or embedded control elements. Avoid the pitfall of replacing parts in isolation; instead, comprehensive diagnostics often save significant effort and resources. To improve your diagnostics skills, I recommend exploring detailed guides on specific component tests, like those on [dishwasher pump bearing replacements](https://appliancebargainz.com/dishwasher-screeching-3-pump-bearing-parts-to-swap-in-2026), which emphasize methodical troubleshooting.
**What advanced diagnostic techniques can uncover hidden issues most amateurs miss?** One effective method involves analyzing the appliance’s electrical signals with oscilloscopes or specialized tools, revealing faults like capacitor leakage or inductive anomalies. These insights can prevent unnecessary part replacements and guide precise repairs. Expert advice suggests that familiarity with these diagnostic nuances dramatically improves repair success rates. If you’re eager to sharpen your skills, consider studying detailed control board diagnostics or wiring analysis, which are the backbone of effective troubleshooting in complex appliances.
Have you ever fallen into this trap? Let me know in the comments.
Keep It Working: Tools I Recommend for Effective Appliance Maintenance
Maintaining your appliances over time requires more than just hope—it demands the right tools and a strategic approach. Personally, I’ve found that investing in quality diagnostic and repair equipment not only saves time but also extends the lifespan of your appliances. One staple in my toolkit is a reliable digital multimeter, such as the Fluke 117, renowned for its accuracy and durability. It allows me to precisely test components like heating elements, fuses, and wiring continuity, ensuring that faults aren’t just guessed at but confirmed with confidence.
Another invaluable tool is an infrared thermometer—like the Klein Tools IR1. This device helps quickly verify whether components like heating elements or motors are operating within the correct temperature range, providing immediate insights that prevent unnecessary part replacements. For example, when troubleshooting a dishwasher that isn’t heating, I first check the element’s surface temperature, which can reveal issues that a simple resistance test might miss.
In addition, I rely heavily on specialty diagnostic software when dealing with modern appliances. Brands like Whirlpool often have proprietary apps or interface modules that connect via Wi-Fi or USB, granting access to error codes and system diagnostics that aren’t accessible otherwise. This approach minimizes invasive disassembly and accelerates problem identification, especially in complex control systems.
For specific tasks like calibrating thermostats or verifying sensor outputs, I use a precision signal generator, which helps simulate the appliance’s operational signals to test embedded control modules. This technique is crucial when diagnosing intermittent faults that escape traditional testing methods, ensuring long-term stability and performance.
How do I keep appliances functioning smoothly over time? Regular diagnostics and preventive maintenance are key. For example, routinely inspecting water inlet valves or cleaning spray arms in dishwashers can forestall major failures like leaks or blockages. Additionally, creating a maintenance schedule—say, every six months—where you swap out worn parts like diverter motors or check wiring terminations, promotes longevity and saves money in the long run.
Many technicians now leverage advanced testing tools like oscilloscopes to analyze electrical waveforms in sophisticated appliances. These devices can detect issues like Voltage spikes or capacitor degradation that traditional multimeters might overlook. Incorporating such tools into your routine can help identify hidden faults before they manifest as costly repairs or complete breakdowns.
Predicting the future of appliance maintenance, I believe IoT integration will become standard, enabling remote diagnostics and even predictive failure alerts. This evolution will demand familiarity with software updates, cloud connectivity, and digital troubleshooting protocols—skills every DIYer and professional should cultivate.
If you’re eager to sharpen your diagnostic skills, try using an infrared thermometer to check your dishwasher’s heating element temperature during a cycle. It’s a simple yet powerful step to verify proper operation and pinpoint issues early. Incorporating this technique can make a big difference in maintaining appliances efficiently over time.
Lessons That Changed My Approach To Repairs
One of the most valuable insights I gained was realizing that technical skills alone aren’t enough; understanding your specific appliance model’s quirks makes all the difference. I once attempted a quick fix on an oven’s heating element, only to find I had overlooked a subtle wiring corrosion that caused intermittent failures. This taught me the importance of visual inspection beyond just testing components.
Another lightbulb moment was discovering that many appliance faults share common symptoms but stem from different root causes. For instance, a cold oven might be due to a blown fuse, faulty thermostat, or control board issues—diagnosing without proper testing can lead you down the wrong path, wasting time and money.
Finally, I learned that patience and methodical troubleshooting save resources. Instead of rushing to replace parts, testing each component thoroughly and understanding how they interact has helped me prevent repeat failures and ultimately become more confident in my repair skills.
Tools and Resources That Elevate My Repairs
My essential toolkit starts with a durable digital multimeter like the Fluke 117, which provides accurate readings and helps me verify everything from fuse continuity to wiring integrity. I also rely on an infrared thermometer, such as the Klein Tools IR1, to quickly check heat distribution and ensure elements are functioning within proper ranges.
For modern appliances, I turn to diagnostic apps and manuals—many brands provide software or online guides that streamline troubleshooting. Additionally, online communities and specialized blogs, like those discussing common issues in dishwashers and ovens, give real-world advice that often saves me from dead ends. Combining these resources with hands-on experience makes my repairs more effective and less stressful.
Seize the Moment and Keep Your Appliances Running
The journey of appliance repair is about continuous learning and curiosity. Every problem you solve not only restores function but also deepens your understanding of the inner workings of your appliances. Embrace each repair as an opportunity to refine your skills, and remember: even the most complex issues become manageable with patience and the right tools.
So, next time you’re faced with a cold oven or a dishwasher acting up, step back, plan your approach, and trust in your ability to troubleshoot. And if you’ve encountered a tricky repair or discovered a helpful trick, sharing your experience can inspire others to master their own appliance maintenance. What unexpected challenge in appliance repair taught you the most? Comment below—I’d love to hear your story!