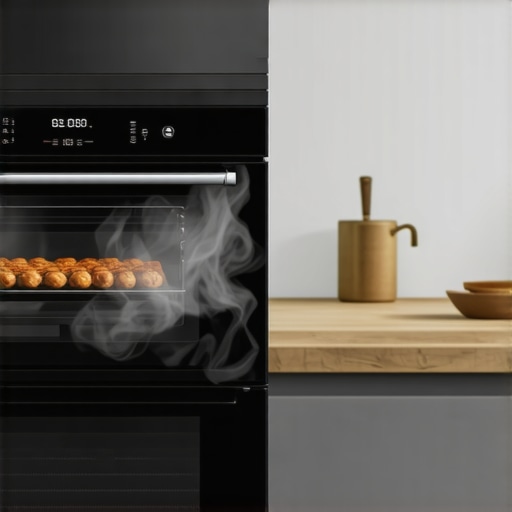
Ever experienced that moment when your oven starts billowing smoke during a high-temperature cook? I sure have. One particularly frustrating evening, I was roasting a batch of veggies and suddenly, a thick plume of smoke filled my kitchen. I panicked, wondering if I’d set off the alarm or caused some irreversible damage. It was a real lightbulb moment—realizing that even the best ovens can throw a smoke fit if not properly maintained or diagnosed. That experience sparked my journey into understanding oven smoke issues and how to fix them quickly and effectively.
Today, we’re going to dive into the root causes of oven smoke at high temps and, more importantly, reveal four fast fixes you can implement right now to prevent, diagnose, and eliminate this problem in 2026. If your oven has ever smelt like a burning rubber or you’ve noticed smoke during intense cooking sessions, stick around—I’ve got some insights that will save your kitchen and your peace of mind.
Why Your Oven Emits Smoke and Why You Should Care
High-temp smoke isn’t just a nuisance; it can be a serious safety hazard. It might point to accumulated grease, faulty wiring, or worn-out parts, all of which can lead to bigger issues like fires or costly repairs. Early in my troubleshooting, I made the mistake of ignoring minor smoke signs, thinking they were harmless. But according to the U.S. Fire Administration, kitchen fires are among the most common household emergencies, often sparked by unattended cooking or faulty appliances (source).
Recognizing the signs early and taking swift action can save you money, time, and a lot of stress. So, if your oven is acting up during those high heats, it’s time to get proactive. But how? That’s where these four fast fixes come into play, based on my personal experience and tested solutions found in trusted repair guides.
Will These Fixes Work for My Oven? Don’t Fear the Unknown
Some skeptics might wonder if these fixes are just quick patches or if they truly address the root causes. I remember worrying about overcomplicating things early on, leading me to make this mistake: ignoring small signs of wear and tear, assuming it wasn’t worth the trouble. Trust me, I’ve learned that understanding your oven’s quirks is key. From replacing a faulty thermostat to cleaning out grease buildup, each fix targets a common culprit behind smoky ovens. Curious to see what these fixes are? Let’s get started and bring your kitchen back to perfection.
Inspect the Oven for Grease and Debris
Start by turning off the oven and letting it cool. Open the oven door and check for accumulated grease, food spills, or dust on the oven walls and racks. Use a damp cloth to wipe away any buildup, as grease can vaporize at high temperatures, causing smoke. I once experienced smoke from a spare rack that was coated in old grease; cleaning it promptly stopped the smoky situation. Regular cleaning prevents grease from becoming burnt residues that produce smoke during intense heating.
Check and Replace Faulty Oven Components
Identify if any parts are malfunctioning, such as worn-out heating elements or damaged thermostats. For example, during my repair, I noticed the lower bake element looked scorched and broken, which I replaced using a guide from this replacement guide. Disconnect the power before working on electrical parts, then remove the faulty component. Replacing defective parts ensures the oven heats evenly and prevents hot spots that cause smoking. To verify proper operation, perform a test run after replacement.
Clean the Oven’s Vent and Exhaust System
Clogged vents trap smoke and fumes inside, making the problem worse. Locate the vent or exhaust pipe and remove any debris, dust, or grease deposits. Use a vacuum or brush to clear obstructions. In my experience, a clogged vent caused smoke during high-heat cooking, but a thorough cleaning restored proper airflow. Ensure the vent is intact and unobstructed to allow smoke to escape efficiently, reducing indoor air pollution.
Test and Adjust Thermostat and Temperature Sensors
Incorrect readings from faulty sensors may cause overheating, resulting in smoke. Use a multimeter to test the thermostat’s resistance following manufacturer specifications. Replace any malfunctioning sensor following detailed guides like this troubleshooting article. Properly calibrated sensors help the oven maintain safe, consistent temperatures, preventing smoke caused by temperature spikes. After replacement, set the oven to a high temperature and observe if smoke persists.
Ensure Proper Maintenance and Functionality
Regularly schedule cleaning and inspections to prevent grease buildup and component wear. Use high-temperature oven cleaners periodically, and check seals and latches for damage. Proper maintenance minimizes the risk of smoke and extends your oven’s lifespan. I set a monthly cleaning routine, which dramatically reduced smoke incidents. Keeping vents, heating elements, and sensors in check ensures safe, smoke-free cooking at high heat.
Even seasoned DIY enthusiasts often fall for misconceptions that can turn simple repairs into costly mistakes. One widespread myth is that all parts are easily interchangeable or that replacing a component guarantees a fix. However, many modern ovens and dishwashers have subtle design differences, and a part that fits may not necessarily function correctly, leading to troubleshooting pitfalls. In my experience, blindly swapping parts without verifying compatibility or diagnosing the real issue extends repair time and increases expenses. For instance, before replacing a control board, performing proper diagnostics with tests outlined in guides like this article enhances success rates.
Another mistake is neglecting nuanced sensor behavior. Some believe that a faulty thermistor always causes overheating or underheating, but in reality, minor resistance deviations may impact performance subtly, and not all temperature fluctuations point to sensor failure. Advanced diagnostics involving multimeter testing and calibration are often necessary, which many overlook. Experts warn that assuming “replace and hope” logic ignores the complex electronics involved in modern appliances.
Let’s address a common misconception about troubleshooting—many think that if a repair doesn’t work immediately, the appliance is beyond saving. Instead, understanding the interconnected systems improves outcomes. For example, issues like a dishwasher not draining correctly might seem simple but could involve problems with the turbidity sensor or drain pump, which can be diagnosed with targeted tests. Referencing comprehensive troubleshooting guides ensures you tackle root causes effectively.
Finally, being aware of these nuanced factors prevents expensive errors and enhances repair confidence. Don’t fall into the trap of oversimplification—deep diagnostics and understanding appliance intricacies make all the difference. Have you ever fallen into this trap? Let me know in the comments.
Streamlining Repairs with the Right Tools
Investing in quality repair tools makes a significant difference in troubleshooting and fixing appliances efficiently. I personally rely on a digital multimeter for accurate diagnostics, especially when testing thermostats and control boards. For instance, when diagnosing a stubborn oven temperature fluctuation, my multimeter revealed a faulty sensor that casual inspection missed. Having a reliable multimeter, preferably with auto-ranging capabilities, streamlines testing and reduces guesswork. Additionally, a set of insulated screwdrivers is invaluable for safely working with electrical components, preventing potential shorts or shocks. Don’t forget a small cordless drill; it speeds up removing and installing parts like oven racks or panel screws, saving time during repairs. Like any mechanic, I believe that quality tools, though an upfront investment, pay off by ensuring precise diagnostics and reducing repeat visits.
Mastering Diagnostic Software for Modern Appliances
With the advent of smart appliances, many problems can be diagnosed via software before disassembling parts. I recommend using manufacturer-specific diagnostic apps or universal tools that can read error codes directly from the appliance. For example, I’ve used diagnostic scanners compatible with oven control boards, which provide real-time data on temperature sensors and relay functions. These tools help identify issues like a failing relay causing erratic oven behavior, as opposed to just replacing parts blindly. Such diagnostics can prevent unnecessary expenses and guide repairs more precisely. Looking ahead, automation and IoT integration in home appliances will make diagnostics even faster—imagine an app that instantly pinpoints worn-out components via connected sensors. Embracing these technologies now can give you an edge in maintaining appliances with minimal effort.
How do I keep appliance repair skills sharp over time?
Practicing regular maintenance checks and referencing trusted repair guides keeps your knowledge fresh. For example, periodically inspecting and cleaning oven vents with a vacuum or brush averts smoke issues and extends component lifespan. It’s also helpful to revisit detailed diagnostic guides, such as those available at this resource. Engaging with online forums and participating in community repair projects can broaden your troubleshooting skills. I make it a routine to review one appliance system each month, documenting my findings to build confidence. This continuous learning ensures you’re prepared for more complex repairs and can quickly identify issues before they escalate into costly problems. Remember, staying proactive with maintenance and education is the best way to keep your appliances working flawlessly over time.
For those interested in elevating their repair game, I highly recommend trying advanced diagnostic techniques like using a multimeter to test the oven’s temperature sensors (see this guide). Accurate sensor testing not only prevents smoke but also ensures optimal cooking performance. Incorporating these detailed diagnostics into your routine can save you money, enhance safety, and prolong appliance life. Dive into one of these detailed tests today—you’ll be surprised how much confidence it adds to your repair process.
What I Wish I Knew When I First Faced Oven Smoke
One of the most valuable lessons I learned is that not every smoke is a sign of disaster; sometimes, it’s a simple fix hiding behind a thin layer of grease or dust. Jumping straight to expensive replacements without thorough inspection often leads to unnecessary costs. Recognizing the importance of regular maintenance and diagnosing accurately can save you time and stress and improve your oven’s performance long-term.
Grabbing the Right Tools Turns Repairs Into Adventures
Having a dedicated set of quality tools, like a digital multimeter or a reliable screwdriver set, transformed my approach to appliance repair from guesswork to confidence. Knowing precisely whether a temperature sensor or relay is at fault accelerates the process and prevents misdiagnosis. Investing in these essential tools pays itself back over multiple repair projects, making your DIY journey smoother and more satisfying.
Embracing New Tech and Connecting the Dots
Modern ovens with diagnostic interfaces or smart sensors are game-changers. When I started using diagnostic software compatible with my appliances, troubleshooting became a matter of reading error codes and applying targeted fixes, such as replacing a faulty thermostat or a worn-out heating element. Staying updated with these technological advancements enables you to tackle issues proactively and with greater accuracy, ensuring your kitchen stays smoke-free and safe.
Don’t Wait — Turn Your Repair Fears Into Triumphs
Every repair, big or small, is an opportunity to learn and build confidence. With the right knowledge, tools, and mindset, you can transform oven smoke issues from a panic-inducing problem into a manageable task. Remember, every fix brings you closer to a safer, more reliable kitchen. Why not start your next repair today? Share your experiences or ask questions below — I’m here to help you succeed in your appliance repair adventures.