Ever experienced that sinking feeling when your dishwasher starts leaking, and suddenly your kitchen floor is a mini swimming pool? I remember the first time I faced it—water everywhere, and me frantically grabbing towels. It hit me then how a tiny, hidden valve in my dishwasher was draining gallons of water unnecessarily, wasting resources, and costing me more than I realized. That lightbulb moment made me realize: hidden, overlooked parts can turn small problems into big disasters.
In this post, I’ll share the four most effective, inexpensive fixes for dishwasher water valves that can save you from water waste heading into 2026. These silent offenders often go unnoticed—yet they silently waste gallons daily, contributing to unnecessary water bills and environmental harm. And let’s be honest, who wants to replace their entire dishwasher when a simple valve tweak is all it takes?
Why Ignoring Dishwasher Valves Could Cost You
Over the years, I’ve learned that many home appliance issues are caused by tiny parts that we often overlook. Early on, I made the mistake of ignoring a slow leak, thinking it was just a minor seal issue. Big mistake. The leak worsened, leading to extensive water damage and a hefty repair bill. It’s a common trap: thinking small problems will stay small.
Now, studies show that household leaks waste more than 1 trillion gallons of water annually nationwide—the equivalent of skipping laundry for a week in many homes (EPA WaterSense, 2022). And if your dishwasher’s water inlet or drain valve is faulty, those leaks can go unnoticed, quietly siphoning water away and raising your bills.
But don’t worry. I’ve been through the troubleshooting maze, and I’ve found that most of these problems are surprisingly fixable—and affordable. You don’t need to be a plumbing expert or buy fancy tools. A few simple part replacements can restore your dishwasher’s efficiency and save water—and especially during a looming water scarcity in 2026, every drop counts.
Are you tired of watching your water bill spike because of leaks you can’t see? If so, you’re in the right place. Next, let’s dive into how to identify those sneaky valve issues, and more importantly, how to fix them yourself with step-by-step guidance. Trust me, DIY could be simpler than you think—and the environmental and financial benefits are worth it. Want to get started now? Check out some of the cost-effective parts that help fix a leaking dishwasher base without breaking the bank, right [here](https://appliancebargainz.com/4-cheap-parts-to-fix-a-leaking-dishwasher-base-in-2026). That’s just one example of how small parts can make a big difference.
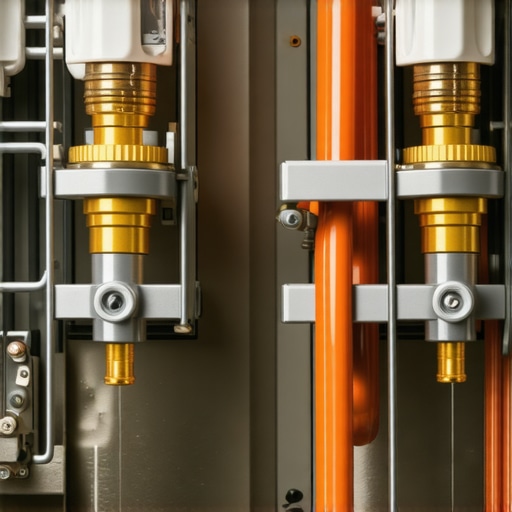
Isolate the Problem with Visual Inspection
Start by unplugging your dishwasher and removing the lower panel to access the water inlet and drain valves. Use a flashlight to examine for corrosion, cracks, or mineral buildup on the valve bodies. I once found a mineral crust clogging my inlet valve after a quick glance, which caused intermittent water flow issues. Cleaning or replacing these parts can restore proper function.
Test Water Inlet Valve Functionality
Disconnect the water supply line and use a multimeter to check for continuity across the inlet valve solenoid terminals. If there’s no continuity, the valve has failed and needs replacement. Remember, a faulty inlet valve often causes overfilling or no filling at all. For a quick diagnosis, consult the guide on troubleshooting and parts testing.
Assess the Drain Valve System
The drain valve prevents water from escaping during operations. If your dishwasher leaks or doesn’t drain, the drain valve might be stuck open or clogged. To test, manually activate the drain valve using a multimeter to check for electrical faults. Also, remove debris or mineral deposits from the valve to improve operation. In my experience, a simple cleaning fixed a persistent leak.
Clean or Replace Faulty Valves
If inspection and testing reveal damage, replace the affected parts. For instance, if the inlet valve’s coil is burned out, swapping it with a new, inexpensive part can prevent thousands of gallons of wasted water annually. Use the article on cheap parts for dishwasher base fixes for compatible replacements. Always turn off the water supply before installation.
Perform Final Leak and Functionality Checks
After replacing parts, plug the dishwasher back in and run a short cycle with the door open to observe water flow. Look for leaks around the valves and ensure proper filling and drainage. Adjust or tighten fittings as needed. A thorough check ensures no small leaks go unnoticed, which could escalate later.
Keep Your Components in Check
Regularly inspect your dishwasher’s valves and filters to catch potential issues early. Simple maintenance like mineral deposit removal or tightening fittings can extend the lifespan of your appliance and prevent costly repairs. For more detailed diagnostic steps, review the comprehensive guide on effective troubleshooting techniques.
 Many homeowners approach appliance diagnostics with misconceptions that can hinder effective repairs. Contrary to popular belief, not all parts that appear faulty are the root cause. For example, a failing water inlet valve might seem obvious, but sometimes the issue is a clogged filter or a damaged control board, which require different troubleshooting steps. Relying solely on visual cues can lead you astray—it’s crucial to verify component functionality with proper tests. I’ve encountered many DIYers who replace parts unnecessarily, only to find the problem persists because they overlooked more subtle issues like miscalibrated sensors or electrical faults.
One common myth is that replacing expensive parts guarantees resolution, but this can lead to costly and unnecessary expenses. For instance, before swapping out the oven’s heating element, it’s wiser to test the temperature sensor and temperature control board first; often, these are the culprits behind inconsistent heating. This approach not only saves money but also improves diagnostic accuracy.
Beware of the “oops” trap—many people forget to disconnect power and water supplies before beginning repairs, risking personal injury or further damage. Always ensure safety precautions are in place, and double-check electrical connections after repairs. For advanced diagnostics, tools like multimeters and circuit testers are invaluable—trusting your multimeter to check for electrical continuity or resistance can pinpoint issues that visual inspections miss.
Why do so many get confused about diagnostic procedures? It often boils down to a lack of understanding about how appliances’ electronic controls and safety features interact. Having in-depth knowledge about these nuances makes a significant difference. For example, when diagnosing a dishwasher that won’t drain, testing the drain pump and float switch systematically can prevent unnecessary replacements. A comprehensive guide on troubleshooting, such as the one on effective troubleshooting techniques, reveals how to approach complex issues methodically.
Make sure you’re testing the right components and interpreting diagnostic signals correctly. Advanced problems, like control board failures or sensor malfunctions, require specific tests. The article on crucial oven sensor tests can provide insights into more sophisticated diagnostics.
Do you often jump to part replacements without thorough testing? If so, you’re likely making repairs harder and more expensive than necessary. Remember, understanding the nuances of appliance diagnostics enhances your chances of a quick fix and prevents costly mistakes. For a deeper dive into specific diagnostics, check out the comprehensive troubleshooting guide. Have you ever fallen into this trap? Let me know in the comments.
Choosing the Right Tools for Reliable Repairs
Investing in quality diagnostic tools is crucial to maintaining your appliances efficiently. I personally favor a digital multimeter with auto-range capability, which simplifies testing sensors, switches, and electrical components. A reliable multimeter like the Fluke 115 helps identify faulty wiring or failed parts quickly, saving you time and preventing unnecessary replacements. Whenever I troubleshoot a dishwasher that’s not draining or an oven that won’t heat, a good multimeter is my first go-to. For more advanced diagnostics, I recommend a thermal imaging camera—an investment that reveals hidden hot spots or insulation issues, especially in ovens, before they cause major damage. As appliance trends evolve, having precise, durable tools ensures you keep appliances working longer and avoid costly service calls.
Mastering Preventative Maintenance
Consistent preventative checks extend the lifespan of your appliances. I schedule quarterly inspections that involve cleaning filters, testing sensors, and inspecting valves. For instance, cleaning dishwasher water inlet filters with a soft brush prevents mineral buildup, which can lead to leaks or poor performance. For ovens, testing the temperature sensor periodically with a multimeter reduces the risk of inaccurate heating—an issue that can be diagnosed via detailed guides like this expert guide. Implementing routine maintenance helps catch problems early, reducing repair costs and ensuring long-term reliability.
Using Software and Diagnostic Apps to Stay Ahead
Modern appliances increasingly incorporate diagnostic modes accessible via smartphone apps or control panel codes. I utilize manufacturer-specific apps, which provide real-time error codes and troubleshooting suggestions—saving time sifting through manuals. For appliances without smart features, I rely on generic diagnostic tools compatible with multiple brands, allowing quick readings of error codes. Staying current with firmware updates and guided diagnostics from reputable sources helps me spot issues before they escalate. The trend is moving toward AI-powered diagnostics, predicting failures based on usage patterns, which I believe will become standard in the next few years—making appliance upkeep even more manageable. Embracing these tools today positions you ahead of the curve, ensuring your kitchen runs smoothly without surprise breakdowns.
How Do I Maintain Repairs Over Time?
Regularly revisiting your maintenance routines, like checking for mineral deposits or loose fittings, keeps everything running efficiently. I set reminders to test critical components like thermal sensors or water valves, especially after hard water seasons. Deep cleaning and testing these parts with tools such as multimeters periodically can prevent small issues from turning into costly repairs. For example, testing your oven’s igniter’s resistance can reveal early signs of failure—often long before it impacts performance. To stay organized, I document maintenance schedules and repair histories, which helps in diagnosing recurrent issues faster. Ultimately, sticking to a consistent maintenance plan leveraging reliable diagnostic methods ensures your appliances serve you reliably into 2026 and beyond. Why not try testing your dishwasher’s inlet valve this month using the tips from this guide and see if it’s time for a replacement? This proactive approach could save you from unexpected leaks or breaks later on.
What I Wish I Had Known When I Started Diagnosing Appliances
One of the toughest lessons I learned was that appearances can be deceiving; a faulty valve might look pristine but still cause leaks. Trusting visual cues alone often leads to unnecessary part replacements, so always test components meticulously. Also, I underestimated the importance of proper safety precautions—forgetting to disconnect power or water can cause accidents or further damage. Lastly, patience beats haste; thorough diagnostics save money and time in the long run, especially when troubleshooting complex systems like water valves in dishwashers and ovens.
Tools and Resources That Changed My Approach
I rely heavily on a durable multimeter like the Fluke 115 for accurate electrical testing; it’s been invaluable in differentiating between electrical faults and mechanical failures. The comprehensive guides on effective troubleshooting techniques and oven sensor tests have become my go-to references. For parts, I trust sites that offer real reviews and detailed specifications—saving me from costly wrong guesses. These resources ensure I’m prepared for nearly any repair scenario, making DIY fixes both safer and more reliable.
Take Action Today to Protect Your Home and Wallet
Repairing your dishwasher or oven isn’t just about saving money; it’s about empowering yourself to extend the lifespan of your appliances and conserve water heading into 2026. Start with simple inspections—check your water inlet valves and drain systems—and apply the diagnostic tips discussed here. The effort you invest now can prevent bigger surprises later, saving you from costly replacements and environmental waste. Why not begin with testing your dishwasher’s inlet valve using the step-by-step guidance on this budget-friendly repair kit? Small actions today lead to big savings tomorrow.