Ever had that sinking feeling when your oven ignites with a faint glow but refuses to spark a real flame? I remember the first time it happened to me. I was all set for a cozy dinner, the smell of baking filling the air—then suddenly, all I got was a dull, ember-like glow that faded without igniting my burners. It was frustrating and confusing, especially since I thought I had done everything right. That moment made me realize how common and perplexing this problem is for homeowners, and how critical it is to understand what’s going wrong.
When Your Oven Glows, But Still Won’t Ignite
Many people overlook this issue because the oven’s glow can give a false sense of security. You see that faint light, and you assume everything is fine. But a glowing igniter without creating a flame signals that something’s off, and if left unaddressed, it can lead to bigger problems—like gas leaks or inefficient burning. What I discovered early on was the importance of diagnosing the *correct* parts before jumping to conclusions or wasting money on unnecessary replacements. Trust me, I learned this the hard way—replacing parts prematurely can be a costly mistake.
If you’ve experienced this scenario, you’re not alone. And good news: there’s a systematic way to tackle it. Today, I’ll guide you through the essential parts to check and replace, so you can fix this annoying problem yourself and get your oven back to cooking efficiently. Plus, I’ll share some tips from my personal repair projects that have saved me from calling a professional—and costs that could add up from ignoring these issues.
Will Replacing Parts Actually Fix My Oven?
Early on, I made the mistake of assuming a faulty igniter was the root cause without considering other components. That mistake cost me time and extra money. But I also learned that understanding the *how* and *why* of each part’s failure is key to a lasting repair. For instance, often a worn-out igniter isn’t the only culprit; switches, sensors, or control modules can be involved. If you’re skeptical about DIY repairs, I get it. But with some guidance and basic tools, most of these issues are manageable. Want to see which parts most commonly cause this problem? Check out the [top diagnostic tests for faster fixes](https://appliancebargainz.com/top-oven-repair-tips-diagnostics-for-faster-fixes-2025) and arm yourself with knowledge.
In the next sections, I’ll walk you through the diagnostic steps, the parts to replace, and how to do it safely and effectively. By the end, you’ll feel more confident fixing your oven—and no longer dread that faint glow. So, if this problem sounds familiar, stay tuned, because your solution might be just a few parts away.
Test the Igniter’s Power Supply
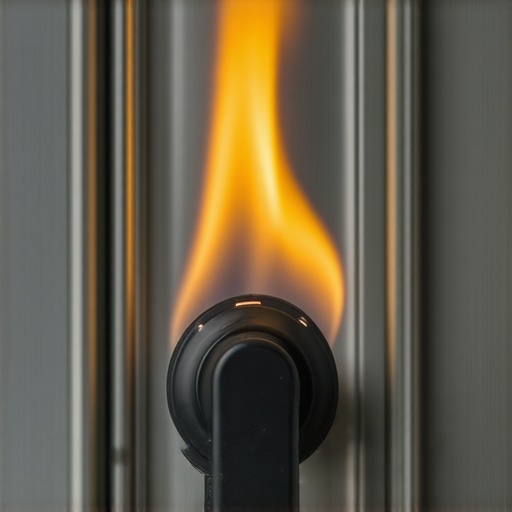
Start by turning on your oven and observing the glow of the igniter. If it glows faintly or not at all, the issue might be with the power reaching the igniter. Use a multimeter to check for voltage at the igniter’s connection. If there’s no power, inspect the oven’s control board and wiring for loose connections or damaged components. I once found a loose wire connection that took me just five minutes to fix, restoring the ignition cycle.
Check the Igniter for Wear and Tear
Remove the igniter and examine it closely. Look for cracks, corrosion, or a buildup of debris. A worn-out igniter won’t generate enough heat to ignite the gas, even if it glows brightly. I’ve replaced igniters that appeared perfectly fine but tested as having insufficient resistance, which proved effective in restoring proper ignition. For detailed testing procedures, visit this guide.
Verify the Gas Supply Is Adequate
Ensure that your gas supply is steady and sufficient. Check the gas valve for proper opening and listen for any unusual sounds. Sometimes, a partial gas blockage or a closed valve can prevent ignition. If you’re unsure, test the gas pressure using a manometer or call your gas provider. I once experienced a low-pressure situation due to a partially closed valve, which was quickly resolved by opening it fully, restoring the flame.
Inspect the Flame Sensor or Thermocouple
The flame sensor detects a flame and signals the control board to continue gas flow. If faulty, it may falsely prevent gas from igniting. Clean the sensor with a soft cloth to remove soot or deposits. For persistent issues, test its resistance with a multimeter. A defective thermocouple may also be the culprit, especially in older models. For more detailed diagnostic steps, check this resource.
Examine the Control Module and Safety Switch
If all other components seem operational, the control module or safety switches might be faulty. These parts regulate ignition signals and safety operations. Use a wiring diagram to identify the power flow and test the switches with a multimeter. I replaced a faulty control board that was preventing the ignition cycle, a task that restored my oven’s full functionality without needing a professional technician. For common control board issues, see this guide.
Perform Safety Precautions During Repairs
Always disconnect the power before working on your oven. Ventilate the area if testing gas components. Use insulated tools and wear safety gloves. If you’re unsure about any step, consult the oven’s manual or a professional. My first repair involved carefully disconnecting wires and replacing a broken igniter, which I learned to do safely after reading this safety checklist.
Many homeowners believe that fixing appliances like dishwashers or ovens is straightforward—swap out the faulty part, and everything will work seamlessly. However, this oversimplification often leads to frustration and recurring problems. A common myth is the assumption that *a single defective component is always the root cause*, which isn’t necessarily true. For example, replacing a heating element without inspecting related sensors or control boards can result in the same issue reappearing later. In reality, appliances are complex systems, and their failures are interconnected. Overlooking secondary factors such as wiring corrosion, sensor calibration, or control module glitches can trap even experienced DIYers, causing unnecessary part replacements and wasted time. A prevalent mistake is ignoring diagnostic steps that test entire systems before replacing parts. For instance, improper testing of the dishwasher’s float switch or the oven’s thermocouple can lead to misdiagnosis. This mistake is especially costly because it prompts a cycle of swapping parts that seem faulty but are actually fine, while the real culprit remains hidden. To avoid this, it’s crucial to perform comprehensive diagnostics; that’s why I recommend following expert-guided tests like those detailed in this guide or this diagnostic resource. This ensures you address the actual cause, not just the symptoms. Another trap is relying solely on visual cues; for example, a glowing igniter might look functional but could still be weak internally, and testing resistance with a multimeter reveals its true condition. When it comes to smart or modern appliances, the complexity increases. Many believe that high-tech control boards are rarely the problem because they’re expensive; in fact, subtle issues like firmware glitches or electrical noise can cause erratic operation. Regular calibration and updating firmware—when possible—can prevent these issues, but many overlook this step and assume hardware failure instead. Ultimately, understanding the nuances of appliance systems empowers you to troubleshoot effectively. Remember, appliances are built with numerous interdependent components—failing to recognize this interconnectedness often leads to unnecessary repairs. Always approach repairs with a systematic diagnostic plan rather than jumping straight into replacing parts. Doing so can save you money and extend the lifespan of your appliances. Are you cautious enough with your repairs, or have you fallen into these traps? Let me know in the comments.Keeping your oven and dishwasher in perfect shape doesn’t have to be guesswork. The key is investing in the right tools and adopting methods that enable precise diagnostics and effective maintenance. First, a high-quality digital multimeter is indispensable. I personally rely on a Fluke 117, known for its accuracy and durability, which allows me to measure voltage, resistance, and continuity with confidence. When testing components like igniters or switches, this tool helps me avoid unnecessary replacements by pinpointing the real issue. Additionally, a non-contact voltage tester simplifies initial troubleshooting by quickly confirming power presence without risking contact with live wires. For more detailed diagnostics, an infrared thermometer is invaluable—it lets me spot uneven heating or cold spots in an oven, which can be signs of faulty sensors or damaged elements. I prefer a Fluke-resource IR thermometer because of its precise temperature readings and ease of use. Beyond hardware, I use specialized diagnostic software compatible with my appliance control boards. This software can run self-tests, reveal error codes, and sometimes even update firmware remotely, ensuring my appliances stay optimized and reducing long-term breakdowns. Looking ahead, I predict that diagnostics will increasingly incorporate IoT connectivity, enabling remote monitoring and predictive maintenance, which could revolutionize how we care for our appliances. How do I maintain appliance performance over time? Regular calibration of sensors and periodic cleaning of critical parts like igniters and sensors significantly extend appliance lifespan. For instance, cleaning the flame sensor in a gas oven with a soft cloth ensures accurate flame detection and safe operation. If you’re dealing with complex issues like uneven cooking or recurring faults, I recommend starting with control board diagnostics to identify underlying problems quickly. Don’t hesitate to try calibrating your oven with simple tools like an oven thermometer and following these quick calibration tips. Taking proactive steps now can prevent costly repairs later and keep your appliances humming smoothly. Remember, systematic testing and routine maintenance are your best allies for reliable operation—so invest time in learning these skills, and your appliances will thank you for years to come.
Lessons That Changed My Approach to Appliance Fixes
One of the most significant insights I gained was that troubleshooting isn’t just about replacing parts — it’s about understanding the interconnected system. I once replaced an igniter, only to find the problem persisted because I overlooked a faulty safety switch. Now, I always think holistically, checking all related components before making a swap.
Another lightbulb moment was realizing that visual cues can be deceptive. A glowing igniter might look fine but can be internally worn. Testing resistance with a multimeter became my go-to step, saving me from unnecessary replacements and frustration.
Patience and cautious testing outweigh haste. Rushing to replace what seems broken without diagnostics can lead to recurring issues and additional costs. Taking the time to run comprehensive tests has profoundly improved my repair success rate.
Tools and Resources That Empower My Repairs
My essential toolkit now includes a high-quality digital multimeter, like the Fluke 117, which provides accurate readings and builds confidence during testing. I also rely on a non-contact voltage tester for quick power checks. An infrared thermometer helps me identify uneven oven heating, which often points to sensor issues. For detailed diagnostics and upgrades, I turn to trusted guides like this resource and these diagnostic tests. They consistently help me pinpoint issues and avoid guesswork.
Investing in these tools has definitely paid off by reducing repair times and increasing success. As appliances become more complex, I believe that mastering diagnostic software compatible with control boards will become more essential. The more I learn about the systems involved, the better my repairs turn out.
Your Next Step in Appliance Confidence
Every repair I attempt, armed with knowledge and proper tools, boosts my confidence. It feels rewarding to save money, extend the life of my appliances, and avoid the inconvenience of waiting for professional repair services. Remember, the key isn’t just in fixing the part but understanding the system behind it. Approach your repairs with curiosity and patience, and those frustrating glow-and-no-flame problems will become manageable challenges instead of daunting obstacles. What’s the most surprising thing you’ve discovered during a repair? Share your stories below!