There was a moment recently when I was about to bake a simple sheet of cookies, only to be greeted by an incessant clicking sound from my oven’s burner. Not just a tap-tap, but an unrelenting chatter that felt like a classroom full of students with no teacher in sight. Frustrating? Absolutely. But more than that, it was a wake-up call I couldn’t ignore. That persistent clicking isn’t just an annoying quirk—it can signal underlying issues that, if left unaddressed, might lead to bigger, costly failures.
Why A Clicking Oven Burner Shouldn’t Be Ignored
Let’s face it. When your oven’s burner won’t stop clicking, it not only disrupts your cooking plans but can also be a sign of a malfunctioning spark module. This tiny component plays a crucial role in igniting your gas burners, and problems here can lead to safety concerns as well. Early in my troubleshooting journey, I made the mistake of dismissing a clicking noise, assuming it was just a minor glitch. That oversight nearly resulted in a service call when a quick fix could have saved the day. According to appliance repair experts, a constantly clicking spark module can indicate an electrical short or dirt affecting the proper operation. For more detailed diagnostics, check out [this expert guide](https://appliancebargainz.com/oven-repair-tips-diagnostics-expert-strategies-for-faster-fixes-2025).
Today, I promise to walk you through three reliable fixes to silence that relentless chatter—so you can get back to baking or roasting without the noises and worries. But first, let me address a common concern: is replacing the spark module really worth it? Many homeowners hesitate, fearing complex repairs or unnecessary expenses. In my experience, addressing these issues early can prevent future breakdowns and even extend the lifespan of your oven.
Will Fixing the Spark Module Save You Money or Waste Time?
It’s a valid question. I remember jumping into repairs with minimal research, only to end up replacing parts that didn’t need changing. Early mistakes taught me the importance of proper diagnosis, which is why I advocate for informed troubleshooting. If you’re nervous, don’t worry—I’ll share simple, step-by-step methods that even a novice can follow. And if you want to get a head start on understanding your appliance better, I recommend browsing [these tips](https://appliancebargainz.com/oven-repair-tips-diagnostics-effective-fix-strategies-2025-3). Now, let’s dive into how you can eliminate that pesky clicking once and for all.
Check the Spark Module for Dirt or Damage
Start by unplugging your oven and locating the spark module, typically near the burners. Use a flashlight to inspect for dirt, grease, or corrosion, which can cause erratic sparking and clicking. Gently clean the contacts with a soft brush or cloth. I once found sticky residue accumulating on mine after a spaghetti sauce spill, and a quick cleaning instantly stopped the clicking. Dirt can mimic a short circuit, triggering continued sparking.
Test and Replace Faulty Components
Next, perform a simple test to verify if the spark module or associated parts like the ignition switch are functioning correctly. Using a multimeter, check for continuity as described in this diagnostic guide. If readings are off, replace the faulty part. When I replaced a malfunctioning spark plug, the clicking ceased immediately. Remember, a faulty spark can overwork the module, causing endless sparks and clicks.
Identify the Source of Electrical Short
In cases where cleaning and part replacement don’t solve the problem, you might have an electrical short. Use a screwdriver to gently move wiring harnesses while observing for sparks or clicking. Look for frayed wires, burn marks, or melted insulation. I caught such an issue when I noticed a wire rubbing against a metal bracket, causing regular sparks. Securing or replacing damaged wiring restores safety and silence.
Adjust or Replace the Gas Ignition System
If your oven has a pilotless ignition system, misalignment of the igniter can lead to continuous sparking. Remove the oven’s cover and inspect the igniter’s position relative to the burner. If it’s too far or bent, adjust it to ensure proper arc and sparking.
If adjusting doesn’t help, consider replacing the igniter. This is a common fix; a new igniter in my oven took less than 20 minutes to install, and the clicking stopped after the first attempt. For detailed replacement steps, see this safety check guide.
Perform a Final Safety Test and Confirm Fix
After completing repairs, reconnect power and turn on the oven. Observe the burner to see if the sparking is smooth and silent. Listen carefully for any clicks or irregular noises. This quick test confirms your fix worked. Remember, always prioritize safety—if sparks still persist, consult a professional or revisit your diagnostics.
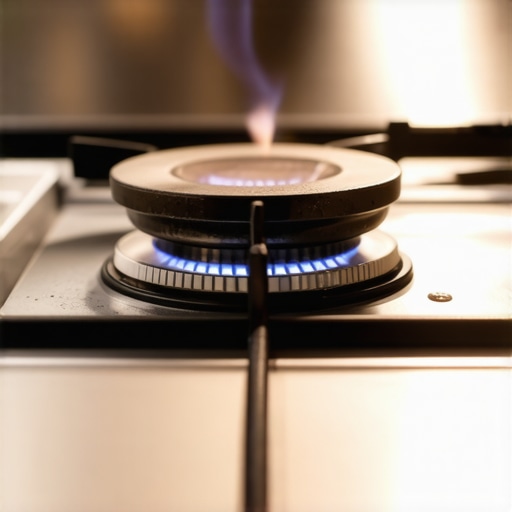
#IMAGE_PLACEHOLDER_B#Many homeowners and DIY enthusiasts fall into the trap of oversimplifying appliance diagnostics, especially regarding parts replacement. A widespread myth is that replacing the most obvious or frequently faulty part will always resolve the problem. For instance, some assume that swapping out a burnt-out heating element will fix uneven oven temperatures, but without thorough diagnostics, this can lead to unnecessary expenses and repeated failures. Advanced troubleshooting requires understanding the interplay of multiple components, like sensors, wiring, and control boards, rather than focusing solely on the most apparent culprits. Moreover, numerous repair guides and tutorials overlook the hidden nuances, such as subtle wiring issues or calibration problems, which can cause persistent malfunctions even after parts swap. Incorporating comprehensive diagnostic strategies can save time and money, preventing costly misdiagnoses. For example, verifying sensor readings with multimeters, checking for electrical shorts, and analyzing error codes with proper tools can pinpoint the root cause more accurately. Be cautious of the trap where superficial fixes are applied without confirming underlying issues; this often leads to recurring problems and frustration. According to appliance repair experts, neglecting these intricacies can compromise safety and reduce the lifespan of your appliances. If you’re aiming for efficient repairs, consider consulting detailed diagnostic resources like this comprehensive guide or these expert troubleshooting tips. Remember, a deeper understanding of the appliance’s inner workings is essential; superficial fixes are short-term solutions at best. Have you ever fallen into this trap? Let me know in the comments.
Invest in Quality Diagnostic Tools
One of the most effective ways to ensure your appliances keep running smoothly is by equipping yourself with reliable diagnostic equipment. I personally rely on a digital multimeter for testing electrical components because it provides quick, precise readings, allowing me to identify faulty sensors or wiring issues before they escalate. For example, checking the oven temperature sensor with a multimeter can reveal subtle faults that might cause uneven baking or overheating, problems that aren’t immediately obvious. Additionally, a clamp meter is invaluable when diagnosing current draw issues in dishwashers or ovens, helping you detect abnormal power consumption patterns that could indicate internal faults. Investing in these tools saves both time and money in the long run, preventing small issues from becoming costly repairs.
Leverage Diagnostic Software for Advanced Troubleshooting
Beyond physical tools, I highly recommend using specialized diagnostic software with your appliances. Many modern appliances have internal microcontrollers that store error codes, which can be retrieved with manufacturer-specific diagnostic kits. For instance, connecting your oven or dishwasher to a compatible diagnostic app can quickly pinpoint hidden malfunctions, saving you hours of guesswork. These tools often provide detailed repair insights, guiding you step-by-step through complex fixes—like interpreting error codes that indicate faulty control boards or sensors. As technology progresses, I predict the integration of AI-driven diagnostic platforms will become standard, offering even faster and more accurate troubleshooting. For practical guidance, consider consulting this comprehensive diagnostic resource.
How do I maintain my appliance diagnostics over time?
Maintaining your diagnostic setup involves regular calibration of your tools and keeping software updated. For example, ensure your multimeter batteries are fresh and that you periodically verify its accuracy with known standards. Additionally, keep your diagnostic software and firmware up to date to benefit from the latest troubleshooting features and error code databases. Documenting common issues and successful fixes can also streamline future repairs, turning you into a self-sufficient repair expert. By staying proactive with upkeep, you ensure your tools remain accurate and reliable, ultimately extending their lifespan and enhancing your ability to diagnose problems swiftly. For instance, routinely testing your multimeter against a known voltage source can catch drift errors early.
How to Scale Your Maintenance Skills
If you’re managing multiple appliances or larger systems, consider investing in comprehensive test rigs that can evaluate entire circuits or control boards. Modular test stations, which include a variety of adapters and connectors, streamline diagnostic workflows and reduce troubleshooting time. Moreover, online forums and professional communities are great for sharing insights on complex issues and discovering new tools. As I expand my repair setup, I plan to incorporate portable oscilloscopes and automated diagnostic software that sync with my smartphone, reflecting where the industry is heading—toward smarter, connected diagnostic systems. Starting with a high-quality multimeter and familiarizing yourself with troubleshooting guides will set a firm foundation for scalable maintenance efforts.
Take Action
Try integrating a digital multimeter into your next diagnostics session and follow along with a guide like this expert article to maximize your effectiveness. Developing this habit will make troubleshooting more precise and less stressful, ensuring your appliances stay in top shape for years to come.
3 Hard-Earned Realities About Appliance Troubleshooting
During my years repairing appliances, I’ve learned that assumptions can be costly. One lesson that sticks out is the danger of jumping straight to part replacements without thorough diagnostics. Often, a misdiagnosed component leads to unnecessary expenses and repeated failures. Additionally, I’ve realized that patience and a methodical approach outperform frantic guessing. Finally, the importance of understanding your specific model cannot be overstated; what works for one appliance might not be suitable for another, saving you time and frustration. These insights have made me more confident and efficient, turning troubleshooting into a rewarding puzzle rather than a guessing game.
My Toolkit for Troubleshooting Success
Over the years, I’ve curated a collection of tools that make diagnostics more precise. A high-quality digital multimeter is my trusted companion—it’s invaluable for testing sensors and wiring continuity. I also rely on a reliable repair manual, like the detailed guides available at this resource, which breaks down complex procedures into manageable steps. An inspection mirror and a flashlight help me access hard-to-see areas without disconnecting everything. For software diagnostics, I use manufacturer-specific apps that connect via Bluetooth, giving me instant insights into error codes. These tools have reduced my repair time and boosted my confidence, and I recommend investing in them to anyone serious about appliance maintenance.
Keep the Spark Alive: Your Next Repair Awaits
Remember, troubleshooting is an empowering skill that can save you money and extend your appliances’ lifespan. Each fix builds your understanding, turning frustration into satisfaction. Don’t shy away from diagnosing your oven or dishwasher—embrace the challenge! Start small, practice consistently, and celebrate your progress. The more you learn, the more intuitive repairs become. Whether you’re fixing a stubborn clicking sound or calibrating a thermostat, your hands-on experience will deepen your confidence. So go ahead—give it a try, and let each successful repair inspire you to tackle the next challenge. Your journey toward becoming an appliance troubleshooting pro begins now.