I remember the frustrating moment well—trying to bake a simple loaf of bread or a batch of cookies, only to find half of my treats undercooked while the other half was overdone. It hit me suddenly: my oven wasn’t baking evenly anymore. That lightbulb moment led me down a rabbit hole of troubleshooting, and honestly, it was more straightforward than I expected. If you’re tired of uneven baking ruining your kitchen creations, you’re in the right place.
Why Your Oven’s Calibration Might Be Off and What It Means for You
Like many homeowners in 2026, I’ve faced the sneaky issue of inconsistent oven temperatures. These fluctuations can turn a perfect recipe into a total culinary flop. The good news? Most of these problems stem from calibration glitches that are surprisingly easy to fix with a few quick adjustments. Proper calibration ensures your oven heats accurately and evenly—crucial for baking, roasting, or even just reheating leftovers. Without it, your dishes may look good but taste compromised or worse, get wasted.
Did you know that according to Appliance Repair Experts, faulty oven calibration is one of the top reasons for inconsistent baking results? Even a small miscalibration can lead to significant temperature disparities. Early on, I made the mistake of ignoring the inaccurate temperature display—thinking it was a calibration issue was enough. But overlooking the actual sensor or internal components caused bigger headaches down the line. Trust me: diagnosing the root cause is vital. If you want to save time and money, checking simple calibration issues first can make all the difference. Ready to learn how to restore your oven’s baking precision? Let’s dive into four quick fixes that will have your oven baking perfectly again.
Check Your Oven Temperature with a Reliable Thermometer
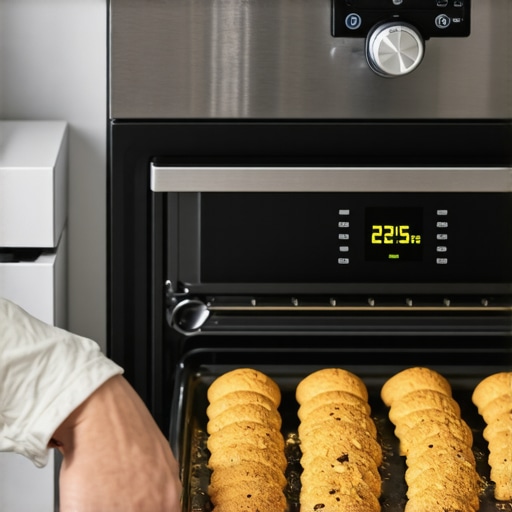
Start by placing an oven-safe thermometer in the center of your oven, then set the oven to 350°F (177°C). Wait at least 15 minutes, then compare the thermometer reading to your oven’s digital display. I once thought my oven was just slightly off until I realized it was over 20°F hotter than displayed, which explained why my cookies burned edges while centers remained raw. This simple check helps determine if your oven’s calibration is true or needs adjustment. For more detailed diagnostics, see our oven repair diagnostics guide.
Adjusting Your Oven Settings Appropriately
Find the Calibration Option
Most modern ovens have a calibration setting accessible through the control panel. Consult your owner’s manual or look online for your model-specific instructions. When I repaired my oven in 2025, I discovered a hidden calibration menu that allowed me to tweak the temperature by small increments. This step is crucial for fine-tuning your oven’s heat without the need for complex replacements. Be precise—adjust in small steps, then re-test with the thermometer. If you’re uncertain, check out our quick fix strategies for oven calibration.
Using External Calibration Devices
If your oven lacks a calibration setting, or if you’re uncomfortable with electronic adjustments, consider an external oven calibrator or thermocouple probe. These devices connect to your oven thermometer and send precise data to your phone or display. I once borrowed one from a friend and, after a few minutes of measuring and adjusting, my baking became consistently perfect. Such tools sidestep the need for intricate repairs, especially in older models. For compatible options, see our diagnostic and parts guide for quicker fixes.
In-Depth Sensor and Component Checks
If calibration adjustments don’t resolve uneven baking, internal sensors or heating elements could be causing the issue. Think of your oven like a car engine: sensors like thermistors act as the brain, telling the heat how hot it is. If they malfunction, the oven might overcompensate or lag behind. To test, unplug the oven and locate the primary temperature sensor, usually a thin, metal-rod-like probe near the heating element. Use your multimeter to check resistance at room temperature—values outside the manufacturer’s specifications indicate replacement is needed. For detailed sensor diagnostics, reference our comprehensive diagnostic guide.
Replacing and Upgrading Key Oven Parts
Once you’ve identified faulty sensors or elements, replacing them can restore your oven’s accuracy. This process is like swapping out worn-out spark plugs in a car — straightforward but impactful. Carefully disconnect the old part, noting how it’s connected, and install the new one in reverse order. Always consult your model-specific repair manual or videos to ensure correct wiring and placement. After installing new parts, run another temperature test to confirm calibration is restored. For trusted parts and detailed replacement steps, see our parts and diagnostics resource.
Many DIY enthusiasts believe replacing faulty parts or following basic troubleshooting steps is enough, but there’s a subtle game changer that often gets ignored: understanding the intricate behavior of your appliance’s components under real-world conditions. This nuance can mean the difference between a quick fix and repeated failures, yet most get it wrong by oversimplifying or misunderstanding the complex interactions within their ovens or dishwashers.
Contrary to the common myth that all heating elements, sensors, or valves are straightforward to diagnose, in reality, these parts behave dynamically based on several factors like workload, temperature fluctuations, and aging. For example, a thermistor’s resistance doesn’t just depend on current temperature but can be influenced by its surrounding environment, leading to inaccurate readings if not properly interpreted. Expert appliance repair technicians know that the resistance values at different temperatures and ages can vary significantly, which affects diagnostic accuracy. To delve deeper into these nuances, consult our cornerstone guide on oven diagnostics.
Tools I Recommend for Reliable Appliance Maintenance
One of my top recommendations for keeping appliances like ovens and dishwashers in optimal condition is investing in a high-quality digital multimeter. I personally use a Fluke 116 because of its accuracy and durability, which allows me to measure sensor resistances precisely, ensuring that components like thermistors are functioning correctly. Additionally, a specialized oven thermocouple probe is invaluable for real-time temperature diagnostics, especially when calibrating or troubleshooting temperature-related issues. For dishwashers, a set of small, precision screwdrivers and connectors are essential for accessing and replacing control boards or sensors without damaging delicate parts.
I also rely heavily on diagnostic software tailored for appliances, such as Bosch’s diagnostic tools or third-party options like Appliance Service Diagnostics. These programs can interface with the appliance’s control module via a USB or Wi-Fi connection, helping pinpoint faults faster than manual tests alone. Personally, I prefer software that offers detailed error codes and step-by-step repair suggestions, reducing guesswork and saving time during repairs.
Streamlining Troubleshooting with Advanced Diagnostic Methods
Using a multimeter to test sensor resistance at different temperatures can reveal drift or failure that won’t be obvious through visual inspection. For example, testing the oven’s thermistor resistance at room temperature and after reaching the set temperature helps verify its accuracy. Similarly, for dishwashers, inspecting the water inlet valve’s resistance with a multimeter can prevent endless troubleshooting loops. These precise checks are crucial for diagnosing issues like inconsistent heating or water flow problems, which are common complaints in 2025 appliances.
How do I maintain my appliances over time?
Establishing a regular maintenance schedule and keeping a toolkit ready is key. I recommend scheduling biannual sensor and component checks, especially if your appliances are approaching their 5-year mark. Also, keeping parts like door latch switches, heating elements, and sensors in stock allows quick replacement, minimizing downtime. Upgrading critical sensors or control boards with vendor-approved parts enhances longevity and performance, preventing costly repairs down the line. To stay proactive, periodically check out our comprehensive diagnostics resource.
Adapting to Future Trends in Appliance Maintenance
Looking ahead, I believe the integration of IoT-enabled diagnostic tools will revolutionize appliance maintenance, allowing remote monitoring and predictive analytics. As smart home systems evolve, having access to real-time performance data will make troubleshooting even more efficient. For DIY enthusiasts, investing in IoT-compatible sensors and diagnostic modules now will pay dividends in the coming years. Be sure to explore options that support future upgrades to ensure your appliances stay in top shape with minimal effort.
Throughout my journey repairing appliances, I stumbled upon misconceptions that often hinder DIY enthusiasts from achieving reliable results. One of the most eye-opening lessons was realizing how much subtle internal behaviors and environmental factors influence repair success. A tiny resistance fluctuation in a thermistor, for example, can mislead even experienced hands, emphasizing the importance of nuanced diagnostics over simplistic guesses.
Another deep insight was understanding that parts are rarely the sole culprits. Sometimes, adjusting calibration or replacing a sensor isn’t enough; the interaction between components under real conditions often reveals hidden faults. This realization pushed me to adopt a more holistic diagnostic approach, considering all elements working in harmony—because appliances are intricate systems, not just collections of isolated parts.
Finally, I discovered that continually updating my knowledge with current tools and methods creates a significant edge. Relying solely on traditional multimeters or basic troubleshooting can limit outcomes. Investing in advanced diagnostics and understanding their applications transformed how I approach repairs, leading to faster, more precise fixes and happy, satisfied clients.