4 Control Board Tests for an Oven That Won’t Heat in 2026
Ever had that sinking feeling when you press the oven button, and silence answers back? Years of baking and roasting only to find your oven suddenly refusing to heat can turn your kitchen into a frustrating no-man’s land. I remember a particular Sunday afternoon—plans for a roast canceled quietly as I futilely tapped the control panel, wondering what had gone wrong. That moment of helplessness was my wake-up call to dig deep into the world of oven diagnostics, especially focusing on the crucial role played by the control board. If you’ve faced similar issues, you’re not alone, and I promise there’s a way out.
Why Your Oven’s Control Board Might Be the Culprit in 2026
Let’s be honest. When your oven refuses to heat, the first instinct is often to blame the heating element or maybe the thermostat. But what if I told you that in many cases—especially with newer models in 2026—the real troublemaker is actually the control board? These digital brains manage everything from temperature settings to safety protocols. Over time, they can develop faults that silently stop your oven from heating altogether. Recognizing this shift is vital because replacing or repairing a faulty control board can restore your oven’s functionality without the fuss of replacing the entire appliance.
Is Focusing on Control Boards Overhyped or Essential?
My early mistake was to overlook the control board entirely, wasting precious time and money replacing parts that weren’t even the problem. It’s tempting to assume the heating element has gone rogue, but with the advancements in oven tech, the control board now plays a pivotal role. According to expert diagnostics guides, addressing the control board can often be the quickest fix—saving weeks of guesswork and headaches. Curious if your oven’s brain is tired? Check out this comprehensive guide for diagnostics and repair tips that have saved many home chefs.
So, have you ever experienced your oven just refusing to heat despite all signs pointing elsewhere? If so, keep reading. We’re about to dive into the practical, step-by-step methods to test and troubleshoot your control board, ensuring you don’t get caught in the cycle of unnecessary replacements. The good news is, with a few simple tools and a little patience, you might just turn your oven back on—and regain that culinary confidence.
**
Test the Power Supply and Check Fuses
Before diving into complex diagnostics, start by ensuring your oven is receiving proper power. Use a multimeter to test the outlet voltage—think of it as confirming the water supply before checking the pipes. If voltage is stable, inspect the oven’s internal fuses or circuit breakers; a blown fuse is like a clogged pipe blocking the flow. Replacing blown fuses or resetting breakers can often restore power, paving the way for further tests.
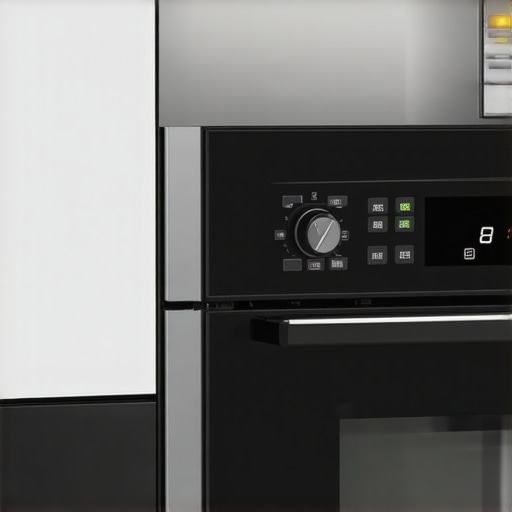
Inspect the Control Board Visually for Damage
Remove the oven’s control panel to access the circuit board, keeping in mind it’s like opening the motherboard of a computer. Look for burnt components, corrosion, or cracked solder joints—these are clear signs of failure. A burnt resistor or melted capacitor is akin to a fried wire, indicating that the control board needs repair or replacement. Remember, safely disconnect power before any inspection to avoid shocks.
Use a Multimeter to Test Control Board Components
Set your multimeter to resistance or voltage mode to test critical control board parts. For example, check the input voltage at the control board to verify it’s receiving power. Next, test specific components like relays and resistors—think of it like checking if a valve opens and closes properly. If readings are off, the component is faulty. Refer to the [diagnostics guide](https://appliancebargainz.com/oven-repair-tips-diagnostics-quick-fix-strategies-for-faster-results-2025) for detailed testing procedures.
Perform a Functional Test of the Control Board
Reconnect the control board temporarily, and perform a test cycle. Observe if the display powers up and responds to inputs. If buttons don’t register or the display remains blank, the control board might have lost its programming—similar to a computer freezing. Sometimes disconnecting and reconnecting ribbon cables can reseat faulty connections, restoring functionality without replacing parts. For guidance, check the step-by-step [diagnostic routine](https://appliancebargainz.com/oven-display-blank-3-control-board-diagnostics-to-try-2026) for control boards.
Test the Control Board with a Replacement or Bypass
If suspicion remains high, replace the control board with a compatible unit or perform a bypass test by connecting known-good signals. This is akin to swapping out a computer’s central processing unit to see if it resolves the issue. Be cautious and follow the manufacturer’s wiring diagrams meticulously. Such a method can confirm whether the control board is the root cause before investing in a new one. Remember, a faulty control board is often the hidden culprit behind no-heating complaints. For sourcing parts, explore the [repair parts guide](https://appliancebargainz.com/oven-repair-parts-diagnostics-quick-guide-to-fix-your-appliance-fast-2025).
Document Your Findings and Decide on Next Steps
Keep a detailed log of your tests—the voltages measured, components inspected, and any anomalies noticed. This record will be invaluable if you need professional help or decide to order a replacement control board. If tests indicate a faulty control board, proceed to replace it with proper tools and follow safety protocols. If not, revisit other potential causes like wiring issues or sensor failures, consulting related diagnostics at [this guide](https://appliancebargainz.com/oven-wont-heat-5-common-parts-to-diagnose-in-2026) for comprehensive troubleshooting.
When it comes to appliance diagnostics, many enthusiasts and even seasoned repairers overlook subtle nuances that can make or break a repair job. A common misconception is that troubleshooting is all about checking specific parts; however, the real mastery lies in understanding the interconnectedness of components and the assumptions we carry. For example, many believe that replacing a faulty element guarantees a fix, but diagnostics require a layered approach—testing circuits, verifying signals, and interpreting diagnostics codes based on real data, not just symptoms.
One critical nuance is the danger of confirmation bias. It’s easy to fixate on a part that visibly looks damaged, like a control board or heating element, without confirming its fault through proper testing. This oversight can lead to unnecessary part replacements, increasing costs and risking further damage. As highlighted by expert guides, employing multimeter testing for each suspected component before replacement ensures accuracy—see this diagnostics guide for detailed testing procedures.
Are Faulty Control Boards Truly the Root of All Failures?
Many assume control boards are the primary failure point in ovens and dishwashers—especially in models from recent years. While control boards can indeed develop faults, it’s crucial to consider other causes like wiring issues, sensors, or power supply problems. Rushing to replace the control board without comprehensive testing often results in recurrent failures. The key is to verify that signals reach and originate from the control board effectively; otherwise, you’re chasing ghosts. For advanced diagnostics strategies, this quick fix guide proves invaluable.
Another trap to avoid is neglecting the importance of reference points in your testing routine. Many overlook the value of verifying ground connections or the integrity of wiring harnesses, which can mimic control board failures. An overlooked wiring fault can cause intermittent faults that look like electronic failures but are actually related to connectivity issues. Ensuring that all wiring is intact and properly connected is a step often skipped—this is well covered in comprehensive diagnostic articles. In the realm of dishwasher diagnostics, a prevalent myth is that error beeps always indicate a specific component failure, ignoring the fact that electrical signals could be blocked or misinterpreted due to sensor misalignments or control issues. Deep diagnostics involve testing each sensor, relay, and circuit independently, rather than jumping straight to replace parts based on error codes. Have you ever fallen into this trap? Let me know in the comments. Remember, effective repair begins with precise diagnosis—embracing nuance and avoiding common myths can save you time, money, and frustration.
Staying ahead of appliance issues requires more than just the basic screwdriver and multimeter. As someone deeply involved in diagnostics, I recommend investing in a high-quality digital inspection camera. This tool allows you to see inside tight spots—like behind control panels or within wiring harnesses—without disassembling everything. Personally, I use a Wi-Fi-enabled borescope, which streams live footage to my tablet. It’s invaluable for spotting corrosion, loose connections, or burnt components at a glance. Additionally, having a reliable set of precision screwdrivers tailored for small appliance screws helps prevent stripped fasteners during reassembly. For software, diagnostic apps connected to your multimeter can streamline troubleshooting by interpreting readings against known appliance parameters, reducing guesswork.
Long-term results come from documenting your repairs. I keep a digital log of every diagnosis, part replaced, and issue unresolved. Over time, patterns emerge—like worn-out sensors or failing control boards—that inform proactive maintenance. Regularly testing components such as sensors using specific diagnostics, as outlined in this expert guide, ensures your appliances continue to run smoothly and helps you plan for parts replacements before catastrophic failures occur. Scalability is also key; as you gain experience, investing in a small set of specialized tools—like a sensor capacitance meter or a relay tester—can significantly speed up repairs and reduce unnecessary part swaps.
How do I keep my appliance diagnostics skills sharp over time?
Staying current with evolving diagnostics strategies is essential. I dedicate time weekly to review the latest repair articles and forums. Participating in online communities allows sharing of nuanced insights—like recognizing subtle signs of control board degradation or sensor drift—helping me refine my approach. I also recommend setting up a dedicated repair space with organized parts bins and labeled tools, which streamlines workflow during troubleshooting sessions. For instance, understanding how to interpret diagnostics codes accurately can prevent unnecessary replacements, saving both time and money. Make it a habit to periodically revisit your tools and maintenance routines, ensuring they match the complexity of modern appliances.
In fact, leveraging diagnostic software that interfaces with your multimeter or test devices can predict potential failures before they happen. Predictive maintenance is the future, especially as appliances become smarter and more interconnected. For advice on integrating these tools into your routine, check out this comprehensive guide. I encourage you to try using a diagnostic app in tandem with your multimeter—it’s a game-changer for early fault detection and preserving your appliances’ long-term health.
What the Unexpected Taught Me About Oven Repairs
One profound lesson I learned is that the most obvious culprit isn’t always the root cause. I once replaced a heating element only to find the oven still refused to heat—turns out, the control board had a microcrack disrupting signals. Recognizing these subtle signs involved paying close attention to diagnostics codes and inspecting connections meticulously. This experience reinforced that patience and detailed scrutiny ultimately lead to success.
The Secret Sauce Behind Reliable Repairs
Building a robust diagnostic approach isn’t about following a checklist blindly—it’s about cultivating curiosity and questioning assumptions. For example, when an oven fails to preheat, investigating wiring harnesses and sensors alongside the control board allows for a comprehensive diagnosis. Integrating tools like a Wi-Fi-enabled borescope streamlines this process, revealing hidden issues like corrosion or disconnected cables that can be the actual problem.
Why Deep Diagnosis Beats Guesswork Every Time
I’ve seen countless repair attempts fail because of rushing into part replacements based solely on symptoms. Instead, employing a layered testing method—examining power supply, inspecting visual signs of damage, and conducting multimeter tests—transforms troubleshooting into a strategic process. This approach conserves time and money, and most importantly, increases the likelihood of a long-lasting fix.
Insider Wisdom for Navigating Complex Control Boards
Don’t Discount Minor Symptoms: Small irregularities like flickering displays or inconsistent responses can indicate control board faults, especially when combined with recent error codes. Recognizing these nuances prevents unnecessary replacements.
Check Connections Before Replacements: A loose ribbon cable often masquerades as a faulty control board. Ensuring all wiring is secure is a quick win that can save hours of diagnostic guesswork.
Document Every Step: Keeping detailed notes of test results and observations helps track patterns and simplifies future troubleshooting efforts.
Stay Updated with Latest Guides: Resources like the diagnostics guide keep me informed about emerging issues and new testing techniques.
Embrace Continuous Learning: Modern ovens are increasingly sophisticated. Investing time in online forums and repair communities enhances your diagnostic intuition and keeps you ahead of common pitfalls.
Navigate the Repair Maze with Confidence
Overcoming the hurdles in diagnosing oven issues hinges on your willingness to dig beneath the surface. Embrace detailed testing, scrutinize connections, and leverage innovative tools to unravel complex problems. Every successful repair boosts your confidence and sharpens your skills, transforming frustration into mastery. Remember, the secret to effective diagnostics isn’t just technical prowess—it’s patience, curiosity, and a readiness to learn from every challenges faced.
Are you ready to level up your diagnostic skills? Share your experiences or ask questions below—let’s troubleshoot together!
 When it comes to appliance diagnostics, many enthusiasts and even seasoned repairers overlook subtle nuances that can make or break a repair job. A common misconception is that troubleshooting is all about checking specific parts; however, the real mastery lies in understanding the interconnectedness of components and the assumptions we carry. For example, many believe that replacing a faulty element guarantees a fix, but diagnostics require a layered approach—testing circuits, verifying signals, and interpreting diagnostics codes based on real data, not just symptoms.