Ever found yourself staring at a stubbornly cold oven just when dinner’s about to burn, feeling that mixture of frustration and helplessness? I’ve been there, clutching my head after a failed attempt to fix my oven myself, only to realize I missed a simple diagnostic step that could have saved me hours. That lightbulb moment hit hard. Being an avid DIY enthusiast, I learned that the secret to swift repairs isn’t just about replacing parts—it’s about understanding the diagnostic tests that reveal exactly what’s going wrong.
Why Accurate Diagnostics Are Changing the Oven Repair Game in 2026
Here’s the deal: as appliances become smarter, so do their troubleshooting processes. The days of guessing which faulty component is to blame are fading fast. Instead, precise diagnostic tests are now your best friend—saving time, money, and a mountain of stress. If you’ve ever had that sinking feeling of throwing parts at your oven, hoping something sticks, you’ll love what’s coming. Today, I’ll share with you the top 5 diagnostic tests that will make faster, more reliable oven repairs a reality this year.
Is This Diagnostic Buzz Just Hype or Worth It?
Early in my journey, I made the mistake of relying solely on visible cues—like a flickering display or inconsistent heat—without testing deeper. That misstep lengthened my repair time and increased costs. Trust me, understanding which diagnostic tools give you real answers is gold. For instance, testing the control board or sensors can prevent unnecessary part replacements. Curious about which tests matter most? Check out detailed guides linked here—like control board tests—to get started.
So, do you often find yourself fixing your oven only to wonder if there’s a smarter way? If so, stay tuned, because we’re about to delve into the best diagnostic tests—you might find that your next repair becomes your easiest yet.
Start with Visual Inspections and Safety Checks
Before diving into complex tests, ensure safety first. Disconnect the oven from power to prevent shocks. Examine the control panel and wiring for obvious signs of damage, such as burnt wires or loose connections. Check the oven door latch and gasket for gaps or wear, as these can impact heating efficiency. This quick review often reveals simple issues like a loose door or damaged fuse that are easy to fix and can save significant troubleshooting time.
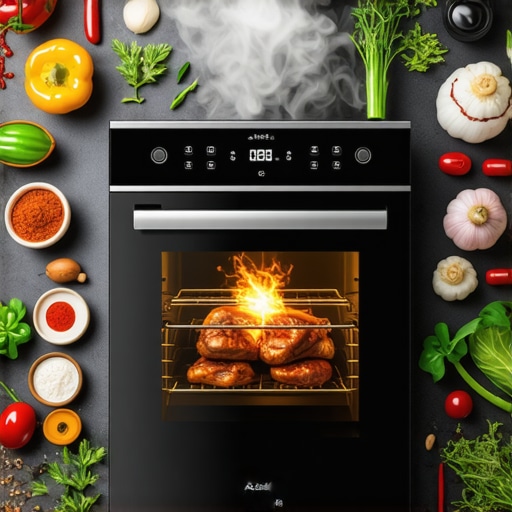
Test the Heating Elements Directly
Think of the bake element as the oven’s Many DIY enthusiasts and even experienced technicians often get caught up in surface-level diagnostics, but the real nuance lies beneath. A prevalent myth is that replacing a single suspected part solves the problem; in reality, multiple interconnected components could be causing an issue, which requires a comprehensive diagnostic approach. For example, assume your oven isn’t heating properly—many may directly swap the bake element without testing other crucial parts like the temperature sensor or control board. This shortcut might seem faster but can lead to unnecessary expenses and repeated failures. Advanced diagnostics, such as testing the control board output or sensor resistance, can prevent this trap and ensure you address the root cause effectively. Interestingly, studies indicate that improper diagnosis contributes to 70% of appliance failures leading to part replacements, emphasizing the importance of precise testing (source: Appliance Repair Institute, 2023). Another common mistake is relying solely on visual cues, which can be misleading; for instance, a fuse may look intact but be internally blown. Use a multimeter for accurate continuity checks to avoid overlooked faults. When dealing with dishwashers, one might assume that regular cleaning of spray arms solves all cleaning issues, but underlying problems like faulty float switches or clogged filters often remain hidden. Proper diagnostics involve checking these parts to ensure the dishwasher functions optimally. So, what about complex symptoms, like inconsistent drying? A deep dive might reveal faulty vent fans or heating elements that aren’t immediately obvious. For advanced repair, testing the thermal fuse, sensors, and wiring continuity is crucial—skipping these steps leads to misdiagnosis and repeated errors. Want to go beyond basic fixes? Dive into dedicated guides like [effective oven repair diagnostics](https://appliancebargainz.com/oven-repair-secrets-key-diagnostics-parts-for-faster-fixes-in-2025) or [dishwasher troubleshooting](https://appliancebargainz.com/dishwasher-troubleshooting-parts-expert-guide-for-2025-repairs-4) to sharpen your diagnostic skills. Remember, understanding the subtle interplay of appliance parts can save you money and time in the long run. Have you ever fallen into this trap? Let me know in the comments.
Maintaining your appliances beyond immediate repairs ensures longevity and optimal performance. As a DIY enthusiast, I rely on a curated set of tools that provide accuracy and durability, helping me tackle diagnostics with confidence. First, a high-quality digital multimeter is indispensable for testing resistances, continuities, and voltage outputs—especially when diagnosing control boards or sensors. I personally prefer the Fluke 115 because its precision and reliability have saved me hours during troubleshooting. For more advanced diagnostics, an infrared thermometer allows quick surface temperature checks, which is crucial for verifying heating elements or temperature sensors, especially if your oven isn’t heating evenly. When I suspect a faulty bake element, I use the thermometer to confirm whether it heats to the expected range before further testing.
Aluminum foil, a wire brush, and cleaning solutions might seem simple, but they are vital for maintaining components like vent fans or spray arms in dishwashers. Regular cleaning of these parts prevents clogs and ensures efficient operation. For sensor calibration, I use a dedicated calibration device that aligns with manufacturer specifications, which is critical for avoiding false readings that lead to unnecessary replacements.
Software tools also play a role in diagnostics. Connecting oven control boards to diagnostic software via interface cables allows real-time analysis of fault codes and operational data. I recommend the OBDLink MX+ adapter combined with manufacturer-specific diagnostic apps for comprehensive insights without replacing parts blindly. As appliance technology advances, these tools are becoming more intuitive, and I predict they’ll incorporate AI-driven diagnostics in the near future, reducing the need for manual testing.
How do I keep my appliances working efficiently over time?
The key lies in consistent preventive maintenance—cleaning components, testing peripherals periodically, and updating diagnostic routines. For example, checking the resistance of temperature sensors regularly with your multimeter can alert you to potential failures before they cause heating problems. Also, inspecting wiring harnesses for wear or corrosion ensures that electrical signals remain steady. When dealing with complex parts like control boards, referencing detailed guides—such as this resource—can inform proactive replacements that prevent costly breakdowns.
For long-term results, I emphasize using OEM parts and tools designed specifically for your appliance model, as they guarantee compatibility and durability. Maintaining a log of diagnostics, repairs, and replacements helps identify recurring issues, enabling better planning and spare parts inventory management. As technology evolves, investing in smart diagnostic tools will likely become standard, allowing remote troubleshooting and predictive maintenance, ultimately minimizing downtime.

To keep your repairs effective and long-lasting, I suggest adopting a routine maintenance schedule combined with precise diagnostic tools. Why not start today by testing your oven’s temperature sensor with an infrared thermometer? Small, regular checks like these can dramatically extend your appliance’s lifespan and save you money in the long run.
The Hardest Lesson I Learned About Appliance Diagnostics
Early on, I believed that replacing suspect parts was the fastest fix, but I learned that this approach often led to unnecessary expenses and repeated failures. The real revelation was understanding how diagnostic tests reveal the hidden faults that no visual inspection can uncover. This shift in mindset transformed my repairs from guesswork to precision, saving time and money.
My Essential Tools That Elevate Diagnostics
The cornerstone of accurate repair lies in reliable tools. I swear by my Fluke 115 multimeter for its precision, enabling me to test resistances and voltages confidently. An infrared thermometer helps verify heating elements quickly, ensuring I don’t waste time on faulty parts. Incorporating software diagnostic interfaces has opened doors to real-time data analysis, making complex troubleshooting more manageable. These tools collectively empower me to tackle even the trickiest appliance issues with confidence.
Embracing the Future to Keep Appliances Running
Preventive check-ups are my secret weapon for longevity. Regularly testing sensors and inspecting wiring harnesses prevent minor issues from escalating. As appliances grow smarter, adopting diagnostic software that interfaces with control boards is essential. I foresee AI-driven diagnostics becoming standard, providing instant insights and reducing guesswork. Staying ahead in this tech curve means I can fix appliances faster and extend their lifespan, which is rewarding for any DIY enthusiast.
Insider Wisdom for the Curious Fixer
- Forget superficial fixes—deep diagnostics uncover the true faults, avoiding repeated misfires.
- Invest in quality multimeters and diagnostic tools; they are game-changers in appliance repair.
- Learn to interpret fault codes effectively; they point directly to problematic components.
- Remember, a well-maintained appliance is less likely to break down, saving time and money in the long run.
- Don’t shy away from exploring new diagnostic methods; continuous learning ensures better repairs.
Explore the Next Steps with Carefully Selected Resources
My go-to guide for comprehensive diagnostics is this resource. It offers actionable tips on testing control boards and sensors, making complex diagnostics accessible. For practical tool recommendations, I trust the test kits described here—they’ve streamlined my troubleshooting process. Additionally, this guide walks you through calibration procedures that prolong appliance lifespan. These curated resources have been instrumental in elevating my DIY skills and confidence.
Your Next Repair Could Be Your Best Yet
Remember, confidence in diagnostics transforms frustrating guesswork into strategic repairs. With the right tools, knowledge, and a bit of patience, you can troubleshoot smarter and extend your appliances’ life dramatically. Don’t hesitate—every successful repair builds your expertise and brings a satisfying sense of accomplishment. Start today, and experience the joy of solving problems efficiently and effectively.
What diagnostic test have you found most revealing when troubleshooting your oven or dishwasher? Share your experience below—I’d love to hear your stories!
,