I stood there, dish towel in hand, staring at a puddle that definitely wasn’t there ten minutes ago. The smell hit me first—a sharp, acrid metallic tang that told me something was very wrong. My old faithful dishwasher, which had survived three kids and a decade of Thanksgiving dinners, was making a sound like a blender full of gravel. It’s a sinking feeling, isn’t it? You’re weighing the cost of a repair against the price of a shiny new stainless steel model while your dirty plates pile up. I’ve been in your shoes more times than I care to admit, and today, I’m going to help you figure out if your motor is truly toast or if it’s just throwing a temporary tantrum.
Stop Ignoring That Angry Humming Sound
When you press start and hear a low, rhythmic hum but no water moving, your motor is likely struggling to turn. I remember the first time I heard it; I figured it would just ‘work itself out’ if I restarted the cycle. Big mistake. I ended up overheating the whole system because I didn’t realize the impellers were jammed. If your machine is stuck in a loop, you might need to check the fast fix for a dishwasher that wont start before assuming the worst. Sometimes it’s a simple blockage, but often, that hum is the motor’s last gasp before it gives up the ghost entirely.
Is it even worth the hassle of a DIY repair?
This is the big fear, right? You don’t want to spend $200 on parts and four hours of your Saturday only for the thing to leak again. I once spent half a day trying to bypass a sensor, only to find out the motor windings were literally charred black. It was a classic case of not knowing what to look for early on. But here’s the truth: if you can identify the problem early, you save hundreds. According to data from Consumer Reports, the motor is one of the top three most expensive parts to fail, so getting the diagnosis right is the difference between a $50 fix and a $700 replacement.
When the Scent of Burning Plastic Fills the Kitchen
If you smell something burning, stop the cycle immediately. This usually means the motor is seized and the internal windings are beginning to melt. Before you give up and head to the appliance store, it’s worth looking at a comprehensive guide to diy diagnostics to rule out other culprits like a melted wiring harness. Have you ever smelled that weird electrical fire scent coming from your kitchen mid-cycle? It’s terrifying! Tell me your stories in the comments. We’re going to walk through testing your dishwashers circulation pump for continuity to be absolutely sure before we call it quits on your machine and start shopping for a replacement.
Digging into the Belly of the Beast
To get a real answer, you have to get hands-on. Start by killing the power at the breaker—never trust just the ‘off’ button. Most motors live at the very bottom of the machine, tucked away like a hidden engine. You’ll likely need to remove the lower kickplate or even pull the whole unit out and lay it on its back. If you notice a damp mess down there, you should investigate why your dishwasher is leaking from the kickplate area before you blame the motor itself. Often, a slow leak drips directly onto the motor terminals, causing a short that mimics a total mechanical failure. I remember once pulling my unit out, convinced I needed a new pump, only to find a loose hose clamp had been ‘misting’ the motor for months. A ten-cent zip tie saved me a $300 repair bill.
The Manual Spin Test That Saves Hundreds
Think of your dishwasher motor like a bicycle wheel. If a stick gets caught in the spokes, the wheel won’t turn, no matter how hard you pedal. This is exactly what happens when a stray popcorn kernel or a piece of broken glass wedges itself into the impeller. With the motor accessible, try to rotate the fan or the internal impeller by hand. It should spin with just a little resistance. 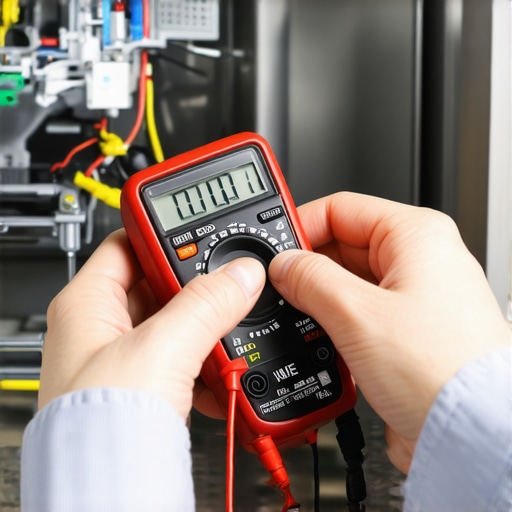 If it feels like it’s stuck in wet concrete, you’ve found your culprit. I once spent an hour fighting a ‘dead’ motor only to fish out a single cherry pit that had wedged itself perfectly into the blades. Once I popped it out, the machine roared back to life. This is one of the most effective parts and diagnostics tips to identify dishwasher faults quickly. If the impeller spins freely but the machine still won’t run, the problem is likely electrical rather than mechanical.
Use a Multimeter to Find the Electrical Heartbeat
This is where we get technical but don’t let it intimidate you. A multimeter is just a tool that checks if electricity can actually flow through a part. You’re looking for ‘continuity’—a continuous path for the current. Set your meter to the Ohms setting and touch the probes to the motor’s terminals. If the screen shows ‘OL’ or infinity, the internal copper windings are broken, and the motor is officially trash. We follow the same logic when testing your dishwashers circulation pump for continuity to confirm the diagnosis. If you get a reading (usually between 10 and 40 ohms), the motor is electrically sound, and the issue might be your control board or a door latch.
Apply These Same Rules to Your Oven
Don’t think these diagnostic skills are limited to just the dishwasher. The logic of ‘Check for Power, Check for Obstruction, Check for Continuity’ applies to almost every appliance in your kitchen. If your oven is acting up, you can use the same mindset for oven diagnostics to pinpoint faults before calling a repair expert. For instance, just like testing a dishwasher motor, you can learn how to test a gas oven igniter with a multimeter to see if it has the ‘heartbeat’ necessary to glow and light the gas. Mastering these basic tests turns you from a frustrated homeowner into a DIY expert who doesn’t get swindled by unnecessary part replacements.But becoming an expert means more than just using a meter; it requires unlearning some of the most common myths that even experienced DIYers fall for.
The Myth of the Bulletproof Control Board
Everyone assumes that when an oven starts acting possessed—beeping at midnight or changing temperatures mid-bake—the expensive control board is the culprit. In my experience, it’s rarely that simple. Often, you’re just seeing is your oven control board failing symptoms when the real issue is a $20 sensor or a loose wire. I’ve seen people drop $300 on a new board only to find the same flickering screen because they didn’t know how to check for a burnt terminal block on your electric oven. The terminal block is the gatekeeper of power; if it’s charred, no amount of new computer chips will fix your heat. Have you ever fallen into this trap? Let me know in the comments. 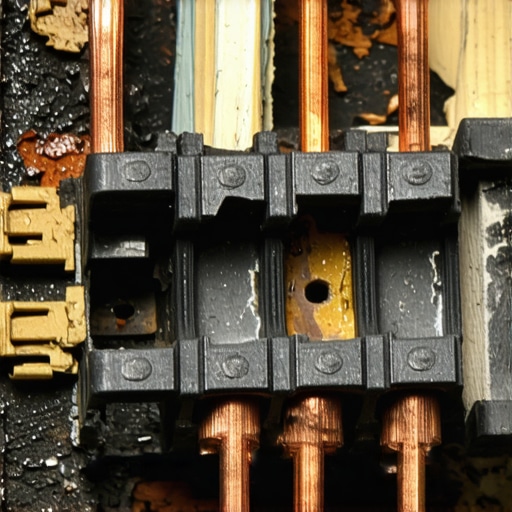
Is the self-clean cycle actually damaging your oven?
This is the nuance that separates the pros from the amateurs. While manufacturers include a self-clean button, many repair experts, including technical researchers from groups like AHAM (Association of Home Appliance Manufacturers), note that the extreme heat—often exceeding 900 degrees—is a leading cause of blown thermal fuses and fried control boards. It’s the ultimate ‘oops’ factor: you clean your oven to prepare for a big dinner party, and the concentrated heat kills the electronics just hours before the turkey goes in. Instead of risking a total blackout, I always recommend mastering oven repair essentials and troubleshooting common issues before you hit that high-heat button.
The Over-Detergent Trap in Modern Dishwashers
We’ve been conditioned to think more soap equals cleaner plates, but modern high-efficiency machines are smarter than that. If you see suds at the bottom after a cycle, you aren’t just wasting soap; you’re confusing the turbidity sensor. This often explains why your dishwasher soap is still dry after a cycle—the machine’s sensors think it has already completed the cleaning phase because of the excessive foam. Also, be wary of the chemicals you use. There is a specific truth about dishwasher pods and your drain hose: if your water temperature doesn’t stay consistently high, that ‘plastic’ film can gunk up your drainage system over time. Before you blame the pump, look at signs your oven temperature sensor is inaccurate or check if your water heater is set high enough to melt those pods properly. Real mastery isn’t just about replacing parts; it’s about understanding the delicate balance of heat, chemistry, and timing.Beyond just identifying the parts, I have to talk about the gear that actually makes this possible. If you are still using a $5 analog multimeter you found in a junk drawer, you are doing yourself a disservice. I swear by my Klein Tools MM400 because it is auto-ranging. When you are shoved into a dark corner under a sink, you do not want to be fiddling with dials to find the right voltage range. You just want to know if that heating element is dead. Using high-quality probes is a game changer when testing an oven temperature sensor with just a multimeter because cheap ones often have high internal resistance that throws off your Ohms reading by just enough to make you buy a part you do not need. The precision of a True RMS meter is particularly vital when dealing with varying voltages in your home; I once saw an oven that would not heat because the terminal block was only receiving partial voltage, something a cheap tester might have missed entirely. 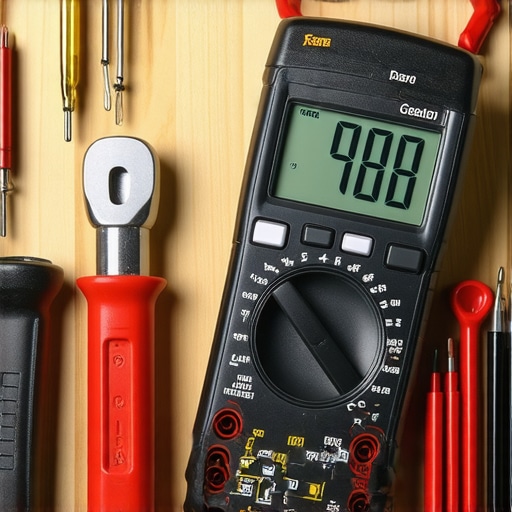
Don’t Lose Your Screws in the Insulation
I have also learned the hard way that magnetic nut drivers are non-negotiable. Modern ovens are held together by dozens of 1/4-inch screws, and if you drop one into the insulation of the side panels, it is gone forever. I have spent more time fishing for dropped screws than actually oven repair essentials and troubleshooting common issues usually requires. It is the little things that keep a quick Saturday fix from turning into a four-hour nightmare of disassembling the entire outer shell just to find a piece of hardware.
How do I keep these machines running for another decade?
Maintenance is not just a buzzword; it is about preventing the avalanche effect where one small failure cascades into a total system collapse. For your dishwasher, that means quarterly deep cleans. You should learn the best way to clean a greasy dishwasher filter because a clogged filter forces the motor to work twice as hard to circulate water, leading to that premature burnout we discussed earlier. In the oven, it is about ensuring airflow and thermal stability. If your racks are covered in burnt-on grime, or if you are fixing an oven that bakes unevenly, you are likely dealing with hotspots that can eventually trip a safety sensor or warp the interior liner. Proactively testing your dishwashers high limit thermostat for continuity once a year can save you from a mid-winter appliance crisis when you least expect it.
The Coming Era of Smart Diagnostics
Looking ahead, I see a shift toward Diagnostic-as-a-Service models. Brands are already pushing Wi-Fi-enabled diagnostics that tell your phone exactly what is wrong. While this sounds great, Technical Service Bulletins from the United Appliance Servicers Association (UASA) remind us that these sensors can also fail, adding another layer of complexity to our repairs. We are moving toward a world where you will need a tablet as much as a wrench to talk to your machines. I want you to take five minutes today and just pull out your dishwasher filter. If it feels slimy or looks gray, give it a scrub. It is the single easiest way to extend your motor’s life. Trust me, your wallet will thank you later.
What My Biggest Repair Blunders Taught Me
After years of wrestling with wiring and wet floors, I have realized that the biggest hurdle isn’t the mechanical failure; it is the mental one. We often jump to the most expensive conclusion because we are stressed and want a quick fix. I once spent a small fortune on a new control board because the display was flickering, only to realize later I should have spent five minutes learning how to check for a burnt terminal block on your electric oven. Here are the three truths I live by now: first, always check the plug and breaker first because vibration can loosen connections over time. Second, 90% of ‘dead’ motors are actually just jammed with simple debris like toothpicks or glass. Third, your machine isn’t failing randomly; it is sending you signals through sound and scent that you can learn to interpret with practice.
The Only Tools You’ll Ever Really Need
You do not need a professional van full of gear to be successful in home maintenance. If you are serious about mastering oven repair essentials and troubleshooting common issues, your kit needs three core items. A high-quality auto-ranging multimeter is the heart of your diagnostic power, allowing you to test everything from sensors to switches. I also recommend a telescopic mirror to see behind those heavy units without pulling them out completely and potentially scratching your floors. Finally, keep a digital copy of dishwasher parts: a comprehensive guide to diy diagnostics on your phone. Having the right reference data at your fingertips prevents that mid-repair panic where you start guessing instead of testing scientifically. #IMAGE_PLACEHOLDER_E#
Take Back Control of Your Kitchen Today
Repairing your own appliances is about more than just saving money; it is about the confidence that comes from knowing exactly how your home functions. Whether you are fixing an oven that bakes unevenly or reviving a sluggish dishwasher motor, every small success builds your expertise for the next challenge. Don’t be afraid to get your hands dirty and look at the internal components yourself before calling a technician. You have the tools, you have the diagnostic roadmap, and now you have the plan to keep your kitchen running smoothly for another decade. Have you ever felt like giving up on a repair right before you found the solution? Let me know in the comments below!