I’ll never forget the Tuesday night I almost threw my kitchen sponge at the wall in pure frustration. I’d just finished a marathon of meal prepping, the sink was finally empty, and I sat down to relax. Then, that dreaded ‘thump’ didn’t happen. You know the one—the sound of the detergent door popping open mid-cycle. I opened the machine an hour later to find a pile of greasy plates and a perfectly intact soap pod just sitting there, mocking me. It feels like a betrayal, doesn’t it? You do all that work loading the thing, and it fails at its one job. Before you go shopping for a whole new appliance or start looking at dishwasher parts and DIY diagnostics, let’s take a breath. I’ve been there, and I’ve made the expensive mistakes so you don’t have to.
Don’t Let a Stuck Door Ruin Your Night
Most of the time, the reason why your dishwasher pod is still in the dispenser after a wash isn’t some catastrophic engine failure. Early in my DIY journey, I actually replaced an entire control board because I thought the timer was broken. It turned out I was just using an oversized spatula that physically blocked the door from swinging open. Talk about a face-palm moment! According to data from Consumer Reports, nearly 25% of dishwasher performance issues are linked to loading errors rather than mechanical failure. Today, we are going to pinpoint exactly what’s blocking that latch and get your dishes sparkling again without a repair bill. Have you ever found yourself re-washing a whole load because the soap never even touched the water?
Is it really worth the effort to fix this myself?
You might be thinking that modern appliances are just too complex for a quick home fix, or that maybe the latch mechanism is just “tired.” While it’s true that some parts eventually fail, most soap door issues are purely mechanical and take less than ten minutes to resolve. If the spring has truly given up, replacing the dishwasher soap dispenser assembly is a surprisingly straightforward task that anyone with a screwdriver can handle. We’ll look at the simple stuff first, like the best way to load your dishwasher to ensure that door has the clearance it needs. Sometimes, the problem is just a bit of gunk or a worn-out dishwasher detergent dispenser seal that’s getting sticky. We’re going to walk through the diagnostics together, neighbor-to-neighbor, so you can stop hand-washing those pans once and for all.
Clear the Path for the Soap Door
Before you start ordering dishwasher parts and DIY diagnostics, check the most obvious culprit: your dinner plates. Think of your detergent dispenser like a bedroom door. If you park a massive laundry basket right in front of it, that door isn’t swinging open no matter how hard you turn the handle. In a dishwasher, large platters or long utensils placed in the bottom rack frequently block the dispenser door’s path. I once spent forty minutes trying to ‘fix’ a latch only to realize my favorite oversized lasagna pan was leaning against the dispenser like a stubborn bouncer at a club. Mastering the best way to load your dishwasher for maximum water reach is often the only repair you actually need to perform.
Scrub Away the Gunk Holding the Latch Hostage
Dishwasher detergent is designed to be sticky when wet, and over time, a film of old soap and hard water builds up around the dispenser’s hinges. This residue acts like a weak glue, holding the door shut even when the machine sends the signal to release. I’ve seen cases where a tiny shard of dried noodle got wedged in the spring mechanism, completely paralyzing it. Take an old toothbrush and some warm vinegar to the area. You should also look for the fast way to clean grimy dishwasher door gaskets to ensure no debris from the main seal is migrating over to the dispenser. If the seal around the soap cup itself looks brittle or flat, you might be looking at how to replace a worn-out dishwasher detergent dispenser seal to prevent moisture from seeping in prematurely.
Keep the Dispenser Dry Before You Load
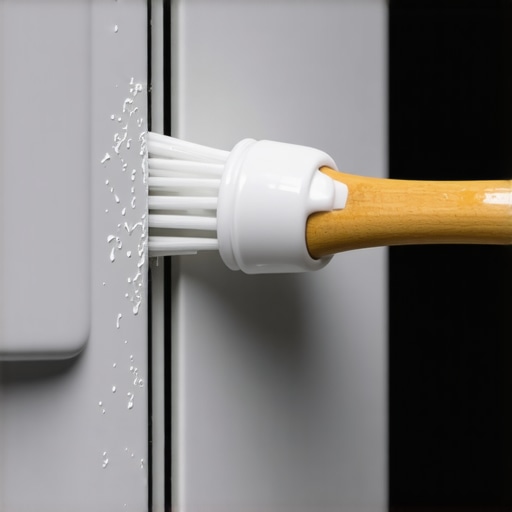
One of the most common reasons why your dishwasher pod ends up undissolved in the tub is moisture in the cup. If you have wet hands when you put the pod in, or if the dispenser wasn’t dried from the last cycle, the pod’s outer casing starts to melt and stick to the plastic. This creates a vacuum effect that prevents the door from popping open. I make it a habit now to wipe the dispenser bone-dry with a kitchen towel before every load. It’s a five-second step that has saved me dozens of re-wash cycles.
When the Problem Is Heat and Not Just Mechanics
Sometimes the door opens just fine, but the pod stays put or doesn’t dissolve. This is usually a water temperature issue. If your water isn’t hitting at least 120°F, that pod is going to sit there like a stubborn pebble. Much like oven diagnostics for pinpointing faults, you can use a multimeter to check the vitals of your machine. You might need to try testing the resistance on your dishwasher heating element to ensure the water is actually getting hot enough to activate the detergent. If the heater is dead, the dispenser might ‘thump’ open, but you’ll still find a gooey mess inside later.
Stop Blaming the Latch for Every Failure
Here is where we get into the real ‘pro’ territory. Most homeowners assume that if the door doesn’t open, the mechanical latch must be snapped or jammed. But here is the contrarian truth I’ve learned from years of tinkering: in many modern high-end models, the culprit isn’t a spring at all—it’s the wax motor. Unlike a traditional solenoid that snaps open with a loud, satisfying click, a wax motor uses heat to expand a piston slowly. If you are someone who likes to peek inside or hit ‘pause’ frequently, you are actually resetting that thermal process. You might think you’re helping, but you’re actually preventing the dispenser from ever reaching the temperature needed to trigger the release. Before you go hunting for parts and diagnostics to identify dishwasher faults quickly, try running a full, uninterrupted heavy cycle to see if the ‘broken’ door was just a victim of your own curiosity.
Why is my dispenser still closed even though the latch tests fine?
If you’ve verified the path is clear and the latch isn’t sticky, you need to look at the electrical heartbeat of the machine. This is where most DIYers get intimidated, but it’s essentially the same logic as oven repair essentials and troubleshooting common issues. The control board sends a specific voltage to the dispenser at a specific time. If the wiring harness in the door has frayed from years of opening and closing, that signal never arrives. According to the Association of Home Appliance Manufacturers (AHAM), electrical fatigue in door-mounted components is a leading cause of ‘ghost’ failures in appliances over five years old. You should try 5 multimeter tricks for diagnosing a dead control board to see if the dispenser is even getting power before you bother unscrewing the assembly.
Don’t Make the Rookie Mistake with Lubricants
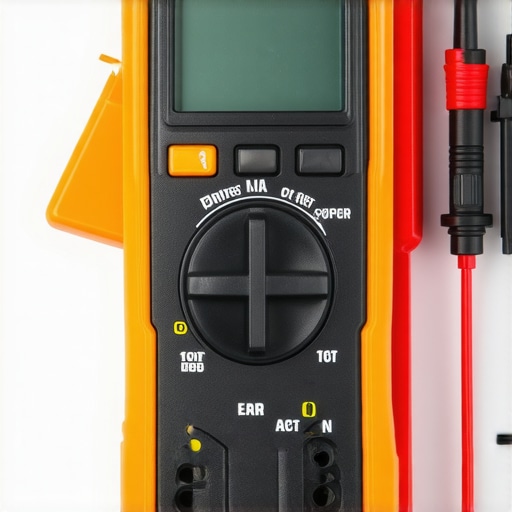
Here is the ‘Oops’ factor that kills more dishwashers than I care to admit: spraying WD-40 or silicone or any oil-based lubricant into the dispenser tracks. It feels like a good idea when the door is sticking, right? Wrong. The inside of a dishwasher is a humid, food-particle-rich environment. That oil acts like a magnet for lint and calcium, turning into a thick ‘sludge’ that will eventually seize the mechanism permanently. If things are sticky, use white vinegar and a soft brush—never grease. I’ve seen people perform checking the thermal fuse on your dishwasher before buying a new one, convinced the machine was dead, when in reality, they’d just ‘lubricated’ their soap door into an early grave. Have you ever fallen into this trap of trying to ‘grease’ a problem away? Let me know in the comments.
The Critical Link Between Heat and Chemicals
Lastly, let’s talk about the ‘smart’ sensors. Some modern machines won’t even try to open the soap door if the water doesn’t reach a certain temperature threshold within the first fifteen minutes. If your intake valve is partially clogged or your water heater is set too low, the dishwasher ‘decides’ it’s not worth releasing the detergent because it won’t dissolve anyway. This is similar to testing your oven’s high limit thermostat with ease; the machine is trying to protect itself from a poor performance cycle. If you are seeing a lot of grease buildup, it’s time to stop looking at the door and start testing the resistance on your dishwasher heating element. When the heat fails, the soap door usually follows suit. Don’t waste money on a new dispenser until you’re sure your water is actually hot enough to melt a pod.
I’ve spent years collecting gadgets, but if you’re serious about DIY, you only need three things: a decent set of nut drivers, a bright headlamp, and a reliable digital multimeter. I personally swear by my Fluke 101 because it is compact enough to fit behind a cramped dishwasher kickplate while being rugged enough to survive a drop on a tile floor. When you are deep into parts and diagnostics to identify dishwasher faults quickly, guessing is your biggest enemy. If you aren’t sure how to read the screen yet, I highly recommend checking out these 5 multimeter tricks for diagnosing a dead control board. It is truly the difference between a fifteen-dollar fix and a five-hundred-dollar mistake.
Grab These Essential Tools Before You Touch a Single Screw
Beyond the multimeter, I always keep a bottle of high-purity white vinegar and a stiff nylon brush in my kit. These aren’t just for cleaning; they are diagnostic tools. Often, what looks like a broken latch is just calcium carbonate from hard water locking the plastic components in place. According to the Whirlpool Technical Service Manual (W10534241B), keeping the sump and dispenser area clear of even tiny plastic shards or mineral buildup is the primary way to extend the life of your motor and latches. You should be testing the resistance on your dishwasher heating element every year or two, especially if you notice the soap isn’t dissolving as quickly as it used to.

Why Your Multimeter is Your Best Friend
Most people use a multimeter once and then let it gather dust, but I use mine to ‘talk’ to my appliances. If the soap door isn’t opening, I don’t just stare at the spring; I check for continuity across the solenoid. It is the same logic you would use for oven diagnostics for pinpointing faults before calling a repair expert. By measuring the electrical flow, you stop being a part-swapper and start being a technician. This proactive approach prevents you from buying a whole new dishwasher parts and DIY diagnostics kit when all you really needed was to tighten a loose wire harness.
How can I keep my dishwasher running like new for years?
The secret to longevity isn’t some magic chemical; it is a consistent routine. Every three months, I pull the bottom rack and get down on my hands and knees to tackle the fast way to clean grimy dishwasher door gaskets. If those seals dry out or get coated in slime, moisture escapes, and that is exactly when your electronics start to corrode. While you are down there, follow the steps for how to clean the hidden debris under your dishwasher filter. You would be shocked at how much a single stray popcorn kernel can disrupt the internal pressure of the machine. I also suggest clearing hard water deposits from dishwasher interior walls to ensure that every spray arm is hitting the dispenser door with the right amount of force.
The Next Decade of Smart Appliance Troubleshooting
Looking ahead, I expect we will see more AI-integrated diagnostics where the machine actually tells you which specific hinge is sticking. But until our kitchens are that smart, we have to rely on our own eyes and ears. The trend is moving toward modular components, which is great news for us DIYers because it means parts are getting easier to swap out without specialized equipment. My challenge for you this weekend: don’t just load the machine and walk away. Take ten minutes to wipe down those gaskets and check your heater’s continuity. You will thank yourself when you aren’t staring at a mountain of greasy dishes on a busy Sunday night.
What My Repair Mistakes Taught Me About Persistent Dishwasher Issues
I’ve realized that most appliance frustration comes from a lack of information, not a lack of ability. Over the years, I’ve learned that loading logic is often more important than the actual mechanical state of the machine. If you find why your dishwasher pod is still in the dispenser after a wash is a recurring mystery, it’s usually because we’ve treated our machines like garbage cans rather than precision instruments. Another lightbulb moment was realizing that the fast way to clean grimy dishwasher door gaskets actually preserves the electronics by keeping humidity where it belongs. Finally, never underestimate the power of a simple visual check; I once almost ordered a whole list of dishwasher parts and DIY diagnostics before realizing a stray toothpick had jammed the latch spring.
The Essentials for Your Repair Kit
I swear by a few specific items that make these jobs ten times easier. First, a Fluke 101 Digital Multimeter is my go-to for its ruggedness and accuracy. If you’re just starting to explore electrical testing, check out 5 multimeter tricks for diagnosing a dead control board to build your confidence. I also keep a set of angled nylon picks for cleaning out dispenser tracks without scratching the plastic, and a high-intensity headlamp so I can actually see into the dark corners of the machine tub.
Stop the Re-Washing Cycle Today
You are more than capable of handling these repairs. Getting deep into parts and diagnostics to identify dishwasher faults quickly isn’t just about saving money—it’s about the satisfaction of knowing your home is running smoothly because of your own two hands. Don’t let a sticky door keep you from enjoying your evening. Have you ever found a completely intact pod after a full cycle? Tell me about your most frustrating dishwasher moment in the comments!