The sound was unmistakable: a rhythmic, metallic thunk-thunk-thunk that seemed to vibrate right through the soles of my slippers and rattle the ice cubes in my glass. I was sitting in the living room, trying to enjoy a quiet evening, but my kitchen had other plans. It sounded like a freight train was passing through the pantry. I walked in to find my dishwasher literally walking out from under the counter, its front feet doing a slow-motion jig across the linoleum. It was more than just annoying; it was a disaster waiting to happen. If you have ever felt that same sense of dread while watching your appliance migrate, you know exactly why we are here today. We are going to stop that movement and protect your kitchen once and for all.
My Kitchen Cabinetry Was Shaking Itself to Pieces
I remember standing there, coffee in hand, watching my unit slowly creep away from the wall. It felt like a personal betrayal. You spend a fortune on a kitchen remodel, only to have a single appliance act like a jackhammer. If you have noticed that your dishwasher shakes the whole kitchen, you are not just dealing with a noisy annoyance; you are looking at potential structural damage. I made a classic rookie mistake early on: I thought I could solve the vibration by wedging a folded-up pizza box into the gap between the tub and the granite. Within a week, the cardboard was a soggy, moldy mess, and the rattling was louder than ever. Trust me, the DIY shortcut is rarely the answer. Most people assume a dishwasher making a rattling noise is just part of the deal with older machines, but it is usually a sign that your mounting brackets have failed or were never installed. Before you start buying new equipment, you might want to check your dishwasher parts guide to ensure the vibration isn’t coming from an internal failure, like a noisy drain pump. But if the machine is mechanically sound and just won’t stay put, we need to talk about anchoring.
Is Drilling Into My Countertops Actually Safe?
This is the big fear everyone has. The idea of taking a drill to expensive quartz or granite makes most homeowners break out in a cold sweat. I get it. However, leaving the unit loose is actually riskier. According to data from the International Association of Certified Home Inspectors (InterNACHI), improper appliance mounting is a leading cause of ‘micro-cracking’ along the edges of stone countertops because the vibration energy has nowhere to go. You are not just fixing a noise; you are saving your stone. We will look at side-mounting kits and specialty adhesives that keep your counters pristine while locking that machine in place. Have you ever caught your dishwasher trying to make a break for it in the middle of a cycle? I would love to hear your horror stories in the comments below—it makes me feel better about my pizza box incident. Let’s get that unit secured so you can finally hear yourself think again.
Get Your Machine Level Before It Starts Walking Again
Before you drill a single hole, you have to talk about balance. Imagine a three-legged dog trying to run a marathon; it doesn’t matter how fast he is, he is going to wobble. Your dishwasher is the same. If the unit isn’t perfectly level, the centrifugal force of the spray arms creates an eccentric load that causes the whole chassis to shift. Use a bubble level on the top edge of the open door to check both side-to-side and front-to-back. If it’s off, you need to adjust the leveling legs. These are essentially heavy-duty bolts at the base. Turning them clockwise lowers the corner, while counter-clockwise raises it. If you find the legs are seized or rusted, consult a dishwasher parts guide to find the right replacements before you strip the threads. Dealing with a machine that won’t sit flat is the primary reason why a dishwasher shakes the whole kitchen during the high-speed rinse cycle.
The Secret to a Rock-Solid Base
Once the legs are adjusted, ensure the dishwasher is making firm contact with the floor. If you have recently done a dishwasher removal for floor repair, the new flooring height might have changed your clearance. A common mistake is leaving a gap between the top of the machine and the underside of the counter. This gap allows the machine to ‘pitch’ forward when you pull the heavy bottom rack out. You want the machine snug—not crushed—against the underside of the cabinetry. If the vibration persists even when level, it might not be a mounting issue at all. I once spent two hours leveling a machine only to realize the rattling noise was actually a loose internal component. Check for signs of a dying circulation pump or a noisy drain pump, as internal mechanical failures create vibrations that no amount of anchoring can fix. 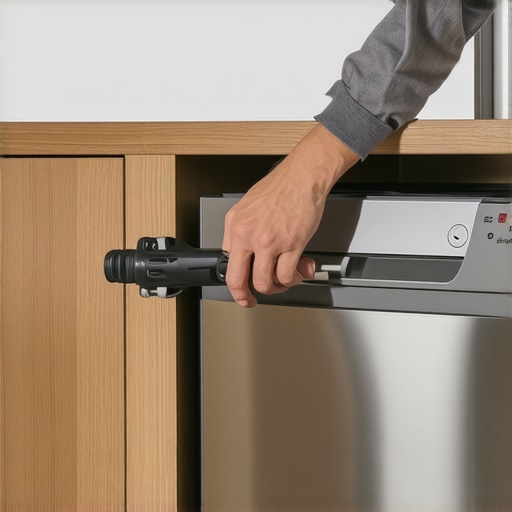
Lock It Down Without Cracking Your Expensive Counters
If you have granite, quartz, or marble, the traditional method of screwing brackets into the underside of the counter is a recipe for a very expensive crack. Instead, we use side-mounting. Most modern units have pre-drilled holes on the sides of the tub frame, often hidden behind plastic plugs. You simply drive screws through these holes into the wooden cabinetry on either side.
Side Mounting Is Your Secret Weapon
If your dishwasher didn’t come with side-mount holes, don’t panic. You can buy ‘granite grabbers’—these are clever adhesive strips with a built-in mounting stud. You clean the underside of the stone with denatured alcohol, stick the grabber on, and let it cure for 24 hours. I used this method on a high-end kitchen remodel last year after the homeowner threatened to kick me out if I brought a drill near her Calacatta marble. I’ll be honest: I was skeptical. I figured the steam would melt the glue within a week. But after a year of heavy use, that machine hasn’t budged a millimeter. It’s the cleanest way to prevent your machine from doing a jig without risking the structural integrity of your stone.
How I Almost Lost a Screw and My Sanity
During one installation, I tried to skip the step of pre-drilling the side cabinets. I figured the self-tapping screw would do the work. Halfway in, the screw hit a hard knot in the wood, snapped the head off, and the vibration of the drill sent my only other mounting screw falling into the dark abyss behind the dishwasher tub. I had to pull the entire unit out just to retrieve a five-cent piece of hardware. The lesson? Always pre-drill your pilot holes and use a magnetic bit driver. It turns a frustrating afternoon into a ten-minute victory. If you find your cabinets are too soft to hold a screw, you may need to look into replacing a stripped screw with a larger gauge or using a wood anchor to ensure the grip is permanent.
Don’t Fall for the Expensive Control Board Trap
Most homeowners—and even some green technicians—are too quick to fire the ‘parts cannon’ at a problem. The most common victim? The main control board. If a dishwasher won’t start or an oven display goes dark, the instinct is to swap the most expensive brain in the machine. However, in my years of tearing these things apart, I have found that the board is rarely the true culprit. Data from the Association of Home Appliance Manufacturers (AHAM) suggests that nearly 30% of returned ‘faulty’ control boards are actually fully functional, pointing to errors in field diagnostics rather than component failure. Often, the real issue is a simple thermal fuse or a loose ribbon cable. Before you spend $300 on a new PCB, you should learn how to tell if your oven control board is actually fried or if you are just looking at a minor wiring glitch.
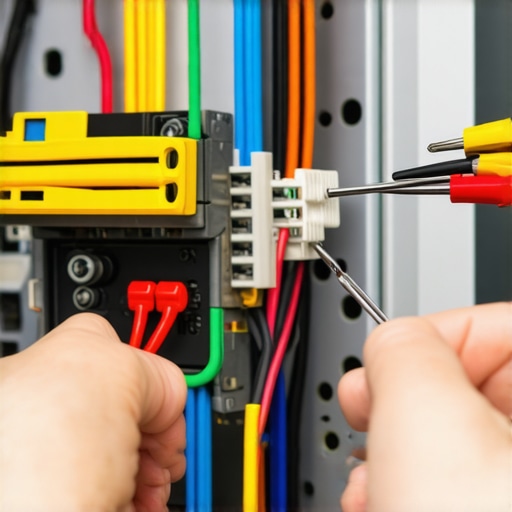
One of the biggest ‘oops’ factors I see involves the pump system. I have walked into dozens of kitchens where a DIYer has already replaced the drain pump because the machine wouldn’t wash, only to realize they actually needed a circulation motor. You have to understand the difference between a drain pump and a circulation pump before you open your wallet. One removes water; the other moves it through the spray arms. Mistaking the two is a classic rookie error that leads to wasted time and a kitchen floor covered in unnecessary spare parts. If you want to stop guessing, you need a strategy for identifying dishwasher faults quickly by listening to the specific rhythm of the cycle.
Why Is Your Oven Telling You Lies About the Temperature?
We have all been there: the oven says it is 350 degrees, but the cookies come out raw. The common myth is that the control board is ‘out of calibration.’ In reality, the issue is almost always the resistance of the temperature sensor. These sensors work on a very specific Ohm-to-temperature ratio. As they age, they drift. Before you assume the whole unit is junk, try testing your oven temperature sensor without calling a pro. A simple $15 multimeter can save you from a $1,000 replacement bill. It is about precision, not just parts. This level of oven diagnostics is what separates a successful repair from a frustrating weekend of trial and error.
Another nuance people overlook is the role of safety switches. If your dishwasher is dead silent, it might not be a power issue at all. I have seen homeowners tear their units apart when they really just needed to be testing the dishwasher float switch for continuity. If that tiny plastic float thinks the tub is overflowing, it will kill the power to the inlet valve every single time. Have you ever fallen into this trap and replaced a perfectly good part? Let me know in the comments—I have certainly been there, and your story might just save someone else a massive headache.
Your Toolbox is Probably Lying to You
I learned the hard way that a five-dollar voltage tester is more of a toy than a tool. When you are deep into oven diagnostics, precision is the only thing that stands between a fixed range and a kitchen fire. I personally transitioned to using a Fluke 117 Electrician’s Multimeter because of its ‘LoZ’ feature, which prevents false readings caused by ghost voltage. If you are trying to figure out how to identify dishwasher faults quickly, you need a meter that reacts faster than the machine’s internal relay. I’ve seen cheap meters suggest a board is dead when it was actually just a slow-reacting capacitor. Investing in a set of non-marring nylon pry tools is my other ‘secret weapon.’ They allow you to pop off control panels without leaving those ugly gouges that scream ‘unskilled DIY’ every time you look at the clock.
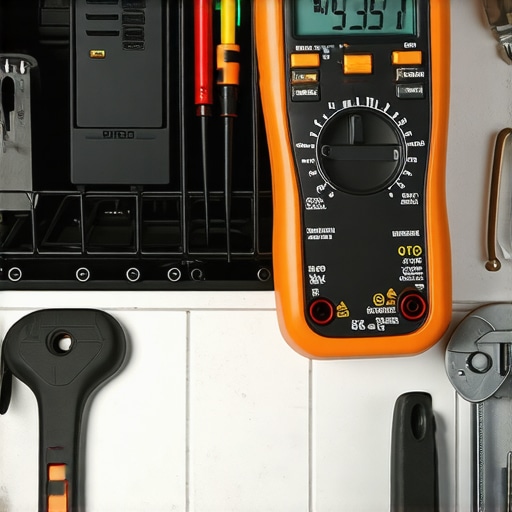
Beyond the hardware, the real pro move is accessing the hidden ‘Service Mode.’ Every modern dishwasher and oven has a diagnostic sequence—usually a weird combination of button presses like ‘Heat Dry, Normal, Heat Dry, Normal.’ According to the technical service manuals from manufacturers like Whirlpool, entering this mode allows the machine to perform a self-test of every component from the heating element to the drain pump. It’s like having a conversation with the machine. Before you start troubleshooting common issues with parts, see if the machine can tell you exactly where it hurts.
How Can I Keep My Appliances Healthy for the Next Decade?
Maintenance isn’t a one-and-done event; it’s a rhythm. For dishwashers, the absolute killer is hard water buildup. I make it a habit to check for mineral buildup in dishwasher spray nozzles every six months. If those tiny holes are clogged, the pump works twice as hard, and you’ll find yourself identifying a dying circulation pump much sooner than you’d like. In the oven, keep an eye on the door seal. A leaky gasket causes the bake element to stay on longer to compensate for heat loss, which leads to premature burnout. I predict that within the next five years, we will see ‘predictive AI’ built into even budget-friendly appliances that will alert your phone the moment a sensor begins to drift from its factory Ohm rating. Until then, we are the sensors. I highly recommend you grab a multimeter this weekend and try testing your oven temperature sensor just to get a baseline reading. It’s the best way to build confidence before a real emergency strikes.
The Unspoken Truth About Repairing Your Own Kitchen Gear
After years of wrestling with stubborn appliances, I have realized that the most valuable tool isn’t in your bag—it is your patience. We often rush to swap out components without truly listening to what the machine is telling us. A real breakthrough happens when you stop looking for what is broken and start looking for what is inconsistent. I spent years chasing ghosts before I realized that a comprehensive dishwasher parts guide is just a map; you still have to be the navigator. One of my biggest lightbulb moments was realizing that professional-grade results come from respecting the machine’s internal logic rather than trying to outsmart it with quick fixes.
Another hard-won lesson? Never trust your eyes alone. A wire can look perfectly connected while being internally frayed, and a control board can look pristine while being totally non-functional. This is why I always preach the gospel of testing for continuity rather than just checking for burns. If you follow essential oven repair troubleshooting steps, you will find that the ‘obvious’ fix is rarely the permanent one. It is about building a mental library of sounds and smells that alert you to trouble before it becomes a flood or a fire.
The Gear That Actually Saved My Sanity
If you are serious about moving beyond the ‘pizza box’ level of DIY, you need a few non-negotiables. First, stop using that cheap hardware store multimeter. A high-impedance digital meter is the only way to get accurate readings on modern sensitive electronics. I also cannot recommend a magnetic parts tray enough; losing a single specialized screw inside a chassis can turn a ten-minute job into a three-hour nightmare. When mastering oven diagnostics, I also keep a set of long-reach nut drivers handy, because manufacturers love to hide the most critical access points in the most awkward places.
Don’t overlook the value of the ‘Tech Sheet’ hidden inside the appliance cabinet. This paper is the holy grail of information, often containing the specific diagnostic codes and wiring diagrams for your exact model. Between that sheet and the ability to identify dishwasher faults quickly through systematic testing, you are better equipped than half the ‘pros’ out there who are just guessing.
#IMAGE_PLACEHOLDER_E#
Stop Being Afraid of Your Own Kitchen
The transition from a frustrated homeowner to a confident DIYer starts the moment you stop seeing your appliances as black boxes and start seeing them as systems. Whether you are tackling a complex oven repair or just trying to stop a dishwasher from vibrating, remember that these machines were designed by humans to be serviced by humans. You have the ability to maintain and fix them; you just need to take it one wire at a time. The satisfaction of hearing that smooth, quiet hum of a perfectly leveled and anchored dishwasher is worth every minute of the struggle. You’ve got this, and your kitchen—and your wallet—will thank you for the effort. Have you ever had a moment where a simple $10 part saved you from buying a brand-new appliance? Let me know in the comments below!