I spent three hours once tearing apart my kitchen cabinets and nearly ripping a door off its hinges because my roast chicken refused to cook through. I looked at the bake element, and it was glowing. It looked perfect. I assumed the worst and nearly spent 200 dollars to see if my oven control board was fried. It wasn’t. The culprit was a microscopic hairline fracture in the heating element that only opened up when the metal reached high temperatures. It’s a frustrating, invisible ghost of a problem that makes you feel like you’re losing your mind, but today, I’m going to show you exactly how to hunt these cracks down so you don’t waste money on parts you don’t need.
When Your Bake Element Lies to Your Face
The biggest lie in home repair is that a glowing element is a working element. We’ve all been there: peering through the glass, seeing that comforting orange arc, and assuming the heat is flowing. But metal expands when it gets hot. A tiny, invisible crack that looks sealed when the oven is cold can pull apart under thermal stress, causing intermittent power drops or dangerous electrical arcing. This is a crucial step in oven diagnostics that most people skip because they trust their eyes too much. According to research on material fatigue by the International Journal of Pressure Vessels and Piping, thermal cycling is the primary cause of micro-fractures in high-heat alloys, meaning every time you preheat, you might be widening a gap you can’t even see yet.
[IMAGE_PLACEHOLDER]
Does a tiny hairline crack really matter that much?
You might be thinking, if it still glows, can’t I just ignore it? I tried that. My early mistake was ignoring a small “blister” on the element surface, thinking it was just spilled cheese. That tiny spot eventually led to a full-blown short that luckily only tripped my breaker but could have done much worse. If you notice your cakes are sunken in the middle or your biscuits are pale on the bottom, you need to check your bake element for blisters and those elusive invisible cracks immediately. It is the difference between a five-minute fix and a ruined dinner party. Have you ever had your oven act like it was possessed, heating up perfectly one day and staying stone cold the next? Tell me about your most frustrating “phantom” appliance repair in the comments below! We’re going to get into the nitty-gritty of using a multimeter and the ‘flashlight trick’ to find those fractures before they leave you hungry again.
You can’t always see a crack with the naked eye, but you can certainly see the shadow it casts when you know where to look. I call this the flashlight trick, and it’s saved me from replacing perfectly good control boards more times than I can count. First, ensure the oven is completely unplugged or the breaker is flipped—safety is not a suggestion here. Get your kitchen as dark as possible; turn off the overhead lights and pull the shades. Take a high-lumen LED flashlight and run the beam slowly and horizontally along the entire length of the element. You aren’t looking for a hole; you’re looking for a break in the texture or a tiny, crystalline reflection that looks different from the smooth matte finish of the rest of the metal. If you see a spot that looks like a grain of salt is stuck to the element, that’s often the precursor to a blowout.
Catch the Fracture with the Flashlight Trick
I remember hunkering down on my kitchen floor at 11 PM, sweat dripping off my nose, convinced my oven was haunted because my pizza was doughy on the bottom every single time. I had already visually inspected the element three times. It wasn’t until I used a focused beam that I saw it: a microscopic, jagged line that looked like a silver hair. This tiny fissure was expanding just enough to break the circuit once the oven hit 350 degrees. If you find a spot that looks suspicious, you should also how to test your ovens bake element for hot spots while the unit is briefly powered back on. Watch for areas that glow brighter or dimmer than the rest of the arc, as these indicate internal thinning of the wire before it actually snaps.

Look for the Tell-Tale Rainbow Reflection
Sometimes the metal doesn’t crack right away; instead, it goes through a stage of extreme oxidation. If you see a section of the element that has a rainbow-like discoloration—similar to oil on water—that’s a sign the protective outer sheath is failing. This is a common part of oven repair essentials troubleshooting common issues with parts because it signals that the element is working overtime. When the metal begins to flake or peel, the internal resistance changes, which confuses your oven’s thermostat and leads to those frustrating temperature swings. I’ve seen people replace their sensors three times before realizing the element was just ‘bleeding’ heat through a failing outer skin.
Use a Multimeter to Prove the Connection is Broken
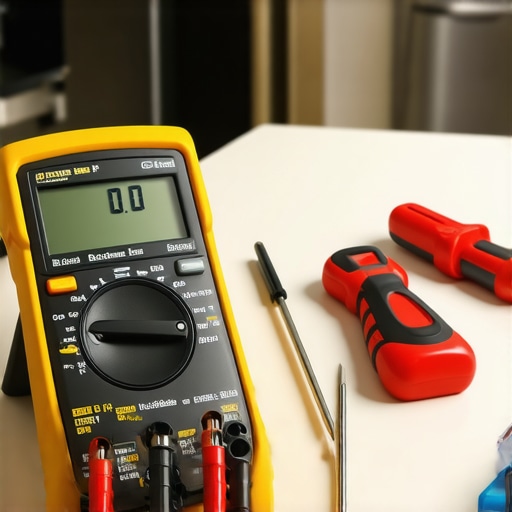
If the flashlight trick leaves you unsure, it’s time to bring in the heavy hitters. A multimeter is the only way to get a definitive ‘yes’ or ‘no’ on the health of your heating element. Think of your heating element like a long, winding garden hose; if there is a hole or a kink, the water—or in this case, the electricity—can’t get to the other side. You’ll want to set your multimeter to the lowest setting for Ohms (resistance). After removing the element from the oven, touch one probe to each terminal. You are looking for a reading between 10 and 50 ohms. If the screen reads ‘OL’ or ‘Open,’ the internal wire has snapped, even if the outside looks brand new. This is one of the most effective 5 multimeter tricks for diagnosing a dead control board or a faulty heating circuit.
Why Zero Resistance Means a Dead Element
If you get no reading at all, the debate is over. While you have the oven pulled out and the back panel off, it’s a great time for testing your ovens high limit thermostat with ease to make sure a spike from a failing element didn’t trip the safety fuse. If the element is definitely toast, don’t panic about the model number. You can usually succeed at finding the right oven heating element without the manual by matching the shape and the terminal distance. Replacing a cracked element is a twenty-minute job that will make your oven feel like it just rolled off the showroom floor.
If you’ve ever replaced an expensive motor only to find the machine still dead, you’ve fallen into the common ‘Part Swapping’ trap. Most DIYers—and even some entry-level pros—assume that because a component isn’t performing its final function, the component itself is the failure point. In my experience, the ‘environment’ is usually the killer. For instance, before you dive into how to identify dishwasher faults quickly, you have to realize that a ‘broken’ pump might just be a victim of a clogged line or a faulty relay. Everyone tells you to buy the most expensive part first, but I’m telling you to look at the path the electricity takes to get there. It is rarely the destination that’s the issue; it’s the journey. Another nuance people miss is the ‘ghost voltage.’ Your multimeter might show 120 volts at the plug, but the moment you put a load on the circuit, that voltage drops to zero because of a corroded wire nut in the wall. You’ll beat your head against the wall replacing parts when the issue is actually your home’s electrical supply.
Why does my dishwasher take three hours just to wash a few plates?
This is one of the most common complaints I hear, and most people assume the motor is ‘getting tired.’ Motors don’t get tired—they either work or they don’t. The real culprit is often a fouled turbidity sensor. These sensors check how dirty the water is; if they are covered in film or hard water deposits, they tell the machine the dishes are still filthy, extending the cycle indefinitely. This is a classic example of why your dishwasher cycle takes hours longer than usual. According to a report by Appliance Design Magazine, sensor-driven logic now accounts for over 40% of cycle-length variations in modern energy-efficient models. If you don’t clean that sensor, you’re just throwing money away on a new pump you don’t need.
Stop Swapping Parts and Start Testing Circuits
Here is the ‘Oops’ factor that bites most people: testing for continuity while the part is still plugged into the circuit. If you leave the wires connected to the control board while using your meter, you can get a ‘false positive’ because the electricity finds a path through the board’s internal circuitry rather than the part you’re testing. You might think your element is fine, but you’re actually reading the resistance of a transformer on the board. Always, always disconnect at least one wire before testing. I’ve seen folks waste hundreds because they didn’t know 5 multimeter tricks for diagnosing a dead control board correctly. Before you pull the trigger on a 300-dollar part, try checking the thermal fuse on your dishwasher before buying a new one. It’s a ten-dollar part that can mimic a total board failure.

Have you ever fallen into this trap and replaced a perfectly good part only to realize it was a simple fuse or a loose wire? Let me know in the comments! We’ve all been there, and sharing those ‘expensive mistakes’ is how we all get better at this. The next time you’re staring at a blank display, remember that how to tell if your oven control board is actually fried involves more than just looking for burn marks—it’s about verifying the power path from the wall to the wire terminal.
Beyond the multimeter, I never walk into a kitchen without a set of offset screwdrivers and a high-intensity flexible bore light. You would be surprised how many times a manufacturer hides a critical screw for the control panel right against the underside of a granite countertop, making it impossible to reach with a standard driver. Using the right dishwasher parts a comprehensive guide to diy diagnostics approach means having tools that can see around corners. I also swear by a needle-point probe set for my meter; standard probes are often too thick to back-probe a connector without damaging the plastic housing. If you’re serious about this, invest in a small tube of dielectric grease. I use it on every connector I touch to prevent the microscopic corrosion that leads to those ‘phantom’ errors we talked about earlier. One highly specific tip from the NEMA (National Electrical Manufacturers Association) standards highlights that poor terminal tension is a leading cause of localized overheating in high-current appliances like ovens. If a terminal feels loose when you slide it back onto the element, crimp it slightly with pliers. A loose connection is a future fire hazard, plain and simple.
How can I keep my appliances running for a decade?
Maintenance isn’t just about cleaning the surfaces; it’s about reducing the friction and heat that kill components. For your oven, this means you should periodically how to lubricate sticky oven door hinges safely using high-temperature graphite or silicone-based lubricants. If the door doesn’t seal perfectly, the control board gets blasted with heat every time you bake, shortening its life by years. In the dishwasher, the ‘silent killer’ is scale. Even if you don’t have extremely hard water, minerals build up in the tight tolerances of the pump bearings. I make it a habit to how to clean the hidden filter in your dishwasher sump every single month. If that filter is clogged, the motor has to work twice as hard to move the same amount of water, leading to early burnout. It’s the difference between a machine that lasts five years and one that lasts fifteen.
Predictive Repair is the Next Big Thing
We are entering an era where your appliances will tell you they are breaking before they actually stop working. According to recent research in the IEEE Sensors Journal on ‘Smart Home Fault Detection,’ the next generation of kitchen tech will utilize vibration analysis and power-signature monitoring to alert homeowners to failing bearings or degrading heating elements. This ‘prognostic’ approach will eventually replace the guesswork of DIY repair. However, until your oven has an AI doctor built-in, you still need to trust your senses. If you hear a new hum or smell something slightly ‘electric,’ don’t wait for a total failure. Knowing when to skip the diy and call a professional oven technician is just as important as knowing how to use a wrench. Sometimes, a strange sound is a warning that a major component is about to experience a catastrophic short. My challenge to you today: go to your dishwasher, pull out the bottom rack, and check the sump for debris. If you find even a single popcorn kernel or a shard of glass, you’ve just saved your drain pump from a premature death. Small actions today prevent three-hundred-dollar headaches tomorrow.
The Microscopic Details That Cost Me Hundreds
One of the hardest lessons I had to learn was that heat doesn’t just cook food—it destroys the very components meant to create it. I used to think that if an element looked solid, it was solid. But metal fatigue is a silent killer. Thermal expansion can turn a hairline fracture into a wide-open circuit in seconds. Now, I never trust my eyes alone; I trust my meter. Another lightbulb moment came when I realized how many “broken” motors were actually just suffering from poor terminal tension. If that wire isn’t tight, it builds up heat, melts the plastic, and mimics a total component failure. Always check the simple connections before you buy the expensive parts.
I’ve also learned that cleaning is effectively a form of preventative maintenance. When I started checking my oven’s bake element for tiny blisters regularly, I caught failures weeks before they ruined a meal. It’s the difference between being a “parts swapper” and a true diagnostic expert.
The Three Tools I Trust When My Oven Quits
You don’t need a van full of gear, but you do need the right stuff. First, get a multimeter with needle-point probes. Standard probes are like trying to do surgery with oven mitts; needle probes let you get into those tiny plastic connectors without breaking them. I also swear by a flexible LED bore light. Being able to see behind the oven liner or under the dishwasher tub without pulling the whole unit out is a game-changer. Finally, keep a tube of dielectric grease handy. A tiny dab on your connectors prevents the corrosion that leads to those “intermittent” errors that drive everyone crazy.
If you’re dealing with noise rather than heat, I recommend learning the difference between various mechanical sounds. For example, identifying a bad dishwasher circulation motor by the sound can save you from tearing apart the wrong side of the machine. These tools and techniques turn a frustrating Saturday into a quick win.
Stop Being Afraid of Your Kitchen Gadgets
There is a profound sense of power in fixing something with your own two hands. You aren’t just saving a few hundred dollars; you’re taking control of your environment. Whether you’re testing an oven broil element or clearing out a clogged sump, you are proving that you don’t need to be at the mercy of a service schedule. Don’t let a “Check Engine” light or a cold oven intimidate you. Most of the time, the solution is right there, waiting to be found with a little patience and a good flashlight.
Have you ever found a tiny piece of glass or a stray bone in your dishwasher sump that was causing a major rattling noise? Drop a comment below and tell me the strangest thing you’ve pulled out of your appliances!