Ever opened your dishwasher only to find the top rack teetering or dangerously wobbly? I remember the first time I bumped into this issue; I was in the middle of a busy morning, unloading a cycle, and suddenly the entire rack shifted awkwardly, nearly spilling dishes everywhere. That lightbulb moment made me realize how much a seemingly minor wobble can turn into a nagging problem, compromising both the longevity of your appliance and your peace of mind.
But here’s the thing: you’re not alone. Many homeowners find themselves frustrated by loose or wobbly top racks, especially with newer dishwasher models in 2026 that boast advanced features but sometimes suffer from simple mechanical quirks. The good news? Fixing these wobbling rails and clips isn’t just possible—it’s straightforward once you know what to look for.
In this post, I’m going to walk you through essential top rail and clip fixes designed to restore stability. Whether you’re a DIY enthusiast or just looking for some quick guidance, I’ll share practical tips rooted in real-world experience. Plus, I’ll highlight common pitfalls, like the mistake I made early on—ignoring the root cause—and how that almost cost me more time and money.
So, if you’ve noticed your top rack wobbles, shifts, or even falls out during cycles, stick around. We’ve got some simple, reliable solutions that will get your dishwasher functioning smoothly again. And who knows—after trying these fixes, you might even enjoy doing the dishes once more!
Why These Wobbles Actually Matter More Than You Think
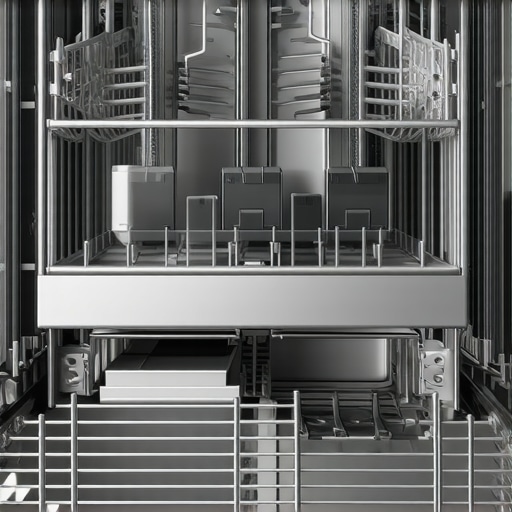
Assessing the Wobble and Identifying the Cause
Begin by removing the top rack from the dishwasher to inspect the rails and clips. Check for visible signs of damage, wear, or misalignment. I once encountered a wobble that started after a cleaning cycle; removing the rack revealed a broken clip that was causing instability. Be sure to gently wiggle the rails to identify any looseness or unevenness.
Checking and Replacing Worn or Broken Rails and Clips
Look for cracks or deformation in the rails and clips. If any parts are damaged, replacing them is straightforward. To do this, note the model specifics, then order compatible replacement parts. For example, I recently swapped out a broken clip with a new one from an online supplier, which immediately stabilized the rack. This video walkthrough can help identify the exact parts you need. For detailed part tests, consider inspecting the clips’ tension and fit, as they often loosen over time.
Removing Old Clips and Installing New Ones
Use a screwdriver to detach screws securing the clips if applicable. Once removed, align the new clips properly and secure them tightly. Ensure the rails glide smoothly after installation. Remember, proper alignment prevents future wobbling and prolongs the lifespan of your dishwasher parts.
Adjusting and Aligning the Rails for Perfect Stability
Realign the rails to ensure they sit evenly on their tracks. Use a level or gently test the rack to confirm stability. An experience I had involved misaligned rails causing the rack to tilt and wobble; adjusting them by slightly bending the rails fixed the issue. Be cautious not to bend too much, as excessive force can cause further damage.
Testing After the Repairs
After reassembling, run a short cycle with dishes loaded to observe the stability of the top rack. Watch for any wobbles or shifts. If it still wobbles, double-check the clip positions and rail alignment. Sometimes, adjusting the mounting screws a little tighter or repositioning clips makes all the difference. If the problem persists, it might be due to worn-out rollers or other underlying components—consider checking the rollers or wheel assemblies for wear.
Maintaining and Preventing Future Wobbles
Regularly clean the rails and clips to prevent debris buildup that can cause misalignment. Applying a small amount of silicone lubricant can keep the moving parts smooth, much like how I used a silicone spray on the rails of a recent dishwasher, which improved glide and stability. Avoid over-tightening screws, as this can warp or damage the clips, leading to recurring issues. Periodic inspections will save you from bigger repairs later.
Many homeowners fall into common misconceptions when attempting repairs on appliances like ovens and dishwashers, often leading to more frustration and unnecessary expenses. One frequent myths is that replacing a single defective part, such as a heating element or a thermistor, will always restore full functionality. In reality, appliances are complex systems where multiple components interact, and overlooking this can cause repeated failures even after part replacement. Advanced diagnostics—like testing the oven’s temperature sensors or the dishwasher’s flow sensors—are essential to identify underlying issues accurately. Ignoring these nuances often results in wasted time, money, and confidence.
A critical error many make is assuming all repairs are straightforward DIY fixes. For instance, even though replacing a control board or inspecting the igniter seems simple, misdiagnosing the problem can cause further damage. For example, a faulty oven igniter might seem like the culprit, but sometimes the issue stems from a defective relay switch or a failed sensor. Proper diagnostic procedures, such as resistance tests outlined in this guide, are crucial.
Another misconception is that newer appliances are less prone to issues or that parts will last forever. However, modern units often incorporate intricate electronic components that can fail prematurely, especially if the technician skips thorough diagnostics or neglects routine maintenance. Regular cleaning and inspections of components like the dishwasher’s float switch or the oven’s thermostat can extend lifespan and prevent costly breakdowns.
Think about the common trap of focusing solely on visible symptoms, like a dishwasher that won’t drain, without considering hidden factors such as a faulty drain pump or clogged valve. Deeply understanding how parts like the water inlet valve or the sensor array work together allows for more effective repairs. For example, issues with the dishwasher’s drain cycle could be due to debris in the pump assembly—all better addressed through comprehensive assessments, not just replacing parts blindly.
Awareness of such nuances elevates your repair game from guesswork to precision. It also emphasizes the importance of utilizing detailed diagnostic techniques, like resistance testing or examining electronic control boards. This approach not only saves time but ensures the longevity of your appliances. For those seeking in-depth guidance, comprehensive tests are detailed in articles like this detailed guide.
This depth of understanding is what separates a novice DIY fix from a true appliance repair enthusiast. So, next time you’re troubleshooting, pause and consider the unseen factors that might be at play. Applying proper diagnostic procedures, avoiding shortcut assumptions, and respecting the complex ecosystem within appliances will serve you well. Have you ever fallen into this trap? Let me know in the comments.When it comes to keeping your appliances running smoothly over time, having the right tools and a reliable maintenance routine can make all the difference. I personally swear by a few key pieces of equipment, like a digital multimeter and a heat-resistant silicone gasket scraper. The multimeter, in particular, is invaluable for diagnosing electrical issues such as faulty thermostats or control boards; I use a Fluke 115 for its precision and durability. The gasket scraper helps clean and maintain the integrity of seals, preventing leaks or moisture intrusion that could damage internal components.
Regular calibration is essential, especially for newer appliances with advanced sensors. For example, periodically testing the oven’s temperature sensors with a resistance meter can prevent uneven cooking—something I check monthly. Software-wise, I rely on diagnostic apps that interface with appliance control boards via Bluetooth, enabling me to run tests remotely and interpret error codes more efficiently. This approach has saved me hours of troubleshooting and has helped catch issues early, like a failing relay switch before it caused a full shutdown.
Thinking ahead, the trend points toward smart diagnostic tools becoming more integrated into home appliances, allowing even less tech-savvy homeowners to perform effective maintenance. Investing in such tools now will make scaling repairs and routine checks more manageable and less intimidating.
How do I maintain appliances like a pro over time?
Consistent cleaning, periodic testing, and using the right diagnostic tools are key. Regularly inspecting components like water inlet valves, thermostats, and control boards can help prevent costly failures. For instance, before replacing a thermistor, I like to use a resistance meter to verify its condition—details on how to do this are available in this diagnostic guide. Setting a routine, such as monthly sensor checks and gasket inspections, extends your appliances’ lifespan and ensures smooth operation.
Don’t forget the importance of maintaining and cleaning components—debris buildup can cause sensors to give false readings, leading to inefficient operation or breakdowns. Applying a thin layer of dielectric grease to electrical contacts can prevent corrosion, which is a common but often overlooked issue. For appliances prone to mineral deposits, like dishwashers, descaling every few months is vital to sustain performance. Remember, a little proactive maintenance now saves you from costly repairs later.
Take the advice and try testing your oven’s temperature sensor resistance this weekend. It’s a straightforward step that can prevent future inaccuracies and uneven heating. Using a reliable multimeter like the Fluke 115, you can perform this check efficiently and with confidence—making your maintenance routine both effective and empowering.
Three Lessons I Wish I Had Learned Sooner
First, never underestimate the importance of inspecting the simple mechanisms first; I once spent hours replacing parts only to realize a tiny clip was the culprit. Second, always keep detailed notes of your repairs; they save face and time when troubleshooting similar issues later. Third, embracing diagnostic tools like multimeters transformed my approach—what seemed daunting became straightforward, saving money and frustration. These insights not only accelerated my repair skills but deepened my understanding of appliance systems, turning a trial-and-error process into a learning journey.
My Go-To Equipment and Resources for Appliance Fixes
When tackling appliance repairs, my trusted tools include a reliable digital multimeter, essential for testing electrical components like control boards and sensors—my preferred is the Fluke 115 for its accuracy and durability. A silicone gasket scraper has been invaluable in cleaning seals and preventing leaks, critical in maintaining appliance longevity. For resources, I rely heavily on detailed guides such as this diagnostic tests overview to understand complex component functions. Additionally, I consult specific repair articles like drain valve fixes to address common issues efficiently, ensuring I get repairs right the first time.
What Excites You About Taking Charge of Appliance Care?
Empowering yourself with repair knowledge is more accessible than ever, and the satisfaction of restoring functionality after a wobble or malfunction brings real confidence. Whether fixing a wobbly dishwasher rack or tracking down a no-heat oven, each success deepens your understanding and saves money. Remember, every appliance has a story, and with patience, diagnostics, and the right tools, you can be the hero of your home’s maintenance. So, why not start with a small fix today? Share your experience or questions—every effort moves you closer to appliance mastery.