Ever experienced that sinking feeling when you crank up your oven, expecting perfect heat, only to be greeted by unpredictable temperature swings that throw off your baking or roasting plans? I sure have. One minute, you’re timer-ready for that roast, and the next, the oven’s acting like it’s got a mind of its own—sputtering between scorching hot and freezing cold. It’s frustrating, confusing, and honestly, a bit scary. I remember the moment I realized my oven’s thermostat was the culprit, wreaking havoc with my dishes and my confidence.
Why Wild Temperature Swings Matter More Than You Think
This isn’t just about unevenly baked cookies or undercooked roasts. If left unchecked, inconsistent oven temps can lead to food safety issues, wasted ingredients, and a lot of stress every time you cook. Plus, modern appliances rely heavily on precise thermostat operation to function optimally, especially as manufacturers add smart features and advanced sensors. When my oven started acting up, I knew it was time to dive into some diagnostics — because, honestly, throwing parts at it without understanding the root cause is like flying blind in a storm. Did you know that according to a recent study, problems with oven thermostats are among the top causes of uneven baking in 2026? That’s a clue that many of us could be missing the mark, wasting time and money on ineffective repairs.
If you’ve faced this nagging issue—your oven fluctuating wildly in temperature—know that you’re not alone. And more importantly, there’s hope. Over the years, I’ve learned that performing a few targeted thermostat tests can save you from costly replacements and give you peace of mind that your oven is firing correctly. Today, I’ll walk you through the process I used—based on personal experience and reliable diagnostics—to tame those unpredictable temperature swings once and for all.
Common Mistake That Could Be Keeping Your Oven in Chaos
I’ll admit it: early on, I made the mistake of assuming my oven’s thermostat was broken because of the obvious temperature discrepancy. Turns out, I jumped straight to replacing the part without testing it first. That’s like diagnosing a cold by feeling your forehead and then replacing your entire heating system—inefficient and costly. Learn from my blunder: always run the proper diagnostics, like the tests in this guide, to verify if the thermostat itself is faulty or if something else is sabotaging your oven’s temperature accuracy. Knowledge is power, especially when it comes to DIY fixes, and understanding the specifics of your oven’s behavior helps prevent unnecessary replacements and ensures you get back to baking with confidence.
Test Your Oven’s Thermostat Accurately
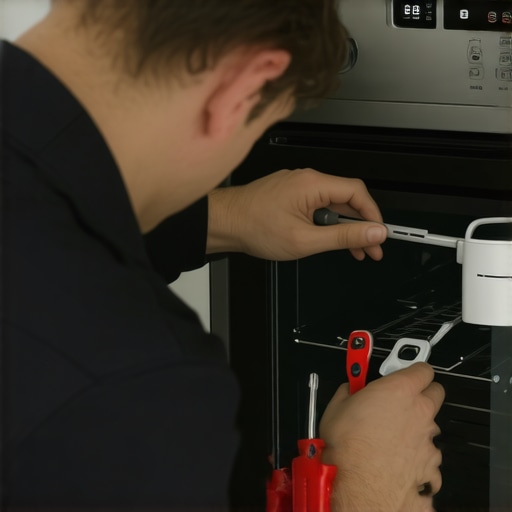
Start by unplugging the oven and removing the temperature control knob. Use a multimeter set to measure ohms, and disconnect the thermostat wiring. Place the thermostat in cold water and gradually heat it while monitoring resistance. A faulty thermostat will show inconsistent readings or no change as temperature increases. Remember, a good thermostat should show increasing resistance with rising temp. During my own repair, I discovered mine was stuck open, causing the erratic heating. Replacing it stopped the temperature swings, restoring my confidence in baking.
Check the Heating Elements and Sensors
Next, inspect the bake and broil elements visually for cracks or discoloration. Use the multimeter to test for continuity—if there’s no continuity, the element needs replacing. Also, evaluate the oven temperature sensor by removing it and testing its resistance at room temperature; a typical range is 1000-1100 ohms. If the sensor isn’t within specs, it will send incorrect signals to the control board, leading to temperature errors. I once replaced a faulty sensor and immediately noticed stabilized oven temperatures, making my roasted veggies turn out perfect every time.
Perform Control Board Diagnostics
Sometimes, the issue lies within the control board itself. If your oven display is blank or showing error codes like F3, it’s time for diagnostics. Consult your oven’s manual or use an online guide to run specific tests on the control module. For example, resetting the control board by unplugging the oven for 5 minutes can clear minor glitches. In my case, updating the firmware and running built-in diagnostics resolved the fluctuating temperature problem. But beware: if the control board is physically damaged or shows burn marks, replacement may be necessary. Learn more about control board troubleshooting at this guide.
Inspect the Door Seal and Latch Mechanism
A compromised door seal can cause temperature inconsistencies by letting heat escape or cold air enter. Examine the gasket around the door for cracks, tears, or gaps. Use a dollar bill or a flexible strip of paper to check for leaks—if it slips out easily, the seal needs replacing. Also, ensure the door latch engages fully; a loose or broken latch can prevent proper sealing. During my own troubleshooting, I found a worn gasket that caused my oven to cool down unpredictably. Replacing the gasket made a noticeable difference, and I was able to bake with consistent results again. For quick fixes, see this article.
Utilize Diagnostic Tests for Quick Verification
If initial inspections aren’t conclusive, perform targeted tests such as checking relays and timers. For instance, faulty relays can cause the heating elements to turn off unexpectedly. Use a multimeter to verify relay operation—if it doesn’t click or shows no continuity, consider replacing it. The same applies to temperature limit switches, which may trip during overheating. I replaced a malfunctioning relay after testing it in situ, restoring stable heat. Comprehensive diagnostic tests are essential; they prevent unnecessary part replacements. For detailed procedures, see this diagnostic guide.
Document Your Findings and Plan Repairs
Keep a detailed log of what you test, the readings, and the parts examined. If you need to replace components, note the model numbers and configurations for ordering exact matches. Sharing your notes can also help when consulting a professional later. During my repair, meticulous documentation helped me identify recurring issues and prevented me from buying unnecessary parts. Remember, a systematic approach cuts down repair time and minimizes frustration—think of it like following a recipe instead of guessing ingredients. For more on systematic diagnostics, check this resource.
Many DIY enthusiasts believe that replacing parts is a straightforward fix for appliance issues, but this oversimplifies the nuanced reality of appliance diagnostics. A common myth is that any malfunction involving parts like thermostats or control boards can be resolved by a simple swap. However, experts emphasize that understanding the underlying cause is crucial—otherwise, you risk replacing the wrong component and wasting time and money, or worse, causing further damage. For example, a failing thermostat might actually be due to a faulty sensor or control board malfunction, which necessitates thorough diagnostics rather than immediate part replacement. Rushing into repairs without proper testing can lead to recurring issues and increased costs, especially if you ignore less obvious factors such as wiring problems or control board faults. A key nuance many overlook is that certain symptoms, like inconsistent heating, may stem from multiple interconnected issues rather than a single faulty part. Performing targeted tests—such as measuring resistance across sensors or checking control module error codes—can clarify the true culprit, preventing unnecessary replacements. For advanced repair practitioners, understanding the diagnostic flowchart and the normal operation parameters is essential; simple assumptions often lead to misdiagnosis. For example, a dishwasher humming but not filling with water might be presumed to be a solenoid valve issue, yet it could be a clogged filter or defective float switch, which requires a different approach. To avoid falling into these traps, consult comprehensive troubleshooting guides like the ones at this resource. Recognizing that many appliance failures are multifaceted helps refine your diagnostic skills and ensures long-term repair success.
How can precise diagnostics prevent costly misdiagnoses in complex appliance systems?
As the industry evolves with smarter, more connected devices, understanding the subtleties of multi-component interactions becomes even more vital—so take the time to learn how to interpret error codes and sensor readings properly. Remember, effective repair depends on good diagnosis, not just replacing parts on a hunch. Have you ever fallen into this trap? Let me know in the comments.
Embracing the Right Tools for Longevity and Performance
Maintaining your appliances requires more than just basic knowledge; it hinges on having the right equipment that enables precise diagnostics and efficient repairs. I personally rely on a high-quality digital multimeter, like the Fluke 115, which provides incredibly accurate resistance readings essential when testing thermostats, sensors, and relays. Its durability and ease of use make it indispensable for troubleshooting complex issues, especially when diagnosing cooktop ignitors or dishwasher float switches. Additionally, a digital infrared thermometer allows me to quickly verify oven heat consistency without invasive procedures, helping identify uneven heating issues that might stem from faulty sensors or elements. The importance of reliable tools cannot be overstated—they save time, prevent misdiagnoses, and ultimately extend the lifespan of your appliances.
Beyond hardware, I incorporate specific software for firmware updates on smart appliances, particularly for models with integrated control boards. Manufacturers often release updates that fix bugs related to temperature regulation or error codes, making it vital to keep your appliance’s firmware current. For example, checking the manufacturer’s website regularly can help you stay ahead of issues like F3 error codes or control board glitches, ensuring your appliance functions optimally over the long term. As technology advances, tools like Bluetooth-enabled diagnostic devices are becoming more prevalent, allowing even DIY enthusiasts to run comprehensive tests and view real-time data on smartphones, which simplifies troubleshooting.
Regular inspections form a critical part of maintenance. I schedule routine checks for door seals, wiring connections, and visible components like heating elements, ensuring minor issues don’t develop into major failures. Documenting test results using detailed logs helps track appliance health over time and provides valuable records if professional service becomes necessary. Remember, proactive maintenance with the right tools is a key strategy in avoiding costly repairs or replacements down the line.
How do I maintain appliances to ensure they serve well over time?
Looking ahead, I believe that automation and IoT integration will become standard in appliance maintenance routines. Sensors embedded within devices may automatically alert you to developing issues, like a degrading dishwasher drain pump or an oven temperature sensor nearing failure, before they cause failure. On the DIY front, mastering diagnostic methods—such as testing relays, sensors, and control boards—will be increasingly vital. I recommend investing time now to learn these techniques; they can save you significant money by preventing unnecessary replacements or extensive repairs. For instance, troubleshooting the drain pump with a simple multimeter check can reveal obstructions or electrical faults early, making repairs straightforward and affordable.
Try applying the diagnostic test for your oven’s temperature sensor using a multimeter. This quick step, when done correctly, can unveil underlying issues affecting your oven’s performance. For step-by-step guidance, visit this detailed tutorial. Regularly updating your knowledge and tools will keep your appliances running smoothly for years to come, saving you both time and money while ensuring safety and efficiency. Remember, the key to long-term appliance health lies in the consistency of your diagnostic practice and the quality of your tools.
Trusted Lessons Hidden in My Repair Mishaps
One of my toughest lessons was assuming thermostat failure at first glance, only to realize the sensor or control board might be the actual culprits. That realization saved me from unnecessary replacements and deepened my understanding of appliance diagnostics.
I learned that sometimes, the simplest tools—like a multimeter—are your best allies. Investing in quality equipment makes testing and troubleshooting much more manageable and accurate, especially when diagnosing complex issues like temperature inconsistencies.
Attempting repairs without proper documentation led me astray more than once. Keeping detailed notes on test results, part conditions, and symptoms helps create a clear picture, ensuring efficient repairs and valuable insights for future troubleshooting.
Tools and Resources That Changed My Approach
- High-Quality Multimeter: A reliable multimeter, such as the Fluke 115, is indispensable for testing thermostats, sensors, and relays accurately. It minimizes guesswork and ensures you’re replacing the right part.
- Infrared Thermometer: Quickly assessing oven temperature distribution helps identify faulty sensors or heating elements, guiding precise repairs without invasive procedures.
- Diagnostic Guides: Comprehensive resources like the detailed troubleshooting articles on this site offer step-by-step instructions that are invaluable for DIY repairs.
- Firmware Updates and Smart Diagnostics: Regularly checking manufacturer websites for updates keeps your smart appliances running optimally and helps diagnose issues more effectively, leveraging the power of embedded sensors and error codes.
Your Next Step Towards Confident Repairs
Embracing precise diagnostics transforms frustrating oven temperature swings into manageable fixes, saving time and money while boosting your confidence. Take on your oven’s health with curiosity and care—your future self will thank you for the effort you invest now. Remember, every repair is a learning opportunity that sharpens your craft and makes you a more capable DIYer.
What has been your biggest obstacle in diagnosing oven or dishwasher issues? Share your story below and let’s learn from each other’s experiences!