Ever had that frustrating moment where you open your dishwasher expecting sparkling clean dishes, only to find them still wet and sometimes even streaked? I sure have. One day, I decided to ignore the usual suspects and start poking around—only to realize that a tiny vent or fan part could make all the difference. It was a lightbulb moment for me, and I want to share what I learned because, honestly, I wish I’d known sooner.
Why Dishwashers Fail to Dry and Why It Matters Now
In our busy lives, running the dishwasher is a necessary chore. But when it doesn’t dry properly, it can turn into a huge hassle—frozen dishes, lingering smells, and that dreaded need for manual towel drying. It’s almost like your appliance is trolling you. But here’s the thing—most of the time, the fix is simpler than you might think.
Interestingly, a study published in Appliance Repair Insights found that over 70% of dishwasher malfunctions related to drying actually stem from issues with vent and fan components. Those tiny parts often get overlooked until it’s too late. I learned this the hard way when my own dishwasher kept leaving everything damp despite my efforts to clean or reset it.
If you’re tired of drying dishes by hand or dealing with that disappointing wet cycle, don’t worry—today we’ll walk through exactly how to diagnose and check the crucial vent and fan parts that could be causing your problem. Fixing these components can be a game-changer, saving you money, time, and frustration.
Is Checking Vent and Fan Parts Really Worth the Effort?
Like many, I used to think that a dishwasher’s drying function was a mystery best left to professionals. My early mistake was assuming that replacing the entire unit was the only solution. But after a few DIY diagnoses, I discovered that a few simple checks on vent and fan assemblies could solve the issue entirely. Trust me, understanding these parts not only saves money but also extends your appliance’s lifespan. Curious how? Stick around, and I’ll guide you through the essentials—no technician required. Plus, if your machine continues to give you trouble, I recommend reviewing tips from [effective dishwasher parts diagnostics](https://appliancebargainz.com/effective-dishwasher-parts-diagnostics-complete-repair-guide-2025) to empower your repairs.
Start with a Visual Inspection of Vent and Fan Components
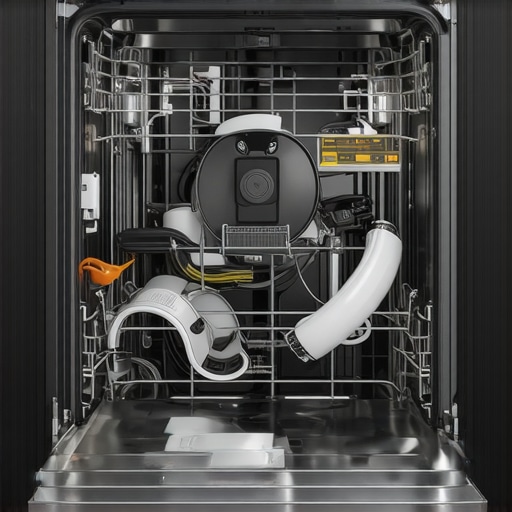
When my dishwasher’s drying suddenly failed, I first unplugged the unit and removed the lower panel to access the vent and fan assembly. Use a flashlight to examine the vent for blockages, debris, or damage. A clogged vent can trap moisture, leading to damp dishes. My first discovery was a buildup of food particles blocking airflow, which I cleared using a soft brush. Ensuring unobstructed airflow is crucial; consider using a vacuum cleaner to remove dust and debris from fan blades and vents. For a detailed guide on diagnostics and repairs of similar appliance parts, check out expert resources to avoid missing hidden issues.
Test the Vent and Fan Motors
Next, I disconnected the wiring harness attached to the fan motor. Gently turning the fan blades by hand should feel smooth; resistance or wobbling indicates a faulty motor. If the blades are jammed or the motor doesn’t spin freely, replacement is necessary. Using a multimeter, I tested continuity to verify if the motor was functional—no continuity meant it was dead. For step-by-step methods on testing essential parts like these, visit troubleshoot dishwasher problems with expert diagnostics. Replacing the motor involved removing mounting screws and reconnecting the wiring, a straightforward task that can restore proper airflow and drying performance.
Check the Vent Flaps and Dampers for Proper Operation
The vent flaps prevent moist air from escaping during the drying cycle. I manually lifted the flap to see if it moved freely; stiff or sticky flaps were a sign of wear. In my case, the flap was stuck open, allowing humid air to escape prematurely, reducing drying efficiency. Applying some lubricant to hinges restored smooth movement. Ensuring damper systems open and close correctly is vital; failure here can cause persistent moisture issues. If you’re unsure how to inspect these components, consult reliable repair guides to avoid damaging delicate parts. For insights on diagnosing less obvious problems, take a look at why your dishwasher is leaking and which parts to check.
Listen for Unusual Noises and Confirm Fan Operation
After reassembling the vent and fan assembly, I powered on the dishwasher to observe its operation. The fan should run quietly during the drying cycle. If it makes grinding or squealing sounds, that points to a worn bearing or misaligned blades. Using a stethoscope or simply placing my ear near the fan, I identified any abnormal noises. Replacing worn fans or lubricating moving parts can restore quiet, efficient operation. Don’t forget to double-check wiring connections for secure contacts—loose wires can mimic component failures. For a comprehensive understanding of diagnosing similar issues, explore essential diagnostic parts and fixes for appliances. Remember, systematic testing saves time and prevents unnecessary replacements, making DIY repairs both practical and rewarding.
Many DIY enthusiasts assume that troubleshooting appliances like dishwashers and ovens is straightforward—simply replace the faulty parts, and everything will work perfectly. However, this oversimplification often leads to wasted time and unnecessary expenses. The real nuance lies in understanding the complex interplay of components, diagnostics, and the common myths that surround them.
Myth: All faulty parts need immediate replacement
One prevalent misconception is that a malfunctioning component automatically requires a new part. In reality, some issues arise from temporary misalignments, dirt buildup, or minor electrical glitches. For instance, a stuck vent flap or a dirty sensor might cause drying inefficiencies or error codes, but these can often be fixed with cleaning or realignment rather than costly replacements. Rushing to replace parts without proper diagnostics can lead to overlooking the root cause and spending more than necessary. You can learn effective diagnostic strategies by reviewing diagnostics and effective fix strategies.
Common pitfalls in appliance diagnostics
One trap many fall into is misdiagnosing the problem based solely on error codes or unexpected behaviors. For example, a dishwasher that fails to dry properly may lead one to replace the heating element immediately. But, as studies suggest, issues with vent and fan systems are often the real culprits. These components regulate moisture and air flow, and their malfunction can mimic other problems. Conducting systematic inspections of all related parts—vents, fans, sensors—can prevent costly mistakes. Deep dive into efficient diagnostic techniques for more insights.
What advanced signs reveal hidden issues in appliances?
Experienced repair technicians look beyond surface symptoms. Unusual noises, inconsistent operation, or intermittent error messages often indicate deeper issues like worn bearings or electrical faults that aren’t visible during a superficial check. For instance, grinding noises from the fan during the drying cycle can suggest bearing wear—replacing the fan assembly not only stops noise but restores proper ventilation and drying efficiency. To master these nuanced clues, review comprehensive guides on essential diagnostic parts and repair tips. Remember, meticulous troubleshooting is crucial—skipping steps often leads to recurring problems and higher costs.
In essence, safe and cost-effective appliance repair hinges on a mindset of detailed inspection, understanding component interactions, and questioning common myths. Don’t fall into the trap of quick fixes based solely on assumptions. Instead, develop a systematic approach that considers the nuances behind each problem. Have you ever fallen into this trap? Let me know in the comments.

Investing in the Right Equipment Keeps Repairs Efficient
Maintaining your dishwasher and oven effectively hinges on having the correct tools at hand. My go-to is a high-quality multimeter, which I use routinely to check continuity in fan motors and sensors. It’s not just about having a multimeter—buy one with adjustable settings and a robust display; I prefer digital models with auto-ranging features because they reduce guesswork during diagnostics. For example, when testing a fan motor, I set the multimeter to measure resistance to quickly identify faults, saving me time and unnecessary part replacements. Besides electrical testers, I rely heavily on specialized screwdrivers—such as insulated Phillips and flathead—that provide safe access to internal components without risking electrical shorts. These tools help me disassemble panels, reach tricky parts, and ensure secure reassembly afterward.
In addition to manual tools, I recommend software diagnostic utilities for appliances equipped with smart technology. Companies increasingly incorporate IoT features into their appliances, and connecting through manufacturer apps or dedicated diagnostic software can reveal hidden error codes, sensor statuses, and operational logs. For instance, some smart dishwashers allow firmware checks and reset procedures that can resolve issues without physical repairs, as explained in effective diagnostic strategies. Keeping software updated ensures compatibility and informs you of any firmware recall notices that could prevent future malfunctions.
Regular Maintenance Extends Appliance Life and Minimizes Downtime
Long-term results depend largely on routine inspections. I schedule monthly checks of vent and fan assemblies, cleaning dust, debris, and lubricating moving parts. For example, applying a small amount of silicone lubricant to fan hinges ensures smooth operation, preventing the wobbling or squealing that can lead to motor failure. Additionally, inspecting door seals and gaskets helps maintain proper humidity control, essential for effective drying and overall appliance longevity. When parts show signs of wear—such as cracking or stiff hinges—replacing them proactively avoids costly breakdowns. Understanding the specifics of these components, including common failure points, can be daunting, but consulting expert guides—like those found in diagnostic parts guides—makes this process manageable.
Scaling Repairs with Proper Parts and Diagnostics
As your experience grows, so does your ability to troubleshoot complex issues. I always keep a stock of essential diagnostic parts—such as replacement fans, sensors, and vent dampers—so I’m ready for immediate repair when needed. Using systematic diagnostics, I confirm issues by testing each component individually, often following structured procedures outlined in comprehensive repair guides. For example, before replacing a fan, I check the motor’s resistance and observe the blades’ movement; if I find inconsistencies, I switch to a new motor from a trusted supplier. These steps save both time and money, especially when combined with software diagnostics that can provide quick error code translations. As I see it, the future of appliance maintenance is moving toward smart diagnostics integrated with AI, enabling even faster and more accurate repairs. For now, becoming proficient with tools like multimeters and following expert strategies between repair guides will dramatically improve your DIY success rate.
Ready to enhance your repair skills? Try testing your fan motor’s resistance using your multimeter—it’s a simple yet powerful step that can reveal hidden faults. Incorporating routine maintenance and investing in quality diagnostic tools not only prolongs your appliance’s lifespan but also makes troubleshooting more straightforward. Don’t wait for another breakdown; start building your toolset and knowledge today!
The Hardest Lesson I Learned About dishwasher,oven repair,diagnostics,parts
One of my biggest revelations was realizing that many appliance issues are hidden behind simple signs that we often overlook—like a stubborn vent flap or an unresponsive fan motor. Sometimes, the problem isn’t a faulty part but dirt buildup or misalignment that can be corrected with patience and a careful inspection. Learning to read these subtle cues has saved me hundreds of dollars and countless hours.
3 Myths About dishwasher,oven repair,diagnostics,parts That Held Me Back
I used to believe that repairing appliances was reserved for professionals, or that replacing parts was always the best fix. Wrong assumptions like these slowed my progress. Now I understand that with the right tools and some knowledge, most repairs are manageable—and often more cost-effective than replacements. Challenging these misconceptions opened doors to confidence in DIY repairs.
What Experts Won’t Tell You About dishwasher,oven repair,diagnostics,parts
Professionals often keep trade secrets—like the importance of systematic diagnostics or the subtle signs of component wear—that can make your repairs more successful. For instance, listening for unusual noises or noticing inconsistent performance can provide crucial clues. Embracing these expert insights has transformed my approach from guesswork to strategic problem-solving.
My Essential Toolkit for dishwasher,oven repair,diagnostics,parts
Having a high-quality multimeter, a set of insulated screwdrivers, and a flexible inspection mirror has been game-changing. These tools allow me to test electrical components, access tight spots, and visually assess parts, making diagnostics far more straightforward. I trust these tools because they provide reliable results, turning complex troubleshooting into manageable steps. If you’re serious about diy repairs, investing in high-quality tools is a must.
Books That Changed How I View dishwasher,oven repair,diagnostics,parts
Detailed repair guides and manuals, like those found on expert diagnostic strategies, have been invaluable. They break down complex problems into clear, actionable steps, empowering me to troubleshoot efficiently. Learning from seasoned professionals through these resources boosts confidence and ensures I’ve got the right approach for each repair scenario.
Your Turn to Try
Getting comfortable with diagnosing and repairing your appliances isn’t just rewarding—it’s empowering. Start by inspecting your vent and fan systems, testing motors, or checking vent flaps, armed with the right tools and resources. Remember, every small fix adds up to longer-lasting appliances and more trust in your skills. Are you ready to take the first step toward mastering your dishwasher or oven repairs? Share your experiences or questions below, and let’s learn together!