If you’ve ever stood in your kitchen, only to see a puddle spreading across the floor beneath your dishwasher, you know how frustrating and stressful that can be. I remember the first time it happened to me—my heart sank. There was water everywhere, and I had no idea where it was coming from. It felt like my trusty appliance had suddenly turned against me overnight.
That lightbulb moment made me realize that many dishwasher leaks aren’t due to some mysterious malfunction or expensive part failure. Often, the culprit is one of a handful of inexpensive components that anyone can inspect or replace with a little guidance. The good news? If caught early, these repairs are quick and budget-friendly, saving you the cost and hassle of calling in a professional.
Don’t Let Leaks Drain Your Wallet: Check These Cheap Parts First
In this post, I’ll walk you through the four most common and affordable parts that could be causing your dishwasher to leak. I’ll also share my own mistakes—early on, I spent hundreds replacing parts that didn’t need replacing, just because I didn’t do my homework. Trust me, a little knowledge here can go a long way. If you want to avoid wasting time and money, stay tuned, and let’s get your dishwasher back in shape.
Is It Really Worth Fixing a Leaking Dishwasher?
Initially, I doubted whether repairing was worth it. I thought new appliances were more reliable. But after some research and hands-on experience, I discovered that many leaks are simple fixes. Plus, DIY repairs can extend your appliance’s life and save you cash. Just be cautious—mistakes early on, like ignoring small cracks or overlooking simple worn-out parts, can lead to bigger headaches later. For expert tips on diagnosing more complex issues, check out this comprehensive guide.
Now, let’s dive into the specific parts you should check first. These are goalsignificant because they’re inexpensive and often the root causes of common leaks. Understanding them can empower you to troubleshoot effectively, whether you’re a DIY enthusiast or just trying to save a few bucks before calling in pros.
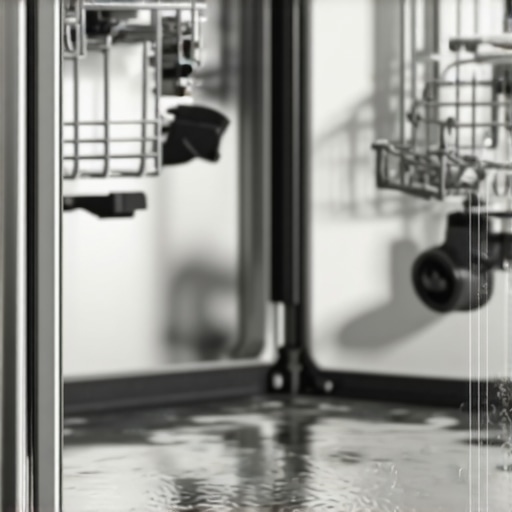
Inspect the Door Seal for Gaps
Start by examining the rubber gasket around your dishwasher door. A worn or torn seal can let water escape during cycles. To check, open the door and look for cracks, debris, or areas where the seal isn’t snugly fitting. I once found a small tear in my seal after a neighbor pointed out water leaking from the door area—replacing it was straightforward and saved me a lot of frustration. If you notice damage, order a new seal and follow the manufacturer’s instructions for replacement.
Examine the Float Switch and Drain System
The float switch prevents the dishwasher from overfilling. If stuck or malfunctioning, it can cause water to leak. Locate the float assembly at the bottom of your dishwasher—usually a small, round sponge or plastic component. Press it gently to ensure it moves freely; if stuck, clean away debris or calcium buildup. Similarly, inspect the drain hose and pump for obstructions or leaks. Clear blockages and replace damaged hoses, as a clogged drain can cause water to back up and leak out during operation.
Check the Water Inlet Valve and Hoses
The inlet valve controls water flow into your dishwasher. If it’s faulty or remains open unexpectedly, it can cause leaks. Turn off your water supply, then disconnect the inlet hose to inspect for cracks or mineral deposits. If the valve appears corroded or doesn’t shut properly, replacing it is vital. Also, examine the inlet hose for cracks or drips and replace if necessary. Remember, a faulty inlet connection often leads to internal leaks and pooling beneath the appliance.
Inspect the Pump and Drain Assembly
The pump circulates water and drains it out at the end. Leaks around the bottom of your dishwasher often point here. To inspect, remove the lower panel, and look for cracked or loose hoses, or pooled water. I once found a cracked impeller in my pump—replacing it fixed the leak instantly. When doing this, ensure the power is unplugged for safety. If you notice corrosion or continuous dripping, replacing the pump or gasket can prevent further leaks and costly damage.
Perform a Controlled Test After Repairs
Once you’ve checked and replaced the suspected parts, run a short cycle with the dishwasher empty. Observe carefully for water leaks, paying attention to the door, bottom, and drain area. Use a flashlight to spot small drips that might otherwise go unnoticed. If water still leaks, revisit your inspections or consider consulting a professional. Properly diagnosing each component ensures you fix the root cause, not just the symptom, saving time and money.
Many homeowners diving into appliance repair believe that replacing parts at random is the best way to fix their oven or dishwasher, but this approach often leads to wasted time and money. A common misconception is that more expensive or more parts replaced will automatically resolve the issue, yet seasoned repair professionals know that accurate diagnostics are the real game-changer. Rushing into part replacement without understanding the underlying cause can mask the true problem or even worsen the damage. For example, someone might replace an oven’s heating element assuming it’s faulty, but overlook a simple relay issue or wiring problem that prevents power from reaching the element. This mistake illustrates the importance of precise diagnosis over guesswork, which is backed by expert tips available at this comprehensive guide. Another nuanced trap is the tendency to forget that many damage signs, such as heat inconsistencies or electrical failures, can stem from a single faulty component like a thermostat or control board—parts that require specific testing methods rather than mere visual inspection. Many DIYers also fall prey to myths like “If a part looks fine externally, it can’t be the cause,” which is incorrect because internal faults or subtle corrosion often go unnoticed without proper testing. The real secret is understanding the role of diagnostics tools and knowing how to interpret diagnostic codes correctly—something you can learn from advanced guides like this expert article. Additionally, advanced repair involves recognizing that many faults are interconnected; a worn door seal may cause overheating that affects electronics, or a clogged vent might fake sensor failure signals. These complexities highlight why relying solely on visual cues is insufficient, and why detailed testing is essential. Being aware of these nuances and avoiding common pitfalls is especially crucial when dealing with intricate components like control modules and heating elements, which require specific diagnostic procedures. Remember, a well-informed repair strategy focusing on accurate diagnostics not only saves money but also prolongs your appliance’s lifespan. To avoid simple mistakes, always consult detailed diagnostic step-by-step guides tailored for your appliance model. Do you often fall into the trap of replacing parts prematurely? Let me know in the comments and share your experience with these advanced insights.
Keeping It Working with Precision Tools
One of my top recommendations for ongoing maintenance is investing in a quality multimeter. I personally rely on the Fluke 117 for its accuracy, durability, and ease of use. It allows me to quickly test electronic components, check voltage levels, and troubleshoot control boards without guesswork. A reliable digital multimeter is indispensable for diagnosing issues like malfunctioning thermostats or faulty wiring connections, especially when dealing with complex oven or dishwasher electronics. I’ve found that understanding how to interpret readings correctly can save hours and prevent unnecessary part replacements.
In addition, I always keep a set of precision screwdrivers rated for appliance repair — particularly Phillips and flat-head sizes suited for tight spaces inside modern appliances. These tools enable me to disassemble components without damaging delicate connectors or casings. For example, when replacing a defective relay or thermostat, having the right screwdriver prevents stripping screws and simplifies reassembly. Pairing these with a good flashlight, like the Olight Tailcap Pen Light, helps me spot issues like corrosion or mineral buildup that aren’t immediately visible.
The Power of Diagnostic Software and Guides
Beyond physical tools, diagnostic software has become a game-changer. Modern appliances often include diagnostic modes accessible via specific button sequences or through proprietary apps. I recommend checking your appliance’s manual or manufacturer websites for access instructions—they often provide step-by-step guides that save troubleshooting time. For instance, I use diagnostic codes to pinpoint control board issues in dishwashers, which, when coupled with diagnostic guides like this expert resource, allow me to identify the exact component causing a malfunction rather than replacing parts blindly.
Future of Appliance Maintenance Tools
The trend is moving towards smarter, more integrated diagnostic tools. Handheld devices capable of connecting to appliances via Bluetooth to retrieve error codes are becoming more affordable and accessible. I believe that in the near future, AI-powered diagnostic apps will analyze appliance behavior remotely, guiding DIY enthusiasts and professionals alike. This evolution will reduce downtime and improve repair accuracy, making appliance maintenance more accessible to everyone.
How do I keep my appliances in top shape over time?
Regular preventive maintenance is key. I recommend scheduling yearly inspections where you clean filters, check hoses for cracks or kinks, and test electronic components with your multimeter. Applying a bit of lubricant on moving parts can prevent premature wear. Also, keeping software firmware up-to-date, when applicable, ensures your appliances benefit from performance improvements and bug fixes. For detailed steps on diagnostics and routine checks, explore this guide. By mastering these tools and practices, you’ll extend the lifespan of your appliances and avoid costly breakdowns — I encourage you to try diagnosing a small, non-critical component today to build confidence in your skills.
Why Trust Isn’t Built on Guesswork, But Diagnostics
One of the hardest lessons I learned was the importance of precise diagnostics over rushing to replace parts. Early on, I replaced multiple components hoping to fix leaks, but often the problem persisted or shifted. It wasn’t until I embraced thorough testing—using tools like a multimeter and following detailed guides—that I started resolving issues efficiently. This experience taught me that patience and proper diagnosis save both time and money, and it’s a lesson I wish I had learned sooner.
The Power of the Right Resources for Appliance Troubleshooting
I rely heavily on trusted sources like this comprehensive repair guide and expert troubleshooting pages because they provide detailed, step-by-step instructions that I can follow confidently. Investing in quality diagnostic tools, such as a reliable multimeter, and consulting these guides has transformed my approach from guesswork to precision, ultimately extending the life of my appliances.
Embrace the Challenge and Keep Learning
Dealing with dishwasher leaks can feel daunting at first, but each repair enhances your skills and confidence. The key is approaching each problem with curiosity and a willingness to learn from mistakes. Whether it’s a torn door seal or a faulty inlet valve, tackling these issues pushes you to become more resourceful. Remember, every expert was once a beginner who refused to give up. Your perseverance will pay off, so don’t hesitate to dive into diagnostics and enjoy the satisfaction of solving problems yourself.
What’s Your Next Step in Appliance Care?
Taking control of appliance repairs starts with educating yourself and practicing the techniques I’ve shared. Which part do you feel most confident to check first on your dishwasher? Or is there a common leak you’ve struggled to fix? Share your experiences below, and let’s continue learning together.