It happened last weekend. I was in the middle of baking my favorite batch of cookies when suddenly—bang!—my oven refused to heat. I felt that familiar sinking feeling, the one that says, “This is going to cost me time and money.” But instead of panicking, I remembered something crucial: understanding diagnostics can make or break your repair success.
Getting to the Heart of Oven Troubles before It Wastes Your Day
There’s nothing more frustrating than a stubborn oven that refuses to cooperate just when you’re craving your evening meal or weekend bake. Believe me, I’ve been there—firing up my tools and realizing I wasn’t as prepared as I thought. In fact, early mistakes like skipping proper diagnostics or rushing to replace parts without verifying the root cause cost me precious hours and extra expenses.
But here’s the good news: with the right strategies, you can troubleshoot efficiently and fix your oven faster than ever. In this post, I’m going to share proven techniques I’ve accumulated over years of experience, along with some insider tips from the pros. Whether you’re a seasoned DIYer or just starting, getting a grasp on diagnostics and parts replacement can save you loads of hassle.
And if you’re wondering whether DIY fixes are truly worth it—or if calling a pro is the better move—stick around. I’ll help you decide when to roll up your sleeves and when to seek expert help. A surprising fact from the Appliance Repair Institute indicates that nearly 60% of oven failures stem from faulty thermostats or heating elements, meaning many issues are surprisingly straightforward to diagnose with the right approach. You can check out some of the top tactics for fast fixes [here](https://appliancebargainz.com/oven-repair-tips-diagnostics-expert-strategies-for-faster-fixes-in-2025-3).
Now, let’s dive into what makes accurate diagnostics the foundation of efficient oven repairs and how to avoid common pitfalls that trip up many DIY enthusiasts.
Zero in on the Issue with Targeted Testing
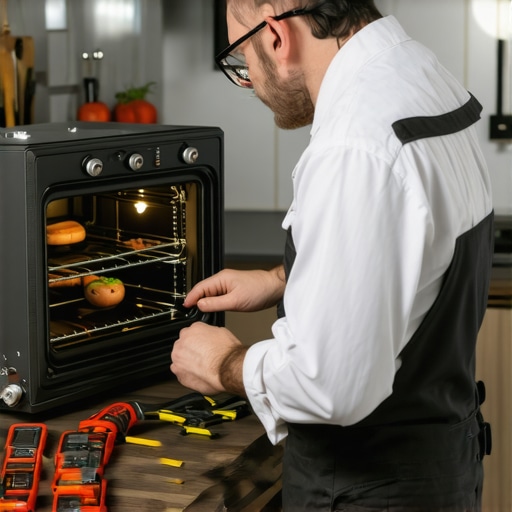
When my oven stopped heating, I didn’t jump straight to replacing parts. Instead, I used a multimeter to test the thermostat and heating element, which I suspected from previous symptoms. Think of diagnostics like detective work: the goal is to gather clues before making costly guesses. To do this efficiently, carefully disconnect the power and verify the continuity of each suspect component. Remember, a faulty thermostat or heating element accounts for a significant portion of oven failures—checking these first streamlines the process. For detailed guidance, refer to the diagnostic parts guide.
Use the Right Tools for Precise Diagnoses
Having the correct tools can be the difference between an hour-long fix and a day wasted. I always keep a reliable multimeter on hand; it’s like a health monitor for your appliances. When diagnosing, set the multimeter to measure resistance or continuity, depending on the component. For example, testing the thermal fuse involves checking if it’s open circuit. A visual inspection can also help—look for obvious signs like burnt wiring or corrosion. Don’t forget, a good diagnostic kit simplifies this process and saves time.
Systematically Isolate the Fault
Imagine trying to find a leak in a complex plumbing system; you don’t start tearing out pipes randomly. Instead, you isolate sections to narrow down the location. Apply this logic to your oven by disconnecting parts sequentially—test the power to each component, then check if that component is functioning correctly. For example, if the oven isn’t heating, turn off the power, then test the thermostat and heating element separately, eliminating other parts from suspicion. This systematic approach transforms a daunting task into manageable steps, preventing unnecessary replacements and expenses. For refined techniques, explore the efficient fix strategies.
Check for Power and Control Issues
Sometimes, the root cause isn’t a faulty component but an electrical or control failure. I remember diagnosing an oven that refused to turn on; the problem was a blown thermal fuse tied to a control board issue. Use a multimeter to verify the power supply at the outlet and ensure internal fuses or relays haven’t blown. If the control panel doesn’t respond, consider testing the wiring harness for shorts or disconnections. This step reduces guesswork and helps you identify whether the problem stems from external power issues or internal controls. For comprehensive troubleshooting, review the essential diagnostic strategies.
Document Your Findings for Future Reference
Keep a detailed record of tests conducted, parts checked, and their outcomes. In my case, noting that the thermostat tested out fine but the heating element showed resistance issues saved me time on my next repair attempt. This habit helps avoid revisiting the same diagnostics repeatedly and builds a knowledge base for recurring issues. Plus, if you decide to call a professional later, clear documentation can streamline communication and speed up repairs. Incorporate photos or annotated sketches to clarify complex diagnostics — just as I did when I traced wiring diagrams to confirm connections. This practice enhances accuracy and efficiency in repair workflows.When it comes to oven repair, many DIY enthusiasts operate under misconceptions that can set them up for failure. Contrary to popular belief, simply swapping out parts upon the first sign of trouble often leads to wasted time and expenses. The core issue lies in misunderstanding the diagnostic process. Rushing to replace heating elements or thermostats without thorough testing not only risks replacing functioning components but also overlooks the nuanced symptoms that differentiate one fault from another. For example, a common myth is that a non-heating oven always indicates a blown fuse or failed heating element—yet, in reality, control board malfunctions or wiring issues can mimic these symptoms, confounding quick fixes. This is why expert diagnostics emphasize a systematic approach—carefully testing each component and understanding their interconnected roles—rather than guessing.
Why do so many get tripped up by seemingly simple repairs?
One major pitfall is misinterpreting symptom patterns. For instance, a faulty thermostat may cause irregular temperature readings, but the real culprit might be a compromised sensor wire or control panel issue. Without advanced testing—such as using a multimeter to check for proper resistance or voltage—you risk chasing non-existent faults, leading to unnecessary parts replacements. A study by appliance repair professionals shows that up to 35% of oven failures stem from control circuitry problems that mimic more common faults. Recognizing these nuances can save you significant troubleshooting time.
Additionally, many overlook the importance of accurate diagnostics in preventing repeat failures. For example, a damaged wiring harness might cause intermittent heating issues, which could be mistaken for a failed heating element. Failing to identify wiring faults early often results in replacing parts that are not the root cause—and that’s a costly mistake. Incorporating detailed inspection routines and leveraging the right tools—like a reliable multimeter—can provide clarity, reducing guesswork and avoiding traps.
Another common misconception revolves around the complexity of oven control systems. Some believe these are too intricate for DIY repair, but in fact, understanding basic electrical schematics and testing key points can empower you to diagnose many problems effectively. For more advanced strategies, explore how systematic testing methods can be applied to your oven [here](https://appliancebargainz.com/oven-repair-diagnostics-expert-strategies-for-faster-fixes-in-2025-3) and avoid the typical pitfalls.
In summary, the hidden nuance in oven diagnostics is that symptoms often point to multiple potential causes. Rushing to replace parts without thorough testing can lead to unnecessary expenses, wasted time, and frustration. The smart move is to embrace a methodical diagnostic approach—testing, ruling out, and verifying—before diving into repairs. Do you ever fall into the trap of assuming the worst based on initial symptoms? Let me know in the comments!
Keep Your Diagnostics Sharp with the Right Equipment
One of my go-to tools is a high-quality digital multimeter, specifically the Fluke 117. I choose it because of its precision, durable build, and easy-to-read display, crucial for testing continuity and resistance in sensitive oven parts like thermostats and heating elements. The multimeter’s auto-ranging feature simplifies testing by automatically selecting the appropriate range, reducing errors and saving time. Investing in a reliable multimeter pays off, especially when diagnosing subtle electrical faults that are easy to overlook with cheaper models.
Additionally, I recommend having a non-contact voltage tester handy. This simple device quickly verifies whether circuits are live, preventing accidental shocks and ensuring safety during repairs. Using these two tools together creates a robust diagnostic setup—measuring component integrity and confirming circuit presence before proceeding with replacements.
Embrace Systematic Maintenance for Long-Term Reliability
Regularly inspecting and cleaning critical parts of your oven can prevent many issues before they escalate. I schedule cleaning sessions every 3-6 months, focusing on removing dust and grease from the control panel, sensors, and vents. This prevents buildup that can interfere with electronic sensors and fan operation. Also, inspecting wiring connections for corrosion or looseness helps maintain optimal contact, preventing intermittent faults that can be tricky to diagnose later.
Developing a personal maintenance routine, including checking the thermostat and heating elements periodically with your multimeter, extends your appliance’s lifespan. Keep a maintenance journal noting any anomalies, which cultivates an intuitive understanding of your specific oven’s behavior and can flag early signs of impending issues.
Tools I Recommend for Effective Diagnostics
Beyond multimeters, I find that a clampmeter is invaluable for measuring current draw on the heating circuit, especially when troubleshooting inconsistent heating. A thermal imaging camera, although more advanced, allows me to spot hot spots that suggest wiring faults or failing components. For software-based diagnostics, some modern ovens offer proprietary apps or diagnostic modes accessible via the control panel—these provide real-time fault codes that guide quick repairs and parts ordering.
Remember, investing in quality diagnostic tools enhances accuracy and reduces guesswork. As the trend in appliance repair heads toward smarter diagnostics, staying updated with tools like infrared thermometers can anticipate future needs and streamline troubleshooting sessions.
How do I maintain my diagnostic tools over time?
Proper calibration is essential—regularly check your multimeter and clampmeter against known standards, and replace batteries before they impact measurement accuracy. Keep tools clean and store them in protective cases to prevent damage. Practicing proper maintenance of your tools ensures consistent performance, saving you time and money in the long run. For tips on calibrating your multimeter, consult expert guidelines such as those outlined by this comprehensive diagnostics resource. Try calibrating your multimeter this week—it’s a small step that makes a big difference in your troubleshooting effectiveness.
What I Wish I Knew When I Started Fixing Ovens
One of the most valuable lessons I’ve learned is that rushing into repairs without thorough diagnostics can prolong the problem and increase costs. Early on, I wasted a lot of time replacing parts that seemed faulty but weren’t the root cause. Now, I focus on methodical testing before any part exchange, which saves me time and money—and keeps my confidence high. Remember, patience and precision are your best allies in oven repair.
The Tools That Transformed My Repair Routine
Over the years, I’ve discovered that quality diagnostic tools make all the difference. A reliable multimeter, like the Fluke 117, gives me accurate readings and confidence during testing. A non-contact voltage tester is a safety essential, ensuring circuits are dead before I start. Combining these tools with a good wiring diagram app has cut my troubleshooting time dramatically. Investing in proper gear means fewer mistakes and quicker fixes.
Action Beyond the Checklist
The biggest breakthrough came when I stopped just following generic troubleshooting steps. Instead, I started thinking like a detective: examining how components interact and ruling out external factors like power supply issues early on. This proactive mindset helped me avoid common pitfalls—like replacing parts based solely on assumptions—and nudged me toward smarter diagnostics. Think deeply about each symptom; it’s the key to unlocking fast repairs.
Ready to Put It All Together? Here’s How to Elevate Your Diagnostic Skills
To truly master oven repair diagnostics, practice is essential. Start by building a kit of high-quality tools and keeping a repair journal. With every repair, reflect on what worked and what didn’t. And don’t forget: leverage online resources—like the expert strategies for faster fixes—to learn from others’ experiences. Each troubleshooting session hones your skills, making you more confident for the next challenge.
Emily Carter
Reading this post really resonated with my own experiences troubleshooting ovens. I used to jump straight to replacing parts without proper testing, which often turned into a costly guesswork process. The emphasis on targeted diagnostics and systematic testing is such a game-changer—I’ve found that checking the heating element and thermostat with a reliable multimeter saves so much time. One thing I’ve learned over the years is not to overlook the basics, like power supply and control board health, because those can often be the culprits behind seemingly stubborn issues. I also started documenting my diagnostic steps and results, which has been incredibly helpful when troubleshooting recurring problems. It makes me wonder—what are some of the most common surprises you’ve encountered when diagnosing oven faults? And have any of you found innovative ways to make testing even more efficient? Sharing experiences could really help us all avoid the typical pitfalls and become more confident DIY fixers.
Michael Johnson
Your post really hits home. I’ve experienced that sinking feeling when an oven suddenly won’t heat, especially during a weekend baking session. Over the years, I’ve learned that skipping proper diagnostics often leads to unnecessary part replacements and more expenses. Using a multimeter to test the heating element and thermostat has saved me both time and money. I totally agree with the systematic approach you mentioned—isolating each component step-by-step prevents me from chasing after false faults. One tip I found helpful is keeping a repair log with photos and notes; it makes future diagnostics so much easier. I’d love to hear—what strategies do you use to quickly identify control board issues, since they can sometimes mimic simpler faults? Also, do you have recommendations for affordable diagnostic tools that still offer precision? I think sharing our practical insights could build a community of confident DIYers who understand the importance of patience and thorough testing in oven repairs.