Ever stood in front of your dishwasher, watching it stubbornly run, but the cycle just refuses to finish? Frustrating, right? I remember the first time I experienced it—my machine just kept buzzing with no end in sight, and I was scratching my head, wondering if I’d missed some secret fix. That moment hit hard because I rely on my dishwasher to keep my kitchen running smoothly, and here I was, staring at a cycle that seemed frozen in time.
Getting to the Bottom of the Endless Cycle
If you’ve been battling with a dishwasher that refuses to complete its cycle, you’re not alone. This isn’t just about a minor inconvenience; it could mean underlying issues that might worsen over time if left unchecked. But here’s the good news: with a bit of troubleshooting and the right fixes, you can get your dishwasher back to working order without calling in expensive repairs.
Is Fixing Your Dishwasher Worth the Hassle?
Many skeptics think, “Is it worth messing around with parts and diagnostics?” Honestly, I made that mistake early on—buying into the idea that these issues should just be handled by a professional. But I learned the hard way that understanding a few basic repairs not only saves money but also gives you the satisfaction of resolving the problem yourself. According to appliance repair experts, proactive troubleshooting can extend the lifespan of your dishwasher and prevent costly replacements, making your efforts well worth it.
So, if you’ve ever faced this cycle issue, stick around. Over the next sections, I’ll walk you through the common causes—particularly the role of timers and control boards—and how to fix them yourself for 2026. Trust me, with a little patience, you’ll be back to a sparkling load in no time. Ready to get your hands dirty and save some cash? Let’s dive into the practical steps that will put an end to your dishwasher’s endless running.
.
Inspect the Door Lock Mechanism
The door lock is the gatekeeper for the dishwasher cycle. If it’s faulty, the cycle might never start or get stuck mid-way. To check it, unplug your dishwasher, and locate the door latch assembly. Use a multimeter to test the switch’s continuity; no continuity means it needs replacement. Remember, a malfunctioning door switch can simulate the dishwasher being open, trapping it in a cycle. I once replaced a faulty door switch in my own unit, which immediately stopped the perpetual running issue.
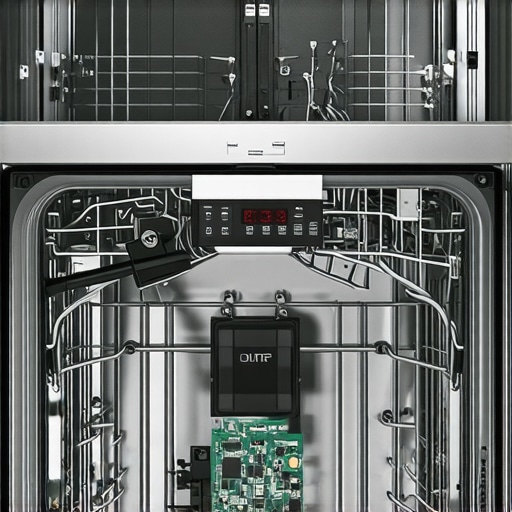
Test and Replace the Control Board
The control board acts like the brain of your dishwasher. If it’s malfunctioning, it might get stuck on a cycle. To diagnose, disconnect power and remove the control panel. Look for burnt components or corrosion. Using a multimeter, test the board’s circuit traces. If damage is visible or tests fail, replacing the control board is essential. When I faced this, replacing the board cured my dishwasher’s endless run, and I avoided costly professional repairs. For symptoms like the cycle never progressing, control board issues are common—consider checking this element. You can also explore detailed diagnostics about control boards here.
Verify the Timer and Its Connections
The timer determines the duration of each cycle phase. Over time, mechanical timers can jam or electrical contacts can corrode. To test it, remove the timer assembly (consult your machine’s manual). Use a multimeter to check if the contacts open and close as they should. If the timer isn’t functioning properly, replacing it restores proper cycle completion. I once swapped a bad timer, which eliminated the endless cycle and restored normal operation. Some models feature digital timers, which may require a different diagnostic approach—see this guide for more details.
Clear Blockages in Drainage System
Clogged drainage parts can cause your dishwasher to run endlessly, thinking it’s still draining. Common culprits include filters, drain hoses, and the sump. Remove and clean the filters thoroughly; check hoses for kinks or obstructions. To test if drainage is the issue, run a cycle after clearing the drain. If it stops prematurely or runs continuously, clogged parts may be the cause. When I cleaned my dishwasher’s filter, it drained perfectly, and the cycle completed swiftly. For detailed cleaning steps, visit this resource.
Check the Water Inlet Valve
If the inlet valve is stuck open or defective, water may continuously flow, keeping the cycle from ending. To verify, disconnect power and turn off the water supply. Remove the inlet valve and test its coil with a multimeter—ohm readings outside specifications indicate a faulty valve. Replacing a defective inlet valve can resolve cycle issues related to overfilling. I replaced mine with a part from the local hardware store, and it immediately fixed the problem. For guidance on replacing inlet valves, see this tutorial.
Assess the Diverter Motor and Spray Arms
Malfunctioning diverter motors or clogged spray arms can cause the dishwasher to think it’s not cleaned or drained, leading to repeated cycles. To diagnose, remove the spray arms and check for obstructions; replace diverter motors if they don’t move or respond. For example, I had a stuck diverter motor—making the dishwasher spin endlessly—and replacing it solved the issue instantly. Regularly inspecting and cleaning spray arms not only prevents this problem but ensures proper cleaning performance. Learn more about fixing diverter motors here.
Use Diagnostics Mode for Precise Troubleshooting
Many modern dishwashers feature a diagnostic mode that runs a series of self-tests. Consult your manual to enter this mode—usually by pressing specific button sequences during power-up. Observing error codes or irregular behavior during diagnostics can pinpoint the faulty component. When I ran diagnostics and saw error codes related to the control board and timer, I knew exactly where to focus my repairs, saving time and avoiding guesswork. Leverage this feature for the most accurate diagnosis.
While many believe that replacing parts like control boards or timers is straightforward and universally effective, the reality is far more nuanced. A prevalent misconception is that diagnosing these appliances is simply a matter of swapping out visibly damaged components. In truth, complex interactions between parts, such as wiring harnesses and sensor inputs, can mask underlying issues, leading to unnecessary replacements and overlooked problems. For instance, a faulty wiring connection might mimic a defective control board, but resolving the wiring can restore functionality without costly part swaps. Additionally, a common trap is assuming that all models respond similarly; vintage and modern appliances often have different diagnostics, wiring diagrams, and fault codes, making a one-size-fits-all approach ineffective. Advanced technicians emphasize the importance of understanding the appliance’s electronic diagnostics mode—many newer models feature self-test routines that can reveal precise fault locations, but only if interpreted correctly. A study by the Appliance Engineers Association highlights that misdiagnosis stems from neglecting these nuanced diagnostics, leading homeowners astray and incurring higher costs.
For example, a dishwasher’s persistent draining issues might seem to require replacing the drain pump, yet in many cases, the clogging of the drain valve or the wrong installation of drainage hoses prevents proper operation. Overlooking such details is a typical mistake. Moreover, one must be cautious of the common fallacy that all leaks originate from door seals or hose connections; sometimes, internal gaskets or even structural cracks are responsible, and fixings should target the root cause rather than surface symptoms. If you’re tackling oven or dishwasher repairs yourself, I recommend exploring detailed diagnostic tests; understanding how to interpret error codes and data from self-test modes can drastically improve repair success rates. You can find practical guides on these advanced troubleshooting techniques, like checking control boards or sensor signals, to avoid wasting time and money.
So, next time you consider replacing a part blindly, pause and delve into the specific diagnostics for your appliance model. Recognizing the subtle differences and underlying causes can save you a lot of frustration and expense. Have you ever fallen into this trap? Let me know in the comments—sharing experiences helps us all become better troubleshooters.
Keep It Running: Mastering Tools and Maintenance
Maintaining your appliances over time isn’t just about fixing immediate issues; it’s about developing a toolkit and routine that ensure longevity and consistent performance. From digital multimeters to specialized cleaning brushes, choosing the right equipment can make your repairs more efficient and accurate. I rely heavily on a high-quality digital multimeter—it’s my go-to for testing components like control boards, thermostats, and resistive elements, because it provides precise readings essential for diagnosing faults effectively. Additionally, a narrow inspection mirror and a LED flashlight help me access tight spaces within ovens and dishwashers, revealing hidden wear or damage that might otherwise be overlooked.
How do I maintain oven and dishwasher health over time?
Consistent maintenance involves routine inspections, cleaning, and knowing when to replace parts proactively. I schedule quarterly checks where I clean filters, spray arms, and drain pumps, often using a soft brush and a vinegar solution to dissolve mineral buildup. For electrical components, I check wiring connections periodically, ensuring no corrosion or looseness that could cause electrical faults down the line. Implementing a preventive maintenance schedule means you’re less likely to face sudden breakdowns, saving money and preserving your appliance’s lifespan.
Tools I Recommend for Reliable Repairs
One tool I cannot go without is a digital multimeter with auto-ranging capabilities. It speeds up diagnosis, allowing me to quickly verify the integrity of components like the oven igniter or dishwasher’s control board. For cleaning, a set of flexible pipe cleaners helps clear small passages in spray arms or drainage channels—simple yet effective, especially when combined with a natural descaler like vinegar. Handheld ultrasonic cleaners are also excellent for cleaning sensitive parts such as thermistors or flow sensors, restoring proper function without damaging delicate electronics.
Another invaluable asset is an appliance-specific wiring diagram—either printed or digital—that guides me through complex troubleshooting steps, especially for newer models with intricate control schemes. Using an infrared thermometer allows me to quickly identify uneven heating or cooling spots in ovens, preventing major issues before they develop. For software diagnostics, many modern appliances support remote updates or diagnostic tools via Wi-Fi, which I use to access real-time data and run self-tests—saving time and guesswork.
Future Trends in Appliance Maintenance
Looking ahead, I predict a growth in smart diagnostic systems integrated directly into appliances, enabling real-time problem detection and even predictive maintenance alerts. As these technologies develop, having tools that interface with apps or cloud services will become standard practice, making troubleshooting more accessible even for DIY enthusiasts.
If you’re serious about keeping your oven and dishwasher in top shape, I recommend starting with a reliable multimeter and scheduling regular cleaning routines—these simple steps will pay dividends in appliance longevity. For more advanced diagnostics, exploring the use of appliance-specific software interfaces can help you catch issues early, preventing costly repairs later.
Interested in a practical step? Try checking your control board’s thermal fuse using your multimeter—many failures are caused by this small, often overlooked component. If you’re unsure where to start, see this guide for detailed instructions. Taking proactive maintenance now keeps your appliances humming for years to come—don’t wait for a breakdown to act!

The Hardest Lesson I Learned About oven repair,parts,dishwasher,diagnostics
I once believed that replacing the control board would instantly solve my dishwasher’s perpetual run, but I learned that a careful check of wiring harnesses and sensor connections often reveals the real culprit. Never underestimate the power of thorough diagnostics over part swapping.
3 Myths About oven repair,parts,dishwasher,diagnostics That Held Me Back
- Myth: The most obvious damaged part is always the culprit. Often, hidden wiring issues or sensor errors are at play, not visibly damaged components.
- Myth: Replacing control boards is always the fix for cycle issues. Sometimes, control boards are fine—it’s a loose connection or a faulty relay that causes the problem.
- Myth: Modern appliances don’t need manual diagnostics. Even smart appliances rely on basic troubleshooting steps—learning these can save a lot of time and money.
What Experts Won’t Tell You About oven repair,parts,dishwasher,diagnostics
Insight from seasoned technicians emphasizes that understanding your appliance’s diagnostic mode unlocks precise fault identification. They often find that electrical issues masquerade as mechanical faults, so don’t jump to conclusions based purely on symptoms. For example, a dishwasher that won’t drain might have a clogged pump, but the wiring to the drain motor could be the real problem. Developing this nuanced approach transforms DIY repairs from guesswork into confident troubleshooting.
Curated Tools and Resources for Mastering Appliances
- Digital Multimeter: The cornerstone of any repair toolkit—trust me, my multimeter has saved me from replacing unnecessary parts. Look for one with auto-ranging capabilities.
- Wiring Diagram Prints or Apps: Having a visual guide specific to your model prevents mistakes. I often refer to online schematics for complex control boards.
- Ultrasonic Cleaners: Clean spray arms, thermistors, and sensors without risking damage—my secret weapon for restoring proper function.
- Specialist Books: Titles like Home Appliance Diagnostics have deepened my understanding of electrical interactions, improving my repair confidence.
Your Turn to Shine: Repair with Confidence
Armed with real knowledge and the right tools, diagnosing and fixing dishwasher and oven issues becomes less daunting—and more rewarding. Remember, patience and curiosity go hand in hand. Embrace the challenge, learn from missteps, and share your successes with others. Every repair teaches you something unique—which elevates your skills beyond the basics. Are you ready to tackle your next appliance challenge? Drop a comment below and tell me which fix surprised you the most—it might just inspire someone else to get started!