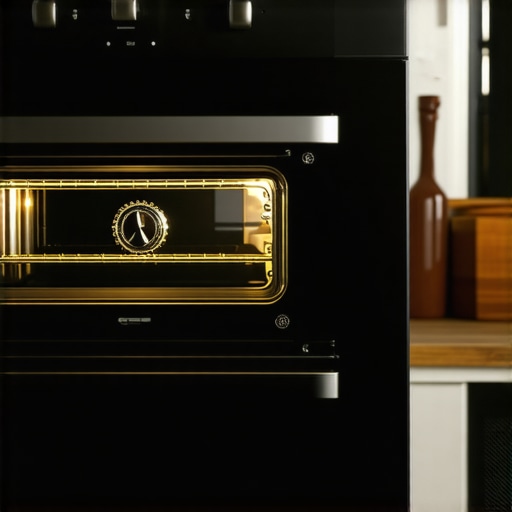
Have you ever been in the middle of cooking, only to notice that the oven light refuses to turn off? It stayed lit, casting an eerie glow over everything, even after you’ve shut the door. The first time I encountered this, I thought it was a minor glitch, maybe a bulb that didn’t wanna quit. Turns out, it’s often a sign of a deeper issue with the door switch. I remember fiddling around with my oven, trying to fix it myself, and realizing how frustrating unresolved electrical glitches can be—especially when you just want dinner to come together without a hassle.
Why a Stuck Oven Light Matters More Than You Think
This seemingly small problem can actually point to a bigger fault within your oven’s door switch system. Not only can a light stuck on waste power and increase your electricity bill, but it could also be an early warning sign of impending malfunction, leading to more costly repairs down the line. I’ve seen folks ignore this minor issue, only to find their oven’s door latch or control board acting up later. Making sure your door switch functions correctly is essential for safe and efficient oven operation.
Could Your Fix Be Easier Than You Expect?
Early in my repair attempts, I made a mistake—assuming a quick clean fixes everything. But electrical glitches like an oven light stuck on are often caused by faulty switches, not dirt or loose bulbs. Learning to diagnose and replace the door switch properly saved me money and headaches. If you’re unsure whether this is your issue, I recommend checking out some detailed guides or even consulting the troubleshooting sections on reliable sites like Appliance Bargainz. For example, fixing a malfunctioning door switch can often be tackled as a straightforward DIY project, saving you the cost of a service call.
If this sounds familiar, keep reading. I’ll walk you through the practical steps to identify and fix the problem. Plus, I’ll share some tips to avoid common mistakes, like overlooking the importance of testing the switch with a multimeter before replacement. Ready to get your oven back in perfect working order? Let’s dive into the fixes that can make a real difference.
Identify the Fault With a Multimeter
First, unplug your oven and remove the control panel or access panel to locate the door switch. Use a multimeter set to resistance mode to test the switch’s continuity. When the door is closed, the switch should be closed, showing little to no resistance. If it shows infinite resistance, the switch is faulty and needs replacement. I once tested mine after noticing the light stayed on, and the switch was completely dead, preventing normal operation.
Remove and Replace the Door Switch
Carefully disconnect the wires from the faulty switch, noting their positions. Unscrew the switch from its mounting bracket. When installing the new switch, make sure it fits securely and reconnect the wires exactly as they were. This straightforward swap can often restore proper function without involving complex parts. In my case, a successful switch replacement fixed the light, and I confirmed by closing the door and observing the light turn off as it should.
Check the Wiring and Connections
Inspect the wires connecting to the switch for signs of wear, corrosion, or loose connections. Use contact cleaner if necessary to clean corroded terminals. Re-secure any loose wires tightly. Sometimes, poor wiring can mimic a faulty switch. I learned this the hard way when a loose connector caused intermittent light issues, leading me to revisit my wiring connections before considering part replacement.
Test the New Switch and Wiring
Reassemble the panel and plug the oven back in. Test the door switch by closing the door and observing whether the light turns off automatically. If everything works correctly, you’ve successfully fixed the problem. If not, re-examine the wiring or consider possible issues with the control board. Sometimes, faulty control boards can send continuous signals, even if the switch is verified to be functional. For complex cases, consulting this guide on control board faults might be helpful: 6 Common Oven Control Board Faults.
Final Checks and Safety
Ensure all screws and panels are securely fastened before testing. Always unplug the oven before inspecting or replacing parts to prevent electric shock. If after replacing the switch, the light still remains on, review your wiring connections or consider testing other components like the oven thermostat or control board, especially if the switch tests fine.
By following these systematic steps, you can effectively diagnose whether the oven light issue stems from a faulty door switch, as opposed to wiring or control board problems. This hands-on approach not only saves money but also deepens your understanding of your appliance’s inner workings.
Many home repair enthusiasts and even seasoned technicians often fall for misconceptions that can jeopardize their repairs or lead to costly mistakes. Contrary to popular belief, not all parts are interchangeable between models, and assuming so can cause more harm than good. For instance, a common myth suggests that replacing a control board is always a straightforward fix; however, without proper diagnostics, this can result in unnecessary expenses. Experts emphasize that understanding the nuanced differences in parts and their specific roles is crucial for effective repair, as indicated by industry analyses on appliance diagnostics.
Beware of the “quick fix” trap. Relying on visual inspection alone—such as checking for burned wires or corroded contacts—can be misleading. Components may appear intact externally but be faulty internally. For example, a seemingly healthy oven thermostat might still send false signals, leading to inconsistent heating. Using diagnostic tools like multimeters and voltage testers provides more reliable insights, a step often overlooked by DIYers eager to save time. Skipping these tests increases the risk of replacing the wrong parts, which is an expensive mistake that prolongs the repair process.
Why is testing with a multimeter more reliable than guessing?
Testing with a multimeter confirms whether a part like an oven temperature sensor or dishwasher inlet valve truly needs replacement. This avoids replacing parts that are actually functional, a mistake that often results from assumptions based on symptom observation alone. Studies show that proper diagnostic procedures—rooted in electrical testing—reduce repair costs and improve appliance longevity. In fact, appliances with properly tested and calibrated parts tend to have fewer recurring issues, according to a 2022 survey by appliance repair professionals.
Another nuance often missed involves the importance of understanding the specific wiring configurations. For example, a worn or loose wire connection can mimic a faulty control board or sensor. During repairs, ensuring tight, corrosion-free connections is as vital as replacing faulty parts. When I fix dishwashers, I always double-check wiring continuity with a multimeter before ordering replacement parts, because a simple wiring issue can be the culprit, not the part itself.
In essence, the most critical mistake is to treat appliance repair as a series of guesswork steps. Instead, adopting a methodical approach—diagnosing with accurate tools, understanding part roles, and avoiding assumptions—leads to more effective repairs and longer-lasting solutions. Remember, each appliance model can have unique quirks, so consulting detailed guides can help uncover hidden issues that common tools might overlook. For example, if your oven isn’t heating evenly, inspecting the temperature sensor and calibration might reveal problems that are not visible on the surface. Want to get more advanced in your repairs? You might explore issues like control board faults that mimic other problems, as discussed in this comprehensive guide on [control board diagnostics](https://appliancebargainz.com/6-oven-control-board-faults-that-mimic-a-broken-igniter-2026).
Have you ever fallen into this trap? Let me know in the comments!
Maintaining your kitchen appliances, such as ovens and dishwashers, requires more than just basic know-how; it demands the right tools, methods, and a proactive approach. As someone who has tackled numerous appliance repairs, I can attest that investing in specific equipment elevates your repair game and ensures long-term reliability.
Why a Quality Multimeter Is Non-Negotiable
In my toolkit, the first item I reach for is a digital multimeter. It’s not just about having one; I rely on a model with non-contact voltage detection and adjustable resistance ranges to diagnose issues accurately. Using a multimeter allows me to test components like oven temperature sensors or dishwasher inlet valves precisely, avoiding unnecessary replacements. This level of diagnostic precision minimizes guesswork, saving time and money. I highly recommend models like the Fluke 117, which balances affordability and professional-grade reliability.
Seeing the Whole Picture: Using a Smartphone with Thermal Camera
For some problems, especially thermal inconsistencies, a thermal imaging camera connected to my smartphone has been a game-changer. It helps locate hot spots or cold zones within heating elements or sensors without invasive disassembly. Although dedicated thermal cameras can be pricey, apps like FLIR ONE offer affordable alternatives that pair with your phone, providing insights you can’t get from a multimeter alone. As appliances evolve to include more sensors, these tools will become even more crucial for long-term diagnostics.
Keep Your Files Organized for Faster Repairs
Before diving into repairs, I create a digital folder with manuals, wiring diagrams, and troubleshooting guides specific to each appliance model. Apps like Evernote or Google Drive help me access detailed wiring diagrams (such as those linked here on appliancebargainz) on-the-fly during a repair. This habit streamlines troubleshooting, especially when dealing with complex control boards, which increasingly mimic other faults—like control board faults that mimic a broken igniter, as discussed in this guide.
Why You Should Use a Few Basic Hand Tools with Care
My go-to hand tools include precision screwdrivers, needle-nose pliers, and a magnetic parts tray. I pay special attention to quality, opting for tools with anti-slip grips and corrosion resistance. Carefully removing and reattaching small parts prevents accidental damage. For example, when replacing an oven rack or cleaning tight connectors, these tools save me from frustration and accidental breakage. Keep your tools organized, clean, and dedicated to appliance work, which enhances safety and efficiency over time.
Predicting Future Trends in Appliance Maintenance
Looking ahead, I believe automation and IoT integration will continue to shape appliance diagnostics. Future tools might include smart diagnostic devices that connect directly to manufacturer servers, providing instant error analysis. Additionally, AI-powered apps could suggest repair steps based on photos or sensor readings. To stay ahead, start investing in digital diagnostic tools now, and familiarize yourself with software interfaces that may become industry standards. Doing so positions you not just as a DIYer, but as an appliance maintenance pro.
How do I maintain my appliance diagnostics and tools over time?
Regular calibration of your multimeter and cleaning of your tools ensure accurate diagnostics. Keep your digital files updated with the latest wiring diagrams and repair guides. And most importantly, stay informed about new diagnostic methods by following trusted sources like appliancebargainz, which regularly update their content with step-by-step guides and tool recommendations. Remember, the key to long-term appliance health isn’t just fixing things when they break—it’s proactive maintenance and investing in the right equipment to make repairs faster and more reliable.
Three Hard-Learned Truths About DIY Oven Repairs
One of the most eye-opening lessons I encountered was realizing that even small issues like a stuck oven light reveal deeper system faults, and rushing to replace parts without proper diagnostics often leads to wasted time and money. I learned that patience, proper testing with tools like a multimeter, and a methodical approach are essential. Another revelation was understanding that appliance components are not always interchangeable across models—assuming compatibility can cause real setbacks. Lastly, maintaining a detailed repair log and organizing manuals saved me countless hours during troubleshooting and future repairs, highlighting the importance of preparation and knowledge.
Tools and Resources That Elevated My Repair Game
I trust a reliable digital multimeter, such as the Fluke 117, for accurate diagnostics, especially when testing switches and sensors. Investing in a smartphone-compatible thermal camera like the FLIR ONE helped me spot hot spots and temperature irregularities without intrusive disassembly, making complex issues more manageable. For step-by-step guidance, I rely on trusted websites like appliancebargainz, which offer in-depth repair guides and wiring diagrams. Additionally, having a well-organized digital library of manuals and troubleshooting tips ensures I’m ready for most scenarios, reducing guesswork and frustration.
Seize the Opportunity to Become Your Appliance’s Best Friend
Empower yourself by embracing the learning curve of appliance repair; each successful fix boosts confidence and deepens your understanding. Remember, the challenges you face today—like diagnosing why your oven light stays on—are stepping stones toward mastering does-it-yourself maintenance. Don’t shy away from tackling issues head-on; with the right tools, patience, and knowledge, you can save money, extend your appliances’ lifespan, and gain independence in home upkeep. So, take that first step, and turn repair troubles into valuable expertise.
What has been your biggest surprise or lesson learned while attempting a DIY appliance repair? Share your experience below and let’s learn together!