It happened at 7:00 PM on a Tuesday. I was just reaching for a clean coffee mug when—*BAM!*—the dishwasher door didn’t just open; it surrendered to gravity like a lead weight. If you’ve ever had a dishwasher door suddenly decide it wants to floor-press your toes, you know that sickening sound of a snapped cable. It’s loud, it’s startling, and it’s usually followed by a few choice words I won’t repeat here. My poor shins took the brunt of it that night. I spent the next week gingerly propping the door up with a kitchen chair just to keep the cat from crawling inside. [IMAGE_PLACEHOLDER_1]
Your Dishwasher Door Shouldn’t Feel Like a Heavy Weight
Most of us take that smooth, gliding motion of a dishwasher door for granted until the dishwasher door spring suddenly snaps. Inside your machine’s cabinet, there’s a delicate tug-of-war happening between heavy-duty springs and thin nylon cables. When those cables fray or snap, you lose all the counter-balance. It’s more than just an annoyance; a falling door can warp the hinges or even pull the whole unit out from under the counter. Trust me, I learned the hard way that ignoring a door that drops open too fast only leads to more expensive problems later. If you’ve been doing dishwasher faults diagnostics on your own, you’ve likely seen these fraying cords. Today, I’m going to show you exactly how to swap those cables out yourself. It’s a job that looks intimidating because you have to learn how to safely remove a dishwasher from its nook, but I promise it’s a fix that saves you hundreds. According to the Association of Home Appliance Manufacturers (AHAM), dishwasher doors are engineered for thousands of cycles, but nylon cables are often the first point of failure due to friction and constant tension. We are going to get your kitchen back to being safe and functional.
Is this repair really worth doing yourself?
I get the hesitation. The first time I did this, I was terrified I’d flood the kitchen or mess up the electrical board. In fact, my biggest mistake back then was thinking I could just replace the one broken cable and leave the other ‘fine-looking’ one alone. Big error. The old cable had stretched just enough that the door sat crooked, which led to a slow leak I didn’t catch for weeks. Always replace them in pairs. Before you start, check out this dishwasher parts guide to make sure you have the right tension kit for your specific model. Have you ever tried to catch a falling dishwasher door only to realize just how heavy those things actually are? Let me know in the comments if your shins have also been victims of the ‘Gravity Door.’ Let’s dive into the tools you’ll need before we start pulling things apart.
Shut down everything before you touch a tool
Safety isn’t just a buzzword; it’s the difference between a successful afternoon and an emergency room visit. Before you even think about unscrewing a panel, head to your breaker box and kill the power to the dishwasher. I also highly recommend shutting off the water supply valve under the sink. I learned this lesson the hard way during a previous oven repair essentials session where I thought ‘just a quick check’ wouldn’t require a full shutdown—only to end up with a nasty zap. Once the power is dead, open the door and remove the screws securing the dishwasher to the underside of the countertop. If your machine is older, you might find that you need to learn how to secure a vibrating dishwasher properly once you put it back, as those mounting brackets often get bent during removal.
Get the machine out of its hole
This is the part that usually intimidates people, but it’s just a slow-motion slide. You only need to pull the dishwasher out about 6 to 10 inches to access the side panels where the springs live. Be extremely careful not to kink the copper water line or the plastic drain hose. One time, I was in such a rush that I yanked the unit out and sliced the drain hose on the sharp edge of the cabinet. A ten-minute cable fix turned into a two-hour plumbing nightmare. If you feel resistance, stop and check the lines. Once you have enough clearance, you’ll see the side of the tub and the pulley system. If you have any trouble identifying what you’re looking at, refer back to your dishwasher parts guide to locate the exact tensioner kit components. 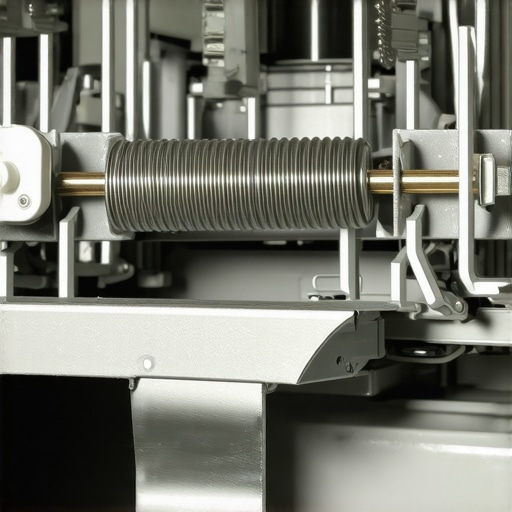
Route the cables through the pulley system
The cable is like a bridge between the door hinge and the heavy-duty spring at the back. Most modern units use a plastic pulley or a ‘channel’ that the cord must sit inside. Remove the old, broken pieces of nylon first. If your spring has also snapped, you’ll need to unhook it from the rear frame. When you install the new cable, hook one end into the door hinge and thread it over the pulley. It’s a lot like threading a needle, but with much more tension involved. I always keep a pair of pliers handy to stretch the spring enough to hook the other end of the cable. If you’ve ever had to deal with an oven door that drops open too fast, you know that the tension must be identical on both sides or the door will sit crooked and potentially leak.
Check the balance before the final install
Before you slide the unit back into the cabinetry, do a ‘dry run’ with the door. Open and close it a few times. It should hold its position at about a 45-degree angle without falling or snapping shut. If it feels too heavy, you may need to move the spring to a different adjustment hole on the dishwasher frame to increase the tension. While the unit is pulled out, it’s also the perfect time for dishwasher faults diagnostics on other components you can’t usually see, like the motor or the drain hose. I once found a slow leak at the back of the pump while replacing a door cable that would have eventually ruined my hardwood floors. This simple check saved me thousands in floor repairs. Make sure everything is snug, the cables are seated in their tracks, and the springs aren’t rubbing against the insulation blanket.Let’s dig deeper. Most people believe that if an appliance stops working, the main control board must be fried. It’s the most expensive part, so it’s naturally the most ‘important,’ right? Wrong. In my experience, the ‘brain’ of the machine is rarely the first thing to go. Usually, it is a ten-dollar sensor or a loose wire giving the board bad information. Before you drop hundreds of dollars on parts you might not need, you have to master dishwasher faults diagnostics that go beyond the surface level. The Appliance Service Training Institute (ASTI) has found that a staggering percentage of electronic boards returned as ‘defective’ by DIYers are actually perfectly functional—the real issue was a peripheral component or a bad ground. Have you ever fallen into this trap of buying the most expensive part first? Let me know in the comments.
Why does a continuity test fail to tell the whole story?
This is the hidden trap that trips up even seasoned DIYers. You pull out your multimeter, check a heating element or a solenoid for continuity, hear that satisfying ‘beep,’ and assume the part is good. But here is the nuance: continuity only tells you the circuit isn’t broken. It doesn’t tell you if the part has developed high resistance or if it’s failing under a real electrical load. For example, 5 multimeter tricks for diagnosing a dead control board include checking for ‘ghost voltage’ that can make a dead circuit look alive. 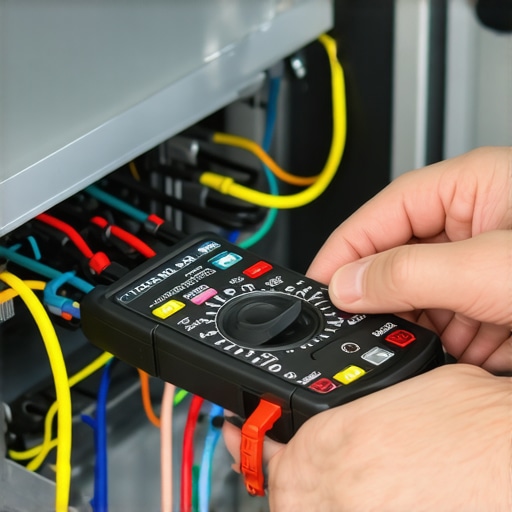
Don’t ignore the tiny safety triggers
Often, we look for massive mechanical failures while ignoring the tiny thermal safeties. If your dishwasher is completely dead, checking the thermal fuse on your dishwasher should be your very first step before you even look at the motor. It’s a similar story with ovens; you can spend hours pinpointing faults before calling a repair expert, only to find a tripped high-limit thermostat was the actual culprit. These tiny components are designed to fail to protect the more expensive ones. If you replace the fuse but don’t find out *why* it blew—perhaps a clogged vent or a failing fan—you’re just going to be doing the same repair next week. Know when to stop diying and call an oven repair expert if you find yourself replacing the same safety part repeatedly. It almost always means there is a deeper systemic issue you are missing.To truly master your home repairs, you need more than just a screwdriver and a prayer. I personally swear by the Fluke 117 multimeter because its low-impedance mode prevents ‘ghost voltages’ from tricking you into replacing a perfectly good control board. Another tool I never work without is a simple telescopic inspection mirror. It allows you to see the back of a gas valve or look for tiny blisters on an oven bake element without having to contort your body into a pretzel. These tools don’t just save time; they prevent the frustration of misdiagnosis.
The gear that separates the pros from the part-swappers
Having the right diagnostics kit is only half the battle; knowing where to look is the other. Most DIYers forget that modern appliances are essentially vibrating boxes of heat and water, which is a brutal environment for electronics. Use your multimeter to go beyond simple continuity. For example, testing the resistance on your dishwasher heating element can tell you if it’s nearing the end of its life long before it actually stops getting hot.
How do I keep my kitchen appliances running for the long haul?
The secret isn’t in some expensive warranty; it’s in the mundane stuff we all ignore. For your dishwasher, the battle is won or lost in the sump. I make it a habit every six months to go beyond the mesh screen and learn how to clean the hidden filter in your dishwasher sump. If that area gets clogged, your pump has to work twice as hard, leading to a premature motor failure. For your oven, it’s about heat management. Periodically inspect your oven’s power cord for heat damage or discoloration at the plug. According to the Whirlpool Master Technician’s Guide, over 40% of electrical failures are actually caused by poor terminal connections rather than faulty components. 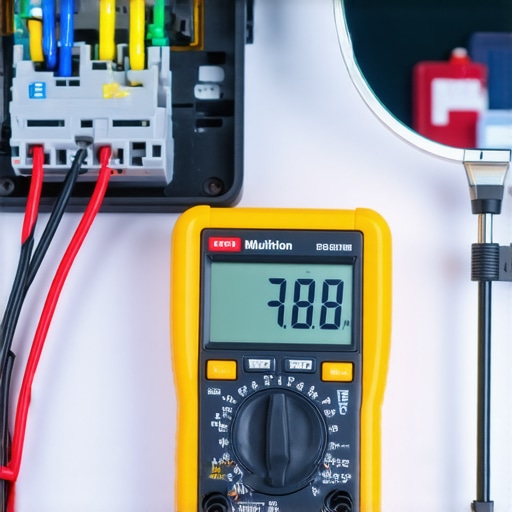
The future of fixing your own machines
As we look toward the future, I see a major shift toward predictive diagnostics. We’re already seeing high-end models that monitor the amperage draw of components in real-time. Soon, your oven will likely send a notification to your phone saying that your igniter is drawing 3.4 amps instead of the required 3.2, meaning it will fail in about 20 cycles. While that sounds convenient, it makes mastering oven repair essentials even more vital so you aren’t at the mercy of a software subscription. Don’t wait for the ‘check engine’ light of your kitchen to come on. My challenge for you this weekend is to perform a proactive check: take five minutes to verify your connections and ensure your filters are clear. It’s the easiest way to avoid a mid-cycle disaster during a big dinner party.
Three Hard Truths About Home Appliances I Learned the Hard Way
Over the years, I’ve realized that most appliance disasters are just small parts asking for help before they fail. First, never ignore a change in sound. If you start identifying a bad dishwasher circulation motor by the sound early, you can avoid a costly motor replacement later. Second, the Replace in Pairs rule is non-negotiable for tension components. When a dishwasher door spring suddenly snaps, the other side has already been overstressed and will likely fail within weeks. Third, dirt is a silent killer. Before you assume a control board is dead, ensure you aren’t just dealing with debris buildup. Mastering oven diagnostics pinpointing faults before calling a repair expert is often 90% observation and 10% actually turning a wrench.
My Go-To Gear for Tackling Any Appliance Failure
You don’t need a professional workshop to be effective, but a few specific items changed my success rate forever. I always keep a high-quality multimeter nearby; specifically, one with low-impedance mode to avoid ghost readings that lead to misdiagnosis. I also suggest using your smartphone to take before photos of every wiring harness—trust me, you won’t remember which blue wire goes where thirty minutes from now. For physical inspections, a small telescopic mirror is a lifesaver for how to inspect your ovens power cord for heat damage without pulling the whole unit out. Finally, keep a dedicated stiff-bristle brush for how to clean the hidden filter in your dishwasher sump. It’s the single most important tool for preventing pump clogs and standing water. [IMAGE_PLACEHOLDER_E]
Why Your Next Repair Is Easier Than You Think
It’s easy to feel defeated when a machine stops working, but remember that these appliances are designed to be serviced, not just replaced. By taking the time to source the correct dishwasher parts and following a logical diagnostic path, you’re taking control of your home’s maintenance. You’ve already done the hard part by researching the problem; now, it’s just a matter of one screw at a time. The confidence you gain from fixing a heavy dishwasher door yourself will carry over to every other room in your house. Have you ever successfully fixed an appliance only to find a spare screw left over at the end? Let me know in the comments below!